
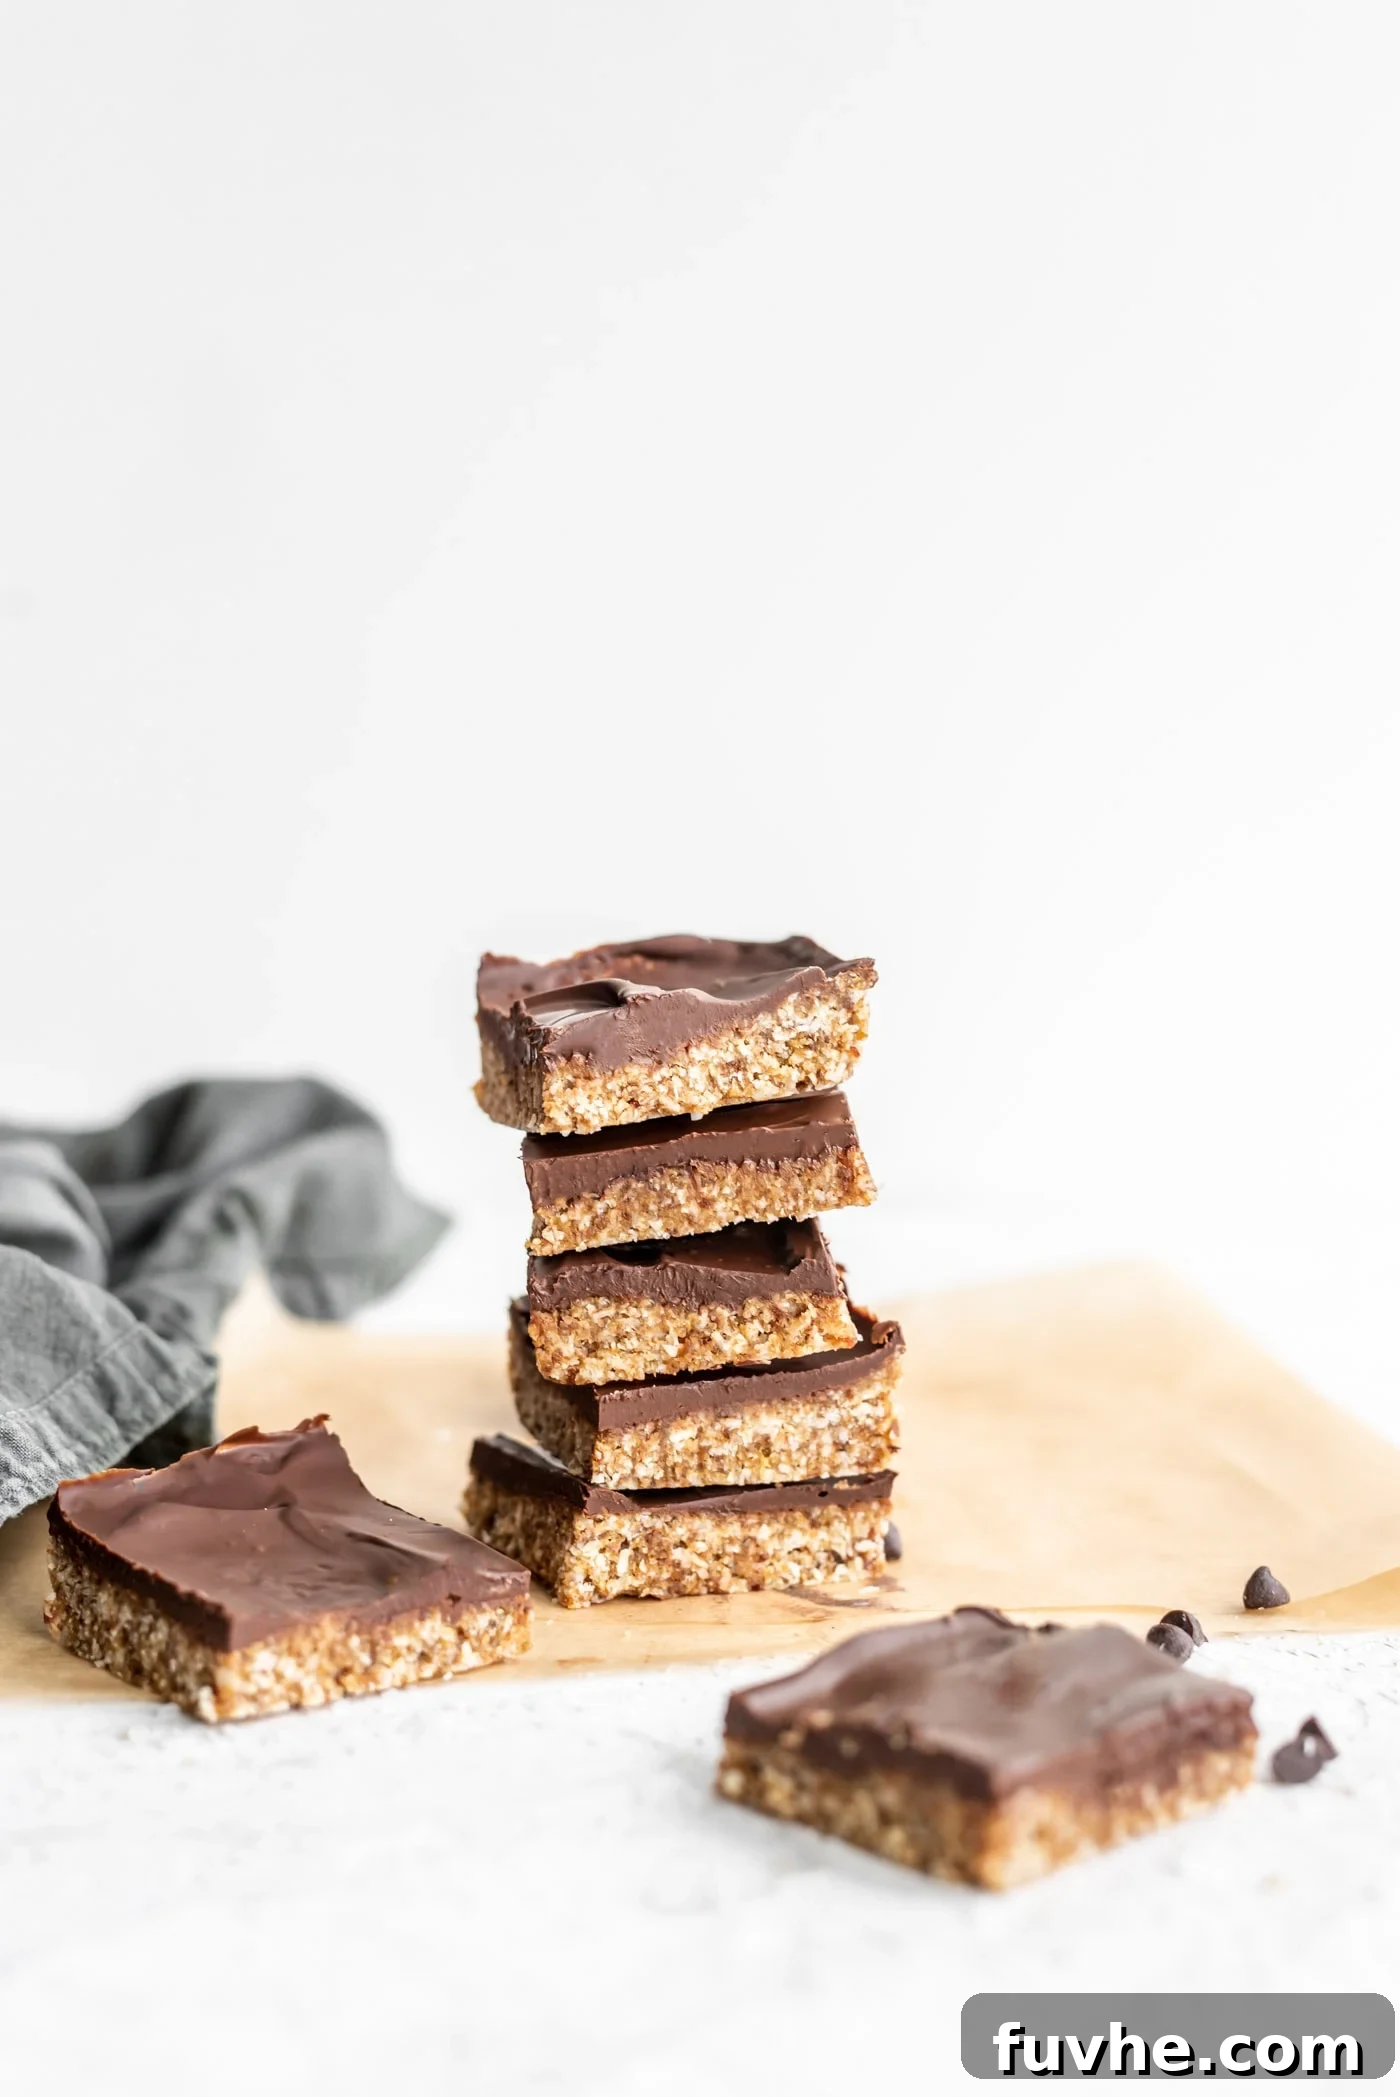
Indulge in the Easiest Decadent No-Bake Chocolate Coconut Bars
Prepare to fall in love with these incredibly simple yet utterly delicious no-bake chocolate coconut bars! Crafted with just 4 wholesome ingredients, these delightful treats come together in minutes, offering a perfect blend of rich chocolate and tropical coconut without ever needing an oven. Ideal for a quick snack, an elegant dessert, or a thoughtful homemade gift, they are a testament to how effortless healthy indulgence can be.
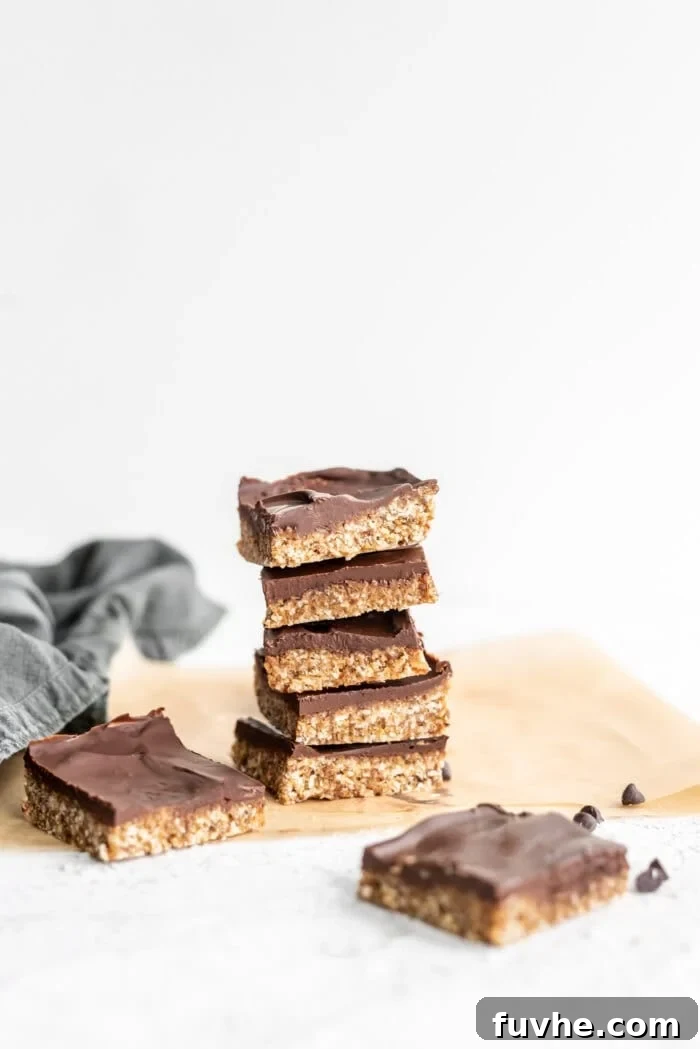
If you’re seeking a dessert that’s both supremely decadent and astonishingly easy to prepare, these no-bake chocolate coconut bars are about to become your new favorite! The foundation of these bars is a wonderfully chewy mixture of sweet dates, fragrant shredded coconut, and a touch of coconut oil. This delightful base is then crowned with a smooth, glossy layer of rich chocolate, creating a symphony of flavors and textures in every bite.
You’ll only need a few minutes for hands-on preparation, and after a short chill in the freezer, they’ll be perfectly set and ready to enjoy. Whether you’re planning an impressive spread for a holiday gathering, looking for a convenient make-ahead dessert, or simply want to keep a stash of wholesome sweet treats in your freezer for daily cravings, these irresistible bars are guaranteed to be a crowd-pleaser for everyone.
Why You’ll Absolutely Love This No-Bake Recipe
These no-bake chocolate coconut bars aren’t just easy to make; they’re a dream come true for anyone seeking a delightful treat without fuss. Here’s why this recipe will earn a permanent spot in your culinary repertoire:
- Effortless Preparation: Forget complicated baking steps! With only 4 simple, readily available ingredients, you can whip up these bars in no time. Perfect for busy schedules or when you need a last-minute dessert that truly impresses.
- No Baking Required: Keep your kitchen cool! This recipe is entirely no-bake, meaning you don’t need to turn on your oven. Just a quick blend and a chill in the freezer, and you’re good to go. This makes them ideal for warmer months or when oven space is limited.
- Dietary-Friendly Delights: These bars are naturally vegan, gluten-free, and tree nut-free (note: they do contain coconut, which is a botanical fruit but often grouped with tree nuts for allergy purposes, so always specify). This makes them an excellent option for serving a diverse group with various dietary needs and allergies.
- Perfect for Any Occasion: Elegant enough for holiday dessert trays, yet wholesome and simple enough for an everyday snack. They strike the perfect balance between indulgent and healthy, making them suitable for any moment – from a post-dinner treat to a delightful afternoon pick-me-up.
- Wholesome Ingredients: Made with natural sweeteners like dates and healthy fats from coconut oil, these bars offer a more nutritious alternative to many store-bought sweets. They satisfy your sweet tooth guilt-free, providing energy and flavor from real, simple foods.
- Kid-Friendly and Customizable: Kids love the rich taste and chewy texture, and the simple preparation makes it a fun activity to involve them in the kitchen. Plus, they’re incredibly easy to customize with different toppings or extracts to suit individual preferences, allowing for endless creative possibilities.
Essential Ingredients for Your Delicious Bars
One of the best aspects of these no-bake bars is the minimal ingredient list. Each component plays a crucial role in creating the perfect texture and flavor. Here’s a closer look at what you’ll need to gather:
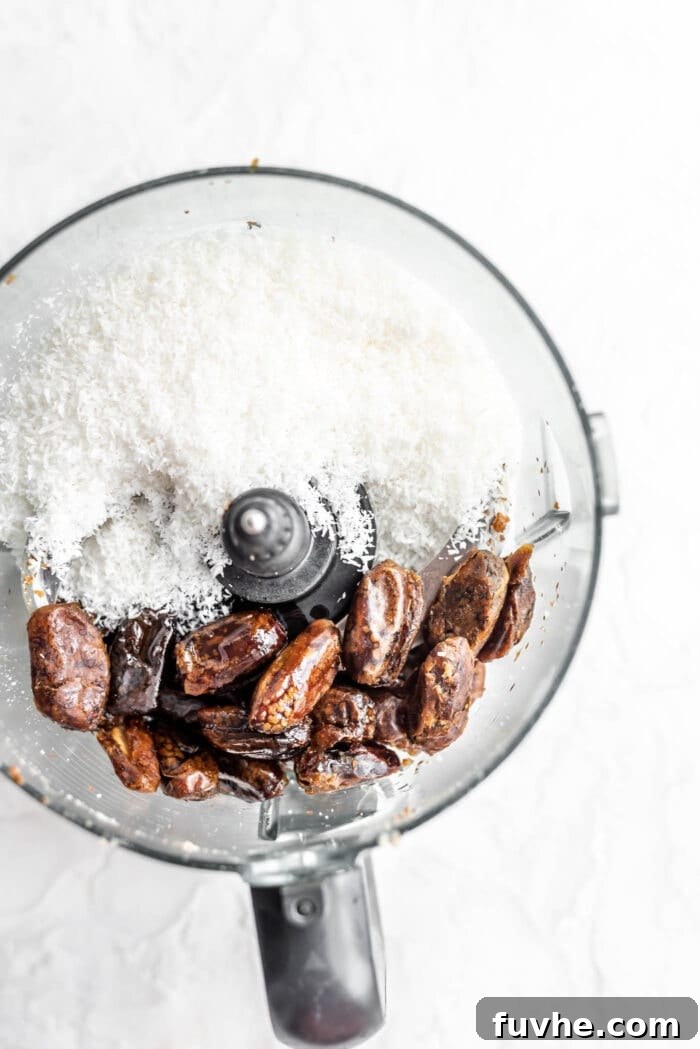
- Shredded Coconut: Opt for unsweetened fine or medium shredded coconut. The unsweetened variety is key to controlling the sweetness of your bars and letting the natural flavors shine. It provides that iconic tropical taste and contributes significantly to the chewy, satisfying texture of the base. Avoid sweetened varieties, which can make the bars overly sweet and alter their consistency.
- Dates: The natural sweetener and primary binder for our bars! While any dates will technically work, for the best results, I highly recommend soft and fresh varieties like Medjool, Deglet Noor, Sayer, or Honey dates. Their natural stickiness and rich caramel-like flavor are irreplaceable and essential for a cohesive dough. If your dates feel a bit dry or firm, a quick soak in hot water for about 15 minutes, followed by thorough draining, will soften them up perfectly for blending, ensuring a smooth, pliable base.
- Coconut Oil: This ingredient is absolutely essential and cannot be substituted in this recipe as a primary binder. Coconut oil is unique because it’s solid at room temperature and melts quickly when warmed. This property is crucial for helping the bars firm up and solidify properly in the freezer, giving them their ideal chewiness and structure. It acts as a setting agent, allowing the bars to hold their shape without baking. For those specifically seeking an oil-free recipe, you might explore other bar or energy bite recipes that rely on different binding agents.
- Chocolate: The crowning glory for these decadent bars! I typically use high-quality dairy-free chocolate chips to keep these bars strictly vegan and ensure a smooth melt. However, feel free to use your favorite quality dark chocolate bar (ensure it’s dairy-free if needed) by chopping it into smaller pieces for easier melting. For an extra special touch and ultimate flavor control, you could even try making your own homemade chocolate to top these bars. The quality of your chocolate will significantly impact the final taste and texture of the topping, so choose wisely!
Kitchen Equipment for Effortless Preparation
To make these delicious no-bake chocolate coconut bars, you’ll only need a few basic kitchen tools. Gathering them before you start will make the process even smoother:
- Food Processor: This is a key piece of equipment, essential for blending the dates and coconut into a cohesive, crumbly dough. A powerful food processor ensures a smooth and even consistency, transforming the ingredients into the perfect base.
- 7-inch Square Baking Pan: This size is ideal for creating bars of a good thickness, ensuring they are substantial yet easy to handle. You can use a slightly larger or smaller pan, but be prepared to adjust the thickness and chilling time accordingly.
- Parchment Paper: Crucial for lining your baking pan. It prevents sticking and, when left with an overhang, makes it incredibly easy to lift the entire slab of set bars out of the pan for clean slicing.
- Small Pot & Heatproof Bowl (for double boiler) or Microwave-Safe Bowl: For melting your chocolate perfectly. The double boiler method is recommended for a smooth, burn-free melt, but a microwave can be used carefully.
- Spatula or Spoon: You’ll need one for firmly pressing the dough into the pan to create an even base, and another for spreading the melted chocolate smoothly over the top.
- Sharp Knife: Essential for cleanly slicing the chilled bars into individual portions without cracking the chocolate topping.
Step-by-Step Guide: Crafting Your Chocolate Coconut Bars
Creating these delightful bars is incredibly straightforward, making them accessible even for novice bakers. Follow these simple steps for perfect results every time:
1. Prepare the Coconut-Date Base
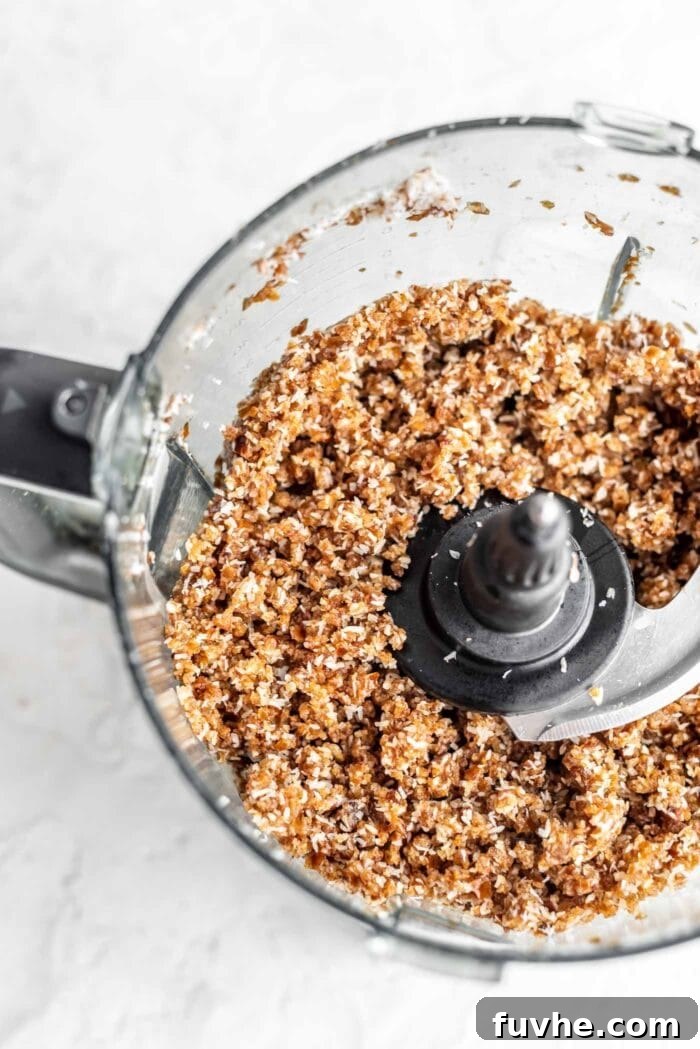
The first and most important step involves creating the rich and chewy coconut-date dough that forms the delectable base of your bars. Carefully add the unsweetened shredded coconut, your chosen soft pitted dates, and the measured melted coconut oil to your food processor. Process these ingredients on high speed until they fully combine into a crumbly yet cohesive dough. It should be sticky enough to hold together firmly when pressed between your fingers, indicating it will form a solid bar.
2. Form the Bars in Your Pan
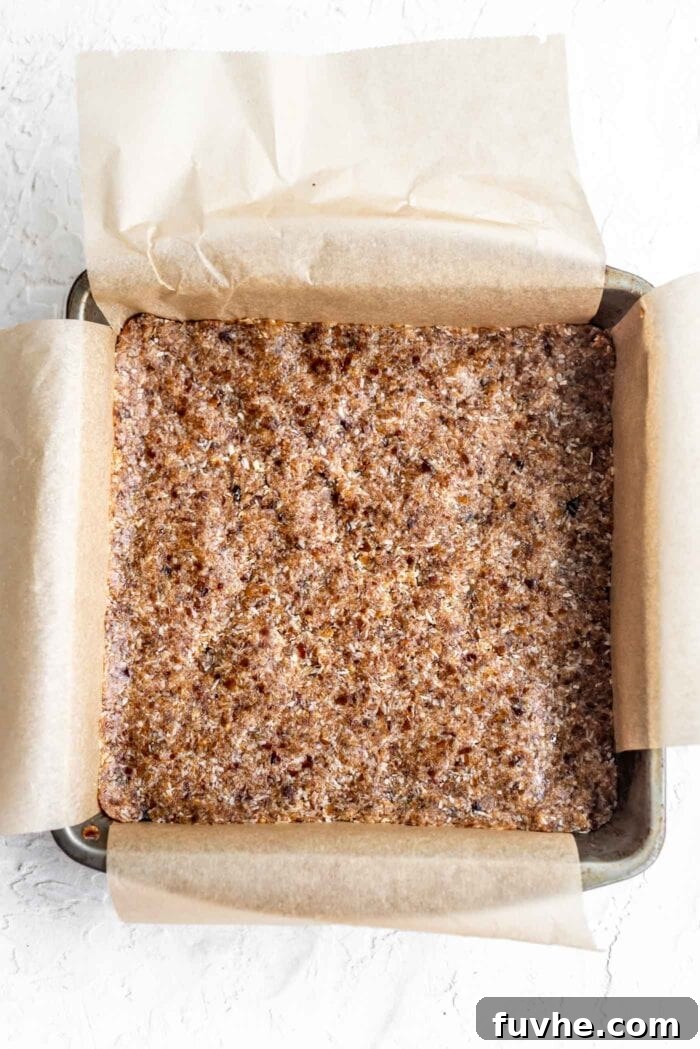
Once you’ve achieved that perfect, delicious coconut-date dough, it’s time to transfer and press it into a pan to create the sturdy foundation for your bars. Before doing so, meticulously prepare an approximately 7-inch square baking pan. The secret to easy removal and perfectly intact bars lies in lining the pan with two overlapping strips of parchment paper. Ensure these strips create an overhang on all sides; these will act as convenient “handles” allowing you to effortlessly lift the entire slab of bars out once they’re chilled and set.
Evenly distribute the dough into the prepared pan and press it down firmly and consistently. Use the back of a spatula or your hands to ensure an even thickness across the entire base, paying special attention to the corners. A compact and uniform base is crucial for well-structured bars that don’t crumble. After firmly pressing, place the entire pan into the freezer to chill. This initial freeze is vital for helping the base firm up nicely before the chocolate topping is added.
Note: It’s completely normal for the dough to appear slightly oily as you press it into the pan. This is simply due to the natural fats from the coconut and coconut oil releasing. Don’t worry, this oiliness will disappear as the bars firm up beautifully in the freezer, transforming into an wonderfully chewy and satisfying texture.
3. Perfectly Melt the Chocolate Topping
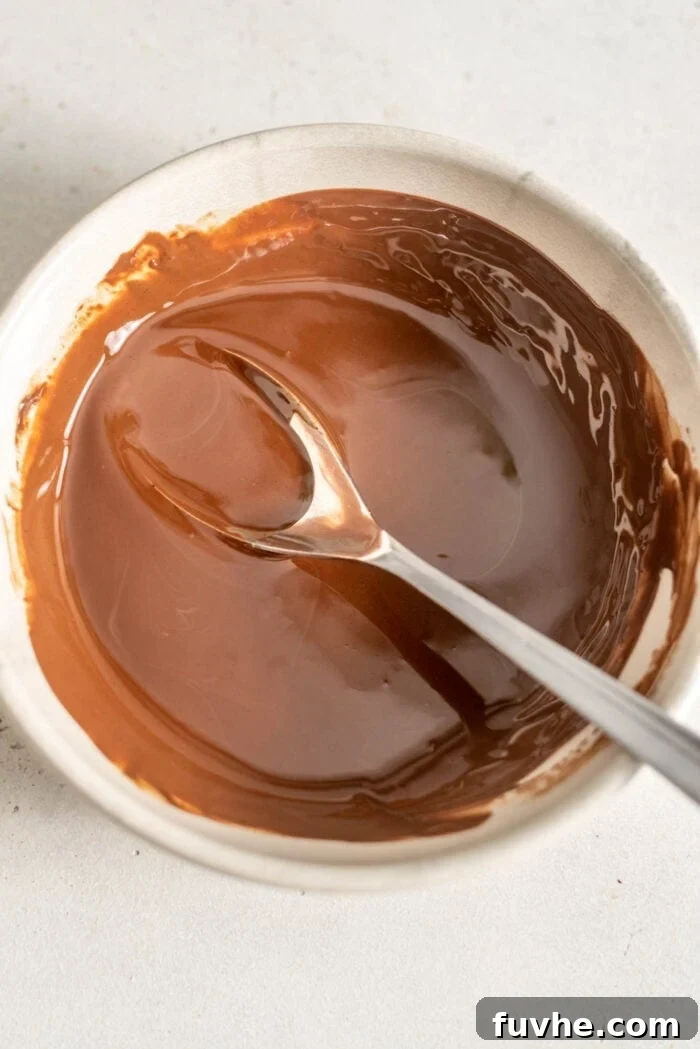
The next exciting step is melting the chocolate for the luscious topping that will complete your bars. Achieving a smooth, glossy chocolate is crucial for a beautiful, professional-looking finish and a delightful mouthfeel. You have two primary, effective methods to choose from:
- Double Boiler Method (Highly Recommended): This is my preferred method for perfectly melted chocolate that is less prone to burning or seizing. You can use a dedicated double boiler, or easily create one at home: simply place your chocolate chips or finely chopped chocolate in a heatproof glass bowl that is large enough to sit securely over a small pot of simmering water. Ensure the bottom of the bowl does not touch the water. The gentle steam from the simmering water will evenly and slowly melt the chocolate. Stir occasionally with a spatula until the chocolate is completely smooth, fluid, and free of any lumps. This method provides excellent control over the melting process.
- Microwave Method: If you’re short on time, the microwave can also be used, but it requires careful attention. Place your chocolate in a microwave-safe glass bowl. Microwave on high in very short 15-second intervals, stirring thoroughly after each interval. It’s critical to proceed with caution here; chocolate can burn very quickly and become unusable if overheated. Remove the bowl from the microwave when there are still a few small lumps present, and continue to stir vigorously until the residual heat melts them completely. This technique minimizes the risk of burning and seizing, which is why the double boiler is often considered a safer bet for a consistently smooth, burnt-free result.
Regardless of the method you choose, ensure the chocolate is entirely smooth and devoid of any lumps before proceeding. This process should only take a few minutes, yielding a beautifully pourable consistency.
4. Apply the Decadent Chocolate Layer
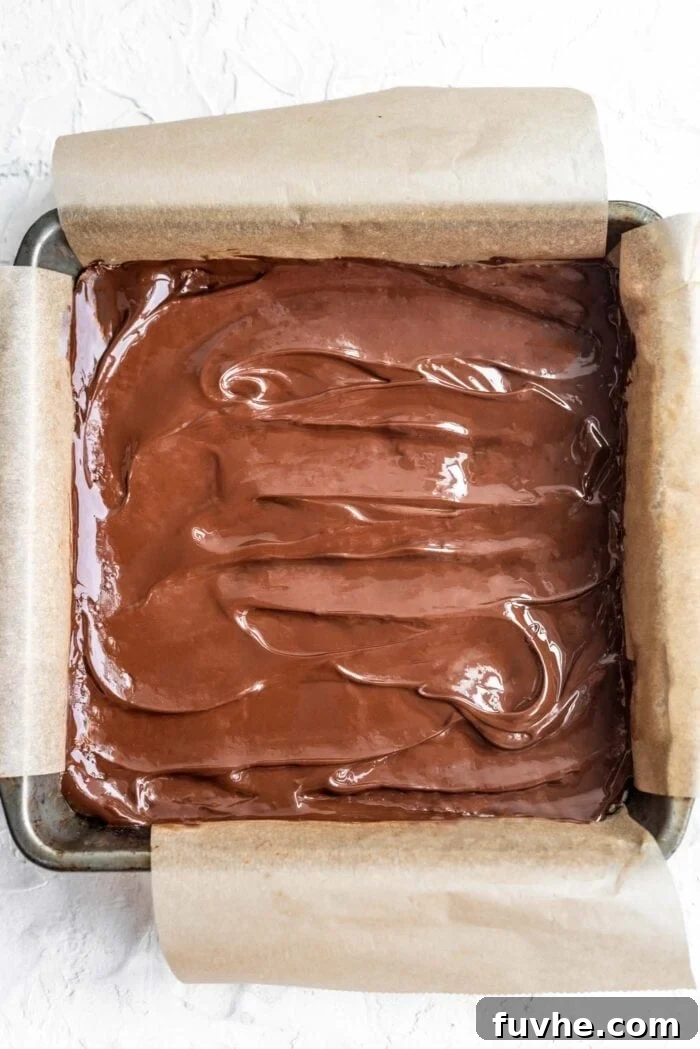
With your chocolate perfectly melted to a smooth, luscious consistency, retrieve the well-chilled coconut-date base from the freezer. Working quickly to prevent the chocolate from setting prematurely, use a spatula or the back of a spoon to carefully and evenly spread the melted chocolate over the firm coconut layer. Distribute the chocolate from edge to edge, ensuring a uniform thickness across the entire surface. A smooth, even chocolate layer not only looks incredibly appealing but also guarantees that delightful chocolatey crunch in every single bite.
Pro Tip: If you find your melted chocolate is too thick to spread easily, you can effortlessly thin it out. Simply add 1 to 2 teaspoons of additional melted coconut oil or a neutral-flavored vegan butter to the chocolate. Stir it in thoroughly until completely combined. This will create a noticeably smoother, more spreadable consistency without compromising the final set of the chocolate.
5. Chill, Slice, and Savor Your Treats!
You’re almost there – just one crucial step left before enjoying your homemade delights! Once the chocolate has been meticulously spread over the coconut base, gently place the pan back into the freezer. This final chilling step is absolutely crucial for the chocolate layer to firm up and set completely, creating that satisfying snap when you bite into it. Allow it to chill undisturbed for at least 30 minutes, or until the chocolate is completely firm and solid to the touch. Patience here ensures the best texture and prevents a messy slicing experience.
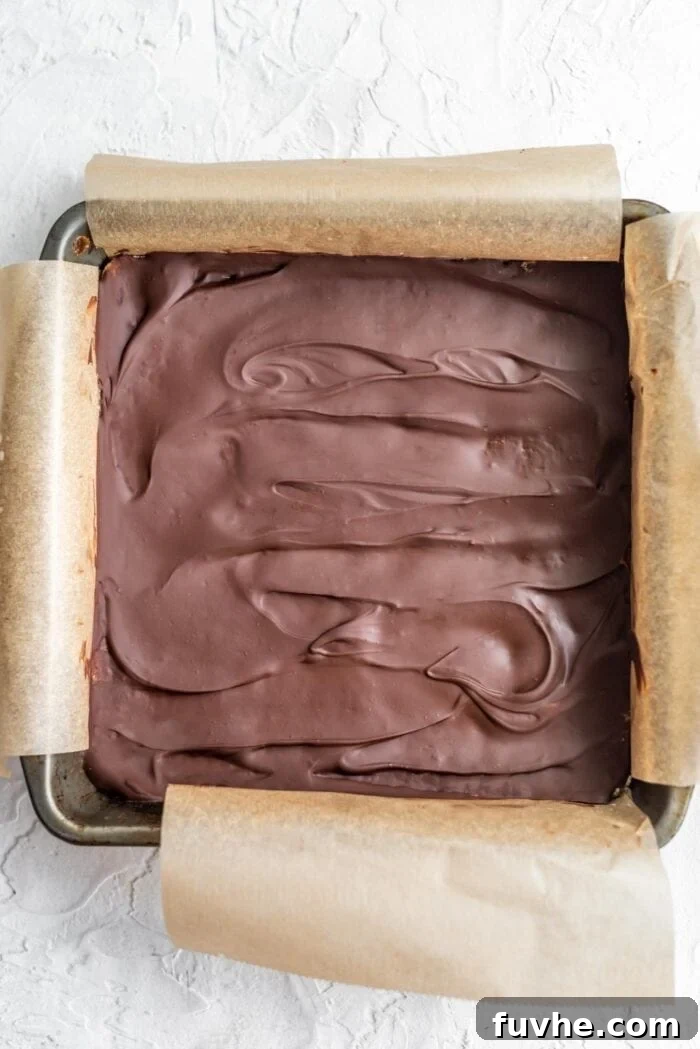
Once fully set, carefully lift the entire slab of bars out of the pan using the parchment paper overhangs. For perfectly clean slices that prevent the chocolate from cracking or breaking, here’s a professional trick: heat a sharp knife under hot running water for a few seconds, then quickly wipe it completely dry. Use this warm knife to gently score the bars where you plan to cut them, applying light, even pressure. After scoring, proceed to slice the bars into your desired size – typically 8-10 generous large bars or 16 smaller, more manageable squares. The warm knife technique helps the chocolate melt slightly on contact, ensuring a smooth cut.
Now, your homemade no-bake chocolate coconut bars are ready to be enjoyed! Take a moment to admire your handiwork and then savor every rich, chewy, and chocolatey bite.
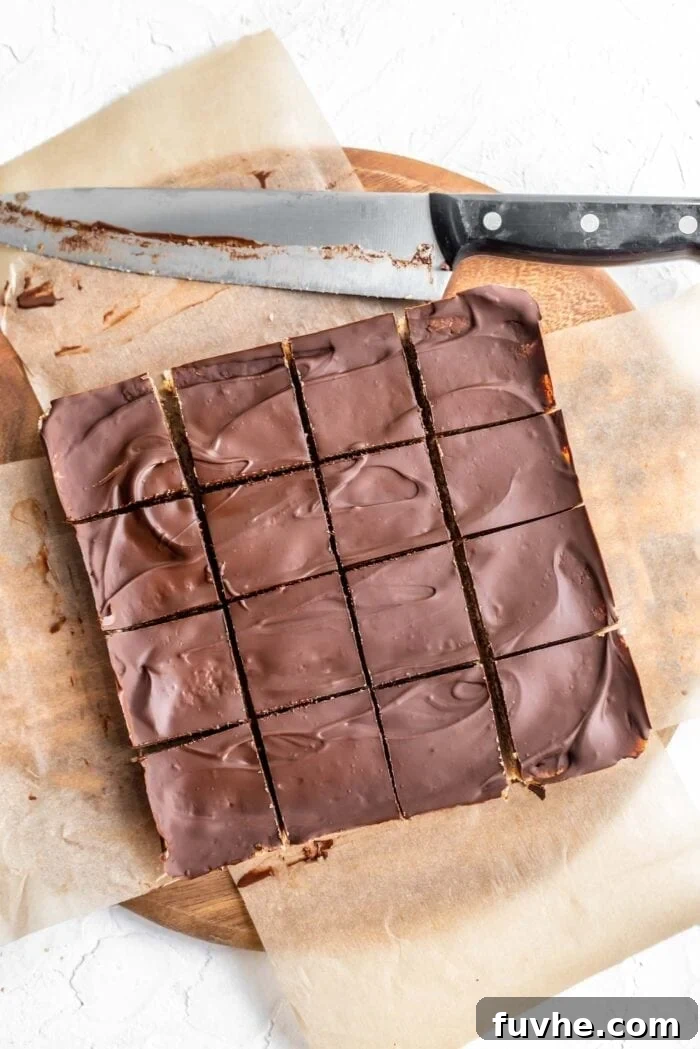
Expert Tips for No-Fail Chocolate Coconut Bars
To ensure your no-bake chocolate coconut bars turn out perfectly every single time, achieving that ideal balance of flavor and texture, keep these invaluable tips in mind:
- Date Quality Matters Immensely: The success of your chewy base heavily relies on the quality and moisture content of your dates. It’s absolutely essential to use soft, moist dates. If your dates are overly dry, they won’t blend as smoothly and may result in a crumbly, unbindable dough. To easily rectify this, simply soak them in hot water for about 15 minutes, then drain them thoroughly before adding them to your food processor. This rehydrates them, making them perfectly pliable for blending.
- Achieving a Smooth, Glossy Chocolate Coating: For an even more professional-looking and easier-to-spread chocolate topping, you can add about 1 tablespoon of additional melted coconut oil or a neutral-flavored vegan butter (such as cacao butter for extra richness) to your melted chocolate. Stir it in until completely combined. This helps to slightly thin the chocolate, creating a beautifully glossy and smooth finish that spreads like a dream and hardens with a satisfying snap.
- Customizing Your Chocolate Experience: While store-bought dairy-free chocolate chips or quality dark chocolate bars work wonderfully, don’t hesitate to get creative and personalize your bars! If you enjoy making things from scratch, consider using a homemade chocolate recipe to coat your bars. This allows you to precisely control the sweetness and flavor profile, tailoring the bars exactly to your taste preferences for a truly unique treat.
- Avoid Over-Processing the Base: While you want a cohesive dough, it’s important not to over-process the coconut and dates. You’re aiming for a texture that is crumbly but sticky enough to hold together when pressed, not a completely smooth paste. A little texture makes the bars more interesting and adds to their homemade charm.
- Chill Thoroughly and Patiently: Patience is a virtue, especially with no-bake desserts. Ensure both the coconut-date base and the chocolate topping are thoroughly chilled and completely firm before attempting to slice them. Rushing this crucial step can lead to messy cuts, a cracked chocolate topping, and bars that fall apart.
Creative Variations & Customizations for Your Bars
While these no-bake chocolate coconut bars are perfect as is, their simple base also serves as a fantastic canvas for your culinary creativity! Here are a few ideas to personalize your batch and explore new flavor profiles:
- Add a Pinch of Sea Salt: A sprinkle of flaky sea salt over the wet chocolate topping just before chilling enhances the chocolate flavor beautifully and provides a delightful contrasting crunch and subtle savory note.
- Nutty Twist: For those who don’t avoid tree nuts, finely chopped almonds, cashews, or walnuts can be added directly to the date-coconut base mixture for extra crunch and a richer flavor. Alternatively, you can simply sprinkle them on top of the chocolate layer before it sets for visual appeal and added texture.
- Extract Excitement: Infuse your bars with different aromatic extracts. A few drops of peppermint extract in the melted chocolate layer can transform these into refreshing mint chocolate coconut bars. Vanilla extract or almond extract could also be added to the date-coconut base for a subtle yet distinct flavor profile.
- Roll Them into Balls: Instead of pressing the mixture into a pan to create bars, try rolling the date-coconut base into small, bite-sized balls before dipping or drizzling them with melted chocolate. This creates elegant, portion-controlled chocolate coconut truffles.
- Boost the Protein: For a more filling and energizing snack, mix a tablespoon or two of your favorite protein powder (such as vanilla, chocolate, or unflavored vegan protein powder) into the date-coconut base mixture. This is an easy way to enhance the nutritional value of your treat.
Common Issues & Quick Fixes
Even though this recipe is incredibly easy and straightforward, sometimes things don’t go exactly as planned. Don’t worry, most common issues have simple solutions. Here are some quick fixes for challenges you might encounter:
- Dough is Too Dry or Crumbly: If your date-coconut base isn’t coming together in the food processor and remains too dry or crumbly, your dates might not have been soft enough. Rehydrate them by soaking them for longer in hot water, or try adding an extra teaspoon of melted coconut oil (one teaspoon at a time) to the food processor. Process again until the mixture sticks together when pressed.
- Dough is Too Oily or Wet: This is less common but can occur if your coconut oil quantity was slightly over or if you used exceptionally moist dates. To remedy this, try adding a tablespoon of extra shredded coconut to the food processor and pulse briefly. The additional coconut will help to absorb some of the excess moisture and fat.
- Chocolate Cracks When Slicing: This common issue usually means the chocolate topping is too cold and brittle. To prevent cracking, allow the bars to sit at room temperature for about 5-10 minutes before attempting to slice them. Remember the warm knife trick mentioned in the slicing instructions – heating your knife under hot water and wiping it dry before each cut is highly effective for clean, crack-free slices.
- Chocolate Isn’t Melting Smoothly or Appears Grainy/Seized: If your chocolate becomes grainy, thick, or “seized” during melting, it might have gotten too hot (especially with the microwave method) or had even a tiny drop of water get into it (a common issue with the double boiler if steam condenses into the chocolate). Unfortunately, seized chocolate is very hard to rescue. To avoid this, ensure your melting bowl is completely dry and carefully prevent any water or steam from touching the chocolate directly during the double boiler method.
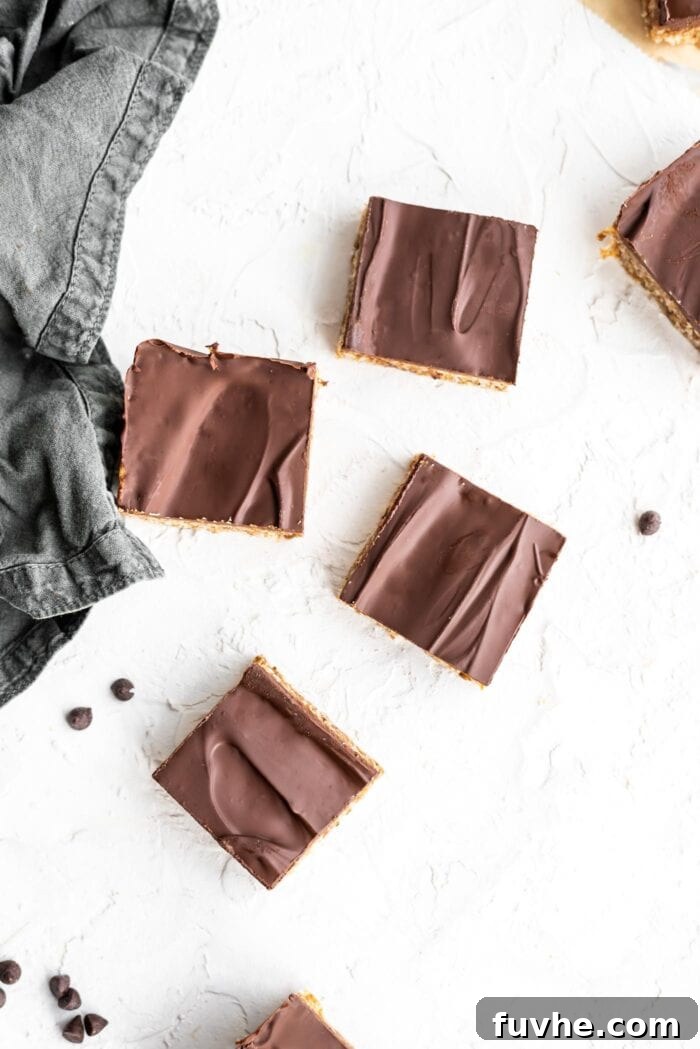
Frequently Asked Questions About No-Bake Coconut Bars
To maintain the vegan integrity of these bars, it’s crucial to select dairy-free chocolate. Excellent choices include readily available dairy-free chocolate chips from brands like Camino, Made Good, Enjoy Life, or Pascha. Alternatively, you can use high-quality dark chocolate bars. Always double-check the label for hidden dairy ingredients or milk solids. Many premium dark chocolates (typically 70% cocoa or higher) are naturally vegan. Brands like Alter Eco or Green & Blacks often offer great dairy-free dark chocolate options that melt beautifully. If using a solid chocolate bar instead of chips, be sure to chop it finely until you have approximately 3/4 cup worth; smaller pieces melt more evenly and quickly.
Absolutely! This recipe is inherently gluten-free, relying entirely on naturally gluten-free ingredients such as dates, shredded coconut, coconut oil, and chocolate. No grains or gluten-containing binders are used in the recipe. However, if you have severe gluten sensitivities or Celiac disease, it’s always a wise practice to review the packaging of your chosen chocolate chips or dark chocolate to ensure they are certified gluten-free and have not been processed in facilities that also handle gluten-containing products, thereby avoiding any potential cross-contamination.
In this specific recipe, coconut oil plays a vital role in binding the ingredients together and allowing the bars to firm up properly when chilled. It’s unique in that it solidifies at cooler temperatures, which is essential for the no-bake structure and the desired chewy texture. Therefore, it is generally not recommended to substitute coconut oil with other liquid oils (like vegetable oil) or butter if you want the bars to hold their shape and have the intended firm yet chewy consistency. If you’re specifically looking for an oil-free no-bake treat, you might need to explore alternative recipes that utilize different binding agents like specific nut butters or other fruit purées that naturally solidify.
Due to the properties of coconut oil and chocolate, these bars are best kept chilled. At room temperature, especially in warmer climates, the chocolate topping can become soft and the bars may lose their firm structure and become quite sticky. For optimal freshness, texture, and to prevent melting, it’s always best to keep them refrigerated until just before serving. They will maintain their delightful chewiness and firm shape significantly longer when stored correctly in a cool environment.
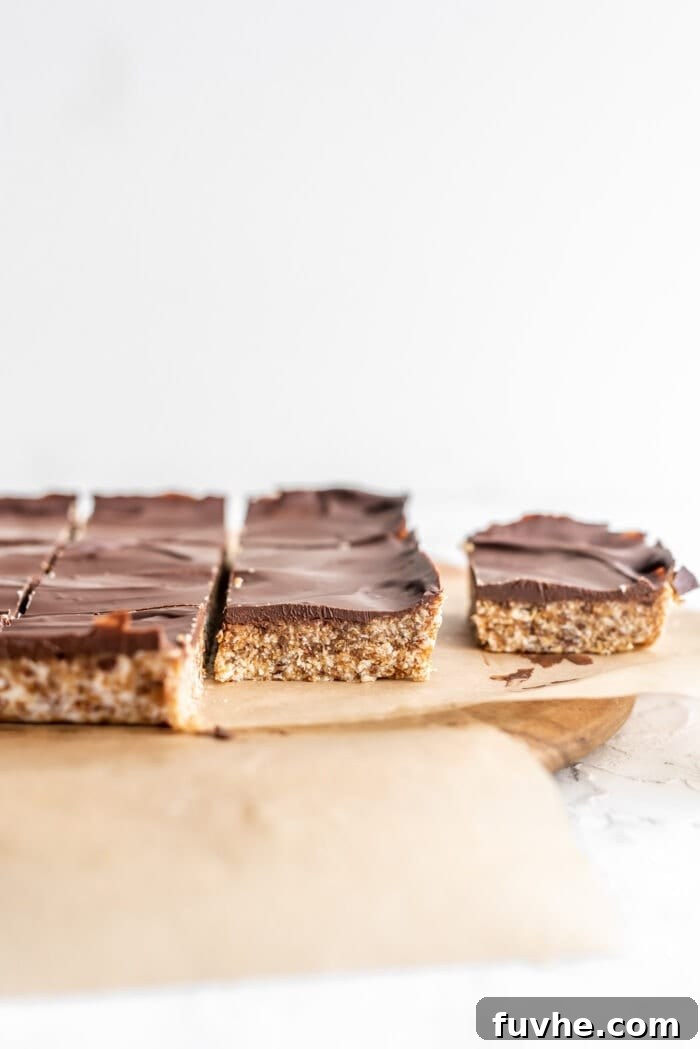
Storing Your No-Bake Chocolate Coconut Bars
Proper storage is absolutely key to maintaining the delicious taste, perfect texture, and structural integrity of your homemade no-bake bars. Since they are no-bake and rely on fats like coconut oil and chocolate to solidify, they are best kept chilled:
- Refrigeration: For short-term storage, place the bars in an airtight container and store them in the refrigerator. They will remain fresh and firm for up to 2 weeks. This will prevent the chocolate from softening or melting, especially in warmer environments, and keep the date-coconut base perfectly chewy.
- Freezer (Recommended for Longer Storage): For extended freshness and to always have a quick treat on hand, the freezer is your best friend. Arrange the bars in a single layer in an airtight, freezer-safe container, separating layers with parchment paper if stacking. They will maintain their excellent quality and flavor for up to 4 months. When you’re ready to enjoy one, simply pull it out and let it thaw slightly at room temperature for a few minutes before eating, or enjoy them straight from the freezer for a firmer, almost candy-like experience.
Explore More Delicious & Easy Desserts
If you’ve fallen in love with the simplicity and deliciousness of these no-bake chocolate coconut bars, you’ll be thrilled to discover more of our favorite easy, wholesome, and often dietary-friendly desserts. Expand your sweet treat repertoire with these tempting recipes:
- Vegan Oat Flour Brownies: Another fantastic date-sweetened dessert, offering a rich, fudgy texture and intense chocolate flavor without any refined sugars or gluten.
- Cashew Tahini Bars: Similar in concept to these coconut bars but with a unique and sophisticated twist! These no-bake bars are made with creamy cashews and nutty tahini, offering a different flavor profile for those who love sesame and a rich, buttery taste.
- No-Bake Peanut Butter Blondies: Indulge in these incredibly easy and satisfying blondies, featuring a rich peanut butter and date base that’s both wholesome and simple to prepare. A perfect treat for peanut butter lovers!
- Chocolate-Dipped Coconut Macaroons: If your heart beats for the classic combination of chocolate and coconut, these chewy, intensely flavored, and decadent macaroons are an absolute must-try! They’re naturally gluten-free and incredibly satisfying.
- Chocolate Fudge Bars: Experience pure bliss with these incredibly decadent chocolate fudge bars. They’re entirely no-bake, super easy to make, and promise an intense, melt-in-your-mouth chocolate experience that’s hard to resist.
Vegan Chocolate Coconut Bars
Deryn Macey
These easy-to-make bars are wonderful to have on hand in the freezer for a delicious and satisfying sweet treat! Perfect for a quick snack or a wholesome dessert for any occasion.
10 mins
30 mins
40 mins
16
Ingredients
- 1 cup packed, soft pitted dates (250 g)
- 2 cups unsweetened shredded coconut (165 g)
- 1 tbsp melted coconut oil (15 g)
- ¾ cup dairy-free chocolate chips
Instructions
- Add the soft pitted dates, unsweetened shredded coconut, and melted coconut oil to a food processor. Process until the mixture forms a crumbly yet cohesive dough that sticks together when pressed.
- Line a 7-inch square baking pan with two overlapping strips of parchment paper, ensuring an overhang on all sides for easy removal. Firmly and evenly press the prepared dough into the bottom of the pan. Place the pan in the freezer to chill while you prepare the chocolate topping.
- Melt the dairy-free chocolate chips using a double boiler method (a heatproof bowl set over a small pot of simmering water) or carefully in the microwave in 15-second intervals, stirring thoroughly after each. Continue until the chocolate is completely smooth and melted.
- Remove the chilled coconut base from the freezer. Using a spatula or spoon, evenly spread the melted chocolate over the entire surface of the coconut base, ensuring a smooth, uniform layer.
- Return the pan to the freezer and allow the chocolate topping to set completely for at least 30 minutes, or until firm to the touch.
- Once fully set, lift the entire slab of bars out of the pan using the parchment paper overhangs. For clean slices, heat a sharp knife under hot water, wipe it dry, then slice the bars into 16 individual pieces. Store the finished bars in an airtight container in the fridge for up to 2 weeks or in the freezer for up to 4 months.
Nutrition Information (per serving)
Serving Size: 1 bar (approx. 40g)
- Calories: 169 kcal
- Carbohydrates: 24g
- Protein: 1g
- Fat: 9g
- Sodium: 30mg
- Potassium: 147mg
- Fiber: 2g
- Sugar: 21g
- Vitamin A: 1 IU
- Calcium: 12mg
*Nutritional information is an estimate and may vary depending on ingredients used, preparation methods, and portion sizes.
This recipe was originally published July 29, 2013, and has been comprehensively updated for enhanced clarity, additional tips, and improved user experience.