
Delicious Homemade Vegan Butterfingers (No Candy Corn or Corn Syrup!)
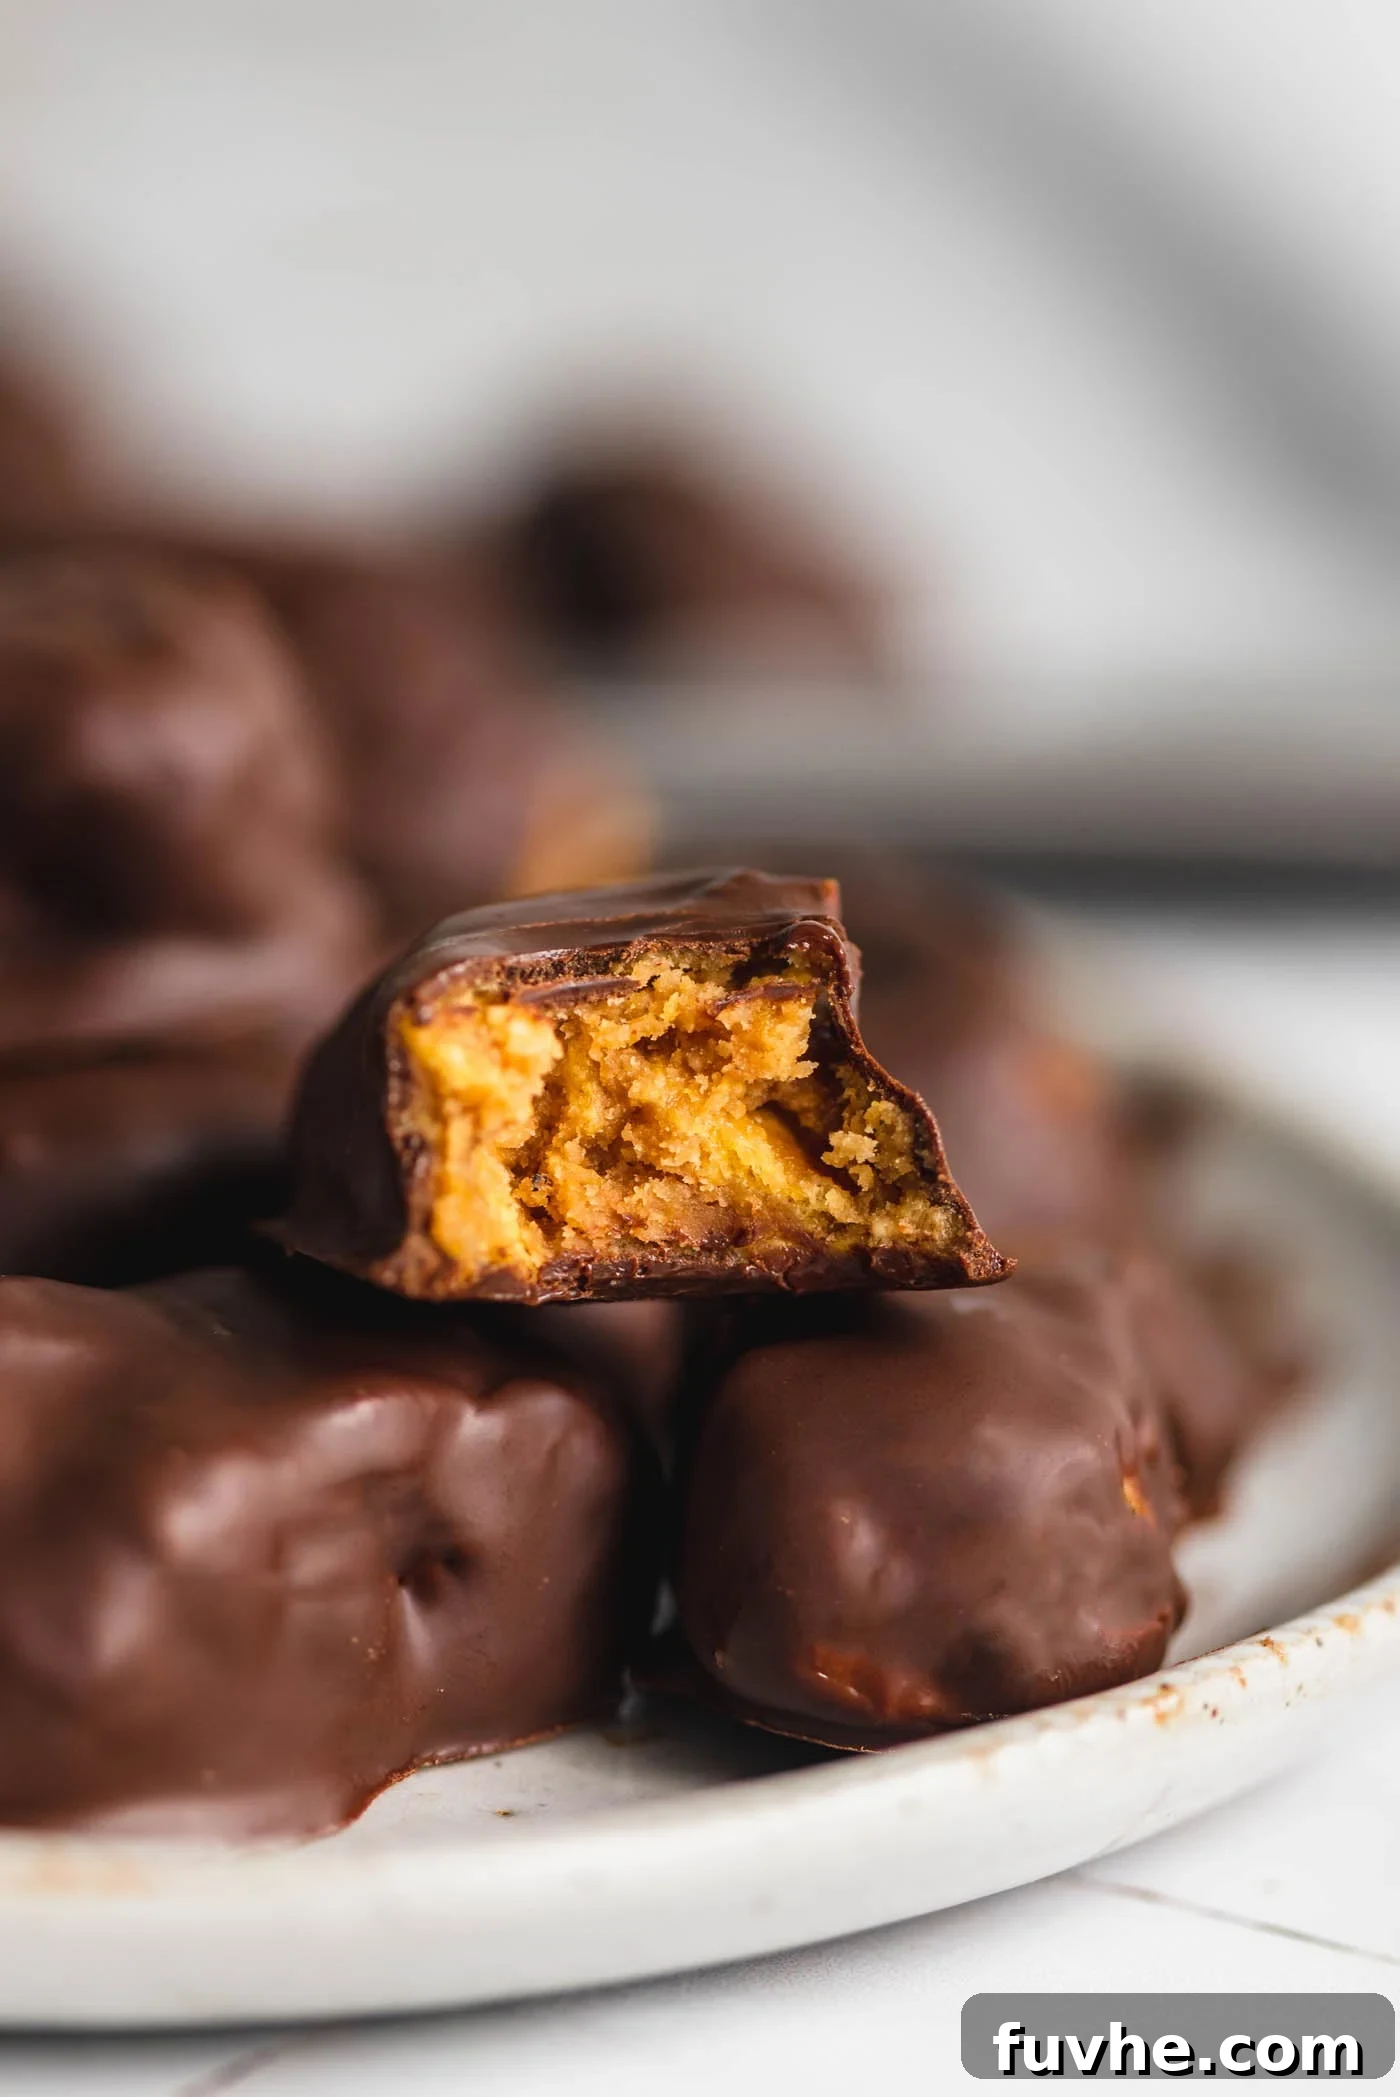
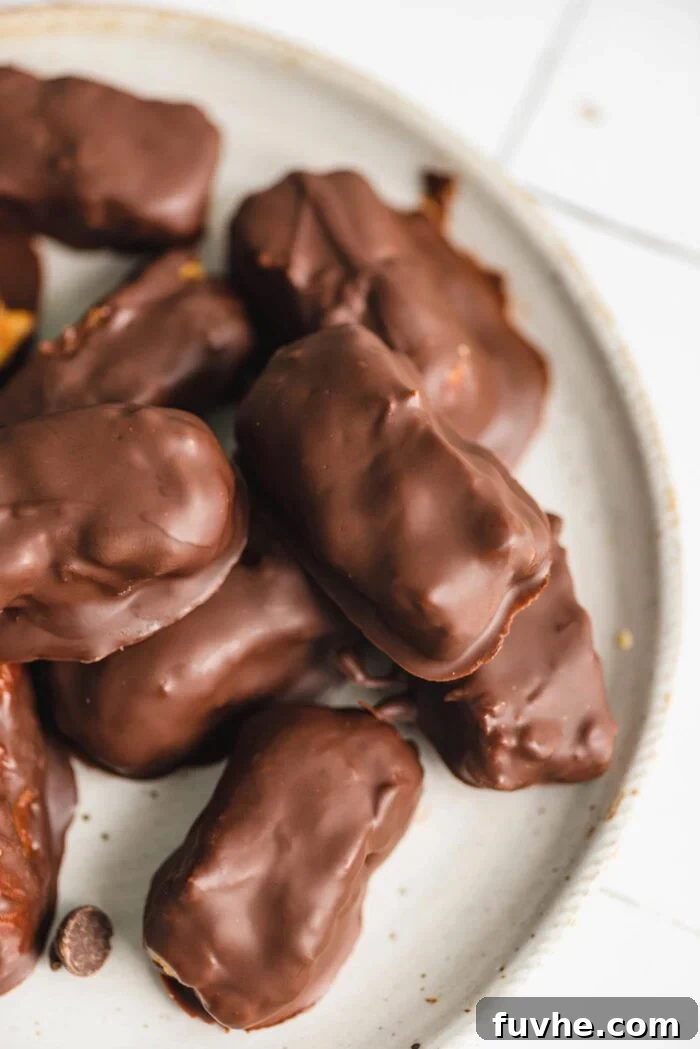
Craving that iconic crunchy, peanut buttery candy bar, but looking for a plant-based version? Look no further! This incredible vegan homemade Butterfingers recipe lets you recreate your favorite nostalgic treat with just a handful of simple ingredients: corn flakes, creamy peanut butter, rich chocolate, and a touch of maple syrup. Forget complicated candy thermometers or hard-to-find ingredients; this recipe is designed for ease, delivering a surprisingly authentic and utterly delicious homemade candy experience that you and your loved ones will adore.
Why You’ll Love This Vegan Butterfingers Recipe
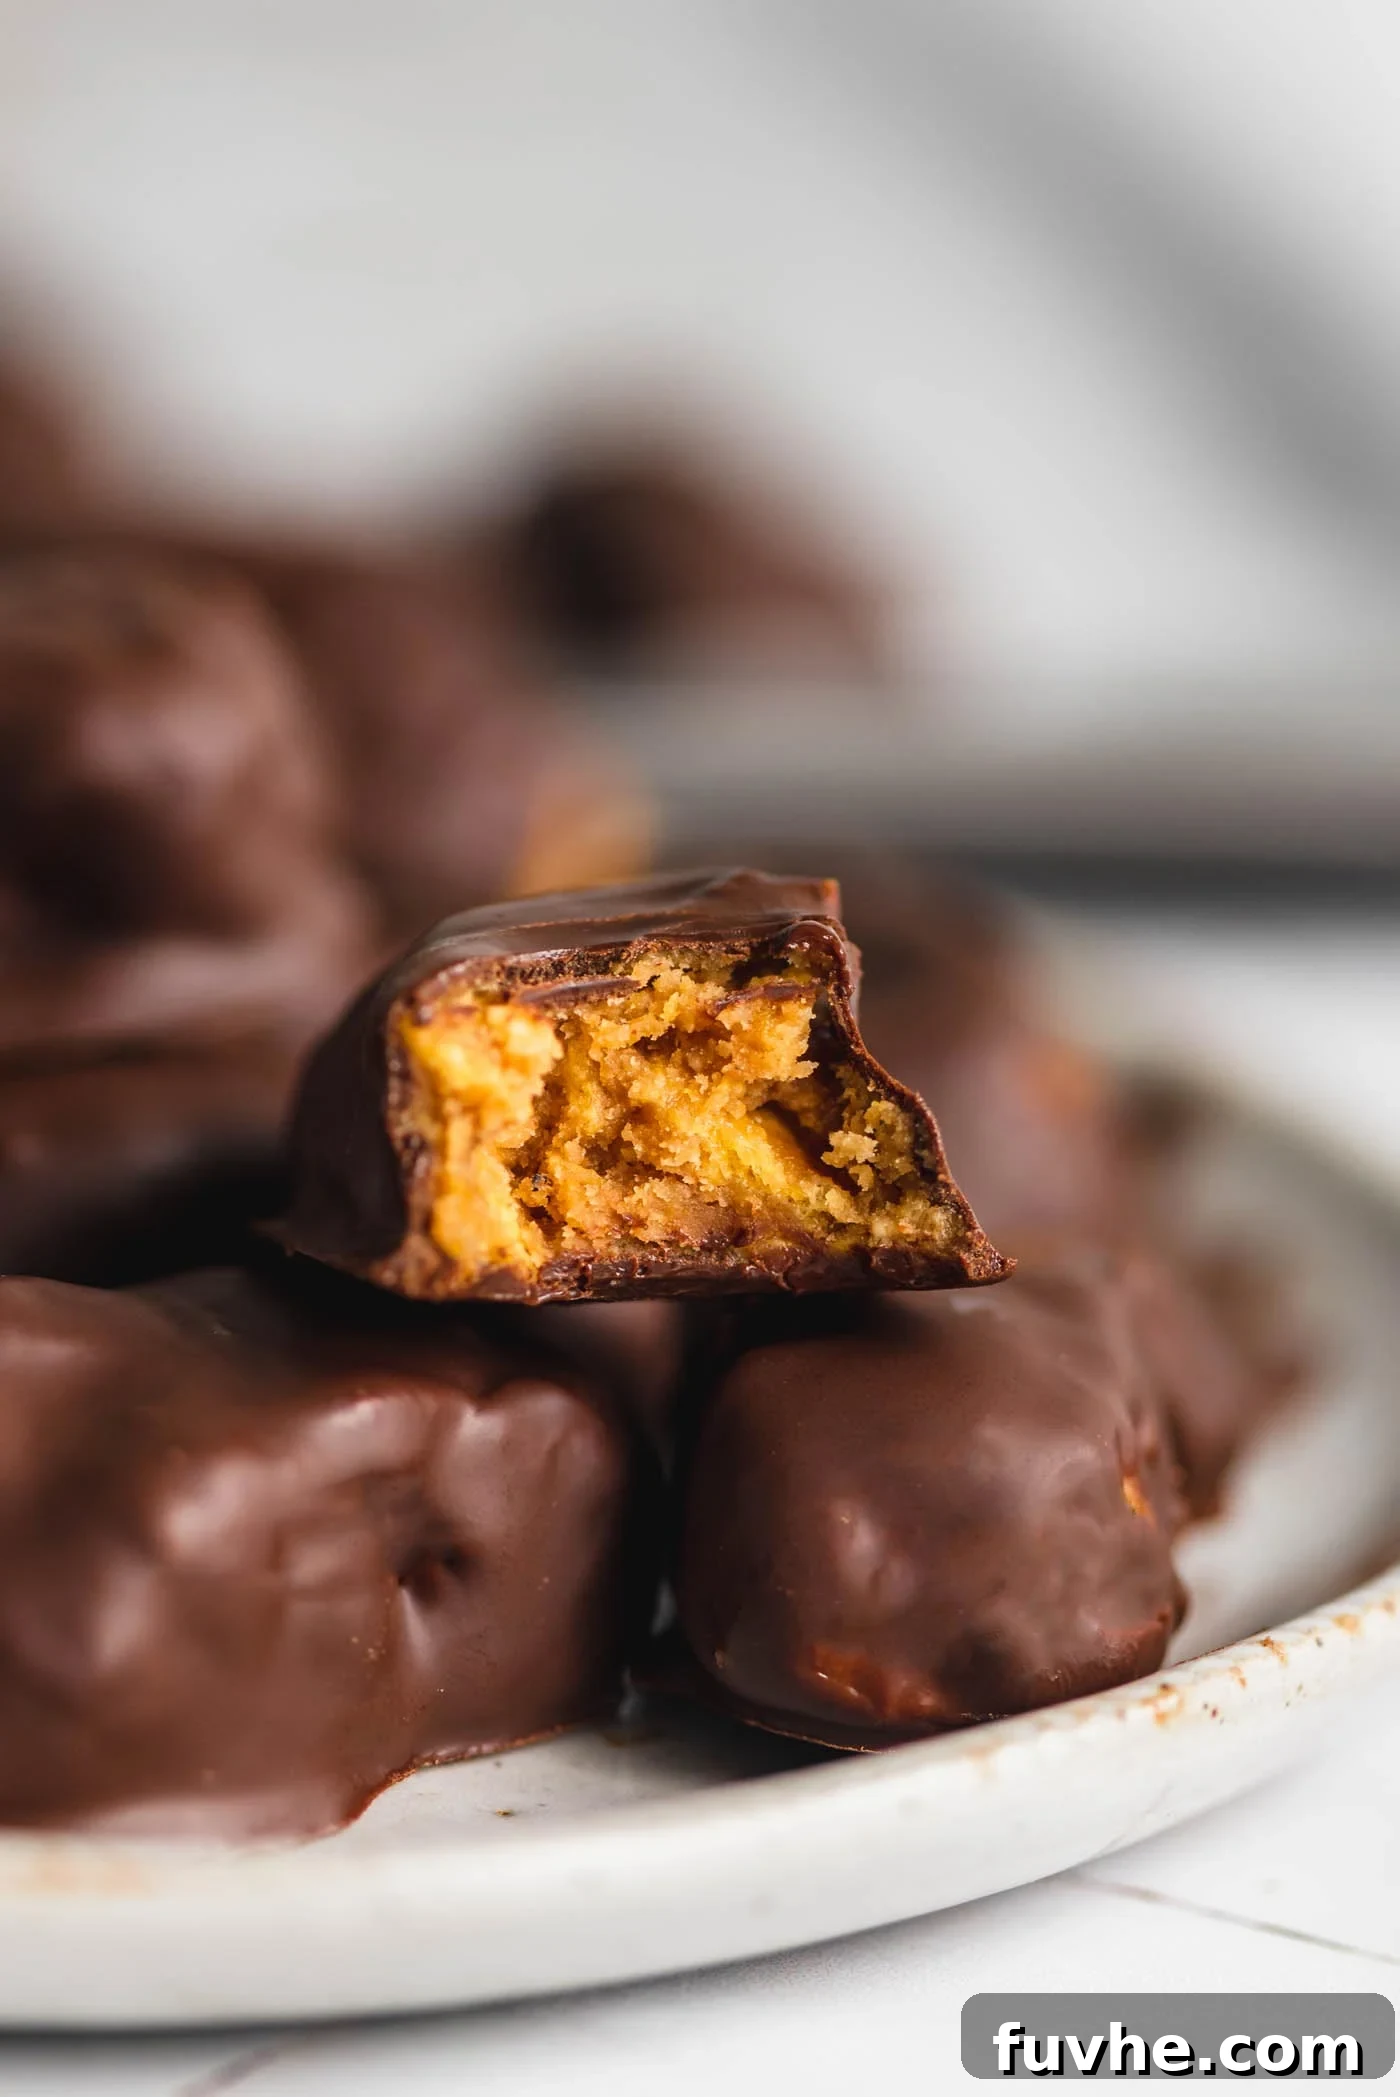
This is more than just a recipe; it’s a culinary journey back to your childhood, reimagined for a modern, plant-based lifestyle. Our homemade copycat recipe for vegan Butterfingers captures the irresistible combination of crunchy corn flakes and smooth, nutty peanut butter, all enrobed in a layer of decadent chocolate. Here’s why these easy and delicious treats will become your new go-to:
- Completely Vegan: Made without any animal products, these bars are perfect for those following a vegan diet or anyone looking to reduce their dairy intake.
- Easily Gluten-Free: With a simple swap of certified gluten-free corn flakes, this recipe becomes a fantastic option for those with gluten sensitivities or celiac disease.
- Nut-Free Option Available: Don’t let allergies hold you back! This recipe can be adapted using sunflower seed butter for a delicious nut-free alternative.
- Minimal Ingredients: You only need 4 core ingredients, making it a quick and accessible recipe for anyone to try.
- No Baking or Candy Thermometer: Say goodbye to complex candy-making techniques. This no-bake recipe simplifies the process significantly.
- No Candy Corn or Corn Syrup: Achieve the signature Butterfingers texture and flavor without relying on corn syrup or seasonal candy corn, allowing you to enjoy them year-round.
- Irresistible Crunchy Filling: The star of the show is the perfectly crunchy peanut butter and corn flake filling, offering that distinctive crispy, flaky texture.
- Rich Chocolate Coating: Each bar is generously coated in a smooth, dairy-free chocolate shell, providing the perfect contrast to the crunchy interior.
- Kid-Friendly & Fun to Make: Get the whole family involved! This recipe is simple enough for kids to help with, making it a delightful activity, especially for holidays like Halloween.
- A Versatile Treat: Perfect for parties, lunchbox snacks, or simply satisfying a sweet craving, these bars are always a hit.
If you’re a fan of homemade candy bars, don’t stop here! Be sure to explore our other fantastic recipes like homemade vegan Reese’s peanut butter eggs, homemade vegan Twix bars, homemade Mounds bars, vegan Thin Mints, and vegan Snickers bars for more delicious plant-based delights!
Essential Ingredients and Optional Enhancements
Crafting these delectable vegan Butterfingers requires just a few pantry staples, but we also have some suggestions for adding extra layers of flavor and texture to your homemade treats.
Core Ingredients:
- Creamy Natural Peanut Butter: Opt for a natural, unsweetened variety where oil separation is minimal. The consistency of natural peanut butter is crucial for the right texture. If your peanut butter is very oily, stir it well before measuring.
- Maple Syrup: This acts as our sweetener and binder, providing a rich, caramel-like sweetness without the need for refined sugar or corn syrup. Agave syrup can be used as a substitute if preferred.
- Corn Flakes: The secret to the signature Butterfingers crunch! Be sure to lightly crush them, leaving some larger pieces for optimal texture. For a gluten-free version, choose certified gluten-free corn flakes.
- Dairy-Free Chocolate Chips: The final decadent layer. Any good quality dairy-free chocolate chips or chopped dark chocolate (ensure it’s vegan) will work beautifully.
Flavorful Additions to Try:
- Vanilla Extract: For an extra layer of warmth and sweetness, consider adding 1 teaspoon of vanilla extract to the peanut butter and maple syrup mixture. It complements the nutty flavor beautifully.
- Roasted Peanuts: Elevate the peanut flavor and add even more crunch by incorporating up to 1/2 cup of crushed roasted peanuts. You can mix them into the filling with the corn flakes, press a few onto each bar before dipping in chocolate, or sprinkle them on top after coating for a visually appealing and tasty garnish.
- Flaky Sea Salt: A sprinkle of flaky sea salt over the freshly coated chocolate bars is a game-changer! It enhances the sweetness of the chocolate and peanut butter, creating a delightful sweet and salty contrast that mimics gourmet candy bars.
- Nutritional Yeast (Secret Ingredient!): While it sounds unusual, adding 2 tablespoons of nutritional yeast to the peanut butter filling can create an even deeper, more complex nutty and savory flavor, reminiscent of Reese’s peanut butter cups. It’s completely optional, but highly recommended if you’re adventurous!
How to Make Homemade Vegan Butterfingers: Step-by-Step Guide
Creating these crispy, chocolate-covered delights is surprisingly straightforward. Follow these steps for perfect homemade vegan Butterfingers every time.
Step 1: Prepare the Peanut Butter Mixture
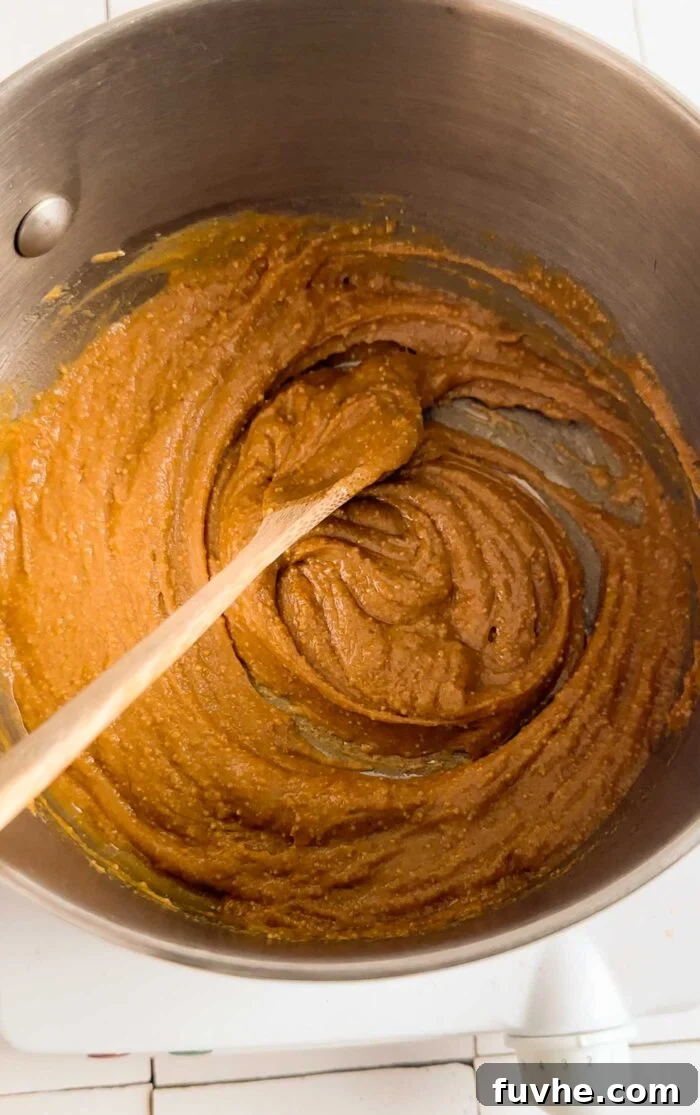
Combine 1 cup of creamy natural peanut butter and ⅓ cup of maple syrup in a small saucepan. If your peanut butter is unsalted, you can add a small pinch of salt at this stage to enhance the flavors. Heat the mixture over medium-low heat. Stir constantly as it heats, bringing it to a very light simmer where you’ll see a few gentle bubbles begin to form. Continue to cook and stir for 2-3 minutes, allowing the mixture to slightly thicken and the flavors to meld. This brief cooking time is essential for achieving the right texture for your candy bars. Once cooked, remove the pan from the heat.
Step 2: Crush the Corn Flakes
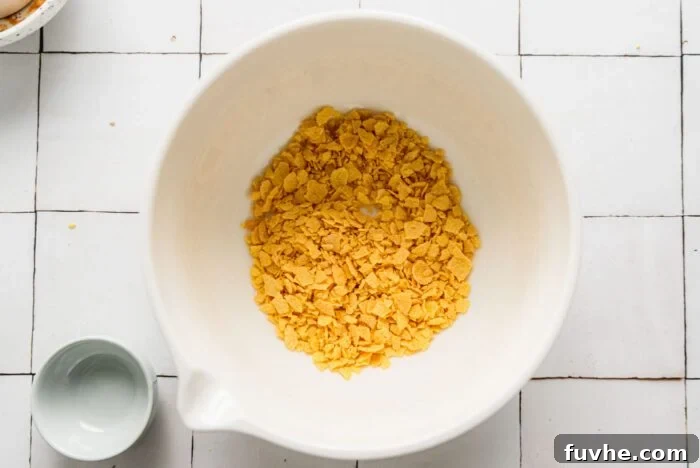
While the peanut butter mixture is still warm, add 2 cups of corn flakes to a large mixing bowl. The key here is to lightly crush the corn flakes, not pulverize them into a fine powder. You can do this easily with your hands, using the back of a spoon, or by placing them in a bag and gently rolling with a rolling pin. Leaving some larger pieces will contribute significantly to the authentic crunchy texture of the Butterfingers. This step ensures every bite has that delightful crispness.
Step 3: Combine and Chill the Filling
Pour the warm peanut butter and maple syrup mixture over the crushed corn flakes in the mixing bowl. Stir vigorously until the corn flakes are completely coated and evenly distributed throughout the peanut butter mixture. The mixture will be thick and sticky. If you’re adding the optional nutritional yeast for that extra “Reese’s-like” savory depth, now is the time to mix it in. Once combined, place the bowl in the fridge to chill for about 15 minutes. This chilling period will make the mixture easier to handle and shape.
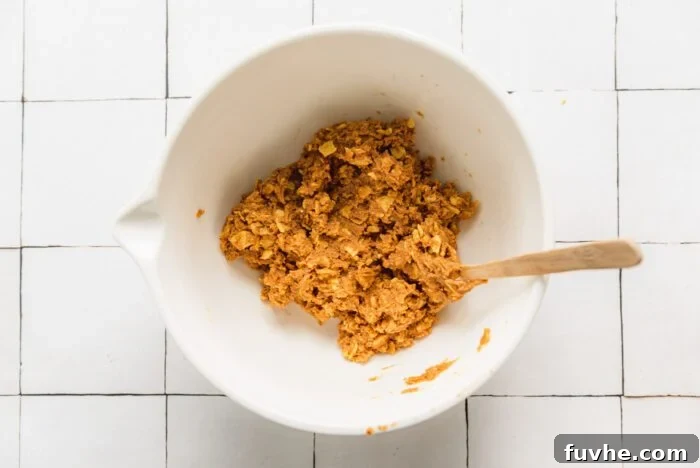
Step 4: Melt the Chocolate
While the filling is chilling, prepare your chocolate coating. Add 1 cup of dairy-free chocolate chips to a microwave-safe bowl. Melt the chocolate in 20-second intervals, stirring thoroughly between each interval, until it is completely smooth and glossy. Alternatively, you can use a double boiler for a more controlled melting process. For a smoother, thinner chocolate coating that’s easier to work with, consider adding 1-2 tablespoons of coconut oil or vegan butter to the melted chocolate and stir until fully combined. Line a baking sheet with parchment paper to prepare for coating your candy bars.
Step 5: Shape the Candy Bars
Remove the chilled peanut butter and corn flake mixture from the fridge. Using your hands, shape the mixture into approximately 18-20 small candy bars. Each bar should use about 1.5-2 tablespoons of the mixture. Aim for a consistent size and shape for even coating. Place the shaped bars onto the prepared baking sheet lined with parchment paper. If you have silicone candy bar molds, they can be a great tool for achieving perfectly uniform shapes.
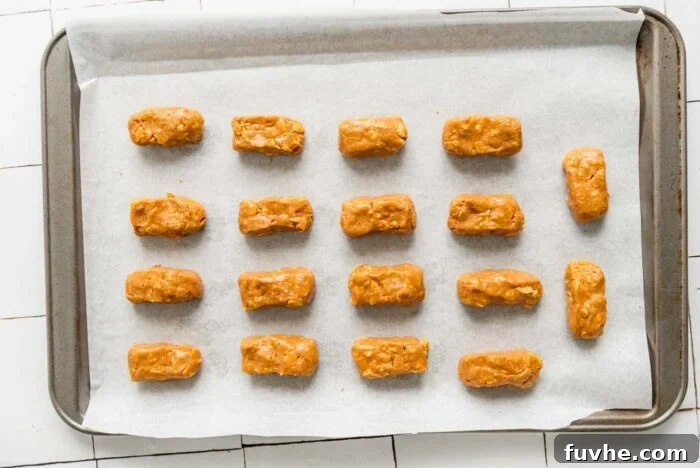
Step 6: Coat with Chocolate
Working quickly, use a fork to dip each shaped candy bar into the melted chocolate, turning it gently to ensure all sides are fully coated. Lift the bar out, allowing any excess chocolate to drip off, then carefully place it back onto the parchment-lined baking sheet. Repeat this process until all the bars are beautifully enrobed in chocolate. If you have any melted chocolate remaining, you can drizzle it decoratively over the coated bars for a professional finish.
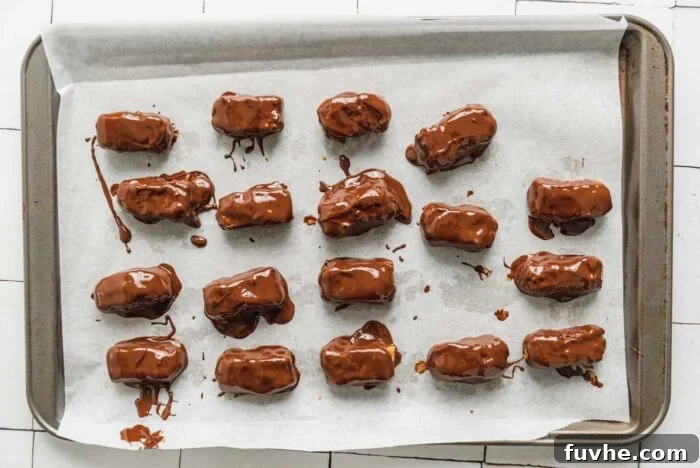
Step 7: Chill Until Set
Once all the bars are coated, place the entire baking sheet into the fridge for at least 30 minutes, or until the chocolate coating has completely hardened and set. This final chill ensures the chocolate is firm and the candy bars hold their shape perfectly. Once set, your homemade vegan Butterfingers are ready to enjoy!
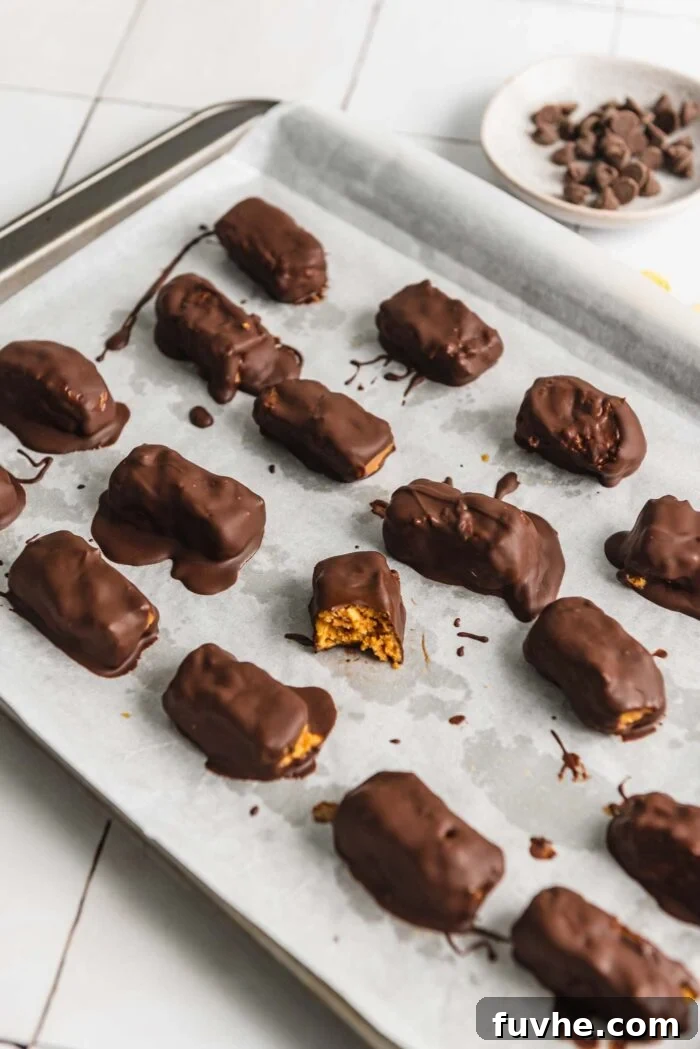
Expert Tips for Perfect Vegan Butterfingers
Achieving that perfect Butterfingers crunch and flavor is simple with these expert tips and tricks:
- Thinning the Chocolate Coating: If your melted chocolate seems too thick, making it difficult to coat the bars smoothly, incorporate 1-2 tablespoons of coconut oil or plant-based butter. Stir it into the chocolate until it becomes a thinner, more manageable consistency. This step is optional but can greatly improve the ease of coating and the final appearance of your candy bars. We often use 2 tablespoons of coconut oil for the best results.
- The Nutritional Yeast “Reese’s Trick”: For an even more complex and savory flavor profile, resembling the beloved Reese’s peanut butter cups, stir in 2 tablespoons of nutritional yeast to the peanut butter filling mixture. While it may sound unconventional, this addition imparts a nutty, slightly cheesy, and salty depth that truly enhances the overall taste. It’s a secret ingredient that often surprises and delights!
- The Easy Loaf Pan Method: Short on time or prefer less shaping? This method is for you! After mixing the peanut butter and corn flake mixture, firmly press it into a parchment paper-lined loaf pan. Smooth the top evenly. Then, melt your chocolate (you might need a little less, around ⅔ cup for this method) and spread it over the top of the pressed mixture. Freeze until the chocolate is completely set, then lift the block out of the pan using the parchment paper, slice it into 16-20 bars, and enjoy! This simplifies the shaping process significantly.
Frequently Asked Questions About Vegan Butterfingers
We’ve gathered some common questions to help you master this delicious recipe.
Is traditional Butterfinger candy vegan?
No, unfortunately, traditional Butterfinger candy bars are not vegan. They contain dairy ingredients such as skim milk, as well as other non-vegan ingredients like TBHQ (a preservative that can have animal-derived carriers) and artificial colors that some vegans choose to avoid. However, this homemade copycat recipe is completely vegan, as long as you use dairy-free chocolate chips or melted dark chocolate that is certified dairy-free.
Is this recipe gluten-free?
Yes, this recipe can easily be made gluten-free! While corn flakes are naturally gluten-free, some popular brands (like Kellogg’s) include malt flavoring derived from barley, which contains gluten. For a truly gluten-free treat, make sure to use certified gluten-free corn flakes. Brands like Nature’s Path offer excellent gluten-free corn flake options that are safe for those with celiac disease or gluten allergies.
Can I use other nut butters?
Absolutely! While peanut butter gives the classic Butterfingers flavor, you can experiment with other creamy nut or seed butters. Almond butter or cashew butter would offer a slightly different but equally delicious flavor profile. For a nut-free option, sunflower seed butter (like SunButter) works wonderfully and maintains a similar consistency and richness.
How do I ensure the bars are perfectly crispy?
The key to crispiness lies in two main aspects:
- Crushing the Corn Flakes: Don’t pulverize them. Leave some larger pieces to provide varied crunch.
- Proper Chilling: Ensure the peanut butter mixture is well chilled before shaping, and the finished chocolate-coated bars are fully set in the fridge or freezer. This helps the internal structure firm up and the chocolate coating to snap.
Can I make these bars ahead of time?
Yes, these vegan Butterfingers are excellent for making ahead! They store very well in the fridge or freezer, making them perfect for meal prep, party planning, or having a healthy treat on hand whenever a craving strikes.
Storage Instructions for Your Homemade Butterfingers
Proper storage is essential to maintain the perfect texture and freshness of your vegan Butterfingers. Since they are a no-bake treat with a soft filling, they require refrigeration.
- Refrigeration: Store the bars in an airtight container in the fridge for up to 2 weeks. This keeps them firm and prevents the chocolate from melting at room temperature.
- Freezing: For longer storage, place the bars in a freezer-safe, airtight container or bag. They can be kept in the freezer for up to 3 months. They are remarkably delicious enjoyed straight from the freezer, offering an extra firm and satisfyingly cold crunch.
- Serving Tips: If you’re serving these bars, keep them in the fridge or freezer until just before they are needed. They will soften at room temperature, especially on warmer days, so it’s best to enjoy them cool.
Vegan Homemade Butterfingers Recipe
Easy homemade Butterfingers candy bars made with corn flakes and peanut butter!
By: Deryn Macey
Prep: 15 mins
Cook: 30 mins
Total: 45 mins
Servings: 20 bars
Ingredients
- 1 cup creamy natural peanut butter, 250g
- ⅓ cup maple syrup, 106g
- 2 cups corn flakes, slightly crushed, 90 g
- 1 cup chocolate chips, 150 g (dairy-free)
- pinch salt, optional (if peanut butter unsalted)
Instructions
- Add the maple syrup and peanut butter (and salt if peanut butter is unsalted) to a small saucepan and heat over medium-low heat. Bring to a light simmer, a few bubbles should appear. Cook for 2-3 minutes, stirring constantly. Remove the pan from the heat.
- Add the corn flakes to a mixing bowl and either slightly crush with your hands, the bottom of a bowl, or crush in a bag before adding to the bowl. You don’t want to completely pulverize them, just break them up a bit. Some larger pieces will add more crunch to the bars.
- Add the peanut butter mixture to the corn flakes and stir to fully combine. Place the bowl in the fridge to chill for 15 minutes.
- After nearly 15 minutes, add the chocolate to a microwave-safe bowl and microwave in 20-second increments, stirring between increments, until it’s completely smooth. Alternatively, use a double boiler to melt the chocolate. Line a baking sheet with parchment paper as well.
- Remove the bowl from the fridge and shape into 18-20 mini candy bars using about 1.5-2 tbsp per bar, placing each on the lined baking sheet.
- Use a fork to dip each bar into the melted chocolate, flipping to coat all sides, then placing back on the baking sheet. Repeat until you’ve coated all the bars. If you have any extra chocolate, drizzle if over any spots you may have missed on the bars.
- Place the pan in the fridge for at least 30 minutes or until the chocolate is hardened. Enjoy your bars.
Notes
Chocolate Coating: If the melted chocolate is too thick, it helps to stir in 1-2 tbsp coconut oil or plant-based butter to thin it out and make it easier to coat the bars. I used 2 tbsp of coconut oil in mine.
Nutritional Yeast: I like to add 2 tbsp nutritional yeast to the filling. This lends a nutty, salty flavour that tastes like Reese’s peanut butter cups. This is totally optional but I usually do!
Substitutions: You can use almond butter or sunflower seed butter instead of peanut butter. You can use honey or agave syrup instead of maple syrup. You can use any variety of corn flakes (sweetened/unsweetened) or another crunchy cereal like brown rice crisps, Rice Krispies or Bran Flakes but I suggest corn flakes for best results.
Loaf Pan Method: For an even easier way of making these, mix up the peanut butter-corn flake mixture then firmly press into a parchment paper-lined loaf pan. Top with melted chocolate, I would use a bit less, about 2/3 cup, then freeze until the chocolate sets. Slice into 16-20 bars and enjoy!
Store butterfingers in the refrigerator for up to 2 weeks or in the freezer for up to 3 months.
Nutrition
Serving: 1 candy, Calories: 146kcal, Carbohydrates: 15g, Protein: 3g, Fat: 9g, Saturated Fat: 3g, Polyunsaturated Fat: 2g, Monounsaturated Fat: 3g, Sodium: 76mg, Potassium: 115mg, Fiber: 1g, Sugar: 10g, Vitamin A: 50IU, Vitamin C: 1mg, Calcium: 19mg, Iron: 1mg