

Indulge in the rich, comforting flavors of classic pecan pie without the fuss of baking! These delightful no-bake pecan pie tarts are incredibly easy to prepare, requiring just 7 simple pantry ingredients. Perfect for impressing guests during the holidays or simply satisfying your sweet tooth, these vegan and gluten-free mini tarts offer a healthier, yet equally decadent, alternative to traditional pecan pie. Get ready to discover your new favorite festive dessert that promises crowd-pleasing perfection with minimal effort.
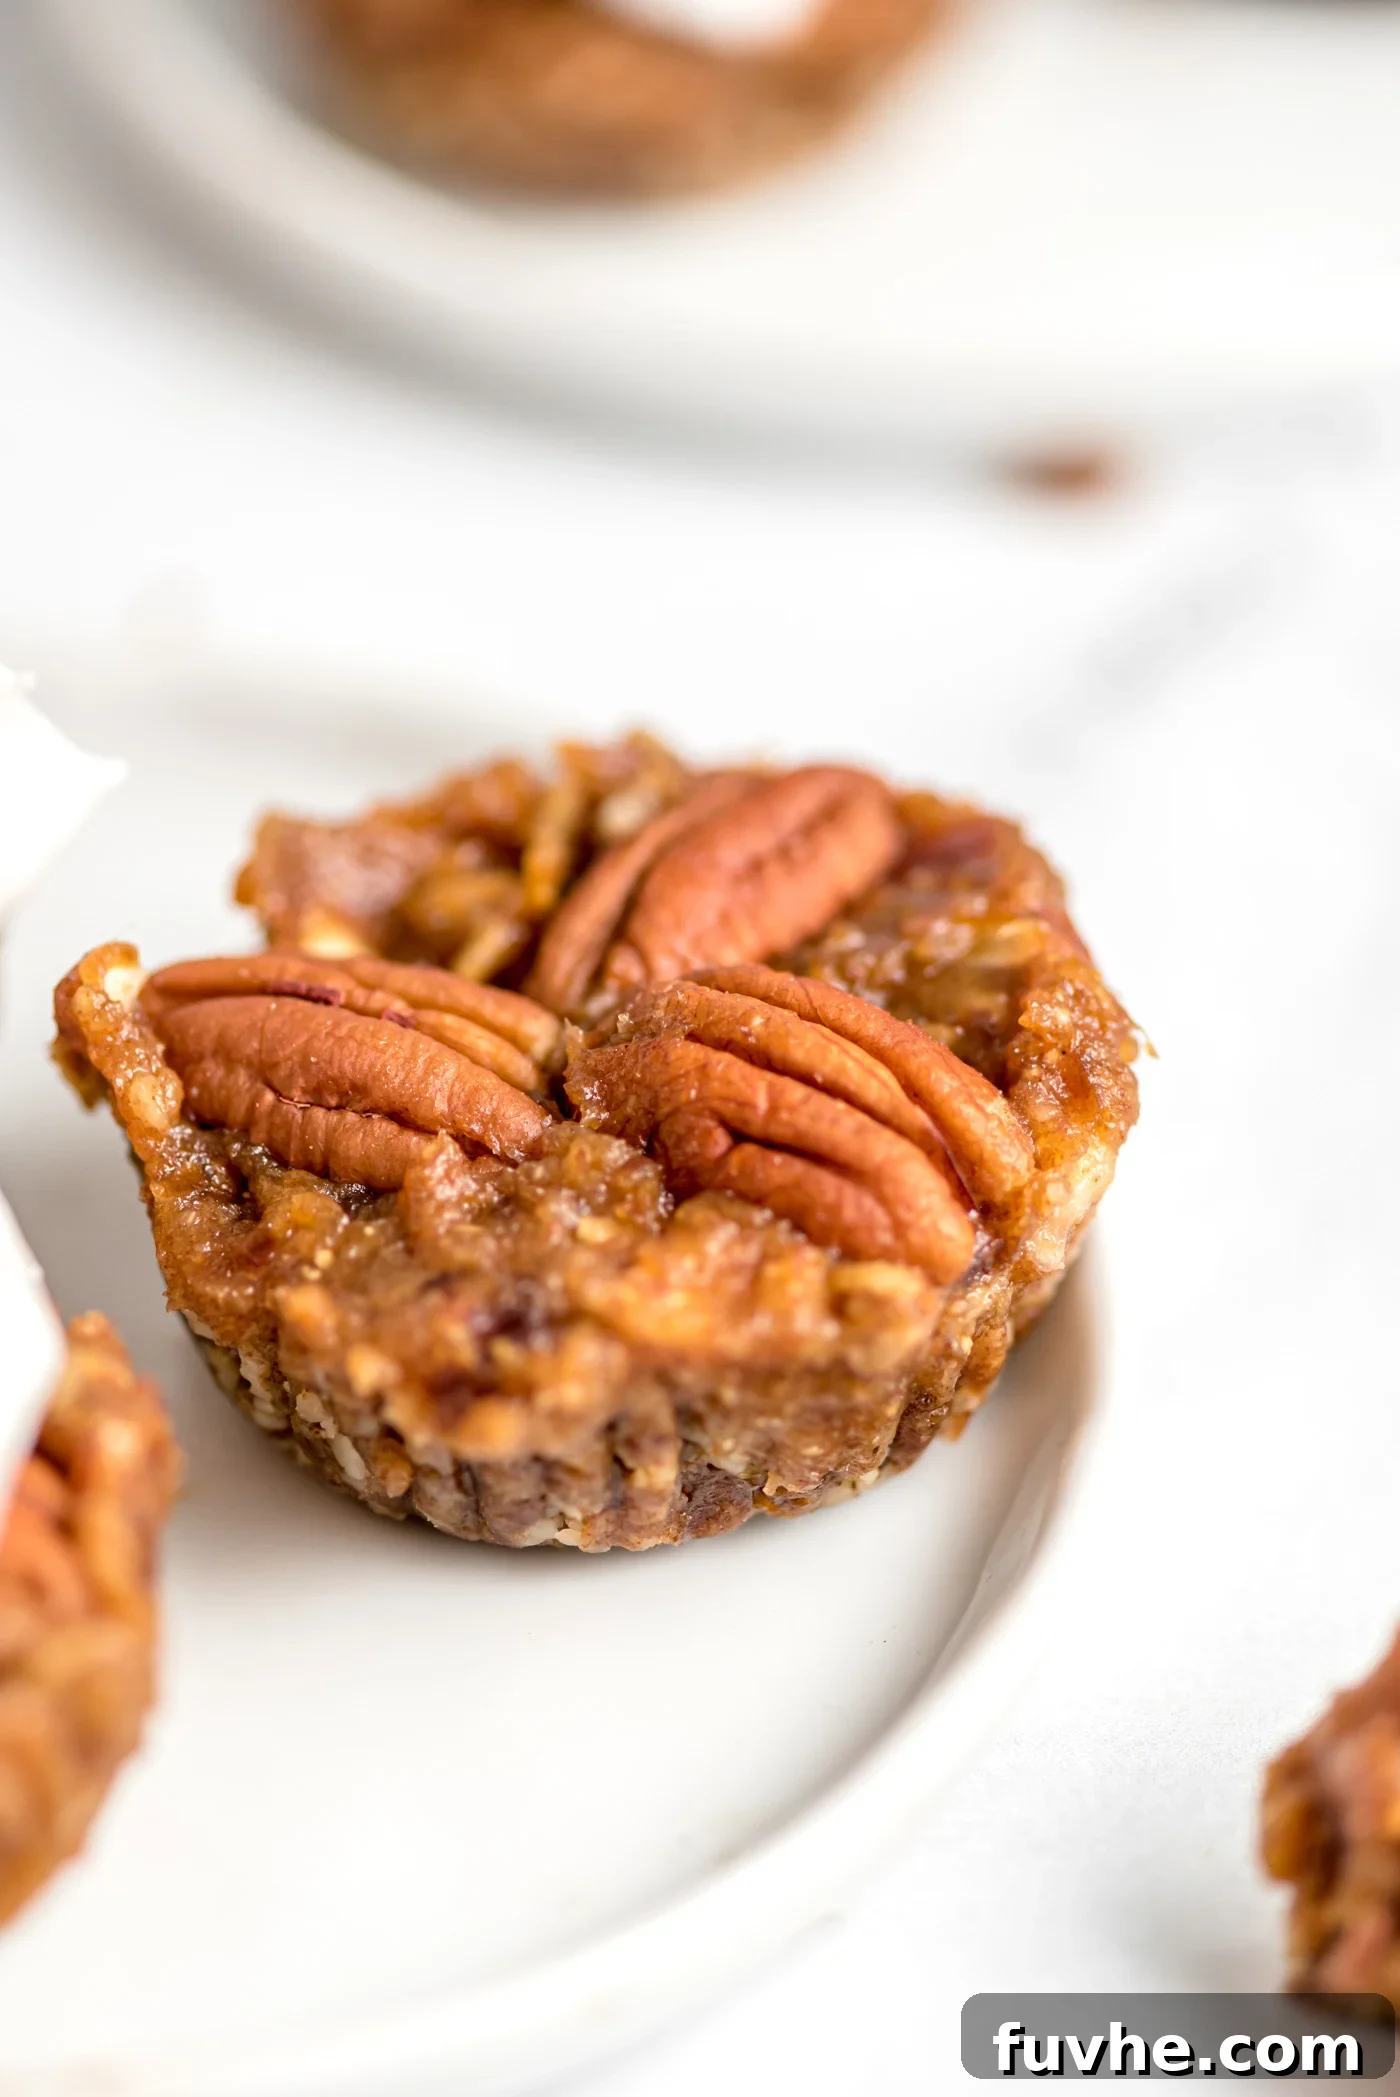
Do you adore the deep, nutty, and sweet taste of pecan pie but often find yourself shying away from the lengthy baking process, or perhaps looking to avoid the butter and corn syrup? If so, then these charming little tarts are precisely what you’ve been searching for! They deliver all the iconic flavor of a classic pecan pie in a convenient, individual serving size, making them ideal for any gathering. For an elevated dessert experience, serve them alongside your favorite dairy-free whipped cream or a scoop of vanilla ice cream – they are guaranteed to be a sensational hit!
If you’re on the hunt for more effortless, no-bake desserts that are perfect for entertaining, don’t miss our Vegan Chocolate Ganache Tart, the creamy Vegan Chocolate Pie, and our festive Vegan Pumpkin Pie Tarts. And for those moments when you do want to embrace the baked pecan goodness, our Vegan Pecan Pie Bars are an absolute must-try.
Why You’ll Love These No-Bake Pecan Pie Tarts
These mini pecan pie tarts aren’t just delicious; they boast a range of features that make them an ideal choice for any occasion, particularly during the bustling holiday season:
- Diet-Friendly Delight: Completely vegan and gluten-free, these tarts cater to various dietary preferences and restrictions, ensuring everyone can enjoy a slice of dessert heaven without compromise.
- Effortless Preparation: Made with just 7 simple, readily available pantry ingredients, the recipe is incredibly straightforward, perfect for novice bakers or those short on time. Say goodbye to complex steps and specialized equipment!
- Authentic Pecan Pie Flavor: Experience the true essence of pecan pie without traditional baking. The carefully balanced crust and filling replicate that beloved sweet and nutty taste, minus the corn syrup and excessive butter.
- Holiday Hero: Their individual portions and rich, festive flavor make them an excellent dessert for Thanksgiving or Christmas gatherings. They’re easy to transport and serve, reducing stress during busy celebrations.
- Versatile Serving Options: Elevate these tarts to an ultimate treat by serving them with a dollop of creamy whipped cream or a scoop of dairy-free ice cream. The contrast of cold topping with the rich tart is simply irresistible.
- Quick Chilling Time: Unlike traditional pies that require lengthy baking, these tarts set up beautifully in the freezer in just one hour, meaning you can have a gourmet dessert ready in no time.
- Make-Ahead Marvel: Prepare these tarts days or even weeks in advance and store them in the freezer, freeing up valuable time closer to your event.
Essential Ingredients for Flawless Tarts
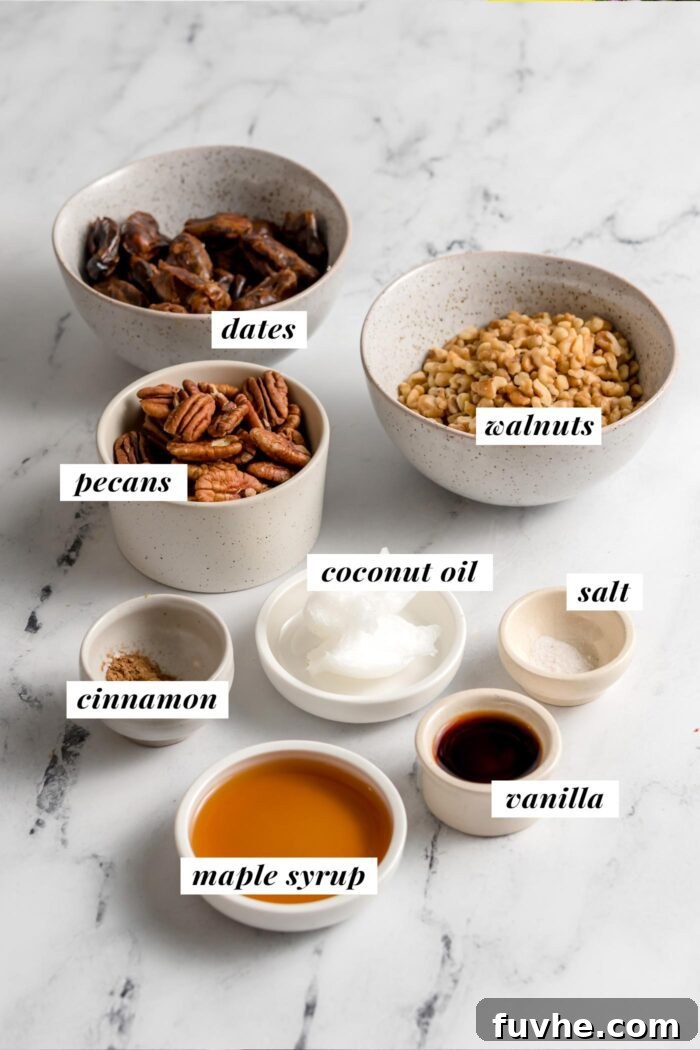
Crafting these delectable no-bake pecan pie tarts begins with selecting the right ingredients. While the full list with precise measurements is included in the comprehensive recipe card below, here’s a detailed look at each component and why it’s essential:
For the Crust: Building the Perfect Foundation
- Walnuts: The base of our crust. Use plain, raw walnut pieces that are unsalted and unroasted. Walnuts provide a tender yet sturdy crust with a subtle, earthy flavor that complements the pecan filling beautifully. If you’re measuring by volume, remember that pre-chopped pieces can vary, so a kitchen scale offers the most accurate measurement (125g for 1 cup). You can swap walnuts for almonds or pecans, but walnuts often yield the best no-bake crust texture.
- Soft Pitted Dates: These are the natural sweetener and crucial binder for the crust. Their sticky texture holds everything together without any added refined sugars. Ensure your dates are soft and moist. Medjool dates are ideal, but Sayer or Deglet Noor also work well. If your dates are a bit dry, a quick soak in hot water for a few minutes will soften them sufficiently.
- Coconut Oil: An indispensable ingredient that helps the crust firm up wonderfully in the freezer, giving it a satisfying bite. Do not omit it, as it contributes to both texture and a subtle, pleasant flavor.
- Kosher Salt: Just a pinch enhances all the other flavors, balancing the sweetness of the dates and bringing out the nutty notes of the walnuts.
- Cinnamon: Optional, but highly recommended. Cinnamon adds a warm, inviting spice that truly elevates the overall “pie” experience, making the crust even more aromatic and delicious.
For the Filling: The Heart of the Pecan Pie
- Lightly Packed Pitted Dates: Again, dates serve as the primary natural sweetener and the creamy base for our rich filling. For the filling, soaking them in hot water is a must, regardless of their initial softness, as this helps create that smooth, caramelly texture. Any variety of soft pitted dates will work well here.
- Water: Used in conjunction with the dates to create a smooth, pourable, and creamy filling consistency when blended.
- Maple Syrup: While dates provide sweetness, 2 tablespoons of pure maple syrup add an undeniable depth of flavor and a touch of extra sweetness that mimics traditional pecan pie. We’ve tested the recipe with and without it, and its inclusion truly makes a difference. For non-vegan alternatives, honey can be used, or agave syrup for a vegan option.
- Coconut Oil: Similar to the crust, coconut oil is vital for helping the filling set beautifully in the freezer, achieving that firm yet yielding texture characteristic of a good pie filling.
- Pure Vanilla Extract: A tablespoon of high-quality vanilla extract is a game-changer, infusing the filling with a comforting aroma and enhancing the overall sweet and nutty profile. Do not skip this!
- Pecan Halves: The star of the show! Use plain, raw pecan halves, free from added oils or salt. These will be pulsed into the filling, providing texture and that signature pecan flavor. You’ll also want a few extra for an optional decorative topping.
For Serving: The Finishing Touch
- Coconut Whipped Cream or Vanilla Ice Cream: Optional but highly recommended! A dollop of creamy coconut whipped cream or a scoop of vegan vanilla ice cream takes these tarts from delightful to utterly divine. The cool, creamy texture is a perfect counterpoint to the rich, firm tart.
Step-by-Step Guide to Perfect No-Bake Pecan Pie Tarts
Creating these no-bake pecan pie tarts is a fun and straightforward process. Follow these detailed steps to achieve perfect results every time.
Crafting the Perfect Crust
- Prepare the Dates: Begin by placing the 1 cup of pitted dates (for the filling) into a small bowl and covering them completely with hot water. Let them soak for approximately 15 minutes while you prepare the crust. This step is crucial for achieving a smooth, creamy filling later.
- Assemble Crust Ingredients: In a food processor, combine all the crust ingredients: walnuts, dates (for the crust), coconut oil, kosher salt, and cinnamon.
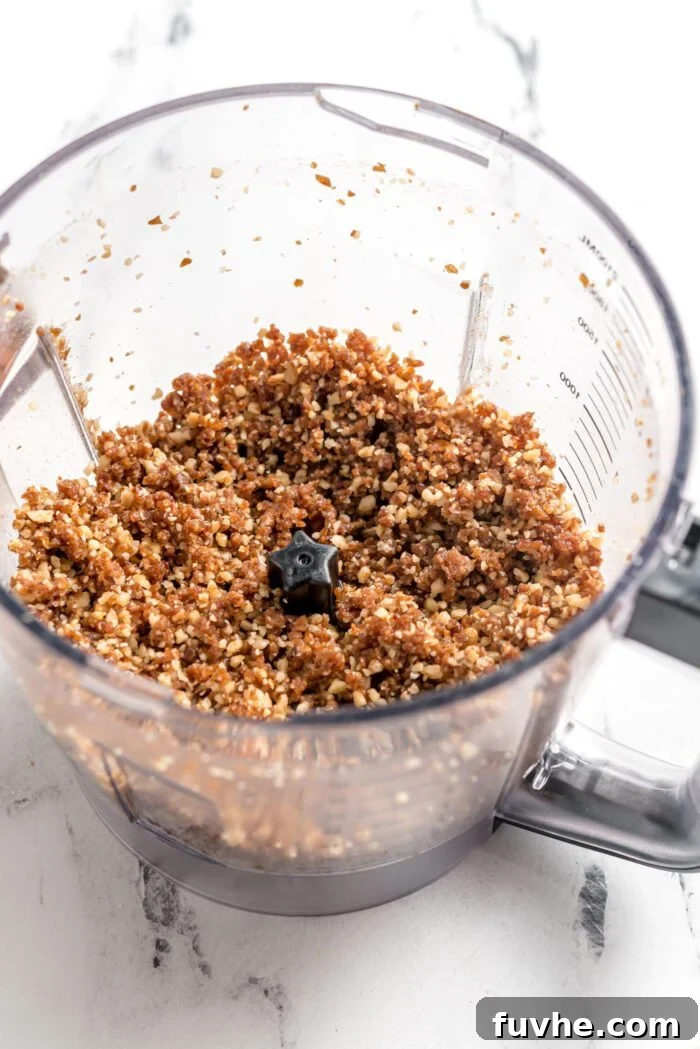
- Process the Crust: Blend the ingredients until a crumbly yet sticky “dough” forms. You should be able to press a piece of the mixture between your fingers, and it holds together firmly. Be careful not to over-process; you want some texture, not a paste.
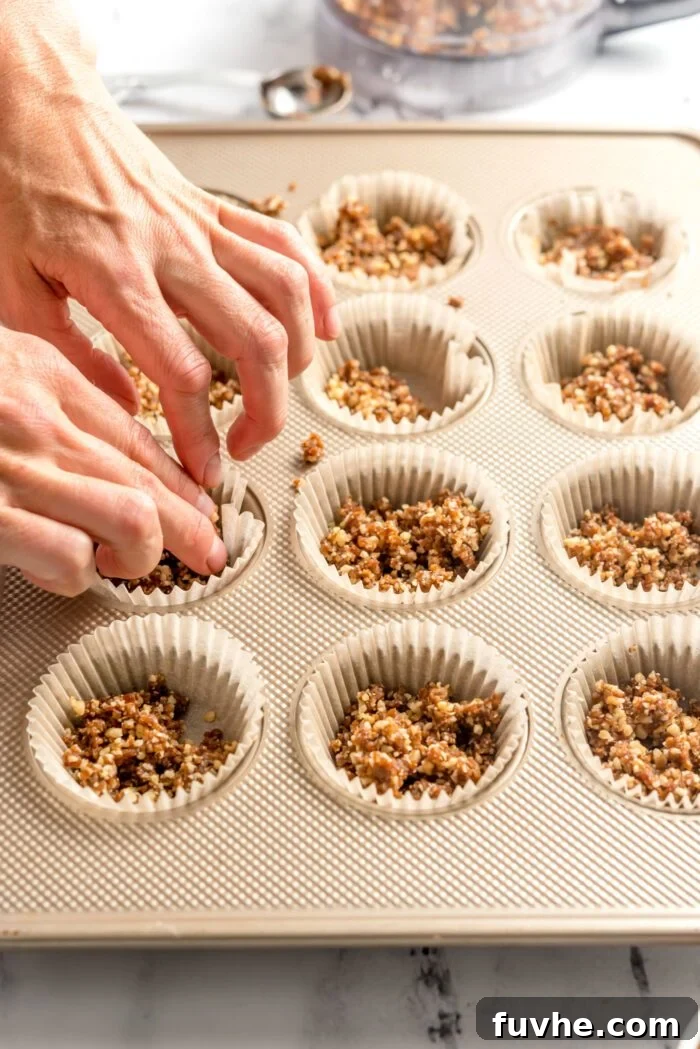
- Form the Tart Shells: Line a standard 12-piece muffin pan with paper cupcake liners. Take a large heaping tablespoon of the prepared crust dough and place it into each liner. After filling all the cups, distribute any remaining dough evenly among them.
- Press and Chill: Using your fingers or the back of a small spoon, firmly press the dough down into a flat, even layer at the bottom of each cup, forming the tart shell. This creates a sturdy base. Once all shells are formed, place the entire muffin pan into the freezer while you move on to making the filling. This initial chill helps the crust set.
Preparing the Rich Pecan Filling
- Drain Dates: Once the filling dates have soaked for 15 minutes, drain them thoroughly. Press the dates down into the bowl or a sieve as you drain to remove as much excess water as possible. This prevents the filling from becoming too watery.
- Blend Filling Base: Add the drained dates, ½ cup water, maple syrup, coconut oil (for the filling), and pure vanilla extract to the same food processor (no need to clean it after the crust!). Blend until the mixture is fully combined and fairly smooth. It’s perfectly fine to have some small chunks of dates for texture, but aim for a creamy consistency.
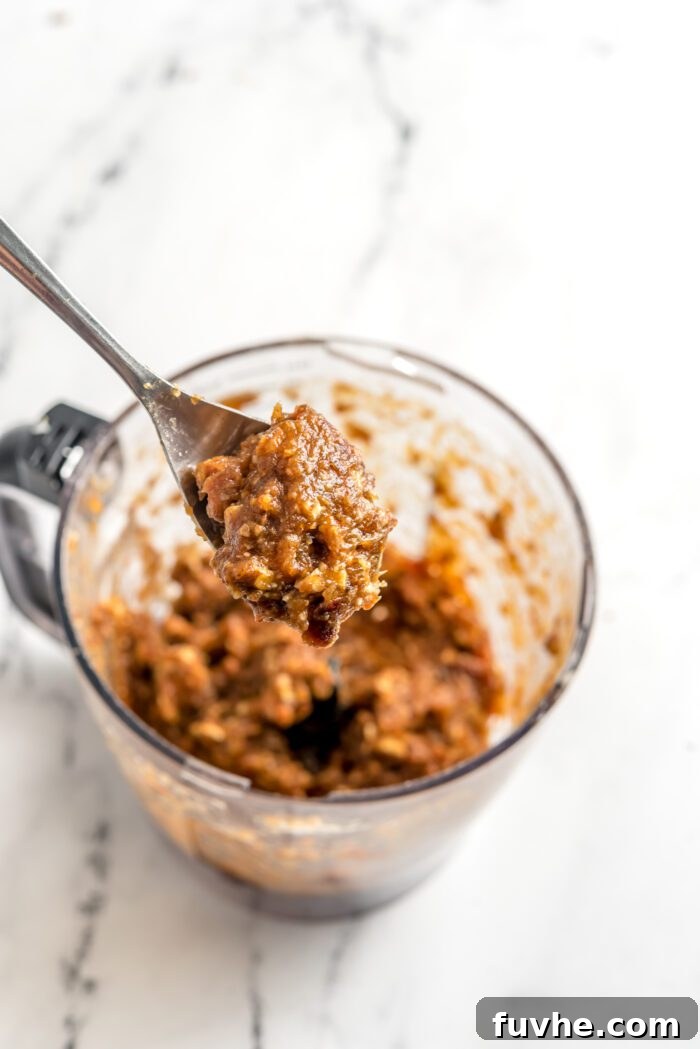
- Incorporate Pecans: Now, add the ¾ cup pecan halves to the food processor. Pulse a few times, or blend briefly, just enough to break down the pecans into small bits and incorporate them into the date mixture. The goal is to leave some texture from the pecans, so be careful not to over-blend into a smooth paste. You want those delightful pecan pieces to shine through.
Chilling and Serving
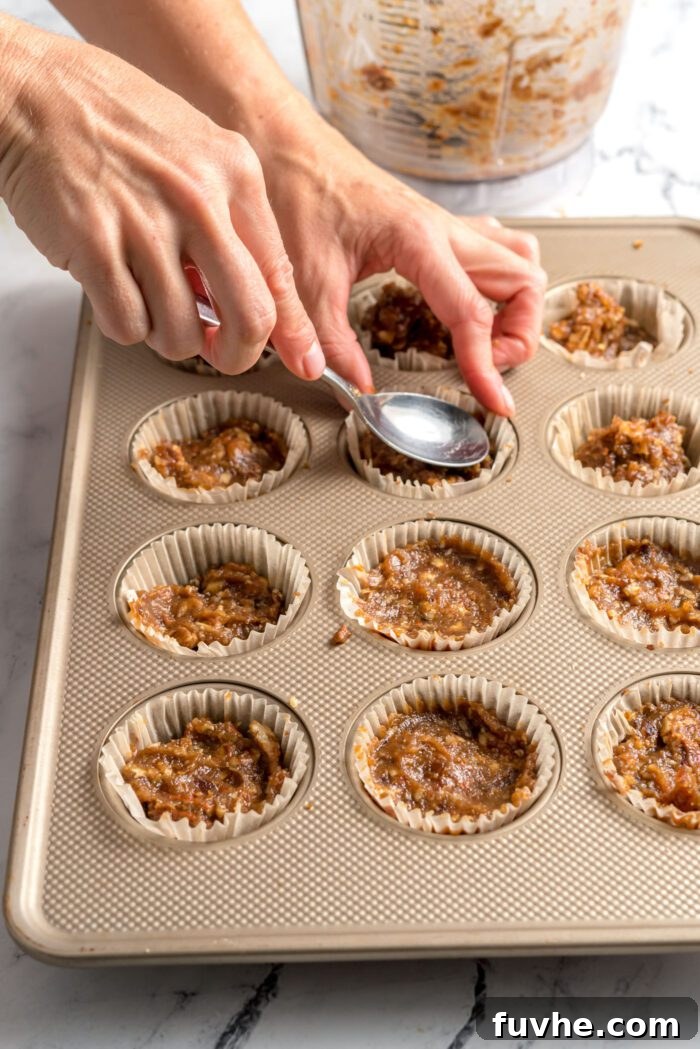
- Fill the Tart Shells: Remove the muffin pan with the chilled crusts from the freezer. Spoon a large heaping tablespoon of the pecan filling into each prepared crust. Distribute any remaining filling evenly among the cups.
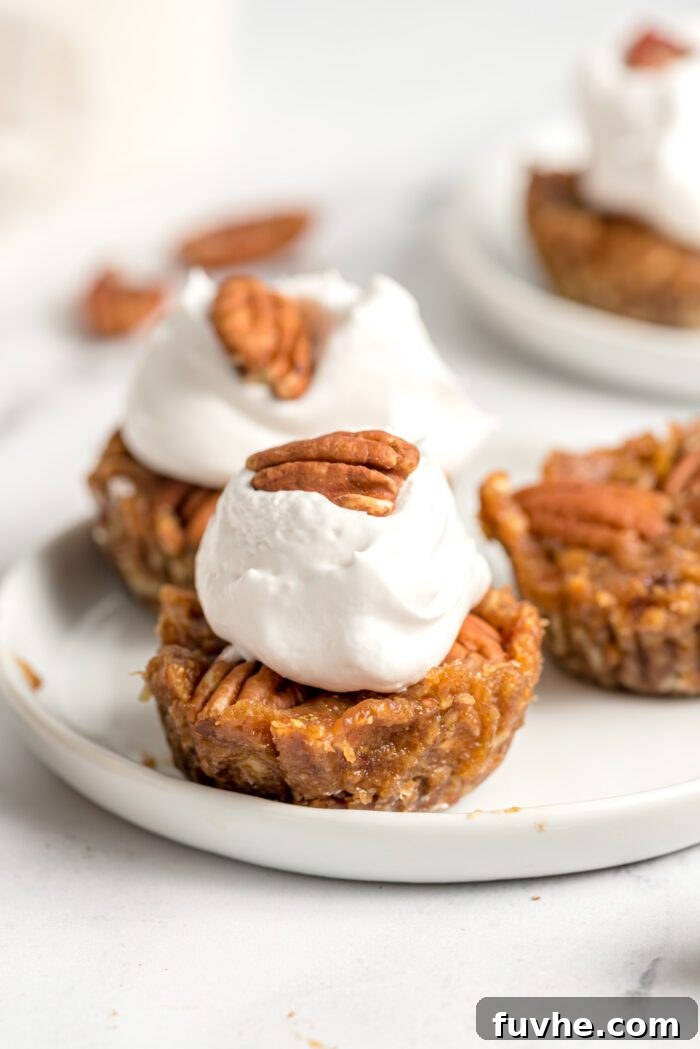
- Smooth and Garnish: Use the back of a spoon to gently smooth the surface of the filling in each tart into a flat, even layer. If you wish to add a decorative touch, arrange 3 whole pecan halves on top of each tart in a small star shape, pressing them lightly into the filling. Alternatively, you can sprinkle some crushed pecans over the tops for a rustic look.
- Final Chill: Place the entire muffin pan back into the freezer for at least 1 hour. This crucial step allows both the crust and the filling to firm up completely, making the tarts easy to handle and perfectly set.
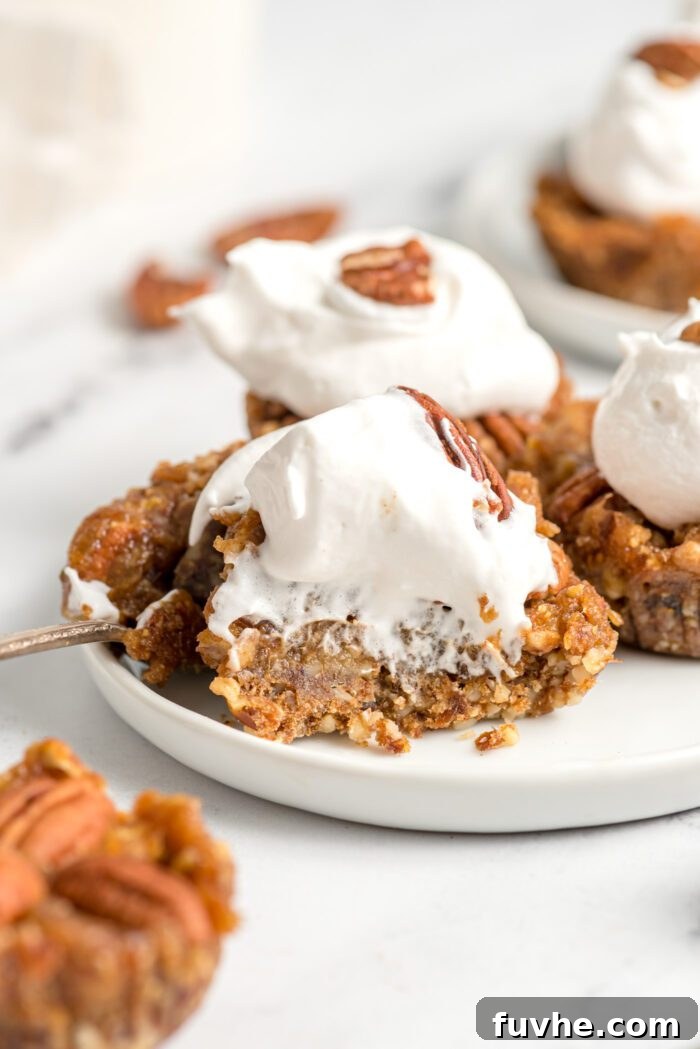
- Serve and Enjoy: Once the tarts are firm, remove them from the freezer. Let them sit at room temperature for 5-7 minutes to soften slightly before serving. Top with a generous dollop of coconut whipped cream or a scoop of vanilla ice cream for the ultimate dessert experience.
Expert Tips for No-Bake Pecan Pie Tart Success
Achieving the perfect no-bake pecan pie tarts is easy with a few insider tips:
- Nut Substitutions for the Crust: While walnuts offer a fantastic texture and flavor for the crust, you can certainly experiment with other nuts. Almonds provide a slightly milder taste, and pecans would double down on the pecan flavor. However, for a no-bake crust that holds together well and has a satisfying bite, walnuts remain our top recommendation.
- Dealing with Dry Dates: The quality of your dates can significantly impact the texture of both the crust and the filling. If your dates for the crust feel particularly dry or hard, soak them in hot water for 5-10 minutes before adding them to the food processor. This will make them softer and stickier, ensuring a well-bound crust. Remember to drain them very well before use.
- Don’t Skip the Maple Syrup: Even though it’s only 2 tablespoons, the maple syrup in the filling plays a crucial role. It doesn’t just add sweetness; it provides a deeper, more complex caramel-like flavor that truly distinguishes these tarts and brings them closer to the classic pecan pie taste. We highly recommend including it for the best flavor profile.
- Texture of the Filling: When blending the pecan filling, avoid over-processing after adding the pecans. You want a creamy base with noticeable, small pieces of pecans for texture and chewiness, not a completely smooth puree. A few short pulses should be enough.
- Individual Servings: Using cupcake liners is highly recommended as it makes removing the tarts from the muffin pan incredibly easy once they’re chilled. This also ensures clean, beautiful individual servings.
- Garnish for Elegance: Don’t underestimate the power of a simple garnish. A few whole pecan halves on top or a sprinkle of crushed pecans can elevate the visual appeal, making these tarts even more enticing.
Storing Your Delicious Pecan Pie Tarts
Proper storage is key to enjoying these no-bake pecan pie tarts at their best, ensuring they remain firm and fresh for future cravings:
- Freezer is Best: For optimal texture and longevity, these tarts are best stored in an airtight container in the freezer. This helps them maintain their firm structure.
- Direct from Freezer or Thawed: You can certainly enjoy them straight from the freezer for a firmer, almost ice cream-like treat. However, we recommend letting them thaw at room temperature for about 5-7 minutes before serving. This slight softening allows the flavors and textures to fully develop, creating a more enjoyable experience.
- Long-Term Storage: When stored in a sealed, airtight container, these tarts will keep beautifully in the freezer for up to 4 months. This makes them an excellent make-ahead dessert for holidays or unexpected guests.
- Refrigeration: While they can be kept in the fridge for a short period (around 30 minutes to an hour) before serving, prolonged refrigeration is not ideal. The coconut oil in both the crust and filling will soften significantly, leading to a much softer, less structured tart. For anything longer than short-term holding, the freezer is definitely the preferred storage method.
Frequently Asked Questions (FAQ)
- Can I make these tarts ahead of time?
- Absolutely! These tarts are an excellent make-ahead dessert. You can prepare them completely and store them in an airtight container in the freezer for up to 4 months. Simply take them out to thaw slightly before serving.
- Are these tarts truly healthy?
- While still a dessert, these no-bake pecan pie tarts are a much healthier alternative to traditional versions. They are free from refined sugar (sweetened naturally with dates and maple syrup), butter, and corn syrup. They also contain healthy fats from nuts and coconut oil, and fiber from the dates. Enjoy them in moderation as part of a balanced diet!
- What if I don’t have a food processor?
- A food processor is highly recommended for achieving the correct consistency for both the crust and the filling. It would be very challenging to get the right texture without one. If you don’t have one, you might be able to use a high-speed blender for the filling, but the crust would be difficult to process evenly.
- Can I use other sweeteners instead of maple syrup?
- Yes, if you’re not strictly vegan, honey can be used. For another vegan alternative, agave syrup can work. However, maple syrup offers a unique flavor that pairs wonderfully with pecans.
- Why do I need to soak the dates?
- Soaking the dates for the filling makes them much softer and easier to blend into a smooth, creamy consistency. This is essential for achieving the luscious, caramel-like texture of the pecan filling.
More Irresistible Vegan Desserts to Explore
If you loved these no-bake pecan pie tarts, you’ll surely enjoy these other delightful vegan dessert recipes:
- Vegan Sweet Potato Pie: A comforting and rich pie, perfect for any holiday table, offering a healthier twist on a classic.
- Pecan Pie Energy Bites: These 4-ingredient energy bites capture the essence of pecan pie in a quick, on-the-go snack or mini treat.
- No-Bake Pumpkin Pie Tarts: Similar in style to these pecan tarts, but featuring the warm, spiced flavors of pumpkin pie, another fall favorite.
- No-Bake Chocolate Caramel Tarts: Adorable individual chocolate tarts filled with a luscious, gooey caramel center.
- No-Bake Pumpkin Cheesecake: An absolutely amazing, incredibly creamy, and decadent no-bake cheesecake that’s an impressive centerpiece for any special occasion.
The No-Bake Pecan Pie Tarts Recipe Card
These adorable no-bake vegan pecan pie tarts are incredibly easy to make with just 7 simple ingredients, perfect for a delicious dessert that everyone will love during holidays and special occasions.
Prep time: 20 mins | Chill Time: 1 hr | Total time: 1 hr 20 mins | Servings: 12 tarts
Ingredients
For the Crust
- 1 cup (125 g) walnut pieces
- ¾ cup (130 g) lightly packed soft pitted dates
- 2 tbsp (30 g) coconut oil
- ¼ tsp kosher salt
- ½ tsp cinnamon
For the Filling
- 1 cup (175 g) lightly packed pitted dates
- ½ cup (120 mL) water
- 2 tbsp (30 g) maple syrup
- 1 tbsp (15 g) coconut oil
- 1 tbsp (15 mL) pure vanilla extract
- ¾ cup (90 g) pecan halves, plus more for topping, if desired
For Serving (Optional)
- Coconut whipped cream or vanilla ice cream
Instructions
- Place the dates for the filling (1 cup, 175g) in a bowl, cover with hot water, and soak for approximately 15 minutes. While the dates are soaking, start preparing the crust.
- Add all of the crust ingredients (walnut pieces, ¾ cup soft pitted dates, 2 tbsp coconut oil, ¼ tsp kosher salt, ½ tsp cinnamon) to a food processor and blend into a crumbly but sticky “dough” you can press together between your fingers.
- Line a standard 12-piece muffin pan with paper liners then add a large heaping tablespoon of the dough to each liner. Once you’ve filled them all, divide any remaining mixture between the cups. Use your fingers or the back of a spoon to firmly press the dough into a flat layer in each cup. Place the muffin pan in the freezer while you prepare the filling.
- Drain the dates (for the filling), pressing them down into the bowl as you drain to help remove excess water.
- Add the drained dates, ½ cup water, maple syrup, 1 tbsp coconut oil (for the filling), and vanilla to the food processor (no need to clean between uses) and blend until fully combined. It’s okay if there are some chunks of dates but it should be fairly smooth.
- Add the ¾ cup pecan halves and pulse or blend briefly to break the pecans down into small bits and combine. There should be some texture to the filling after adding the pecans.
- Add a large heaping tablespoon of the filling to each cup then divide any remaining filling between the cups. Use the back of a spoon to smooth the surface of each into a flat, even layer. If desired, place 3 pecans on top of each in a little star shape, slightly pressing them into the filling.
- Place the tarts in the freezer for at least 1 hour to firm.
- Remove from the freezer and let sit at room temperature for 5-7 minutes before serving topped with coconut whipped cream or vanilla ice cream.
Notes
Store the tarts in a sealed container in the freezer for up to 3 months. You can enjoy them frozen but they’re best after they soften at room temperature for a few minutes. It’s suggested to keep frozen until just before serving. They can be stored in the fridge but the filling will be softer.
Nutrition Information
Serving: 1 tart, Calories: 160 kcal, Carbohydrates: 7g, Protein: 2g, Fat: 15g, Sodium: 1mg, Fiber: 2g, Sugar: 5g