
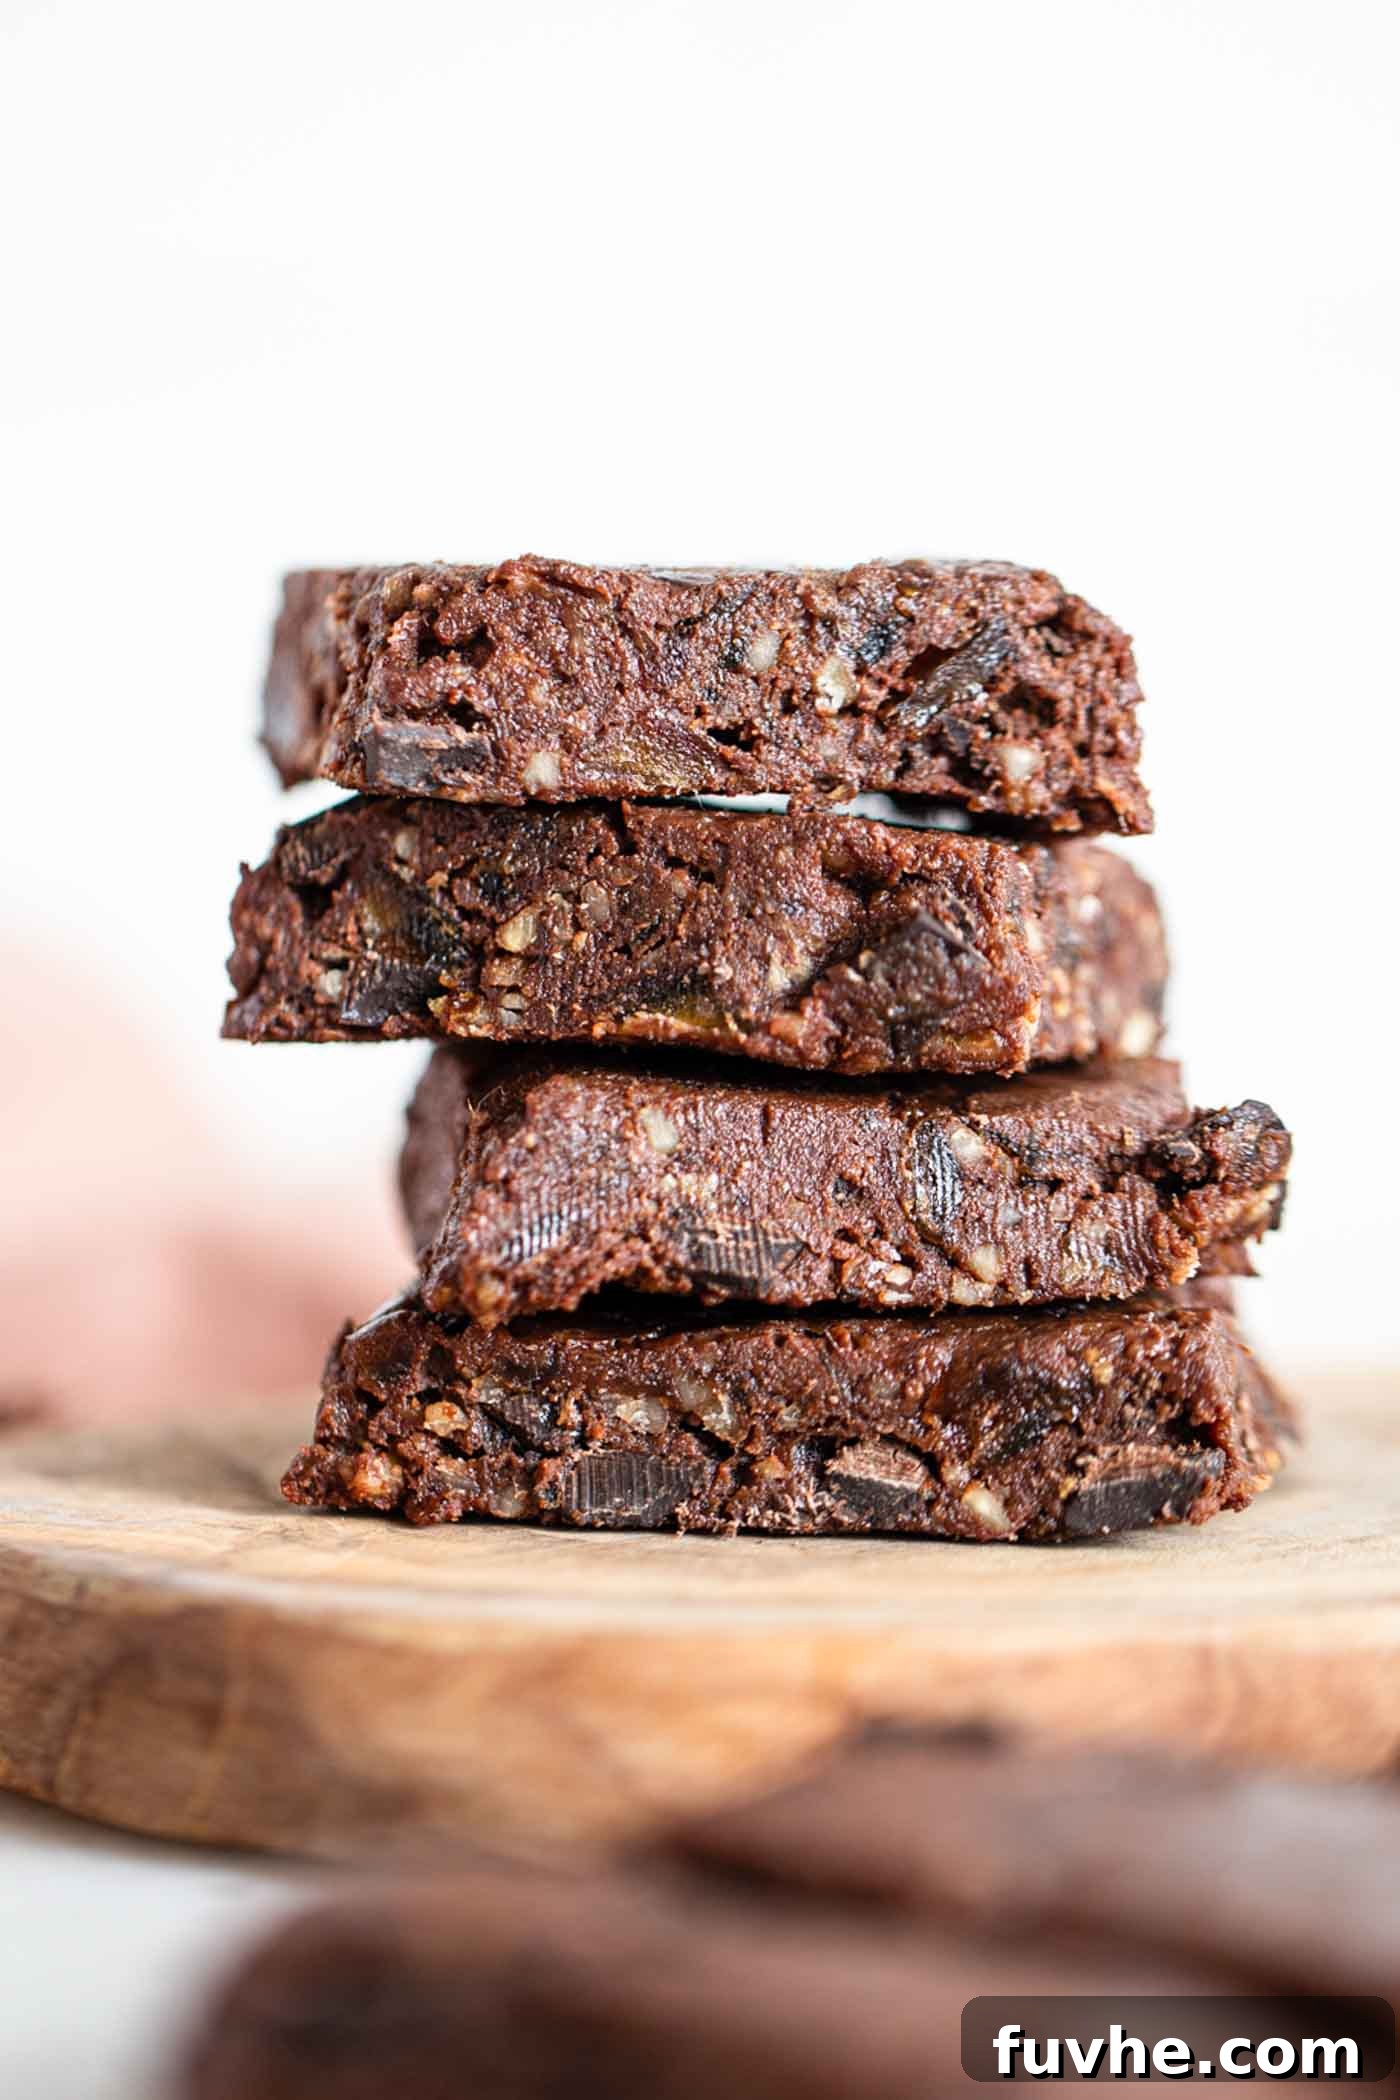
Indulge Guilt-Free: The Ultimate Double Chocolate No-Bake Raw Vegan Brownies
Craving a rich, fudgy brownie but don’t want to turn on the oven? Look no further! These sensational double chocolate no-bake raw vegan brownies are your answer. Crafted in mere minutes with just 6 simple, wholesome ingredients, they offer an unparalleled decadent experience without any baking, cooking, or heating. Perfect for a quick treat, a healthy dessert, or satisfying that intense chocolate craving, these brownies are effortlessly delicious and incredibly easy to make. Get ready to discover your new favorite plant-based indulgence!
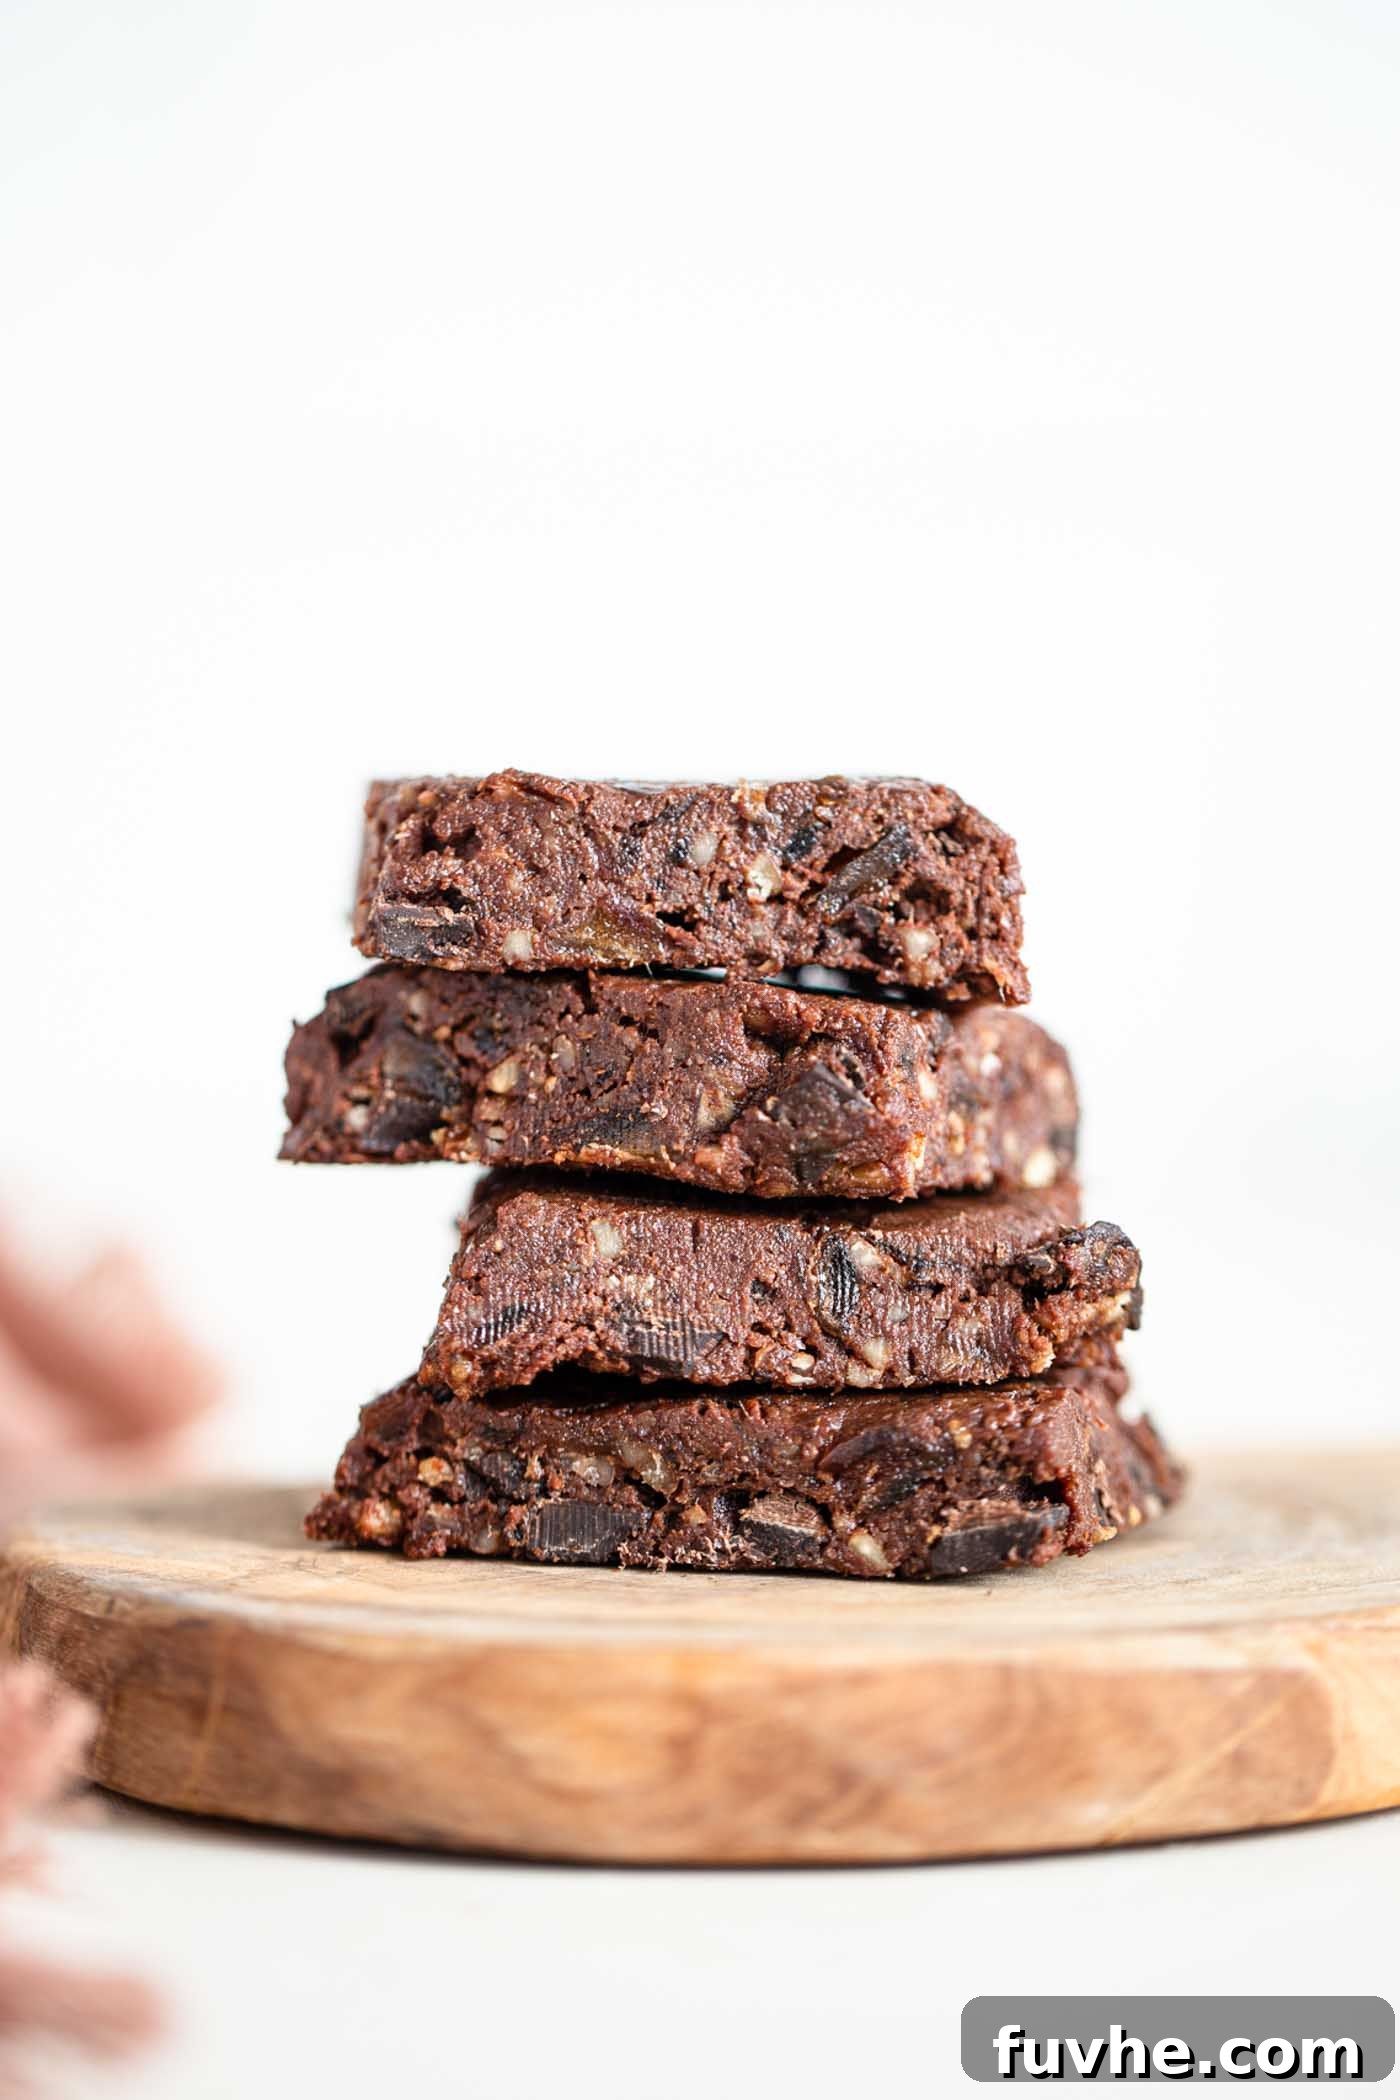
Featured Review
“These were absolutely amazing! I opted for cashews instead of walnuts and then rolled them into delicious balls, coating them with extra cacao powder. I genuinely cannot believe how incredible they taste and how incredibly simple they were to prepare. Thank you immensely for sharing this fantastic recipe!”Katelyn
Why You’ll Absolutely Adore These Raw Vegan Brownies
Beyond their incredible double chocolate flavor, there are countless reasons why these raw vegan brownies will become a staple in your kitchen. They’re not just a dessert; they’re a lifestyle choice for delicious, guilt-free indulgence. Here’s why we know you’ll fall in love with them:
- Minimal Ingredients: You only need a handful of core ingredients – just 4 essentials, plus 2 optional flavor enhancers that elevate them from great to extraordinary. This simplicity means less shopping and more time enjoying!
- Effortless Preparation: Say goodbye to hot ovens and complex baking steps. These brownies are truly no-bake, no-cook, and require zero heating. Just blend, press, chill, and enjoy!
- Dietary Inclusivity: Perfect for almost everyone, these brownies are naturally vegan and completely gluten-free. They cater to various dietary needs without compromising on taste or texture.
- Naturally Sweetened: We harness the natural sweetness of dates, complemented by an optional touch of maple syrup. This means no refined sugars, just pure, wholesome goodness.
- Quick & Convenient: From start to finish, the active prep time is incredibly short. They come together in minutes, making them ideal for last-minute cravings or busy schedules.
- Irresistible Texture & Flavor: Prepare for a rich, intensely chocolatey flavor profile paired with a perfectly chewy, fudgy texture that melts in your mouth. They’re incredibly satisfying.
- Freezer-Friendly: These brownies are perfect for batch-making and stashing in your freezer. Whenever a brownie craving strikes, a delicious, ready-to-eat treat is just moments away.
- Community Approved: With consistent 5-star reviews, you can make these brownies with absolute confidence, knowing they’ve been tried, tested, and loved by many others.
- Wholesome & Nutrient-Rich: Packed with healthy fats from nuts and natural sweetness from dates, these brownies offer a dose of nutrients, making them a healthier alternative to traditional baked goods.
Gather Your Simple Ingredients for Pure Chocolate Bliss
One of the best aspects of these raw vegan brownies is their straightforward ingredient list. You’ll likely find most of these items in your pantry already! Below is a detailed overview of what you’ll need to create this amazing treat, along with helpful notes on substitutions and tips for selection. For the precise measurements and the complete recipe, please refer to the detailed recipe card at the bottom of this post.
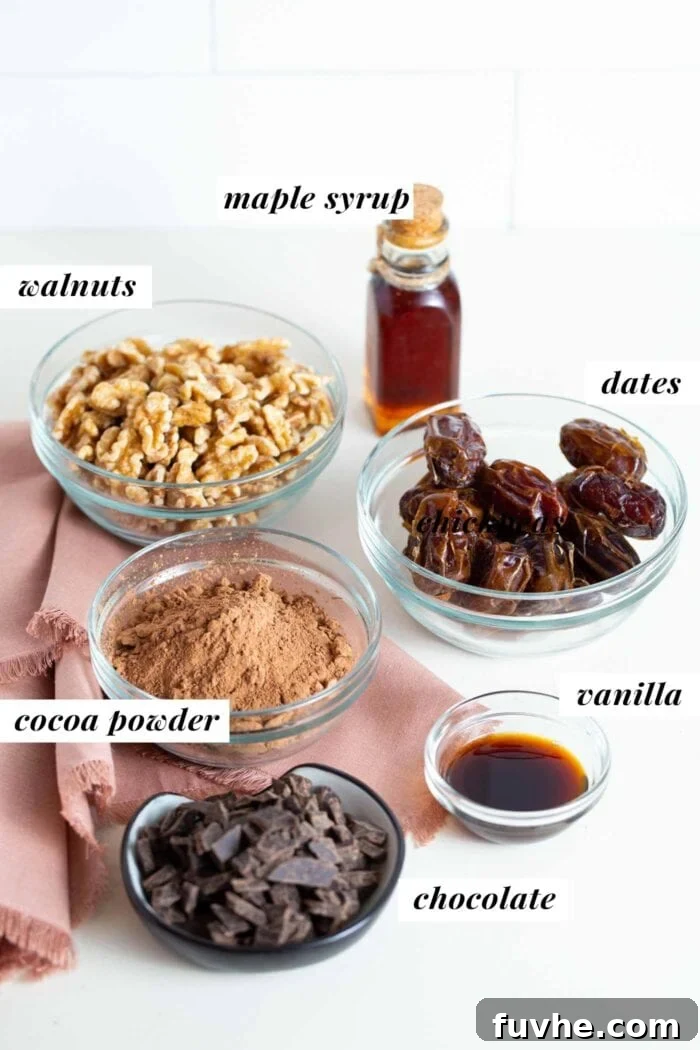
- Dates: The natural sweetener and binder for these brownies. The key is to use soft, moist dates for the best results. Medjool dates are often preferred due to their natural juiciness and caramel-like flavor, but sayer dates or Deglet Noor varieties also work wonderfully. If your dates feel a bit dry or firm, a quick soak in hot water for 10-15 minutes (then thoroughly drained) will soften them perfectly, ensuring your dough comes together smoothly.
- Walnuts: These provide the rich, nutty base and healthy fats for our brownie “flour.” It’s crucial to use raw walnuts that are unsalted and free from any added oils or ingredients. Their subtle bitterness pairs beautifully with chocolate. If walnuts aren’t your preference or readily available, you can easily substitute them with other raw nuts like almonds, pecans, or even cashews for a slightly milder flavor, as suggested by one of our featured reviewers!
- Cocoa Powder: This is where the deep chocolate flavor truly shines. You can use standard unsweetened cocoa powder, readily available in most grocery stores. For an even richer, more intense chocolate experience and added antioxidants, consider using raw cacao powder. Both options will yield delicious results.
- Chocolate Chunks or Chips: For that irresistible double chocolate factor! We recommend using good quality dairy-free chocolate chips or chopped dark chocolate to keep the recipe vegan. Look for brands that are specifically labeled dairy-free if you have sensitivities or are strictly plant-based. For creative variations, feel free to experiment with cacao nibs for a bitter crunch, white chocolate chips for a sweet contrast, or even peanut butter chips for a delightful nutty twist.
- Flavor Enhancers (Optional but Highly Recommended): While the core four ingredients create a fantastic brownie, these additions truly elevate the flavor profile:
- Maple Syrup: A touch of pure maple syrup adds an extra layer of sweetness and moisture, enhancing the overall depth of flavor. You can adjust the amount to your sweetness preference.
- Sea Salt: A pinch of sea salt is a secret weapon in chocolate recipes! It balances the sweetness and intensifies the chocolate notes, making every bite more complex and satisfying.
- Vanilla Extract: A splash of vanilla extract brightens and rounds out the flavors, adding a comforting warmth to the rich chocolate.
Essential Equipment for Your No-Bake Brownies
Making these raw vegan brownies requires minimal kitchen tools, making the process even simpler. Here’s what you’ll need to get started:
- Food Processor: This is the star of the show! A good quality food processor is essential for breaking down the nuts into a coarse flour and then blending all the ingredients into a cohesive, sticky dough. Ensure your food processor has a strong motor to handle the dense mixture.
- Standard Loaf Pan: A 9×5 inch (23×13 cm) loaf pan is perfect for shaping your brownies. You can also use an 8×8 inch square pan for thinner brownies, adjusting the chilling time as needed.
- Parchment Paper: Crucial for easy removal! Lining your loaf pan with parchment paper prevents sticking and allows you to effortlessly lift the firm brownies out for slicing.
- Measuring Cups & Spoons: For accurate ingredient quantities.
- Sharp Knife: For clean, precise slices once your brownies are chilled.
Effortless Steps to Craft Your Double Chocolate Raw Vegan Brownies
Creating these delightful brownies is incredibly simple, requiring just a few easy steps and no baking whatsoever. Follow these instructions closely for perfect, fudgy results every time. Remember, the key to success is using a good food processor and soft, moist dates.
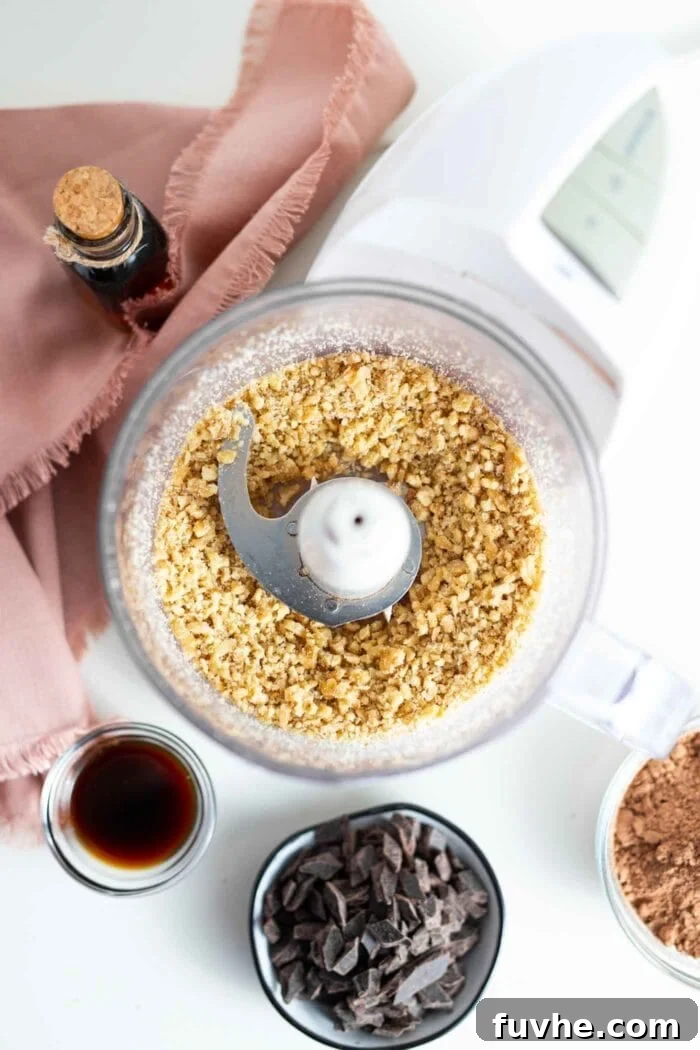
Step 1: Create Your Walnut Flour Base
Begin by adding the raw walnuts to your food processor. Process them on high speed until they break down into a coarse, grainy flour. You’re aiming for a texture that’s finely chopped but still has some small, discernible pieces – not a complete butter. Don’t worry if a few slightly larger chunks remain; they will add a pleasant texture to the finished brownies.
Step 2: Form the Rich Chocolate Dough
Next, add the remaining core ingredients: cocoa powder and pitted dates. If your dates are on the drier side, make sure you’ve soaked them beforehand. Now is also the time to add your optional flavor enhancers: maple syrup, a pinch of sea salt, and vanilla extract. Blend everything together in the food processor. Continue processing until the mixture transforms into a thick, sticky, and cohesive dough. It should pull away from the sides of the processor and clump together. If your dough appears crumbly or too dry at this stage, refer to our FAQ section for troubleshooting tips on how to add a splash of water to achieve the perfect consistency.
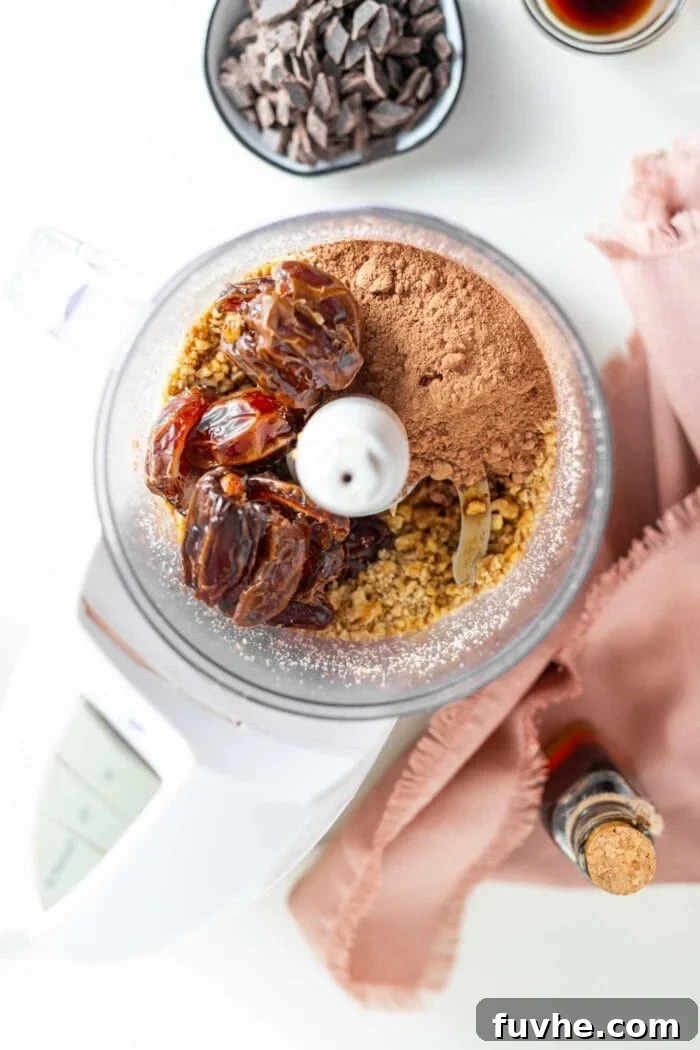
Step 3: Gently Fold in the Chocolate Chunks
Once you have a smooth, thick dough, add your dairy-free chocolate chunks or chocolate chips to the food processor. Pulse the processor just a few times – typically 3-5 quick pulses are enough. The goal here is to gently mix the chocolate into the dough without completely breaking it down. You want to see distinct pieces of chocolate throughout your brownies for that delightful double chocolate experience.
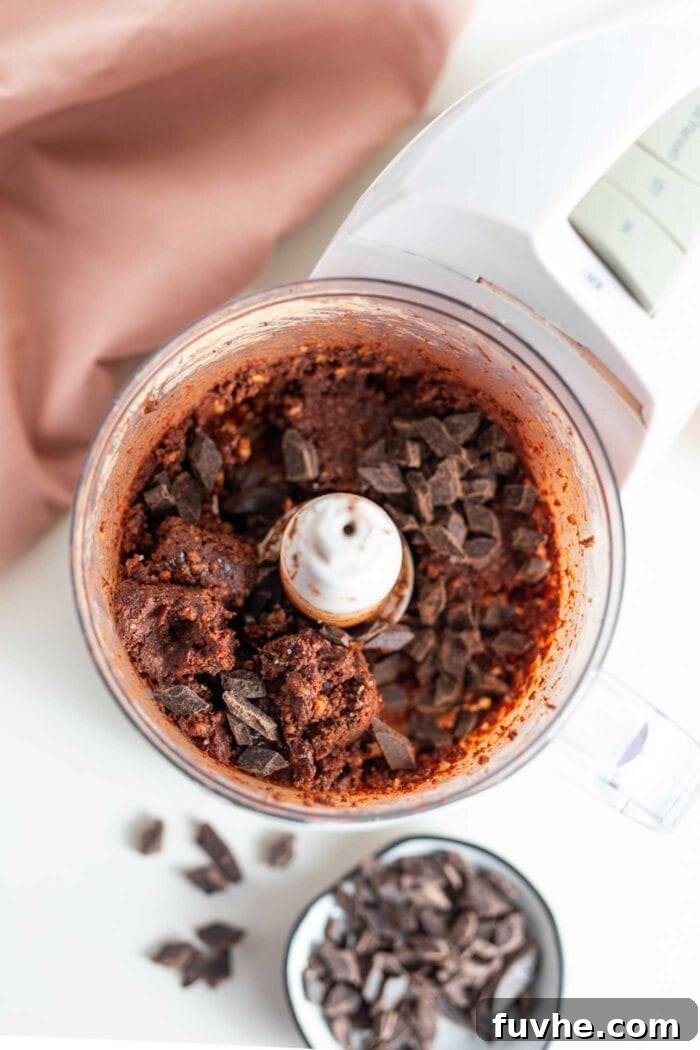
Step 4: Press into Pan and Chill to Perfection
Prepare a standard-sized loaf pan by lining it with parchment paper. To make lifting the brownies out easier, let the parchment paper overhang on the longer sides of the pan. Transfer the brownie mixture into the lined pan. Take a few minutes to press the dough down very firmly and evenly into every corner of the pan. The more compressed it is, the denser and fudgier your brownies will be. Once pressed, place the entire pan into the freezer for about an hour or into the refrigerator for at least two hours. While not strictly mandatory, this chilling step is highly recommended as it helps the brownies firm up beautifully and allows the flavors to meld together, resulting in a superior texture and taste.
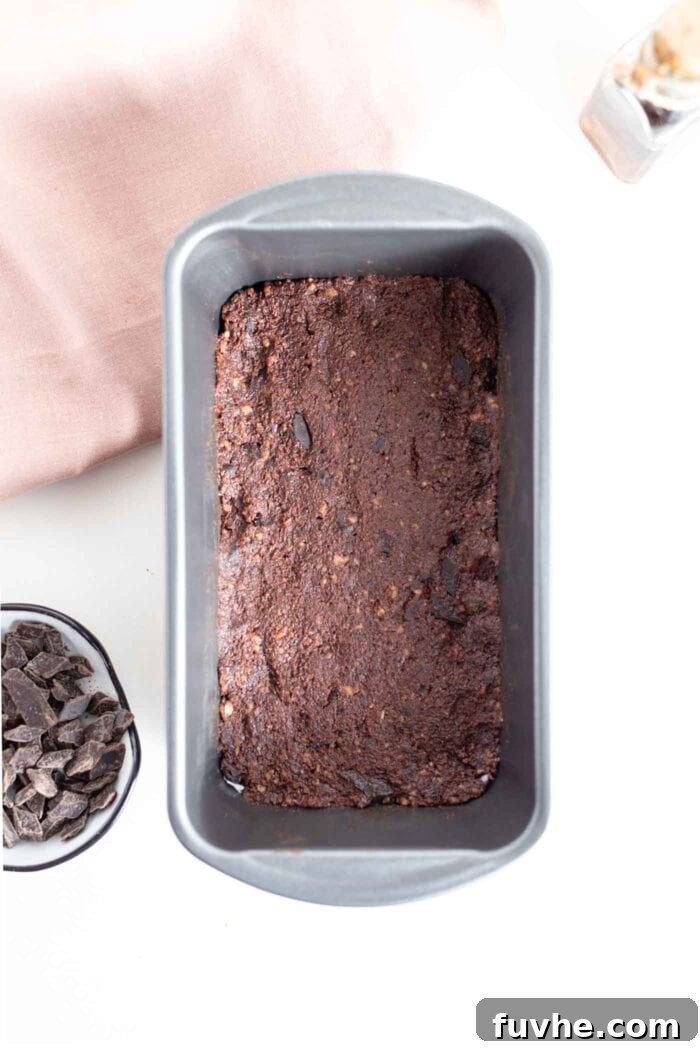
Step 5: Slice, Serve, and Savor
Once the brownies have thoroughly firmed up from chilling, use the parchment paper overhang to carefully lift the entire slab out of the pan. Place it on a cutting board. Using a sharp knife, slice the brownie slab into your desired serving sizes – typically 8-10 bars. Now, your delicious double chocolate no-bake raw vegan brownies are ready to be enjoyed! Prepare to be amazed by their rich flavor and perfect fudgy texture.
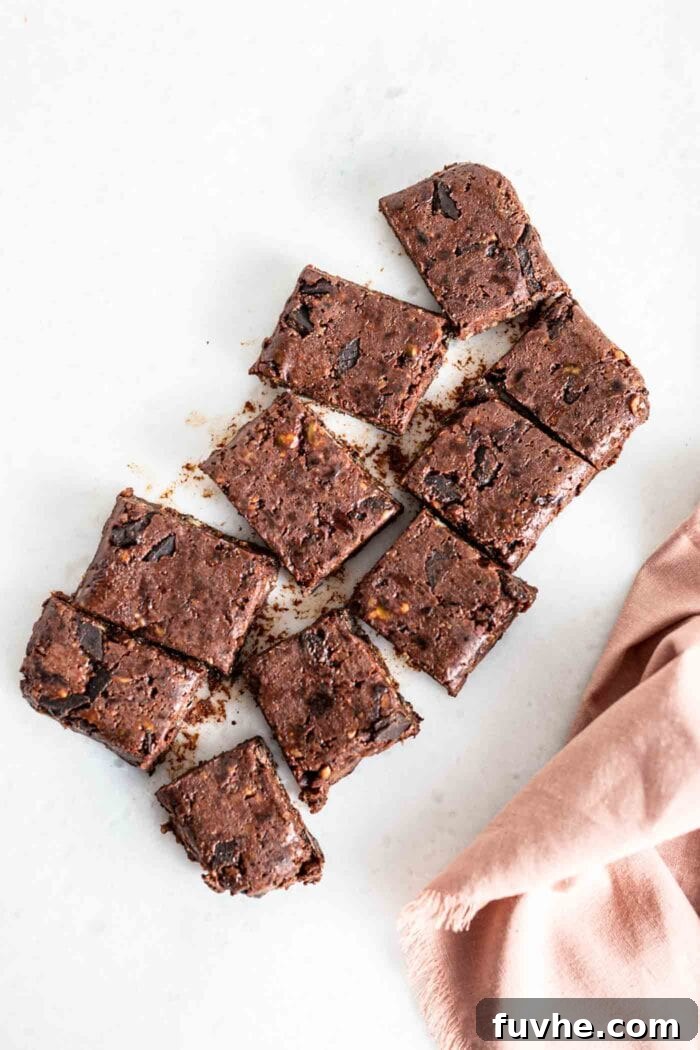
Frequently Asked Questions About Raw Vegan Brownies
Here are answers to some common questions that arise when making these delightful no-bake brownies. If you have any further queries, feel free to leave a comment below!
What if my dough isn’t sticking together?
If you find that your brownie dough is crumbly and struggling to form a cohesive mass, the most common reason is that your dates were too dry. Dates, especially those not as naturally moist as Medjools, can sometimes lack the stickiness needed to bind the mixture. The simple fix is to add moisture, one teaspoon at a time. Add 1 teaspoon of warm water to your food processor, blend again for a few seconds, and then test the dough by pinching a small amount between your fingers. If it still doesn’t hold together, add another teaspoon of water and repeat the blending and testing process. Usually, just a splash or two of water is all it takes to achieve that perfect, sticky dough consistency.
How do you store raw vegan brownies to keep them fresh?
Proper storage is key to maintaining the freshness and optimal texture of your raw vegan brownies. These delicious treats can be stored in an airtight container in the refrigerator for up to 2 weeks. For longer preservation, they freeze beautifully! Simply place them in an airtight freezer-safe container or bag, and they will keep well for up to 3 months. While they are generally fine at room temperature for a short period, they will soften considerably if the environment is warm. For the best fudgy consistency and to prevent them from becoming too soft, we highly recommend storing them in the fridge or freezer unless you’re serving them immediately in a cool location.
What kind of chocolate can I use for these brownies?
To ensure your brownies remain vegan and dairy-free, it’s important to choose the right chocolate. I’ve had great success with brands like Enjoy Life Mega Chunks or their standard dairy-free chocolate chips, which are widely available. However, any good quality dairy-free chocolate chips or a bar of dark chocolate (check the ingredients for dairy) will work perfectly. If using a chocolate bar, simply chop it into small chunks. For those who don’t follow a vegan or plant-based diet, feel free to use your favorite type of chocolate chips or chopped chocolate. The main goal is to add those delightful pockets of melted or soft chocolate for an enhanced flavor experience.
Can I make these brownies nut-free?
While this recipe traditionally calls for walnuts, you can often make simple substitutions to accommodate nut allergies. Consider using sunflower seeds (like hulled raw sunflower seeds) as a base, processing them into a coarse flour just as you would with walnuts. Be aware that sunflower seeds can sometimes impart a slight green hue when combined with baking soda (not used here) or certain acidic ingredients, but this is usually not an issue in raw recipes. Always ensure any substitute is prepared raw and unsalted.
Why choose raw brownies over baked ones?
Raw brownies offer several compelling advantages. Firstly, they preserve the maximum nutritional value of their ingredients since no heat is applied. This means enzymes and heat-sensitive vitamins remain intact. Secondly, they are incredibly convenient – no preheating ovens, no waiting for baking, and no risk of over-baking. Thirdly, the texture is uniquely fudgy, dense, and moist, a characteristic often hard to achieve with traditional baked brownies. Finally, they typically use whole, unprocessed ingredients, making them a healthier dessert option.
Deryn’s Expert Tips & Delicious Variations
As the creator of this recipe, I’ve experimented with these brownies quite a bit, and I’m excited to share some of my favorite tips and variations to make your experience even more delightful and personalized. These small additions can truly transform your raw vegan brownies!
- Decadent Topping Ideas: To take these brownies to the next level of indulgence, consider adding a luscious topping.
- You could prepare the rich chocolate ganache from my No-Bake Hemp Seed Brownies. It adds an extra layer of chocolatey richness and a smooth, glossy finish.
- Alternatively, for a delightful nutty twist, the creamy peanut butter frosting from my No-Bake Vegan Peanut Butter Blondies would be an incredible addition. The combination of chocolate and peanut butter is always a winner!
- A simpler yet equally delicious chocolate topping can be made by melting 1/2 to 3/4 cup of dark chocolate (dairy-free, of course) or chocolate chips with 2 tablespoons of your favorite nut butter (like almond or peanut) or coconut oil. Drizzle or spread this over your chilled brownies for a quick, impressive glaze.
- Food Processor Capacity: If you’re working with a smaller food processor, be mindful of its capacity. The brownie dough is quite dense and heavy, which can strain smaller motors. To prevent this, you might need to blend the dough in two separate batches, then combine them by hand in a large bowl before pressing into the pan. This ensures proper blending and protects your appliance.
- Add a Boost of Protein: For a nutritional boost, consider adding a tablespoon or two of your favorite vegan protein powder (vanilla or chocolate flavored works best) to the dry ingredients. This can slightly alter the texture, so you might need an extra splash of water or a few more dates to maintain the desired consistency.
- Spice It Up: A pinch of cayenne pepper can add a surprising and delightful warmth, creating a Mexican-inspired chocolate flavor. A dash of cinnamon also pairs beautifully with cocoa.
- Citrus Zest: For a bright, fresh flavor contrast, grate a teaspoon of orange zest into the dough. Chocolate and orange are a classic pairing!
- Coconut Flakes: Fold in some unsweetened shredded coconut with the chocolate chips for added texture and a tropical hint.
- Salt Flakes for Garnish: Before chilling, sprinkle a few flaky sea salt crystals over the top of the pressed brownies. This not only adds a beautiful visual touch but also enhances the deep chocolate flavor with a lovely savory crunch.
If you try these Raw Vegan Brownies or any other recipe on Running on Real Food, please don’t forget to leave a comment and a ⭐⭐⭐⭐⭐ rating in the comment section below. Your feedback helps others who are thinking of making the recipe, and I absolutely love to hear from you. And don’t forget to tag me on Instagram @runningonrealfood so I can see your delicious creation! Thank you for trying my recipes! – Deryn
Raw Vegan Brownies Recipe
By: Deryn Macey
These double chocolate no-bake vegan brownies are incredibly rich, fudgy, and absolutely delicious! They are remarkably easy to make with just a few simple, wholesome ingredients, requiring no baking at all. This recipe is also naturally oil-free and refined sugar-free, making it a perfect healthier treat for any occasion.
Prep Time: 10 mins |
Chill Time: 1 hr |
Total Time: 1 hr 10 mins |
Servings: 10 brownies
Ingredients
- 1.5 cup raw walnuts (190 g)
- 2.5 cups loosely packed soft pitted dates (425 g)
- 1/2 cup cocoa powder (35 g)
- 1 tbsp maple syrup (optional)
- 1/2 tsp sea salt (optional)
- 1 tsp vanilla extract (optional)
- 1/2 cup dairy-free chocolate chunks or chips (85 g)
Instructions
- Prepare Dates & Walnuts: If your dates are dry, soak them in hot water for 10-15 minutes, then drain thoroughly. If soft, proceed directly. Add the walnuts to a food processor and process until they break down into a coarse, grainy flour. Small pieces remaining are fine.
- Blend Dough: Add the cocoa powder, dates, and all optional ingredients (maple syrup, vanilla, salt) to the food processor with the walnuts. Blend until a thick, sticky dough forms, pulling away from the sides of the bowl.
- Add Chocolate: Add the dairy-free chocolate chunks or chips. Pulse the food processor a few times (3-5 pulses) to incorporate them into the dough without completely crushing them.
- Press & Chill: Line a standard-sized loaf pan with parchment paper, allowing some overhang on the sides for easy removal. Firmly press the brownie dough into the pan, ensuring it’s even and well-compressed into all corners. Place the pan in the freezer for about 1 hour or the refrigerator for at least 2 hours to firm up.
- Slice & Serve: Once firm, lift the brownie slab out of the pan using the parchment paper. Slice into 10 even bars with a sharp knife. Enjoy immediately or store as directed.
Recipe Notes
- The optional additions of salt, maple syrup, and vanilla significantly enhance the overall flavor profile. While the brownies will still be good without them, these ingredients truly make them outstanding.
- The softness and moisture of your dates are critical. Medjool dates are ideal, but other varieties like Deglet Noor or Sayer work if they are soft. Remember to soak dry dates in hot water for about 15 minutes and drain well before using.
- If, after blending, your dough appears too dry or crumbly and doesn’t stick together, add 1 teaspoon of warm water to the food processor. Blend again, then test the dough by pressing it between your fingers. If it still doesn’t cohere, add another teaspoon of water and repeat. A little extra liquid goes a long way.
- For the most accurate measurements and best results, especially with dry ingredients, using a kitchen scale is recommended.
- Store the finished brownies in an airtight container in the fridge for up to 2 weeks, or in the freezer for up to 2 months. They are best served chilled.
Nutrition Information (per 1 brownie serving)
Serving: 1 brownie |
Calories: 301 kcal |
Carbohydrates: 41g |
Protein: 5g |
Fat: 15g |
Sodium: 118mg |
Potassium: 467mg |
Fiber: 6g |
Sugar: 34g |
Vitamin A: 2 IU |
Calcium: 53mg |
Iron: 1.4mg
Enjoyed this recipe? Share your thoughts below!
Your ratings and comments help our community discover fantastic recipes like this one.
Originally published on December 13, 2016.