
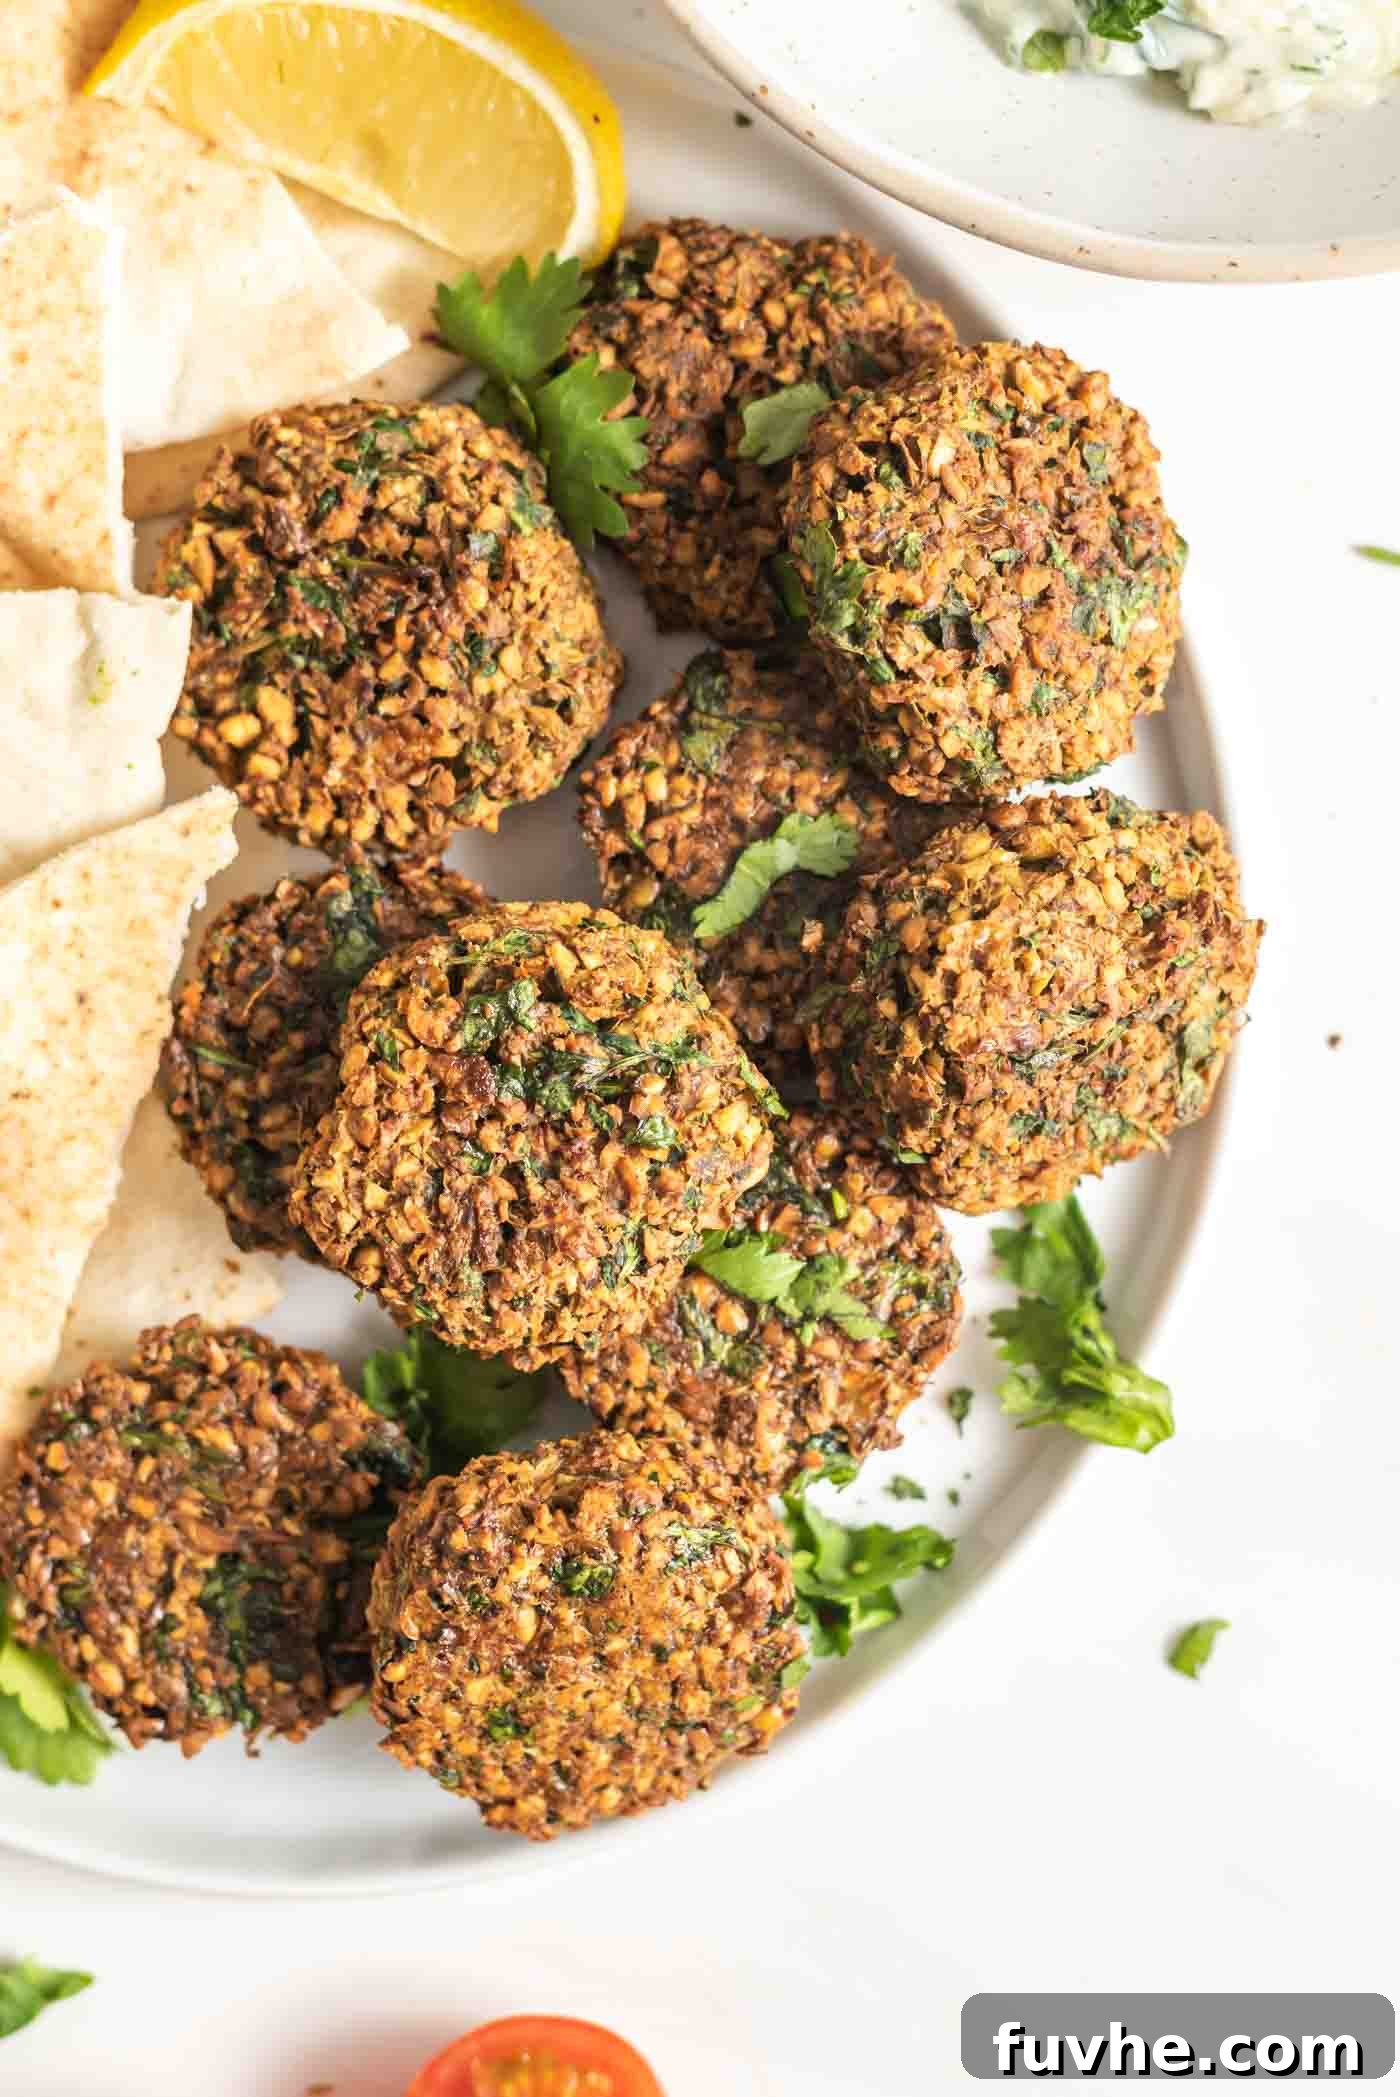
Craving a flavorful, healthy, and easy meal that satisfies your taste buds and dietary needs? Look no further than this incredible vegan baked falafel recipe! Unlike their deep-fried counterparts, these falafel patties are oven-baked to crispy perfection, offering a lighter, healthier twist on a classic Middle Eastern favorite. Bursting with aromatic herbs and spices, they are incredibly versatile and guaranteed to become a staple in your kitchen. Perfect for dipping into creamy hummus or refreshing tzatziki, stuffing into warm pitas with crisp vegetables, or adding a protein-packed punch to your favorite salads and grain bowls, these homemade falafel are a delicious way to enjoy wholesome plant-based goodness.
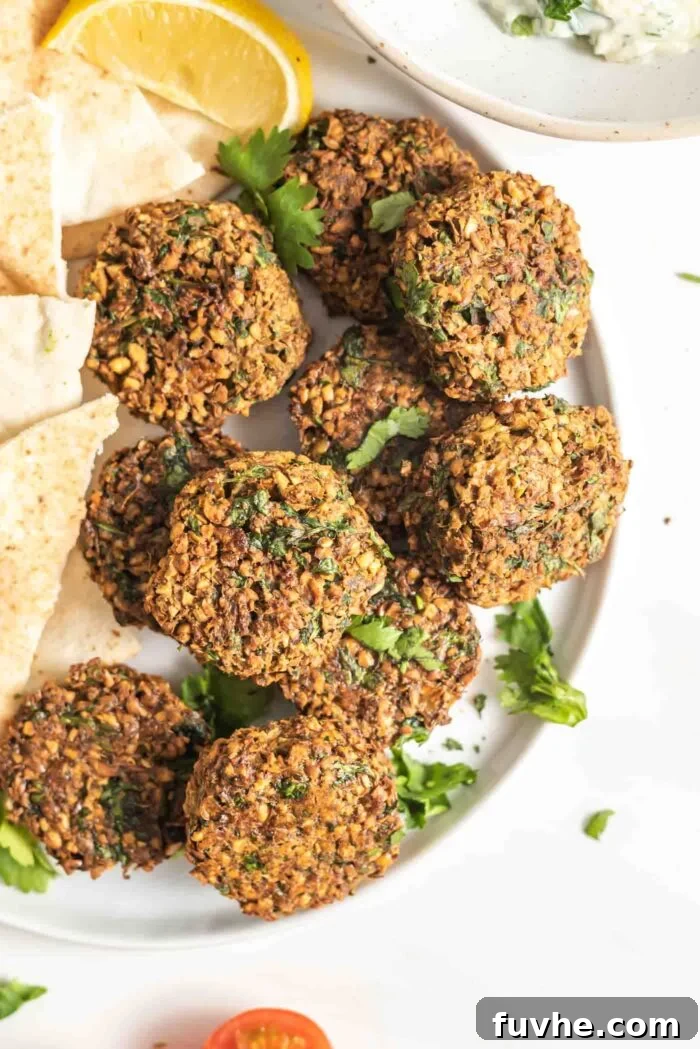
Why You’ll Love This Baked Falafel Recipe: Key Features & Benefits
This baked falafel recipe stands out for several reasons, making it an excellent choice for anyone looking for a wholesome and delicious meal:
- Wholly Vegan and Gluten-Free: Whether you follow a vegan lifestyle or have specific dietary restrictions like gluten intolerance, this recipe is designed to be fully inclusive. Using plant-based ingredients and a gluten-free flour option ensures everyone can enjoy these delightful falafel without compromise. It’s a fantastic way to enjoy traditional flavors while adhering to modern dietary needs.
- Incredibly Versatile for Any Meal: The beauty of falafel lies in its adaptability. These crispy patties aren’t just for pitas! Enjoy them as a star in a vibrant salad bowl with fresh greens and tahini dressing, as the savory heart of a warm pita sandwich loaded with crisp veggies and creamy sauces, or even as a standalone snack with your favorite dips. They can elevate any meal, from a quick lunch to a festive dinner spread.
- Nutritious and Satisfying: Made primarily from chickpeas, fresh herbs, and spices, these falafel are a powerhouse of nutrition. They are an excellent source of plant-based protein, crucial for muscle repair and satiety, and packed with dietary fiber, which aids digestion and promotes gut health. Baking instead of frying further reduces the fat content, making them a healthier alternative without sacrificing flavor or texture.
- Easy to Make at Home: Don’t be intimidated by the idea of making falafel from scratch. This recipe simplifies the process, breaking it down into straightforward steps that even novice cooks can follow. With minimal hands-on time and the magic of your food processor, you’ll be enjoying fresh, homemade falafel in no time.
- Full of Authentic Flavor: The combination of fresh parsley, cilantro, and a blend of earthy spices like cumin and coriander creates a truly authentic falafel flavor. Each bite delivers a burst of vibrant taste, reminiscent of your favorite Middle Eastern cuisine.
Essential Ingredient Notes for Perfect Falafel
Crafting the perfect baked falafel starts with understanding your ingredients. Here’s a closer look at the key components and why each plays a vital role in achieving optimal flavor and texture:
- Chickpeas (Dried, Not Canned): This is perhaps the most critical note for achieving that desired crispy exterior and tender, slightly crumbly interior. You must use dry chickpeas that have been soaked, not canned ones. Canned chickpeas, while convenient, are already cooked and contain too much moisture, leading to a mushy, less authentic falafel that won’t crisp up properly when baked. Soaking dry chickpeas rehydrates them and allows them to break down into the perfect grainy texture in the food processor.
- Fresh Parsley and Cilantro: The vibrant green color and fresh, aromatic flavor of falafel largely come from these herbs. Fresh herbs are non-negotiable here; do not substitute with dried herbs. Fresh parsley offers a bright, slightly peppery note, while cilantro adds a distinct, refreshing aroma. Together, they create the signature falafel taste and contribute to the beautiful texture.
- Aromatic Spices: The soul of falafel lies in its robust spice blend. You’ll need ground cumin, garlic powder, coriander, cayenne pepper, salt, and black pepper. Cumin and coriander are fundamental, providing warm, earthy undertones. Garlic powder adds a pungent depth without the sharpness of fresh garlic (which can sometimes be too strong when blended raw). Cayenne pepper introduces a subtle kick, easily adjustable to your heat preference. While coriander is highly recommended for authenticity, don’t skip the cumin – it’s a foundational flavor.
- Ground Flaxseed (Flax Egg): This is your secret weapon for binding! Ground flaxseed, when combined with water, creates a gel-like consistency known as a “flax egg.” In this vegan recipe, it acts as an excellent binder, replacing traditional eggs and ensuring your falafel patties hold their shape during baking. It also adds a healthy boost of omega-3 fatty acids.
- Flour (Binder and Texture): A small amount of flour helps to further bind the mixture and provides a slightly crispier texture. The beauty of this recipe is its flexibility here. You can use all-purpose flour, whole wheat flour for a nuttier flavor, spelt flour, chickpea flour (for an even more chickpea-forward taste and extra protein), brown rice flour, a gluten-free flour blend, or oat flour. For a truly gluten-free falafel, ensure you select one of the latter options.
Easy Step-by-Step Instructions for Baked Falafel Success
Follow these detailed steps to create perfectly crispy and flavorful baked falafel from scratch. Each stage is crucial for the final result!
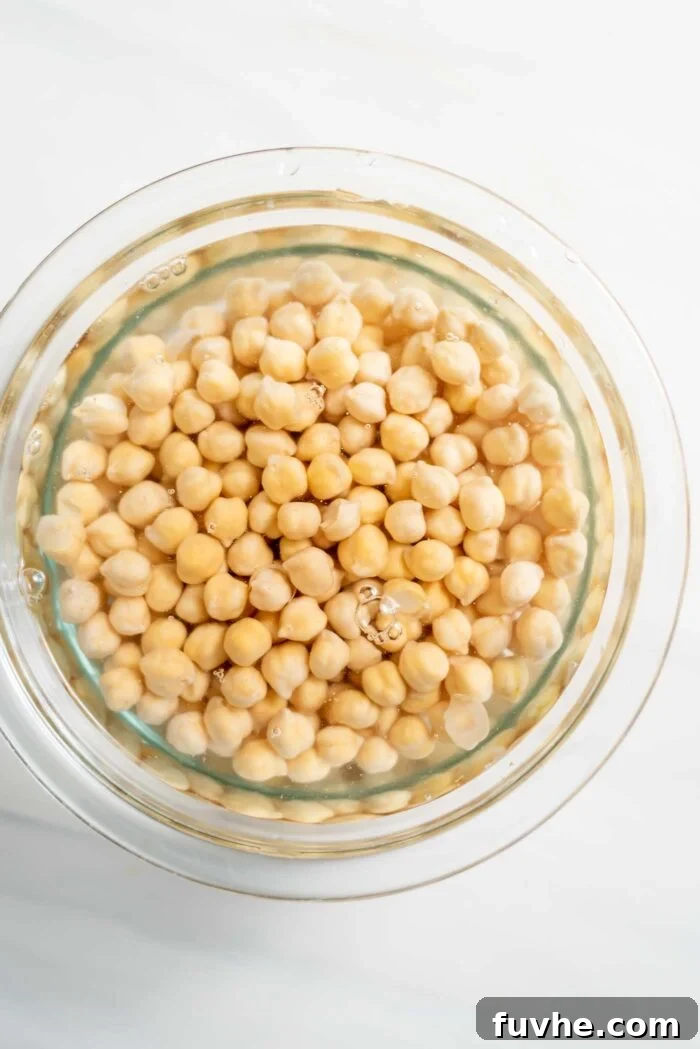
Step 1. Begin with Properly Soaked Dried Chickpeas. This is the foundation of excellent falafel. Place 1 cup of dry chickpeas in a large bowl and cover them with a generous amount of cold water – at least double the volume of the chickpeas, as they will expand significantly. Aim to soak them for a minimum of 12 hours, ideally up to 24 hours. The chickpeas will double or even triple in size, becoming plump and tender. Ensure they remain fully submerged in water throughout the soaking process to prevent uneven hydration. If you notice the water level dropping, simply add more. This extended soak is essential for achieving the right texture for blending and ensuring the falafel cooks evenly.
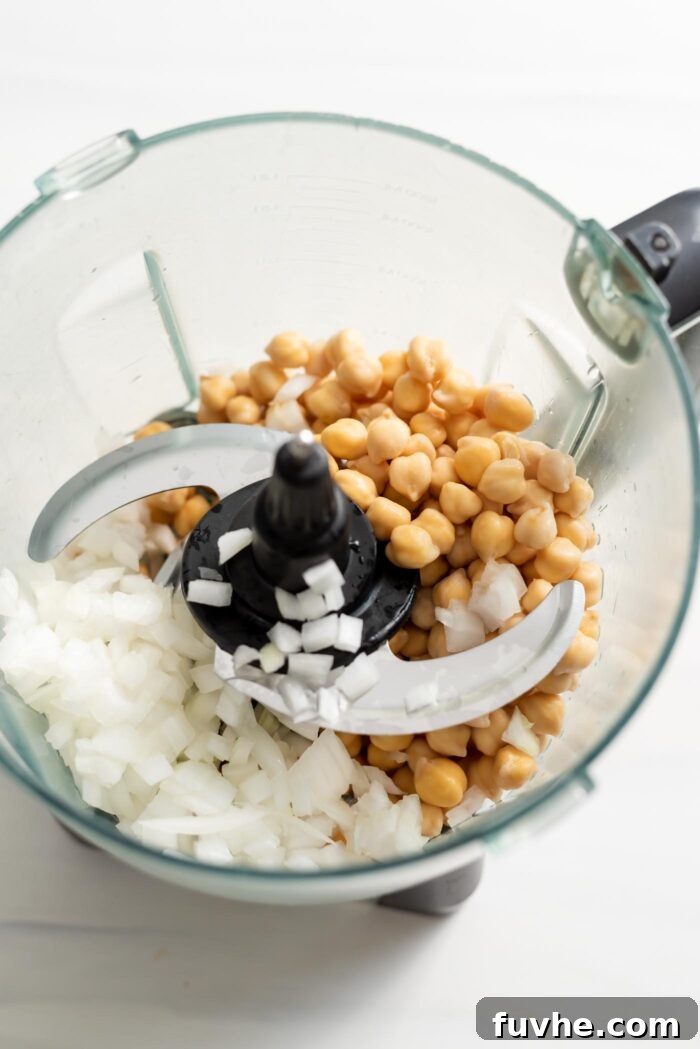
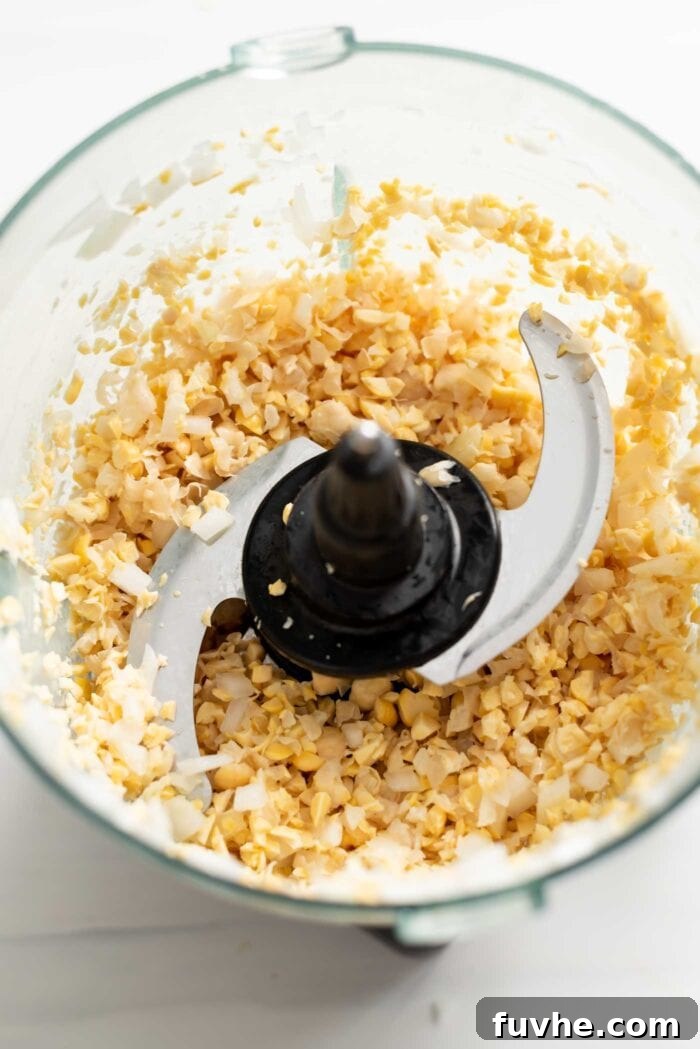
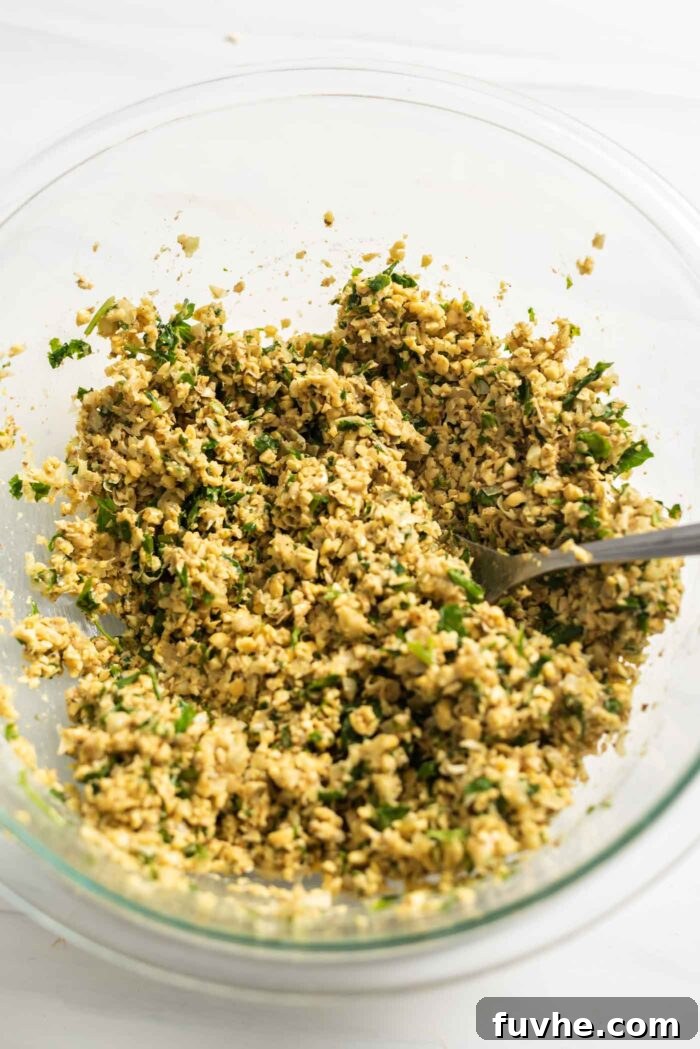
Step 2. Process the Soaked Chickpeas and Onion. Once your chickpeas are perfectly plumped, drain and rinse them thoroughly. Transfer 1.5 cups of the soaked and drained chickpeas to the bowl of a food processor. Add the diced white onion to the food processor as well. Pulse the mixture briefly, using short bursts. Your goal here is to break down the chickpeas into a coarse, grainy consistency and combine them with the onion. It’s crucial not to over-process; we are aiming for a texture that resembles coarse sand or fine gravel, not a smooth paste like hummus. Over-blending will release too much moisture and make your falafel mushy. You may have more than 1.5 cups of chickpeas after soaking, but only use the specified amount for this recipe to maintain the correct consistency.
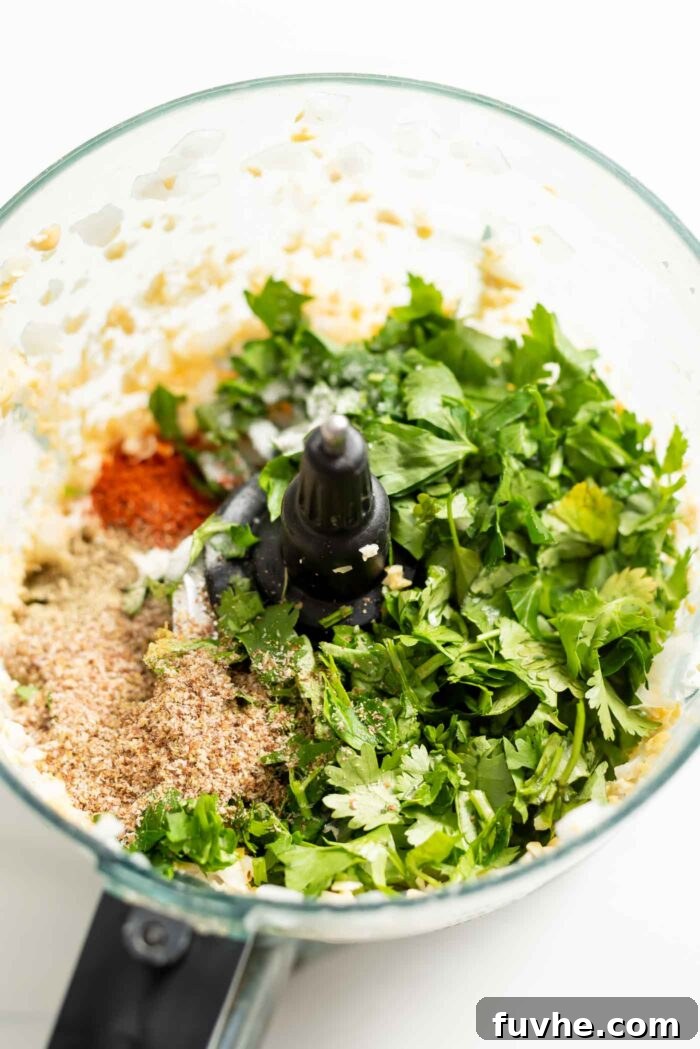
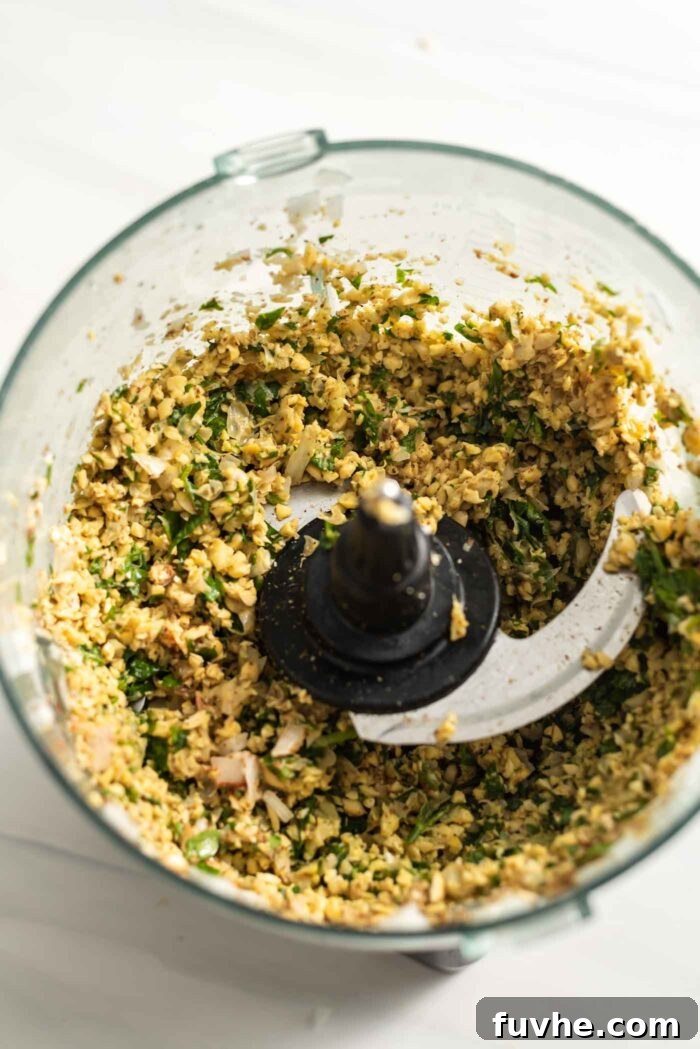
Step 3. Incorporate Fresh Herbs, Spices, and Flaxseed. Now it’s time to add the aromatic elements that give falafel its signature flavor. To the food processor, add the fresh parsley, cilantro, olive oil, ground cumin, ground coriander, garlic powder, cayenne pepper, black pepper, sea salt, ground flaxseed, water, and baking soda. Process again, using short pulses, just until all the ingredients are well combined and the mixture is evenly distributed. Be mindful not to overdo it; the goal is still a coarse, textured mixture, not a smooth paste. While the mixture blends, take a moment to preheat your oven to 400°F (200°C) and line a baking tray with parchment paper. This will ensure your falafel bakes evenly and prevents sticking, setting you up for a smooth transition to the next step.
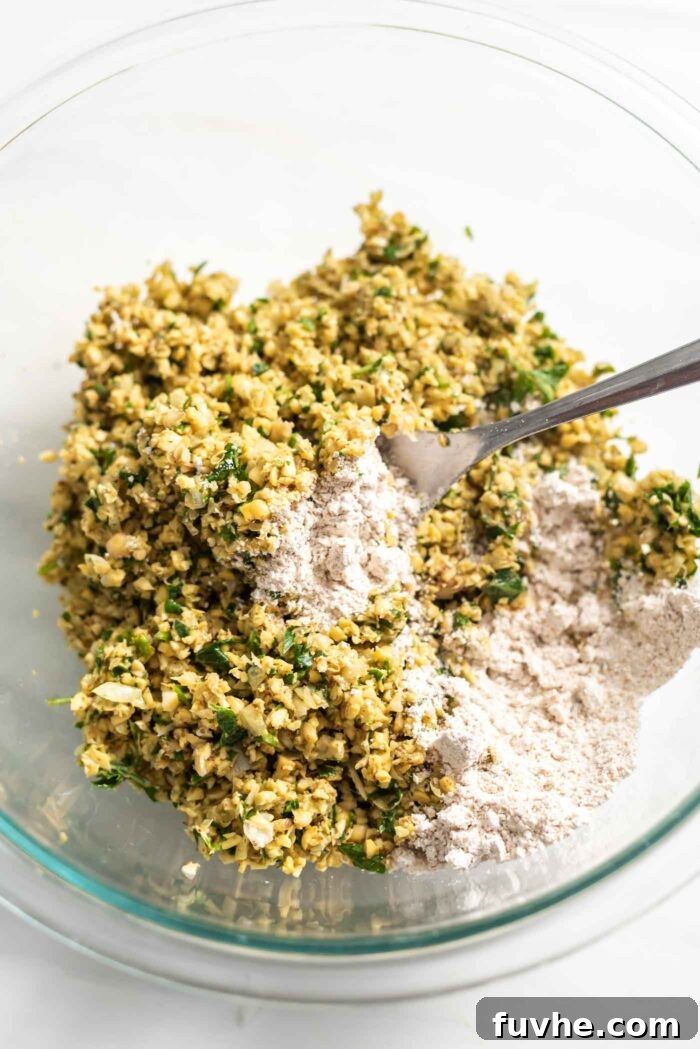
Step 4. Add Flour and Allow the Mixture to Rest. Carefully transfer the food processor mixture into a large mixing bowl. Alternatively, to minimize dishes, you can simply continue in the food processor container if it’s large enough. Add the specified amount of flour to the mixture. Using your hands or a sturdy spoon, mix it thoroughly until the flour is completely incorporated. The mixture should feel slightly cohesive but still grainy. Once mixed, let the falafel mixture sit undisturbed for 10 minutes. This resting period is crucial as it allows the flour and ground flaxseed to fully absorb moisture and work their magic as binders, helping the falafel hold its shape and prevent crumbling during baking. Do not skip this important step!
Step 5. Form and Prepare the Falafel Patties for Baking. After the resting period, the falafel mixture should be easier to handle. Scoop out spoonfuls of the mixture and gently form them into small, uniform patties with your hands. Aim for patties approximately 1/2 inch thick and 1.5 inches wide – you should get about 11-12 falafel. Neatly arrange these patties on your parchment-lined baking tray, ensuring there’s a little space between each one for even baking. To achieve that coveted crispy exterior, lightly spray each falafel patty with avocado or olive oil cooking spray. Alternatively, use an oil mister to apply a fine, even coating of avocado or olive oil. This light layer of oil is key to helping them crisp up beautifully in the oven.
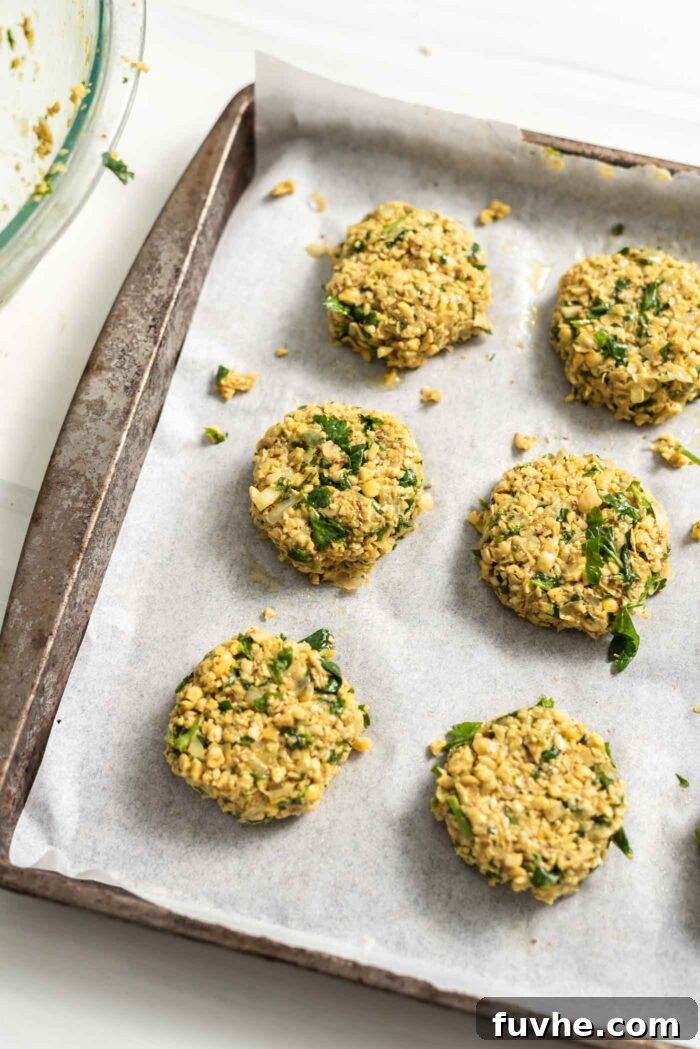
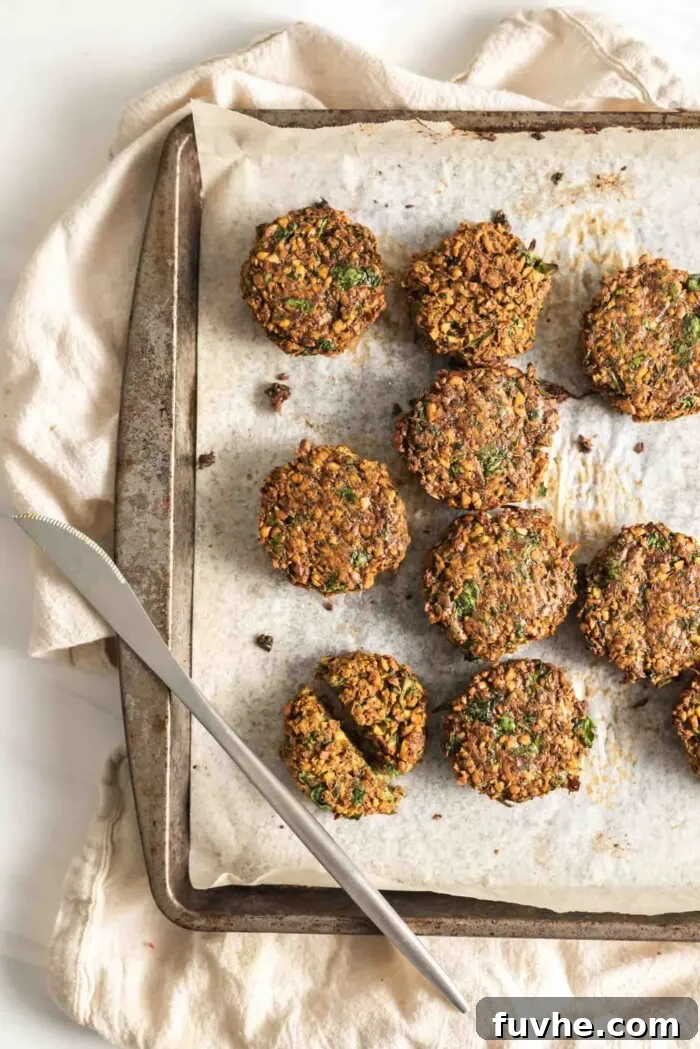
Now, the moment of truth! Place the tray in your preheated 400°F (200°C) oven. Bake for an initial 15 minutes, then carefully flip each falafel patty with a spatula to ensure even browning. Return them to the oven and bake for another 10 minutes, or until they are golden brown and deliciously crispy on both sides. Once baked, they are ready to be served and enjoyed immediately!
Expert Notes and Tips for Perfect Baked Falafel
Achieving the perfect baked falafel is all about a few key techniques. Here are some in-depth notes and tips to ensure your homemade falafel are consistently delicious:
- The Critical Difference: Dried Soaked Chickpeas vs. Canned: This cannot be stressed enough – I highly recommend using dried, soaked chickpeas over canned chickpeas. The final result in terms of texture is miles better. Dried chickpeas, after soaking, break down into a coarse, crumbly mixture that yields a much more traditional, hearty falafel with a delightfully crispy exterior when baked. If you opt for canned chickpeas (which are already cooked and much softer), the recipe will technically work, and the flavor will still be good, but the falafel will be noticeably mushier. They’ll have a softer, almost undercooked pancake-like consistency, lacking the firm bite and crispiness that defines great falafel. The goal is a texture akin to traditional fried falafel, which can only be achieved with properly soaked, uncooked dry chickpeas.
- Ensuring Gluten-Free Falafel: For those with gluten sensitivities or celiac disease, making this recipe gluten-free is simple. When selecting your flour, ensure you choose a naturally gluten-free option. Excellent choices include a dedicated gluten-free flour blend (check labels for binding agents), chickpea flour (which complements the chickpea base beautifully and adds protein), or oat flour (ensure it’s certified gluten-free if cross-contamination is a concern). These alternatives will bind the falafel effectively without introducing gluten.
- The Importance of the Resting Period: Don’t skip the 10-minute resting period after mixing in the flour. This time allows the flour and ground flaxseed to fully hydrate and create a stronger binding matrix. This significantly helps prevent the falafel patties from crumbling or falling apart during baking, ensuring they hold their shape perfectly.
- Don’t Over-Process the Mixture: When blending the chickpeas and other ingredients in the food processor, use short pulses and stop as soon as the mixture reaches a coarse, grainy consistency. Over-processing will turn the chickpeas into a paste, much like hummus, resulting in dense, heavy, and mushy falafel instead of light and airy ones with a crispy crust.
- Even Coating of Oil for Crispiness: The light mist of olive or avocado oil before baking is vital for achieving a truly crispy exterior. Ensure each patty is lightly and evenly coated. An oil mister is ideal for this, creating a fine spray without drenching the falafel. This helps in browning and creating that satisfying crunch.
- Check Chickpea Freshness: If you soak your dried chickpeas for the recommended time and they do not noticeably increase in size or absorb water, they might be old or “duds.” Old chickpeas sometimes don’t rehydrate properly, and if they don’t at least double in size, they won’t yield good falafel. In such a rare case, it’s best to discard them and use a fresh batch of chickpeas.
Creative Ways to Enjoy Your Baked Falafel
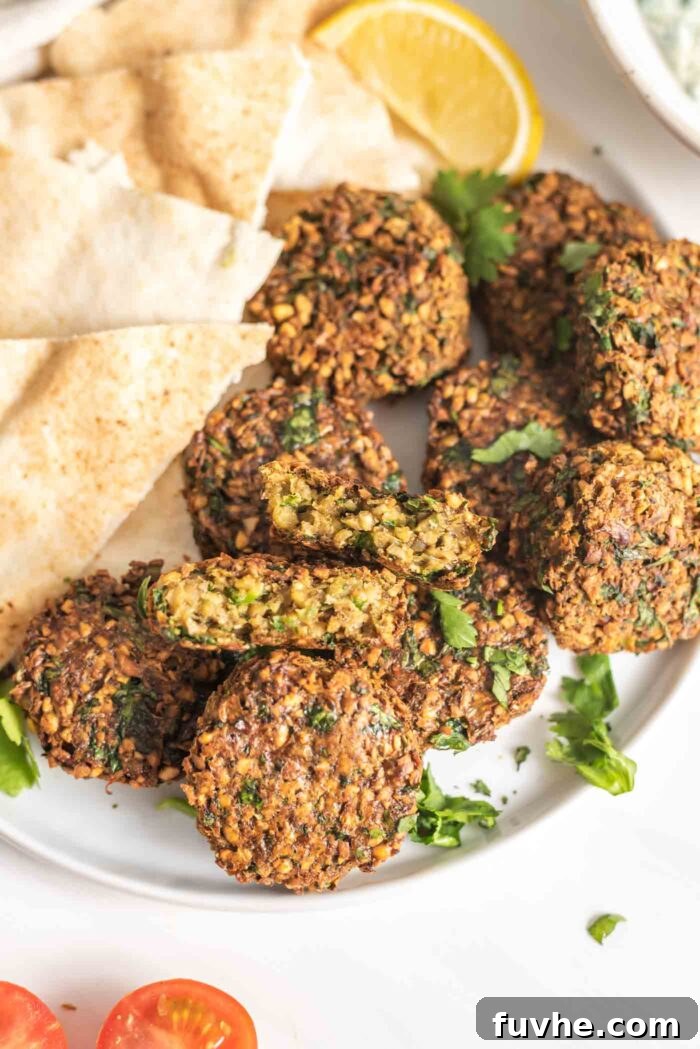
These versatile baked falafel patties can be enjoyed in countless ways, making them a fantastic addition to any meal plan. Here are some delicious serving suggestions to inspire your next culinary creation:
- The Ultimate Falafel Plate: Create a magnificent Mediterranean platter by arranging your crispy falafel with creamy roasted garlic hummus, a drizzle of rich lemon tahini sauce, tangy quick pickled red onions, a fresh green salad, and a side of light and refreshing mashed chickpea tabouleh. This spread is perfect for sharing or as a hearty individual meal.
- Elevate Any Salad: Falafel makes an excellent protein-packed topping for any green salad. Crumble them over a mixed greens salad with cherry tomatoes, cucumbers, and a lemon-herb vinaigrette, or keep them whole for a more substantial bite. They add texture, flavor, and make your salad a filling and complete meal.
- Classic Pita Perfection: Stuff warm, soft pita bread with fresh lettuce, crisp cucumber, a generous dollop of cool and creamy vegan tzatziki, and a smear of your favorite hummus. Add 2-3 baked falafel patties to complete this iconic and satisfying sandwich. A sprinkle of sumac or a dash of hot sauce can take it to the next level.
- A Delightful Side Dish: Serve falafel as a flavorful side alongside other Mediterranean dishes. They pair wonderfully with a simple dip of vegan tzatziki, a bowl of luscious hummus, or a side of creamy tahini sauce for a light yet satisfying accompaniment.
- Boost Your Grain Bowls: Transform your everyday grain bowls into an exciting culinary experience. Add these baked falafel to a hearty Mediterranean farro salad bowl, a vibrant quinoa bowl, or a refreshing cauliflower quinoa tabouleh bowl. They provide an excellent source of protein and an explosion of flavor and texture.
- Snack Time Savior: Enjoy them straight from the oven or cold as a healthy and satisfying snack. Just a few falafel with a dip can curb hunger and keep you energized between meals.
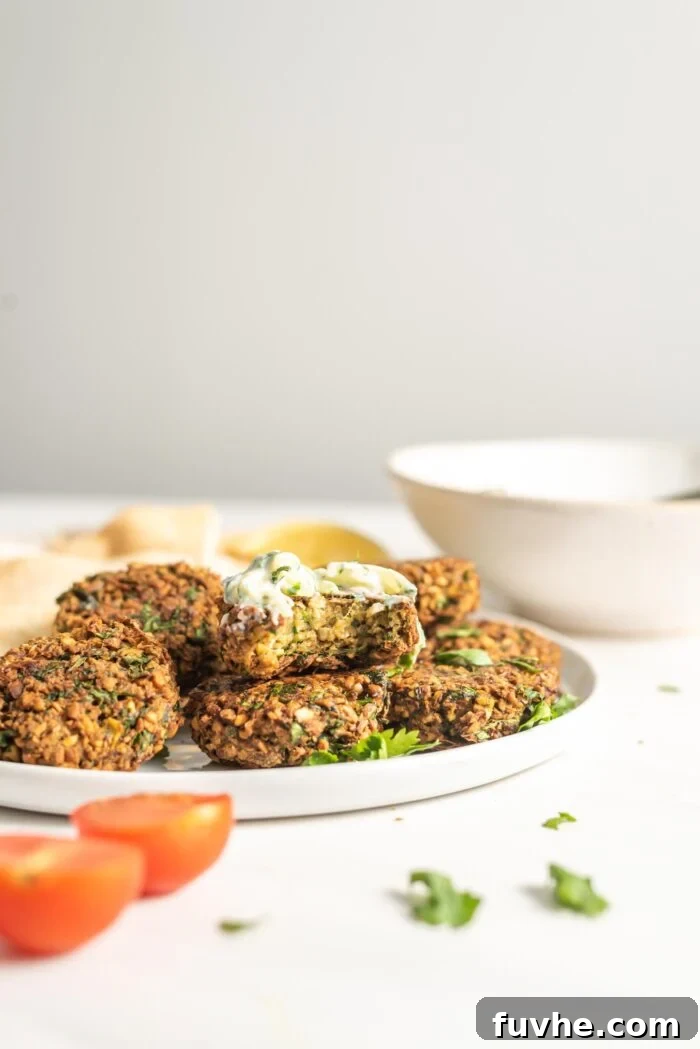
Storage and Reheating Tips for Freshness
Baked falafel is fantastic for meal prepping! Here’s how to properly store and reheat your falafel to maintain their delicious flavor and texture:
- Refrigerator Storage: Allow any leftover falafel to cool completely to room temperature before storing. Transfer them to an airtight container and store in the fridge for up to 5 days. Storing them properly will prevent them from drying out or becoming soggy.
- Freezer Storage for Longer Freshness: For longer storage, falafel freezes exceptionally well. Once cooled, arrange them in a single layer on a baking sheet and freeze until solid (this prevents them from sticking together). Then, transfer the frozen falafel to a freezer-safe bag or an airtight container, ensuring as much air is removed as possible. They will keep well in the freezer for up to 2 months. When ready to use, thaw them overnight in the fridge before reheating.
- Reheating for Optimal Enjoyment: You can enjoy falafel cold, straight from the fridge, which is perfect for salads or quick snacks. However, for that desired crisp exterior, reheating is recommended.
- Stovetop: Heat a lightly oiled pan over medium heat. Add the falafel and cook for a few minutes on each side until heated through and re-crisped.
- Microwave: While convenient, the microwave tends to make falafel softer. Reheat in 15-second increments until warm, but be aware they won’t be as crispy.
- Oven/Air Fryer: This is the best method for restoring crispiness. Preheat your oven or air fryer to 350°F (175°C). Place the falafel on a baking tray (or in the air fryer basket) and heat for 5-10 minutes, or until thoroughly warmed and crispy on the outside.
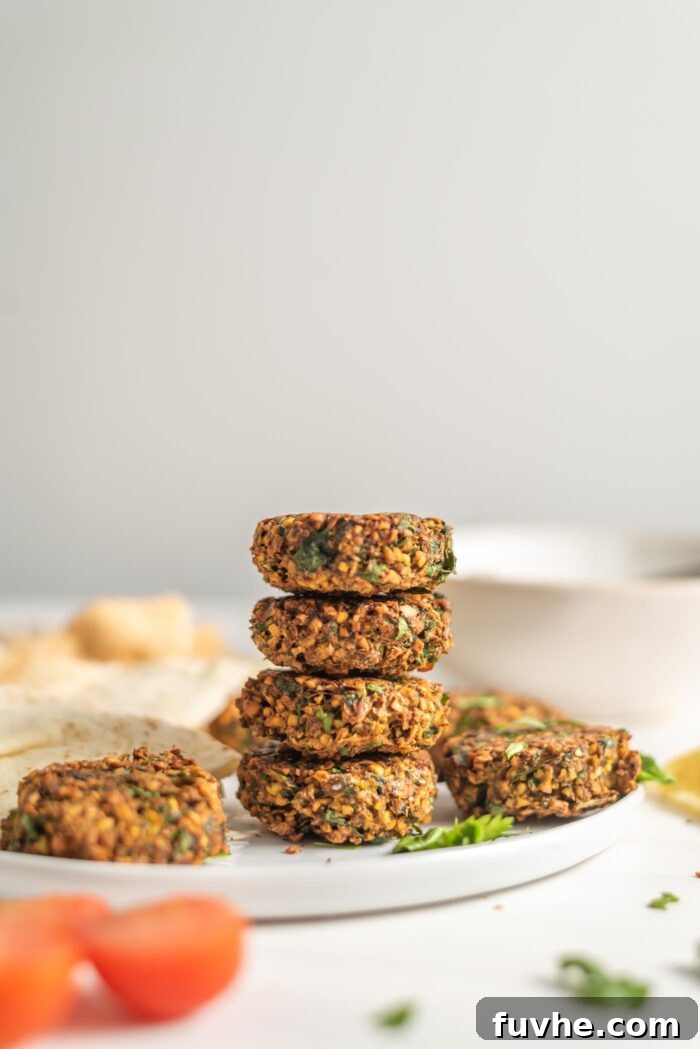
Pair Your Falafel with These Delicious Recipes
Complete your Mediterranean feast or find more plant-based inspiration with these complementary recipes:
- Homemade Vegan Tzatziki
- Quick Pickled Red Onions
- Roasted Garlic Hummus
- Mashed Chickpea Tabouleh
- Cauliflower Quinoa Tabouleh Bowls
- Creative Hummus Bowls
Healthy & Easy Baked Falafel
Pin Recipe
Rate Recipe
Print Recipe
Ingredients
- 1 cup dry chickpeas, approximately 1.5 cups or 165 g after soaking and draining
- 1/2 cup diced white onion, 80 g
- 1/2 cup lightly packed, finely chopped fresh cilantro (20 g)
- 1/2 cup lightly packed, finely chopped fresh parsley (20 g)
- 1 tbsp olive oil
- 1.5 tsp ground cumin
- 1.5 tsp ground coriander
- 1 tsp garlic powder
- 1/2 tsp cayenne pepper
- 1/2 tsp black pepper
- 1 tsp sea salt
- 2 tbsp ground flaxseed, 14 g
- 3 tbsp water
- 1 tsp baking soda
- 2 tbsp flour, see notes (25 g) – use gluten-free for GF option
- olive or avocado oil cooking spray, or olive or avocado oil in an oil mister for light coating
Instructions
-
Place 1 cup of dry chickpeas in a large bowl and cover them with a substantial amount of water, ensuring they are fully submerged. Soak them for 12-24 hours. The chickpeas will expand significantly, doubling or tripling in size, so allow ample room and water for this process.
-
When you are ready to prepare the falafel, thoroughly drain and rinse the soaked chickpeas. Add 1.5 cups of these rehydrated chickpeas to a food processor.
-
Next, add the diced onion to the food processor. Pulse the mixture several times until the chickpeas are coarsely broken down and well combined with the onion. It’s important not to over-mix; the consistency should be grainy, not a smooth paste like hummus.
-
Add all remaining ingredients except for the flour (i.e., fresh herbs, olive oil, all spices, ground flaxseed, water, and baking soda) to the food processor. Pulse a few more times until everything is just combined and uniformly distributed. Again, avoid over-processing.
-
Preheat your oven to 400°F (200°C) and line a baking tray with parchment paper while you finish preparing the mixture.
-
Transfer the contents from the food processor to a large mixing bowl (or simply continue in the food processor container if space allows). Stir in the flour until it is completely combined into the falafel mixture. Let this mixture rest for 10 minutes; this crucial step allows the binders to activate and helps the falafel hold its shape.
-
Using your hands, take spoonfuls of the mixture and form them into small, uniform patties, roughly 1/2 inch thick and 1.5 inches wide. You should yield approximately 12 falafel patties. Arrange them evenly on the parchment-lined baking sheet. Lightly mist each patty with olive or avocado oil cooking spray, or use an oil mister to apply a thin, even coating of oil. This step is essential for achieving a crispy baked exterior.
-
Bake the falafel in the preheated oven for 15 minutes. Then, carefully flip each falafel patty and return them to the oven for another 10 minutes, or until they are golden brown and crispy on both sides.
-
Serve your freshly baked falafel immediately! They are delicious with creamy tzatziki, a rich hummus, or a zesty tahini sauce. Enjoy them on their own, stuffed into warm pita bread, or as a flavorful addition to your favorite salads.
Chef’s Notes
Chickpea Yield After Soaking: While this recipe calls for 1 cup of dry chickpeas, which yields approximately 1.5 cups (165 g) after soaking, it’s possible you might have slightly more. Just use the specified 1.5 cups (165 g) from your soaked batch to ensure the correct consistency and balance of ingredients. Listing 1 cup dry ensures you have enough for the recipe.
Importance of Fresh Chickpeas: For best results, use fresh, good-quality dried chickpeas. If, after soaking for 12-24 hours, your chickpeas do not visibly increase in size or absorb a substantial amount of water, they may be old or stale. Such chickpeas will not break down correctly or provide the desired texture, potentially leading to a disappointing falafel. If they don’t at least double in size, it’s advisable to use a different batch.
Dried vs. Canned Chickpeas – A Crucial Distinction: While this recipe can technically be made with canned chickpeas, for an authentic taste and texture, I strongly advocate using dried, soaked chickpeas. Canned chickpeas are pre-cooked and retain too much moisture, which can result in a softer, mushier falafel that doesn’t crisp up as well. Opting for dried chickpeas will give you that delightful, traditional crispy exterior and fluffy interior, much more akin to classic fried falafel.
Storage and Reheating Recommendations: Allow your baked falafel to cool completely before storing. They can be kept in an airtight container in the fridge for up to 5 days, making them perfect for meal prep. For longer storage, freeze them in a sealed container or freezer-safe bag for up to 2 months. Thaw frozen falafel in the fridge before reheating. To enjoy them warm, you can reheat them in a pan on the stovetop, in 15-second increments in the microwave (though this will soften them), or for the best crispness, in the oven on a baking tray until warmed through to your liking.
Nutrition Information (Per Falafel)
Love this healthy falafel recipe? Rate and comment below!Your feedback helps us create more amazing plant-based recipes.
Frequently Asked Questions About Baked Falafel
Here are some common questions to help you master your homemade baked falafel:
Can I use canned chickpeas if I’m short on time?
While you technically *can* use canned chickpeas if time is a major constraint, it’s highly recommended to use dried chickpeas that have been properly soaked. Canned chickpeas are pre-cooked and contain more moisture, which results in a softer, mushier falafel that won’t crisp up as well in the oven. For that authentic, crispy exterior and tender, crumbly interior, dried chickpeas are always the superior choice.
Why is my falafel mixture too wet or mushy?
There are a few common reasons for a wet or mushy falafel mixture. The most likely culprit is using canned chickpeas, as they carry excess moisture. Another reason could be over-processing the mixture in the food processor; too much blending will release more moisture from the chickpeas and turn them into a paste. Ensure you drain and rinse your soaked chickpeas thoroughly. If your mixture still seems too wet, you can try adding an extra tablespoon of flour until it reaches a more manageable consistency, but avoid adding too much as it can make the falafel dry.
How do I make my baked falafel extra crispy?
Several factors contribute to crispy baked falafel:
- Dried, Soaked Chickpeas: This is fundamental for the right texture.
- Don’t Over-Process: A coarse, grainy mixture allows for better crisping.
- Resting Period: Essential for binders to work and firm up the mixture.
- Light Oil Coating: Lightly misting with olive or avocado oil before baking is crucial. Use a cooking spray or an oil mister for an even, thin layer.
- Hot Oven: Baking at 400°F (200°C) ensures a quick crisp.
- Flipping: Flipping halfway through baking ensures even browning and crispness on both sides.
Can I fry these falafel instead of baking them?
Yes, while this recipe is specifically designed for baking to achieve a healthier outcome, you can certainly fry these falafel. If frying, ensure your oil is hot (around 350-375°F or 175-190°C) and fry for 2-3 minutes per side until golden brown and crispy. Be mindful that frying will increase the calorie and fat content significantly compared to baking.
What are some other serving ideas for falafel?
Beyond pitas and salads, falafel can be a fantastic addition to:
- Mezze Platters: Serve alongside olives, fresh vegetables, dips, and warm pita bread.
- Wraps & Sandwiches: Use larger flatbreads or tortillas for a more substantial wrap.
- Breakfast Scrambles: Crumble them into a tofu scramble for a savory, protein-rich breakfast.
- Appetizers: Serve warm with a variety of dipping sauces at your next gathering.
Conclusion: Your New Go-To Vegan Baked Falafel Recipe
There you have it – a comprehensive guide to creating the most delicious, healthy, and easy vegan baked falafel. This recipe proves that you don’t need to deep-fry to achieve that satisfying crunch and rich, aromatic flavor. By starting with dry chickpeas, embracing fresh herbs, and utilizing the simple magic of your oven, you can enjoy these nutritious plant-based patties in countless ways. Whether you’re a seasoned vegan chef or simply looking to incorporate more wholesome, homemade meals into your diet, this baked falafel recipe is a culinary win. So gather your ingredients, follow these steps, and get ready to impress yourself and your loved ones with a taste of the Mediterranean, right in your own kitchen. Don’t forget to share your creations and rate the recipe below!