
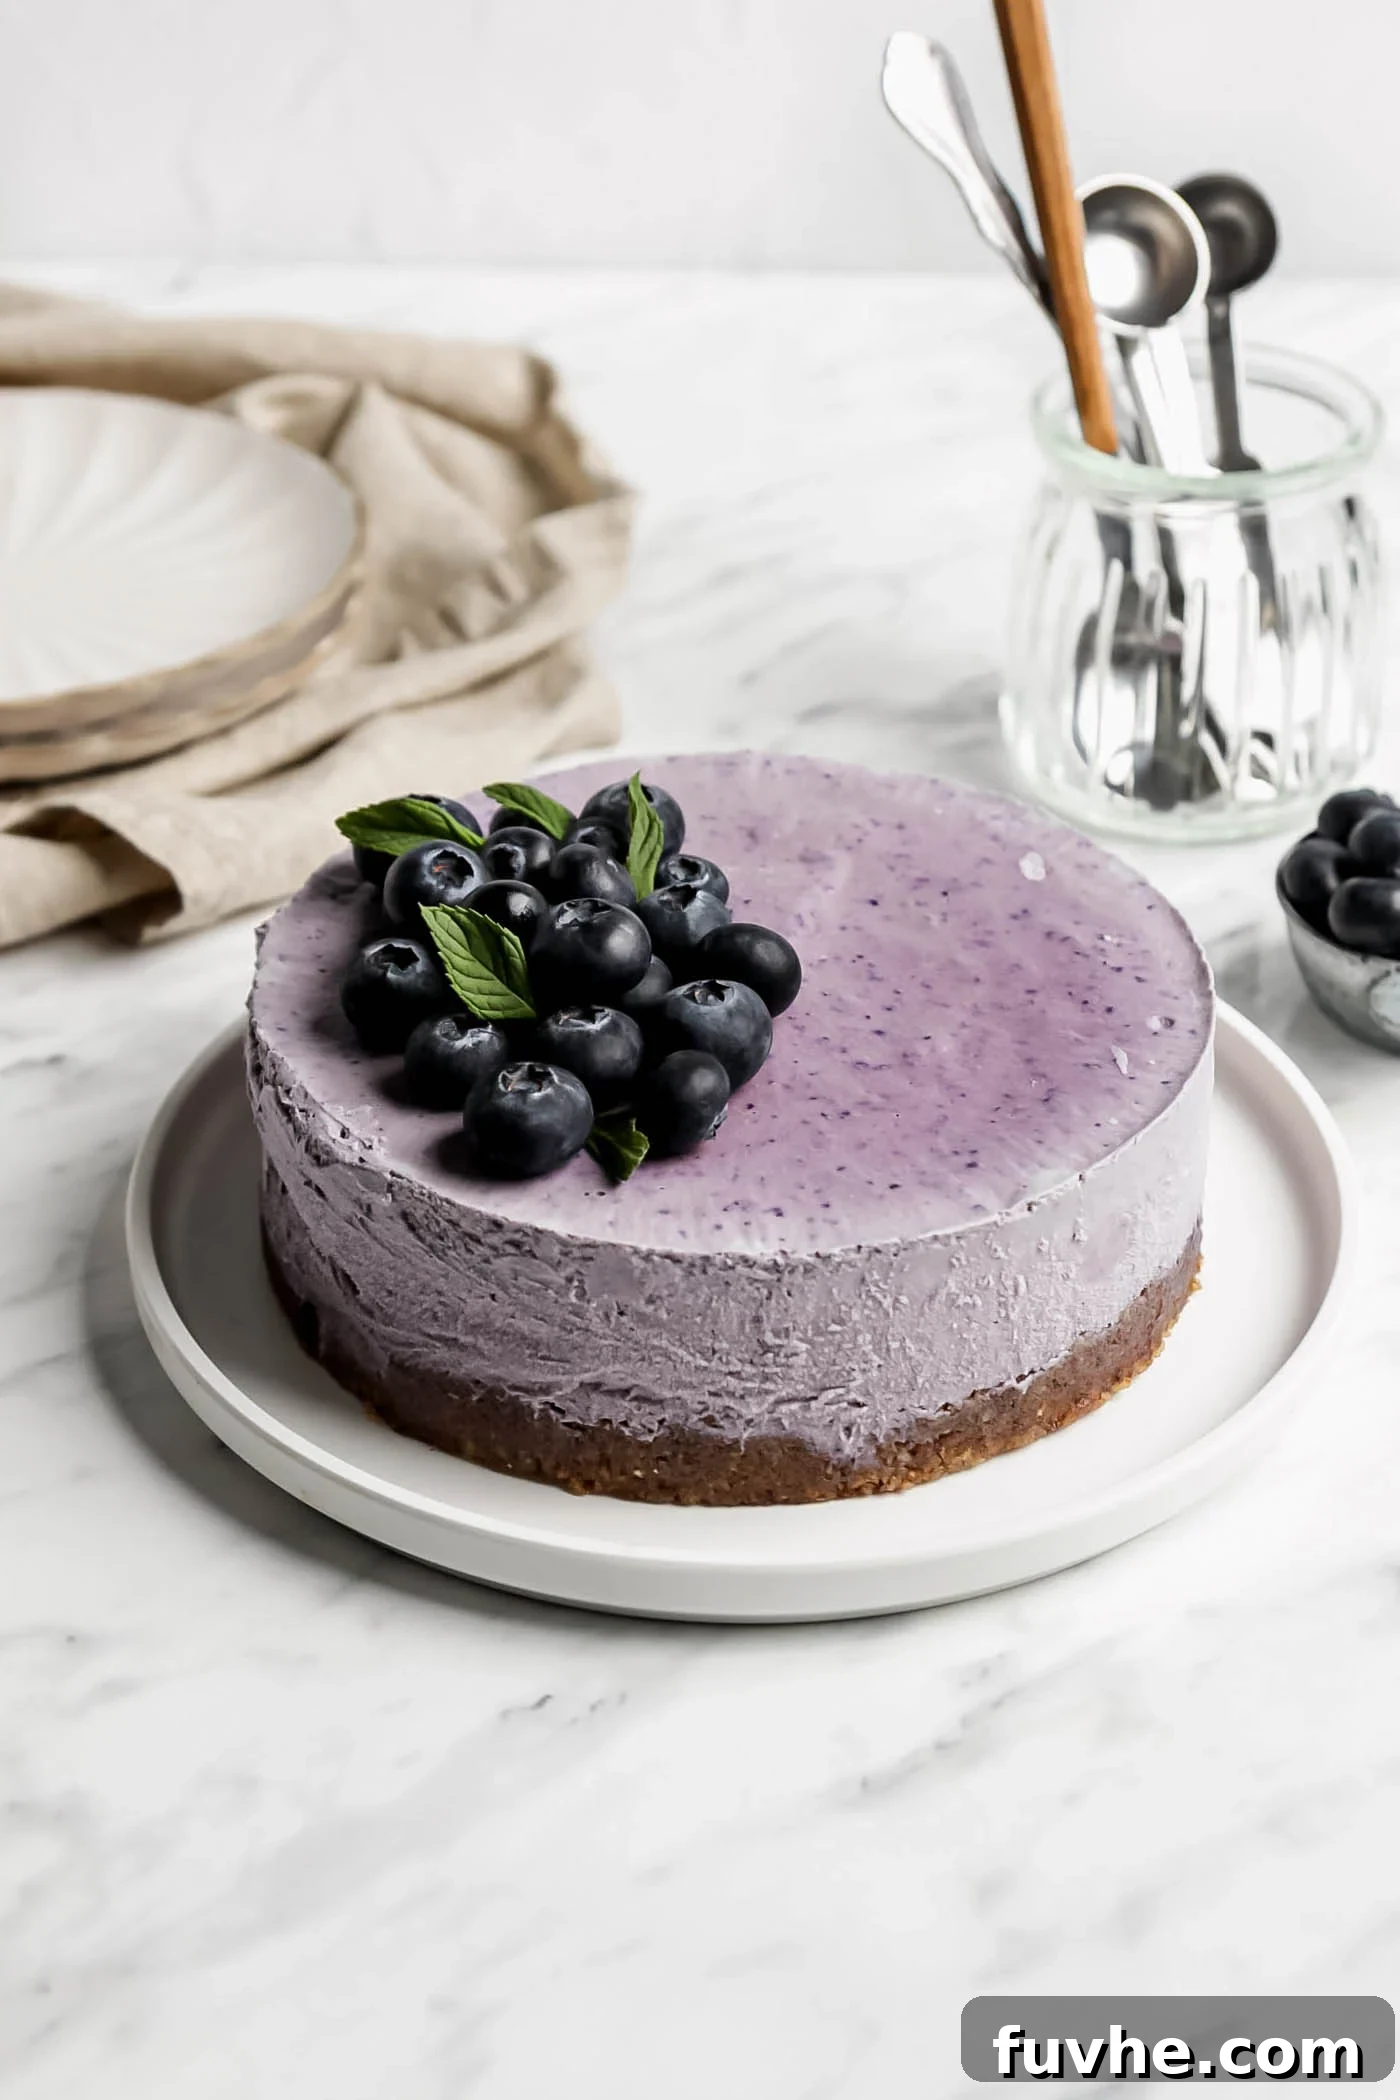
Irresistibly Creamy No-Bake Vegan Blueberry Cheesecake: Your Perfect Summer Delight
Discover the magic of a truly spectacular dessert that requires absolutely no baking! This vegan no-bake blueberry cheesecake is a show-stopping summer treat, designed to impress with its vibrant flavor and velvety texture, all while being incredibly easy to prepare with just a handful of wholesome ingredients. Forget complex oven timings and dairy concerns; this recipe promises pure, plant-based bliss.
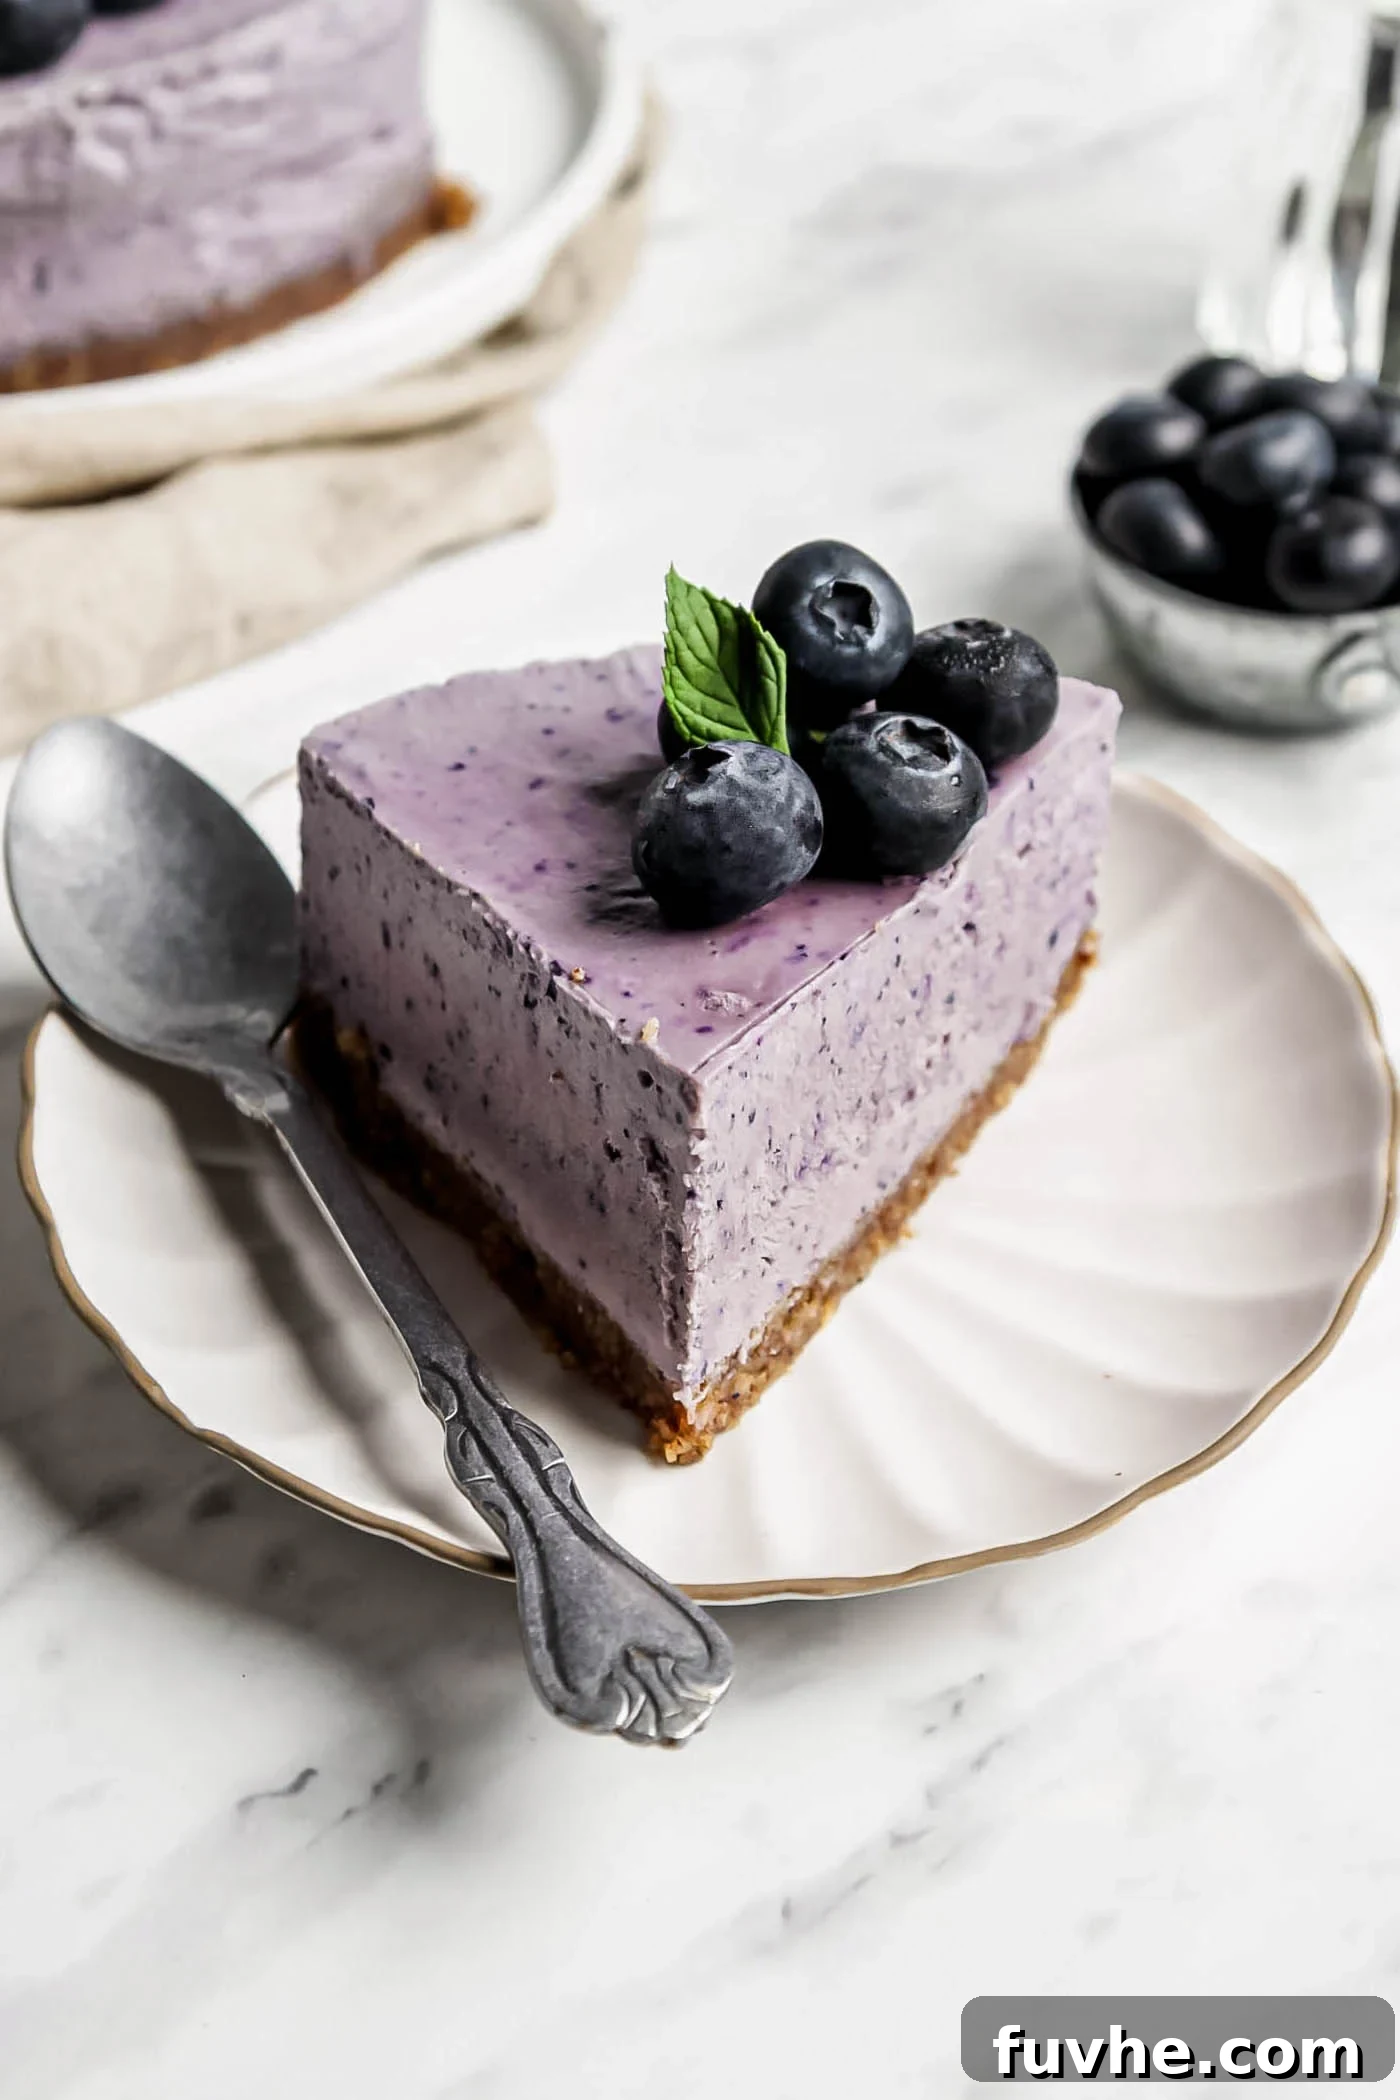
If you’re seeking a refreshing dessert that bypasses the oven, or if dietary restrictions like dairy intolerance have kept you from enjoying classic cheesecakes, then this recipe is your ultimate solution! Crafted without traditional ingredients such as whipped cream, cream cheese, or graham crackers, our vegan cheesecake achieves its luxurious creaminess using soaked cashews and rich coconut cream for the filling. The delightful crust is made from crunchy pecans sweetened with maple syrup and spiced with cinnamon. The harmonious blend of the creamy, subtly tart blueberry filling with the sweet, aromatic pecan crust creates an explosion of textures and flavors that will tantalize your taste buds.
For those who love exploring the world of vegan no-bake desserts, be sure to also try our No-Bake Matcha Cheesecake, the decadent No-Bake Vegan Chocolate Cheesecake, and the cozy No-Bake Pumpkin Cheesecake.
Why You’ll Adore This Blueberry Cheesecake
This exquisite no-bake vegan blueberry cheesecake isn’t just a dessert; it’s a testament to how simple, whole-food ingredients can transform into something truly extraordinary. Here’s why this recipe will become a staple in your kitchen:
- Effortlessly Vegan and Gluten-Free: Made entirely from plant-based ingredients, this cheesecake is naturally vegan and gluten-free, catering to a wide range of dietary needs without compromising on taste or texture.
- No Oven Required – Pure Simplicity: Say goodbye to baking guesswork and oven heat! This cheesecake sets beautifully in the freezer, making it an incredibly simple recipe perfect for warm weather or when you just don’t feel like turning on the oven. The process is straightforward and enjoyable.
- Luxuriously Creamy Texture & Balanced Flavor: Prepare for an unparalleled melt-in-your-mouth experience. The filling achieves an amazing creamy texture, while its lightly sweetened tart flavor, bursting with fresh blueberries, creates a perfectly balanced profile that’s neither too rich nor too sweet.
- Celebrate Seasonal Blueberries: This recipe is the absolute best way to utilize fresh, plump, in-season blueberries. Their natural sweetness and slight tang are highlighted beautifully, making every bite a celebration of summer’s bounty.
- Versatile for Any Occasion: While it shines as a refreshing summer dessert, its elegant presentation and delightful taste make it perfect for any special occasion – from garden parties and barbecues to holiday gatherings and intimate dinners. It’s a dessert that consistently impresses!
Unlocking the Flavor: A Deep Dive into Key Ingredients
The secret to this exceptional no-bake vegan blueberry cheesecake lies in its carefully selected, simple, and wholesome ingredients. Each component plays a vital role in creating the perfect balance of flavor, texture, and structure. Let’s explore them in more detail:
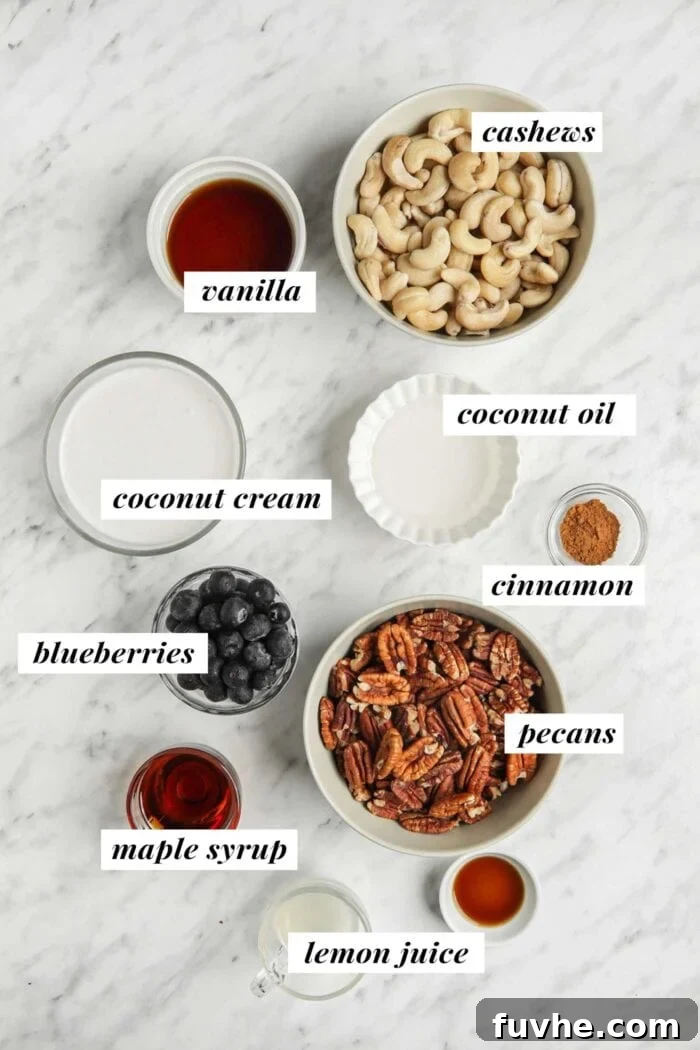
- Pecans: These form the foundational base of our delicious crust. Pecans offer a rich, buttery flavor and a lovely texture when processed. If pecans aren’t readily available, you can easily substitute them with walnuts or almonds, or even a delightful combination of all three. These nuts provide healthy fats and a satisfying crunch that beautifully contrasts with the creamy filling.
- Maple Syrup: Serving as our natural sweetener, maple syrup contributes a distinct caramel-like sweetness to both the crust and the filling. In the crust, it acts as a binding agent. For the crust, you can also substitute it with soft, pitted dates for a different kind of natural sweetness and binding power. For the filling, agave syrup works well as an alternative.
- Raw Cashews: The undisputed star of the cheesecake filling! Raw cashews are absolutely essential for achieving that signature smooth, rich, and creamy texture reminiscent of traditional cheesecake. The key to their transformation is soaking: they must be soaked for at least 4 hours, or ideally overnight, to soften them thoroughly. This ensures they blend into a silky-smooth cream, especially crucial if you don’t own a high-speed blender. Soaking makes all the difference!
- Coconut Oil: This ingredient is non-negotiable and cannot be substituted in this recipe. Melted coconut oil plays a critical role in binding the crust ingredients together and, more importantly, helping the cheesecake filling set firm in the freezer. It solidifies at colder temperatures, providing the necessary structure without any baking.
- Coconut Cream: This rich, thick component is vital for creating the lush, creamy consistency of the filling. You can purchase full-fat coconut cream in cans, often found in the Asian or baking aisle of most grocery stores. Alternatively, and quite simply, you can make your own: just refrigerate two cans of full-fat coconut milk overnight. The thick cream will separate and rise to the top, allowing you to scoop it out and use it, leaving the watery part behind for other uses like smoothies or curries. You’ll need about 1 cup of thick coconut cream for this recipe.
- Fresh Blueberries: The hero of our flavor profile! This cheesecake is best made with plump, ripe, and fresh blueberries, which impart a vibrant color and naturally sweet-tart taste. If you’re looking to deepen the berry flavor or enhance the color, consider adding a teaspoon of blueberry powder or a few drops of blueberry extract. While fresh are preferred, frozen blueberries can also be used; just thaw them slightly and drain any excess liquid before blending.
- Lemon Juice: A splash of fresh lemon juice is crucial for balancing the sweetness and adding a bright, zesty tang that truly elevates the cheesecake’s flavor profile. It mimics the acidity found in traditional cheesecakes, providing a refreshing counterpoint to the rich creaminess.
- Pure Vanilla Extract: A classic flavor enhancer, vanilla extract adds warmth and depth, complementing the blueberries and cashews beautifully. Always opt for pure vanilla extract for the best flavor.
- Sea Salt (Optional for Crust): A tiny pinch of sea salt in the crust can help to enhance the flavors of the nuts and maple syrup, creating a more complex and satisfying taste. It’s a small addition that makes a noticeable difference.
Please note that this is a detailed overview of the core ingredients. A complete ingredient list with precise measurements and comprehensive instructions can be found in the recipe card at the end of this article, ensuring you have everything you need to create this masterpiece.
Crafting Your Masterpiece: Easy Step-by-Step Guide
Creating this stunning vegan blueberry cheesecake is a straightforward and enjoyable process. Follow these detailed steps to ensure a perfect result every time:
Essential Pre-Preparation: Soak Your Cashews! This step is absolutely crucial for achieving the ultra-smooth and creamy filling that defines a truly great no-bake cheesecake. Place your raw cashews in a bowl, cover them with plenty of water, and let them soak for at least 4 hours. For the best, silkiest results, or if you don’t have a high-speed blender, soaking them overnight is highly recommended. Once soaked, drain the cashews thoroughly and give them a quick rinse before proceeding with the recipe.
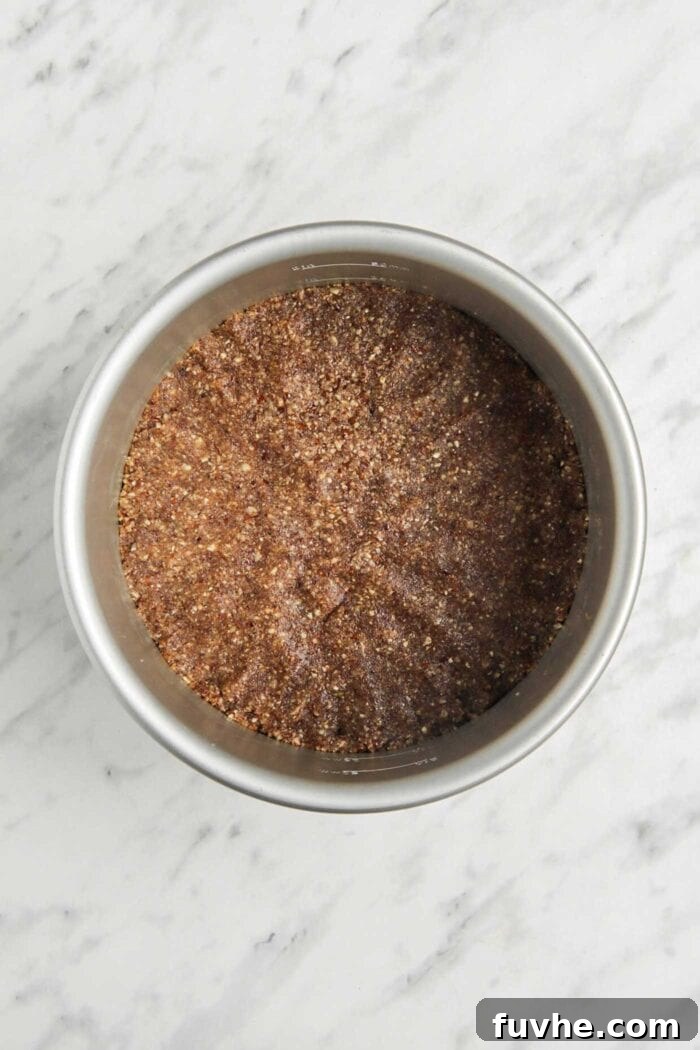
Step 1. Prepare the Irresistible Pecan Crust. Begin by adding the pecans to your food processor. Pulse and blend until they break down into a fine, grainy consistency. Be careful not to over-process them into a butter. Next, add the maple syrup and cinnamon to the food processor with the pecan crumbles. Continue to blend until the mixture forms a crumbly yet sticky dough that holds together when pressed. This indicates the perfect consistency for your crust. Carefully press this dough evenly and firmly into the bottom of an 7 to 9-inch springform pan. The size of your pan will dictate the thickness of your cheesecake – a smaller pan will yield a thicker, taller slice. Ensure the crust is compact and uniform.
Step 2. Create the Velvety Blueberry Cheesecake Filling. Transfer all of your filling ingredients, including the pre-soaked, drained, and rinsed cashews, melted coconut oil, coconut cream, maple syrup (or agave), lemon juice, vanilla extract, and fresh blueberries, into a high-speed blender. Blend on high speed, stopping occasionally to scrape down the sides, until the mixture is incredibly smooth and creamy. This may take a few minutes, but patience is key for achieving that luxurious, velvety texture. Ensure there are no cashew pieces remaining.
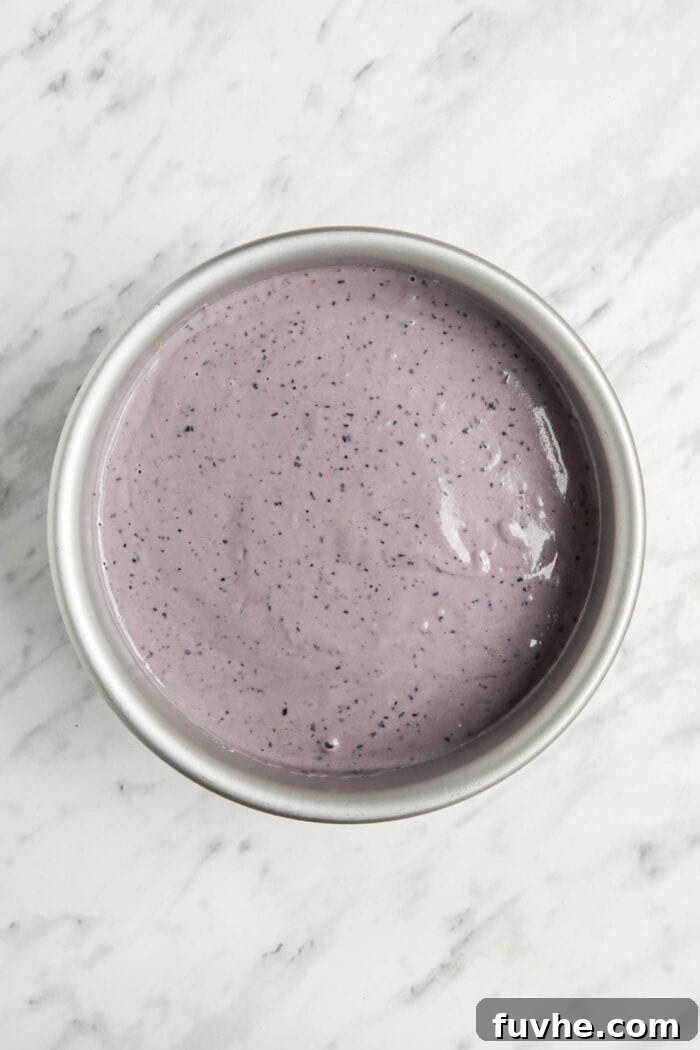
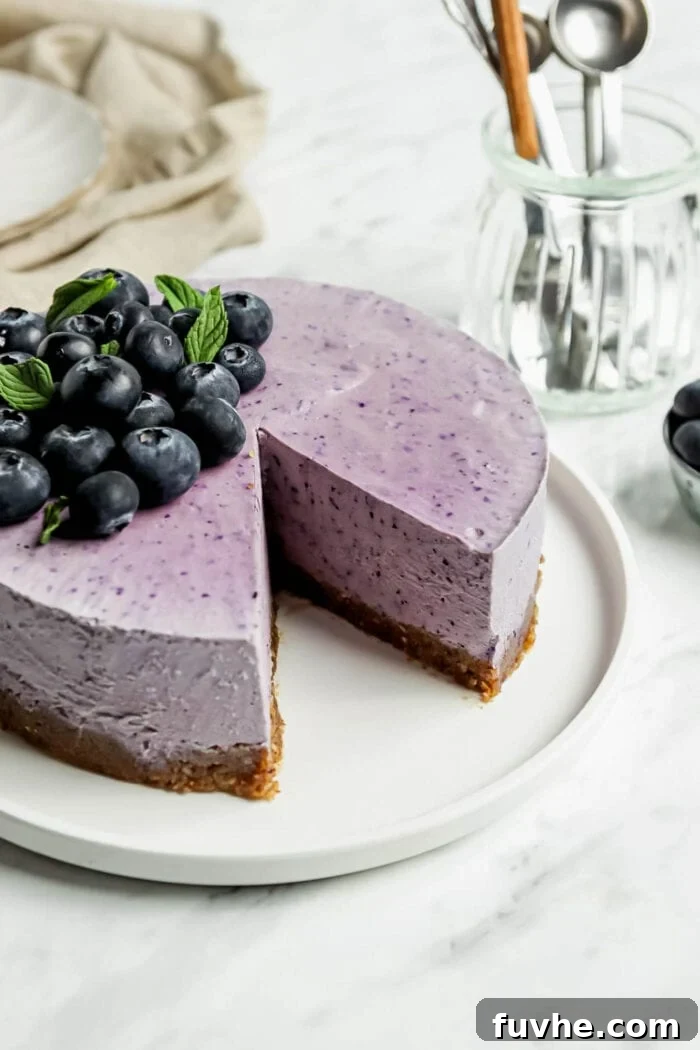
Pour the silky-smooth cheesecake filling evenly over the prepared crust in the springform pan. Gently tap the pan on the counter a few times to release any air bubbles and ensure an even surface. Transfer the pan to the freezer and allow the cheesecake to set completely for a minimum of 2 hours, or ideally overnight. Before serving, let the cheesecake thaw at room temperature for 20-30 minutes, or for 1-2 hours in the refrigerator, to reach the perfect creamy consistency. Slice and serve! Enjoy the delightful taste of this refreshing, homemade treat.
Frequently Asked Questions About Vegan No-Bake Cheesecake
While store-bought coconut cream is incredibly convenient, it’s not always available in every grocery store. But don’t worry, making your own is super easy! You’ll need two cans of full-fat coconut milk for this method. Simply place both cans in your fridge overnight (or for at least 8 hours). In the morning, carefully open the chilled cans. The thick, solid coconut cream will have separated and risen to the top. Scoop out this rich cream, leaving the clear, watery coconut liquid behind. You can save the coconut water for use in smoothies, soups, or curries. Each can typically yields about 1/2 cup of coconut cream, so two cans will provide the 1 cup you need for this recipe.
Absolutely! This recipe is incredibly versatile. Fresh strawberries or raspberries make fantastic substitutions and will yield equally delicious and visually stunning cheesecakes. Simply use the same quantity of your chosen fruit. For other variations, consider mango for a tropical twist, or lime for a zesty key lime pie experience. Just remember that the color and tartness will vary with each fruit, offering endless customization possibilities!
The best way to store your no-bake cheesecake is in the freezer. Once fully set, you can cover it tightly with plastic wrap and then aluminum foil, or transfer slices to an airtight container. Stored this way, it will keep beautifully for up to 3 months. When you’re ready to enjoy a slice, simply remove it from the freezer and let it thaw for 20-30 minutes at room temperature, or for an hour or two in the refrigerator, until it reaches your desired creamy consistency. This also makes it an excellent make-ahead dessert for parties!
Serving Suggestions & Elegant Garnishes
While this no-bake vegan blueberry cheesecake is absolutely divine on its own, a few simple garnishes can elevate its presentation and enhance its flavors even further. Here are some ideas to make your cheesecake truly unforgettable:
- Fresh Blueberries: A generous scattering of fresh, plump blueberries on top adds a beautiful pop of color and a burst of natural sweetness.
- Homemade Blueberry Sauce: Take your cheesecake to the next level with a quick homemade blueberry sauce. Simply simmer 1 cup of blueberries with a tablespoon of maple syrup and a splash of lemon juice until thickened, then cool before drizzling.
- Whipped Coconut Cream: For an extra decadent touch, dollop some whipped coconut cream on each slice. Just chill a can of full-fat coconut milk overnight, scoop out the cream, and whip it with a touch of sweetener until fluffy.
- Fresh Mint Leaves: A few fresh mint leaves offer a refreshing aroma and a vibrant green contrast to the purple cheesecake.
- Lemon Zest: A light sprinkle of lemon zest adds a bright, aromatic finish that complements the tartness of the blueberries.
Remember to remove the cheesecake from the springform pan slowly and carefully after it has thawed slightly. Run a thin knife around the edge of the pan before releasing the sides to ensure clean edges.
Troubleshooting and Tips for No-Bake Cheesecake Success
Even though this recipe is straightforward, sometimes little issues can arise. Here are some common troubleshooting tips to ensure your vegan no-bake blueberry cheesecake turns out perfectly every time:
- “My cashews aren’t blending smooth!” This is almost always due to insufficient soaking. Ensure your cashews are soaked for at least 4 hours, or ideally overnight. If you’re short on time, a “quick soak” method involves boiling water, pouring it over the cashews, and letting them sit for about 30-60 minutes before draining. Also, make sure you’re using a high-speed blender. If your blender isn’t powerful, it will take longer to achieve a smooth consistency, so blend for an extra few minutes, stopping to scrape down the sides frequently.
- “My crust is too crumbly/too wet!” If your crust is too crumbly, you might need a tiny bit more maple syrup or a dash of water to help it bind. Add it very slowly, a teaspoon at a time. If it’s too wet and sticky, you might have added too much liquid. You can try adding a few more finely ground nuts or a tablespoon of oat flour to absorb excess moisture.
- “My cheesecake isn’t setting firm!” This usually points to either not enough chilling time or not enough coconut oil. Ensure your cheesecake is frozen for the recommended 2 hours (or preferably overnight for optimal firmness). Also, double-check your coconut oil measurement, as it’s crucial for setting. If your kitchen is very warm, it might take longer for the cheesecake to firm up, even after thawing.
- “How do I get clean slices?” For perfectly clean slices, ensure your cheesecake is well-chilled (or slightly thawed from frozen). Use a sharp knife and run it under hot water, wiping it clean between each slice. This will help the blade glide through the creamy filling without sticking.
With these tips in mind, you’re well on your way to creating a flawless and delicious vegan no-bake blueberry cheesecake!
More Delicious No-Bake Vegan Desserts to Explore
If you’ve fallen in love with the convenience and deliciousness of no-bake vegan desserts, you’re in luck! There’s a whole world of delightful treats waiting to be discovered. Expand your repertoire with these other fantastic recipes:
- No-Bake Mango Lime Coconut Cheesecake
- Raw Vegan Carrot Cake with Cashew Frosting
- Zesty Vegan Key Lime Pie
- Rich Vegan Chocolate Ganache Tart
- Decadent No-Bake Vegan Chocolate Pie
Each of these recipes offers a unique flavor profile and the same ease of preparation, proving that plant-based, no-bake desserts can be just as, if not more, indulgent and satisfying than their traditional counterparts.
No-Bake Vegan Blueberry Cheesecake
By: Deryn
This raw vegan blueberry cheesecake makes the perfect summer dessert. The smooth, creamy cheesecake filling paired with a simple cinnamon pecan crust is so delicious, it’s sure to be a hit!
- Prep Time: 6 hours (includes cashew soaking)
- Chill Time: 2 hours
- Total Time: 8 hours
- Servings: 8 slices
Ingredients
For the Crust:
- 2 cups pecans (200 g)
- 3 tablespoons maple syrup (45 mL) or 1/2 cup packed, soft pitted dates (110 g)
- 2 teaspoons cinnamon
- 1/4 teaspoon sea salt (optional, for flavor enhancement)
For the Cheesecake Filling:
- 1 1/2 cups raw cashews, soaked in water for 4 hours or overnight (210 g)
- 1/3 cup coconut oil, melted (55 g)
- 1 cup of full-fat coconut cream (200 g)
- 1/2 cup maple syrup or agave syrup (140 g)
- 2 tablespoons lemon juice (30 mL)
- 2 teaspoons pure vanilla extract (10 mL)
- 1 ½ cups fresh blueberries (200 g)
- 1 teaspoon liquid soy lecithin (optional, for improved emulsion and creaminess)
Instructions
- Soak Cashews: Place the raw cashews in a large bowl and cover them with water. Let them soak for at least 4 hours, or preferably overnight, to soften completely. When ready to use, drain and rinse the cashews thoroughly.
- Prepare Crust: Add the pecans to a food processor and blend until they form a fine, grainy crumble.
- Combine Crust Ingredients: Add the maple syrup, cinnamon, and optional sea salt to the food processor with the pecan crumble. Blend until the mixture forms a moldable, sticky dough that holds together when pressed.
- Press Crust: Prepare an 8-9 inch springform pan by lining the bottom with parchment paper for easy removal. Press the dough evenly and firmly into the bottom of the pan using your hands to create a compact, uniform crust.
- Blend Filling: Add the drained cashews to a high-speed blender, along with the melted coconut oil, coconut cream, maple syrup (or agave), lemon juice, pure vanilla extract, blueberries, and optional liquid soy lecithin. Blend on high until the mixture is exceptionally smooth and creamy, scraping down the sides as needed. This may take several minutes to achieve a perfectly silky consistency.
- Assemble Cheesecake: Pour the smooth cheesecake filling over the prepared crust in the springform pan. Gently tap the pan on the counter a few times to settle the filling and remove any air bubbles.
- Chill and Set: Carefully transfer the springform pan to the freezer. Allow the cheesecake to freeze and set for a minimum of 2 hours, or ideally overnight, for best results.
- Thaw and Serve: Before serving, remove the cheesecake from the freezer and let it thaw at room temperature for 20-30 minutes, or in the refrigerator for 30-60 minutes. This allows it to soften to a creamy, sliceable consistency. Slice and serve with fresh blueberries or a drizzle of homemade blueberry sauce on top.
Recipe Notes
- Quick Blueberry Sauce: For a simple sauce, combine 2 cups of blueberries with 1/3 cup water and 1/3 cup sugar or maple syrup (adjust to taste) in a saucepan. Stir frequently and bring to a low boil. Stir in 2 tablespoons of cornstarch and continue stirring until the sauce thickens, about 5 minutes. Let cool before serving.
- Storing: Store any leftover cheesecake in an airtight container in the freezer for up to 3 months. Thaw for 20-30 minutes at room temperature or for a couple of hours in the fridge before serving.
- Substitutions: Blueberries can be deliciously swapped for fresh strawberries or raspberries. For the crust, pecans can be substituted with almonds, walnuts, or a delightful combination of these nuts.
Nutrition Information
Serving: 1 slice
- Calories: 570 kcal
- Carbohydrates: 36 g
- Protein: 7 g
- Fat: 40 g
- Sodium: 15 mg
- Fiber: 4 g
- Sugar: 23 g
Loved this recipe? Don’t forget to rate it and share your thoughts in the comments below!