
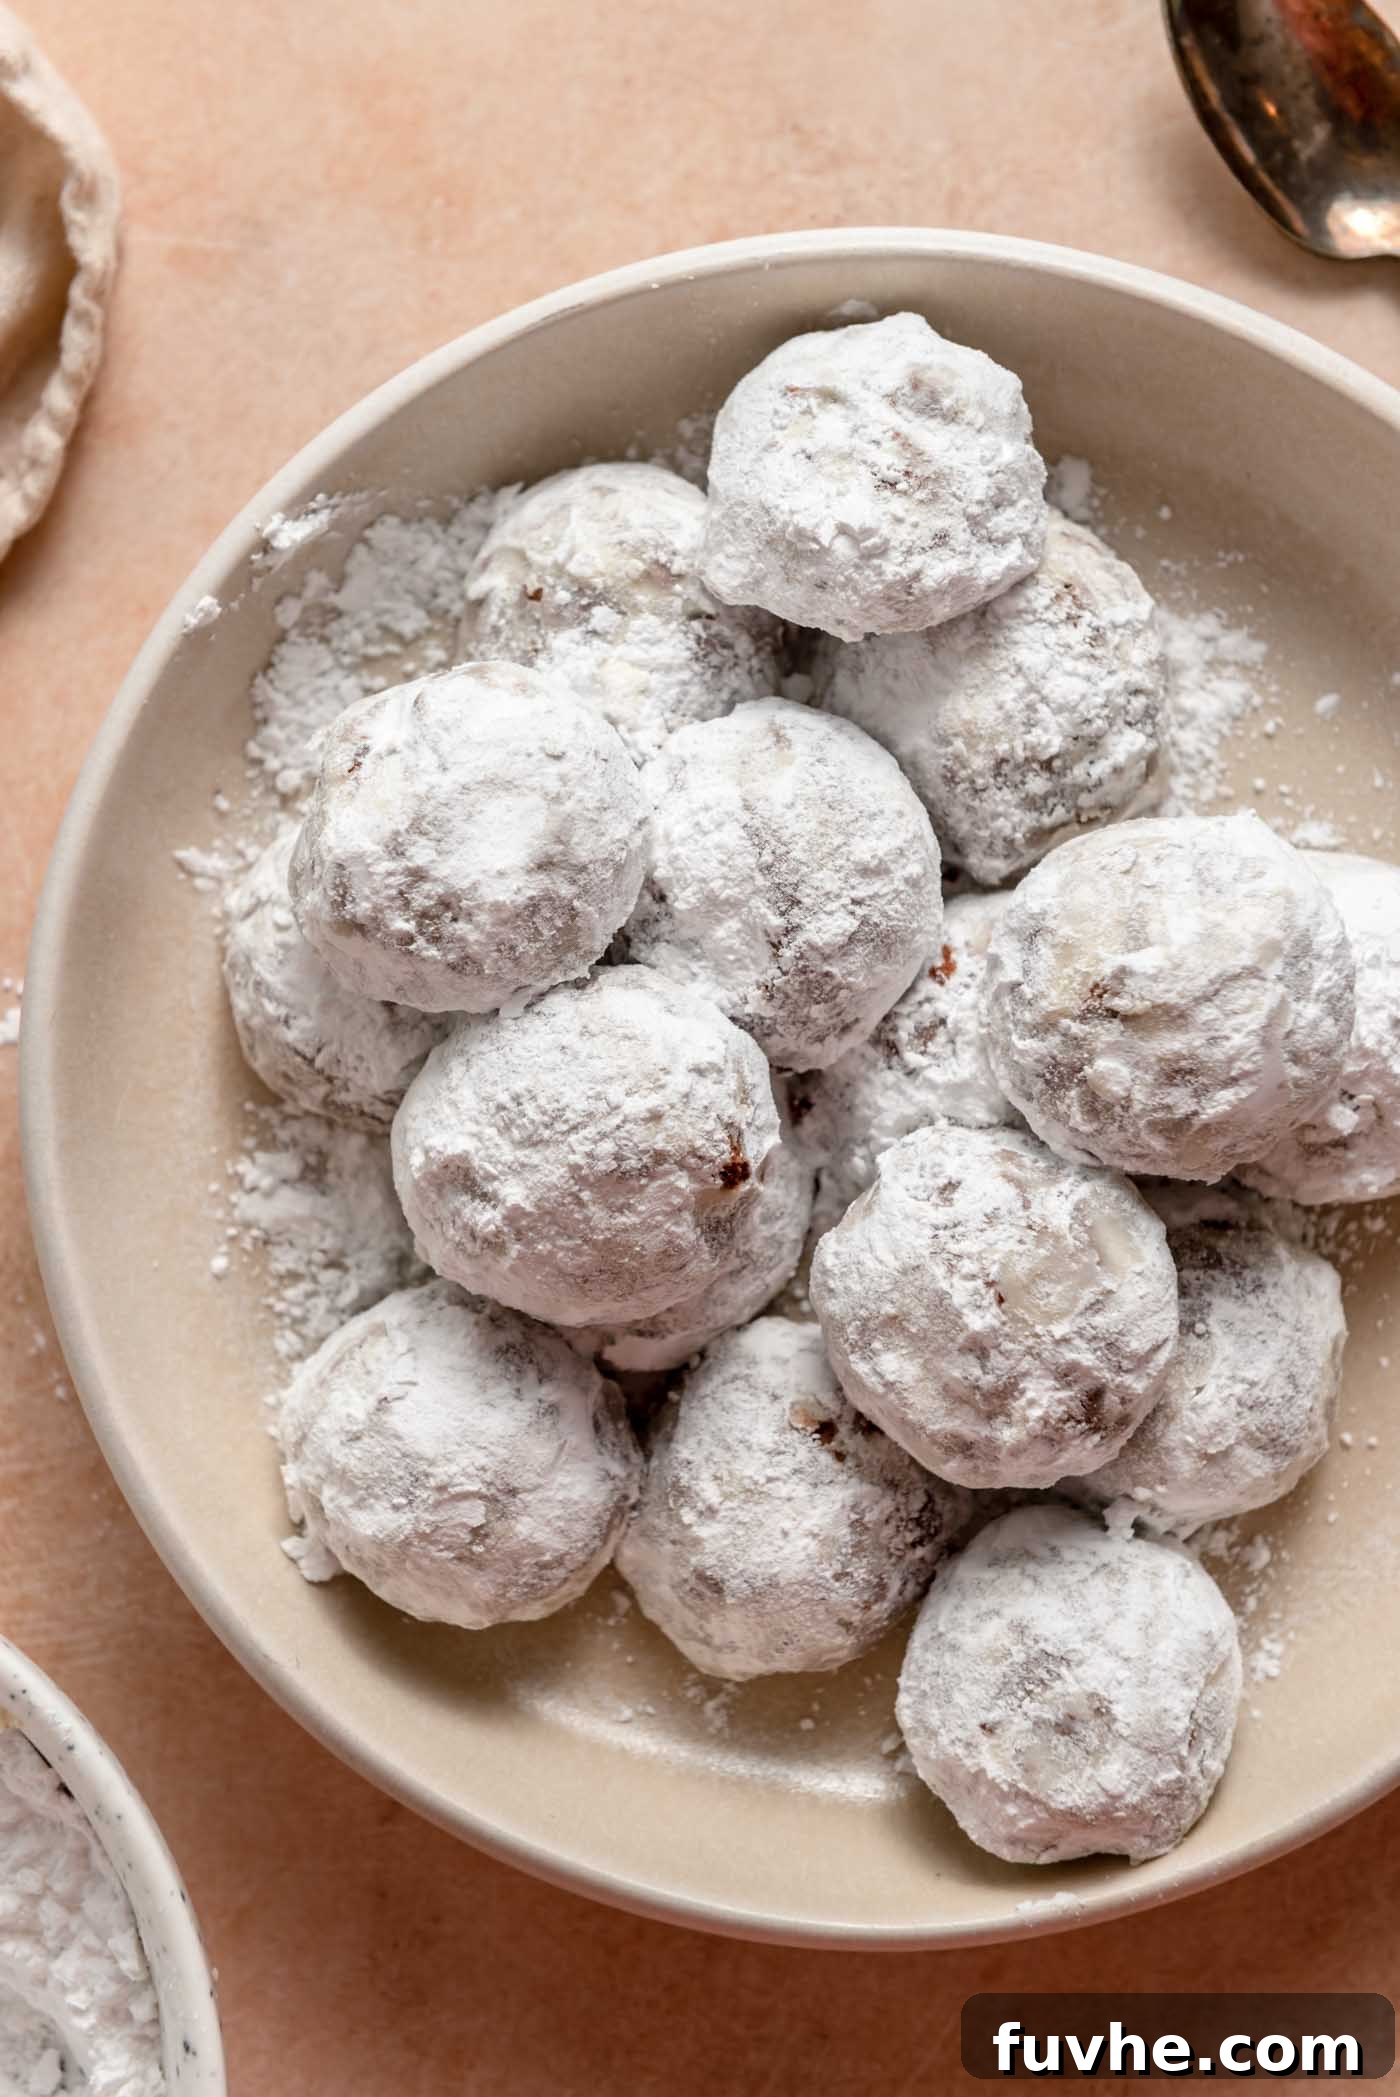
Indulge in the irresistible charm of these buttery, rich chocolate snowball cookies. Each bite offers a melt-in-your-mouth sensation, making them an instant crowd-pleaser and a staple for any festive occasion, especially during Christmas. These delightful treats are not just cookies; they are little spheres of joy, beautifully coated in powdered sugar, reminiscent of freshly fallen snow.
While classic snowball cookies, known by charming names like Mexican Wedding Cookies, Italian Snowballs, or Russian Tea Cakes, often feature nuts, this recipe takes a decadent turn. We infuse them with a double dose of chocolate, using both cocoa powder and mini chocolate chips. This makes them an absolute dream come true for any chocolate lover seeking a festive, easy-to-make, and utterly delicious holiday cookie.
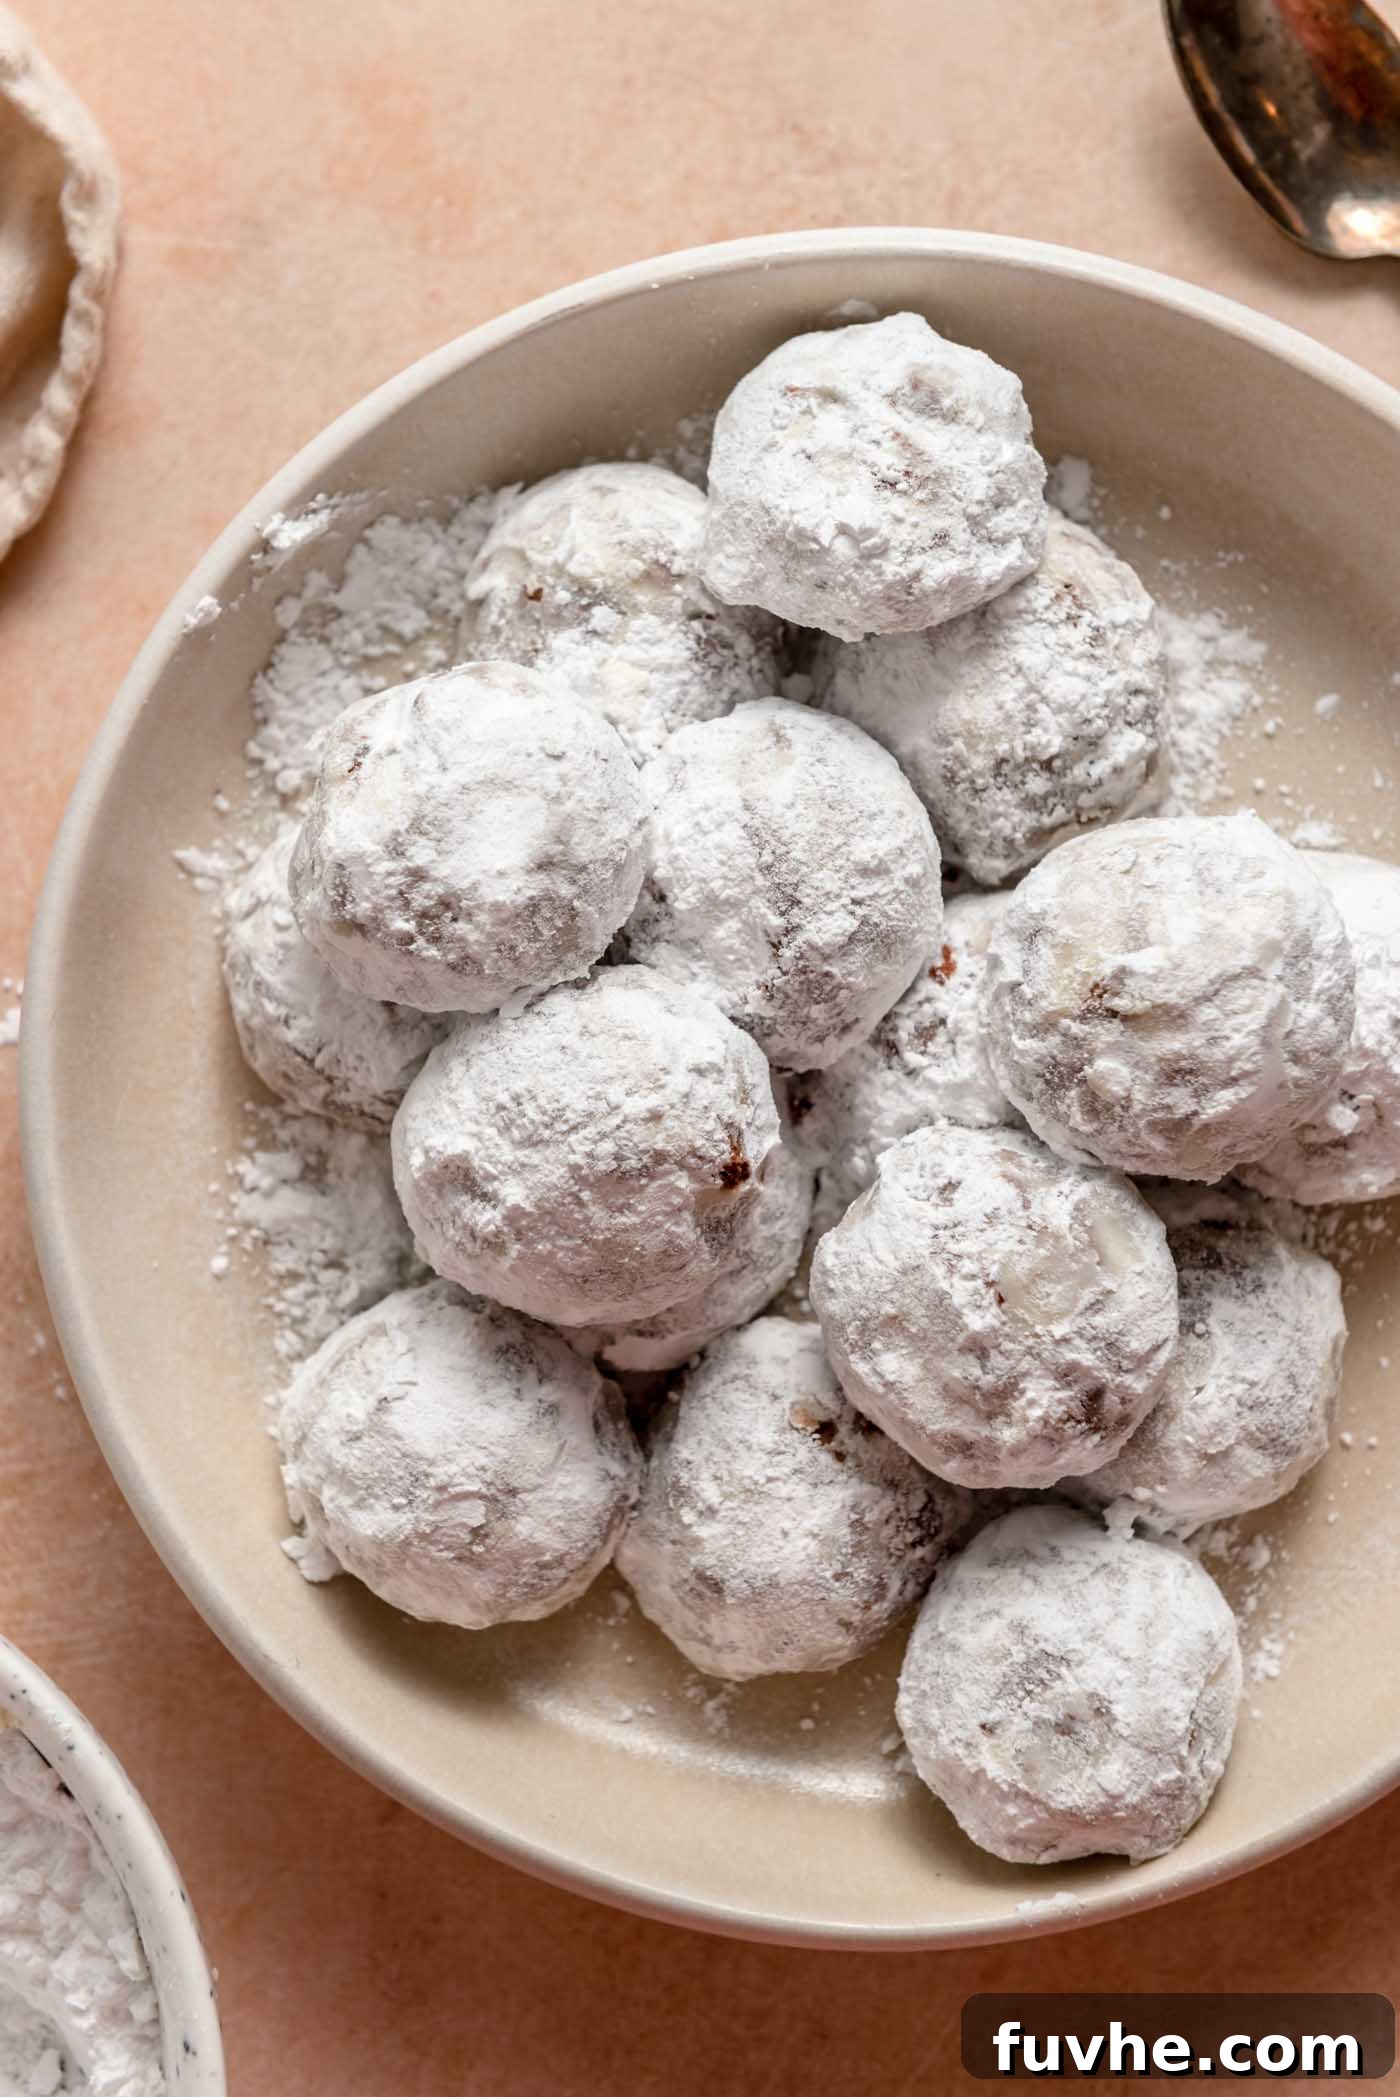
Our chocolate snowball cookies are a delightful variation on a beloved classic. Just like traditional snowball cookies and even buttery lemon shortbreads, they are crafted with a simple base of butter, flour, and confectioners’ sugar, ensuring that signature tender, crumbly, and melt-in-your-mouth texture that everyone adores. The addition of rich cocoa and sweet chocolate chips elevates them to a new level of indulgence.
These charming little cookies are more than just a dessert; they’re a celebration in miniature. Add them to your holiday baking list, prepare them for a cookie exchange, or simply enjoy them as a cozy treat. Be warned: they tend to disappear remarkably fast! You might even consider preparing a double batch to ensure there are enough for everyone, and perhaps a few extra for yourself.
Why You’ll Love This Recipe: Irresistible Highlights
These chocolate snowball cookies are designed for ease, versatility, and sheer deliciousness. Here’s why they’re set to become your new favorite holiday treat:
- Completely Vegan: Made without any dairy or eggs, these cookies are perfect for those following a vegan diet or managing dairy allergies. We achieve that classic buttery texture using plant-based butter.
- Nut-Free Delight: Crafted to be free of nuts, they are a safe and inclusive option for gatherings where nut allergies might be a concern.
- Gluten-Free Friendly: Easily adaptable to be gluten-free by simply swapping in a 1:1 gluten-free all-purpose flour blend, ensuring everyone can enjoy them.
- Festive & Photo-Ready: With their beautiful powdered sugar coating, these cookies have a charming, snow-dusted appearance that makes them a stunning addition to any holiday cookie platter or dessert table.
- Freezer-Friendly: They freeze exceptionally well, allowing you to bake ahead for future events or stash some away for an impromptu sweet craving.
- Make Ahead Option: Both the dough and the baked cookies can be prepared in advance, saving you precious time during busy holiday seasons.
- Simple Ingredients: You’ll only need a handful of basic pantry staples to bring these delectable cookies to life.
- Effortless to Make: With straightforward steps, this recipe is perfect for bakers of all skill levels, from beginners to seasoned pros.
- Perfect for Gifting: Their delightful appearance and delicious flavor make them an ideal homemade gift for friends, family, and neighbors during the holidays.
Essential Ingredients for Chocolate Snowball Cookies
Crafting the perfect chocolate snowball cookie starts with understanding your ingredients. Here’s a breakdown of what you’ll need and why each component is crucial:
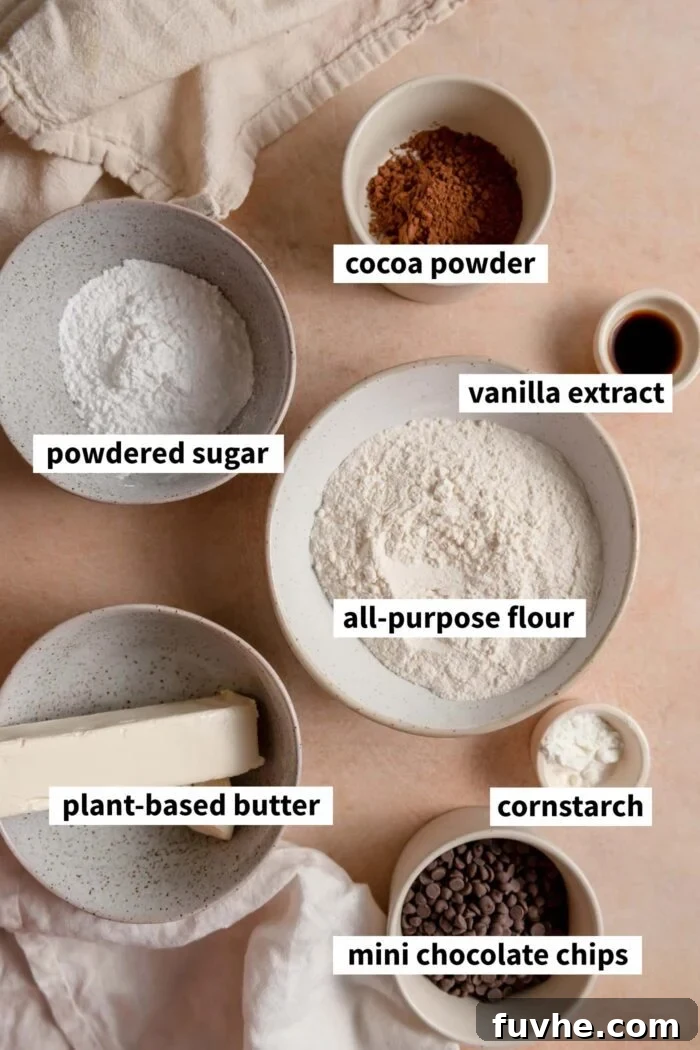
- Plant-Based Butter: The foundation of these buttery cookies. For optimal results, use high-quality plant-based butter sticks like Earth Balance, Miyoko’s, Country Crock, or Melt Organic, as they perform best in baking. Ensure your butter is softened to room temperature for proper creaming. If you’re not adhering to a vegan or dairy-free diet, regular unsalted butter can be used as a direct substitute.
- Powdered Sugar: Also known as icing sugar or confectioners’ sugar. This finely milled sugar is essential both for mixing into the dough, contributing to its tender texture, and for coating the baked cookies. Do NOT use granulated sugar, as it will alter the cookie’s texture significantly. You’ll need some for the dough and extra for rolling.
- All-Purpose Flour: The primary dry ingredient that provides structure. We recommend unbleached all-purpose flour for a light and tender crumb. For a gluten-free version, a 1:1 gluten-free all-purpose flour blend (such as Bob’s Red Mill) works beautifully without needing further adjustments to the recipe.
- Cocoa Powder: This is where the rich chocolate flavor comes from. Dark cocoa powder creates a deep, intense chocolate taste and a beautiful dark hue, but any good quality unsweetened cocoa powder or raw cacao powder will work wonders. Choose your favorite to customize the chocolate intensity.
- Pure Vanilla Extract: While technically optional, a good quality pure vanilla extract significantly enhances the overall flavor profile of the cookies, complementing the chocolate beautifully. If pure vanilla extract is unavailable, artificial vanilla will still contribute a pleasant aroma and taste.
- Mini Chocolate Chips: These are crucial for the “double chocolate” experience. Mini chocolate chips are ideal as they distribute evenly throughout the small cookie balls, ensuring a burst of chocolate in every bite. Regular or dark chocolate chips can be used if minis aren’t available, but you might want to chop larger chips slightly. These are highly recommended for the best flavor, though you could experiment with other additions like chopped nuts if desired.
- Cornstarch: A secret ingredient that contributes to the melt-in-your-mouth texture, making the cookies extra tender and crumbly.
- Salt: A pinch of salt balances the sweetness and enhances all the other flavors, particularly the rich chocolate.
Please refer to the detailed recipe card at the very end of this post for precise measurements and a complete list of ingredients and instructions.
Exciting Flavor Variations for Your Snowball Cookies
While the classic chocolate snowball is divine on its own, these cookies are incredibly versatile and lend themselves beautifully to various flavor enhancements. Here are some exciting variations to inspire your baking creativity:
- Chocolate Mint Snowballs: For a refreshing twist, add 1-2 teaspoons of pure peppermint extract to the dough along with the vanilla. The cool, crisp mint perfectly complements the rich chocolate, making these ideal for the winter holidays. Almond extract can also be substituted for a nutty, sweet aroma.
- Chocolate Orange Snowball Cookies: Brighten up your cookies with a citrusy zing! Incorporate 1 tablespoon of finely grated orange zest into the dough. The fragrant orange peel beautifully highlights the chocolate, creating a sophisticated and vibrant flavor combination.
- Chocolate Nut Snowballs: If you appreciate a bit of crunch, omit the chocolate chips and instead mix in ½ cup of your favorite finely chopped nuts. Pecans, walnuts, or almonds work wonderfully, adding a delightful texture and earthy flavor. These nutty variations are also fantastic with a hint of orange zest!
- Chocolate Coated Snowballs: For an extra layer of decadence, skip the powdered sugar coating entirely. Once the cookies have cooled completely, dip them in melted dark or milk chocolate. Place the chocolate-coated snowballs on parchment paper and chill in the fridge until the chocolate sets for a glossy, impressive finish.
- Chocolate Espresso Snowball Cookies: Elevate the chocolate flavor with a subtle coffee kick. Add 2 teaspoons of instant espresso powder to the dough along with the cocoa powder. The espresso deepens and intensifies the chocolate, resulting in an even richer, more complex taste without tasting overtly like coffee.
How to Make Perfect Chocolate Snowball Cookies
Follow these detailed steps to create your batch of irresistible chocolate snowball cookies:
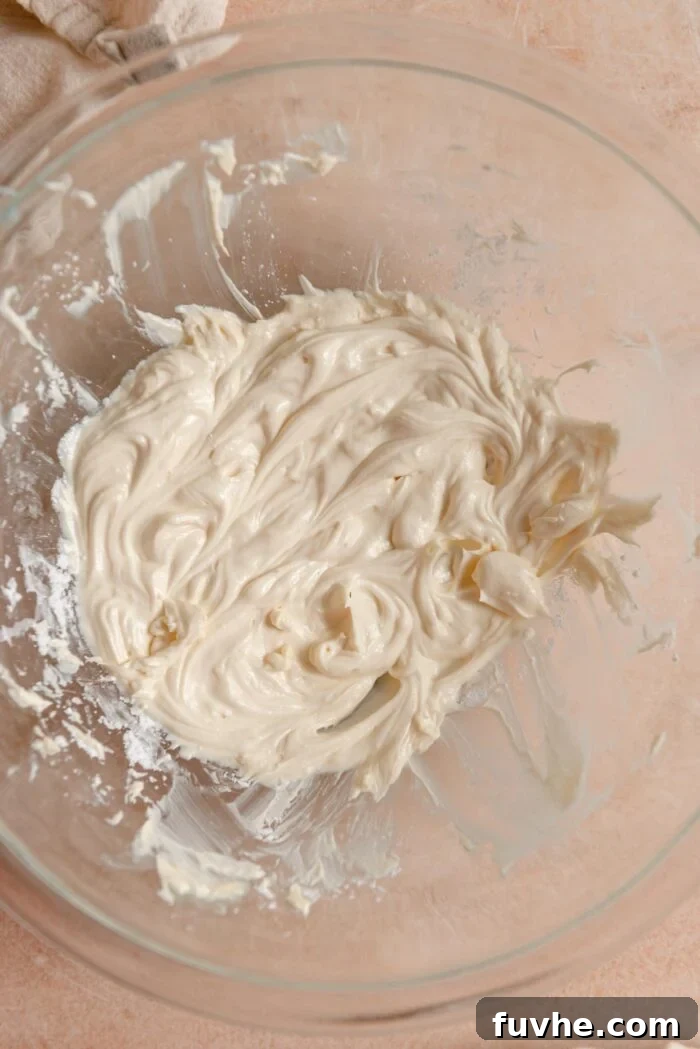
Step 1: Cream the Butter and Sugar. In a large mixing bowl, using an electric hand mixer or a stand mixer fitted with a paddle attachment, beat the softened plant-based butter until it is smooth, light, and creamy. This should take about 1-2 minutes. Next, add the ⅓ cup of powdered sugar and continue to beat the mixture for an additional 2-3 minutes until it becomes notably light, fluffy, and well-combined. This creaming process incorporates air, contributing to the cookies’ tender texture.
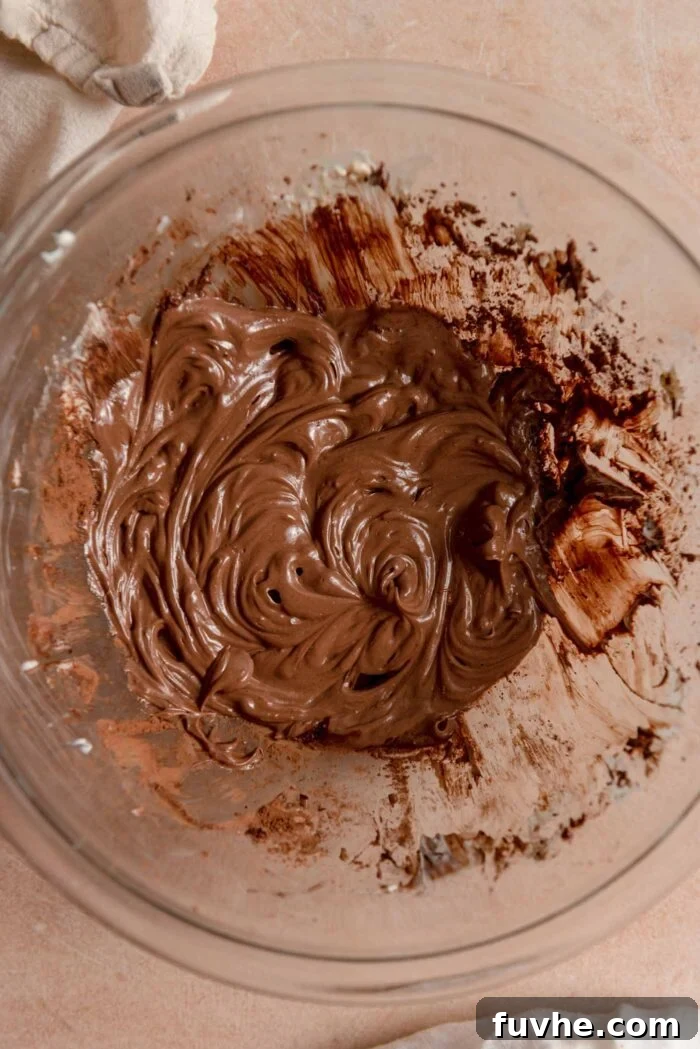
Step 2: Incorporate Vanilla and Cocoa. Add the pure vanilla extract and cocoa powder to the creamed butter and sugar mixture. Continue beating on low speed until all the cocoa powder is fully incorporated and the mixture is uniformly chocolatey and smooth, with no streaks of white. Scrape down the sides of the bowl as needed to ensure everything is well-mixed.
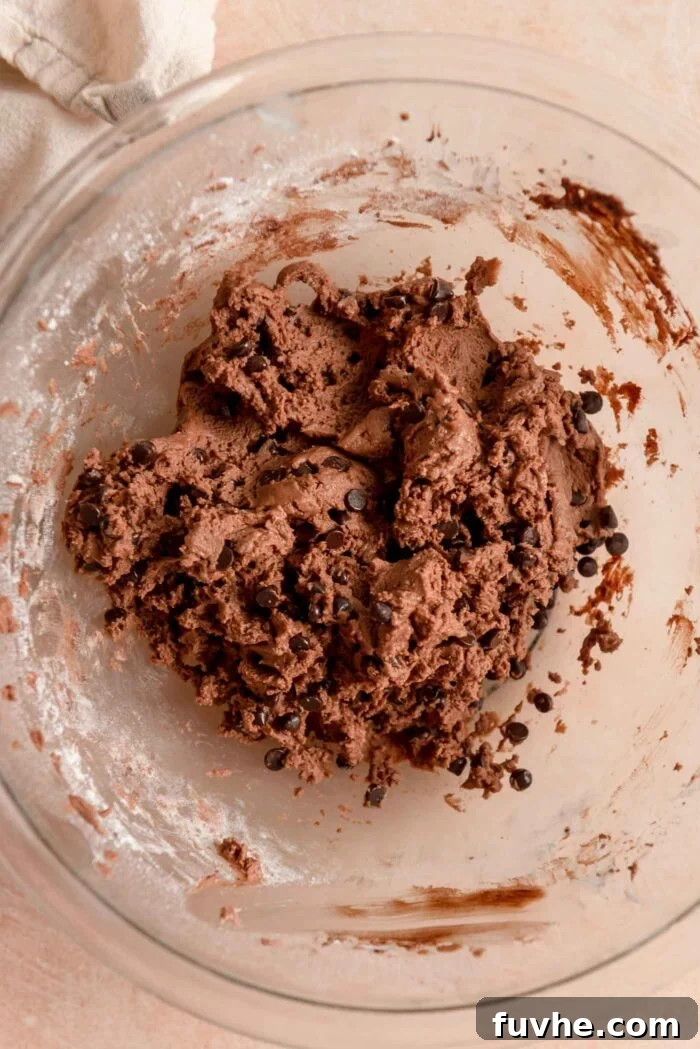
Step 3: Add Dry Ingredients and Chill. Gradually add the all-purpose flour, cornstarch, and salt to the bowl. Begin mixing on low speed to avoid a cloud of flour, then increase the speed to medium until a cohesive, uniform dough forms. The dough should be soft but manageable. Finally, gently fold in the mini chocolate chips until they are evenly distributed throughout the dough. Once the dough is prepared, cover the bowl tightly with plastic wrap or a clean dish towel and chill it in the refrigerator for at least 30 minutes. This chilling step is vital as it helps the butter solidify, preventing the cookies from spreading too much during baking and ensuring they hold their iconic snowball shape.
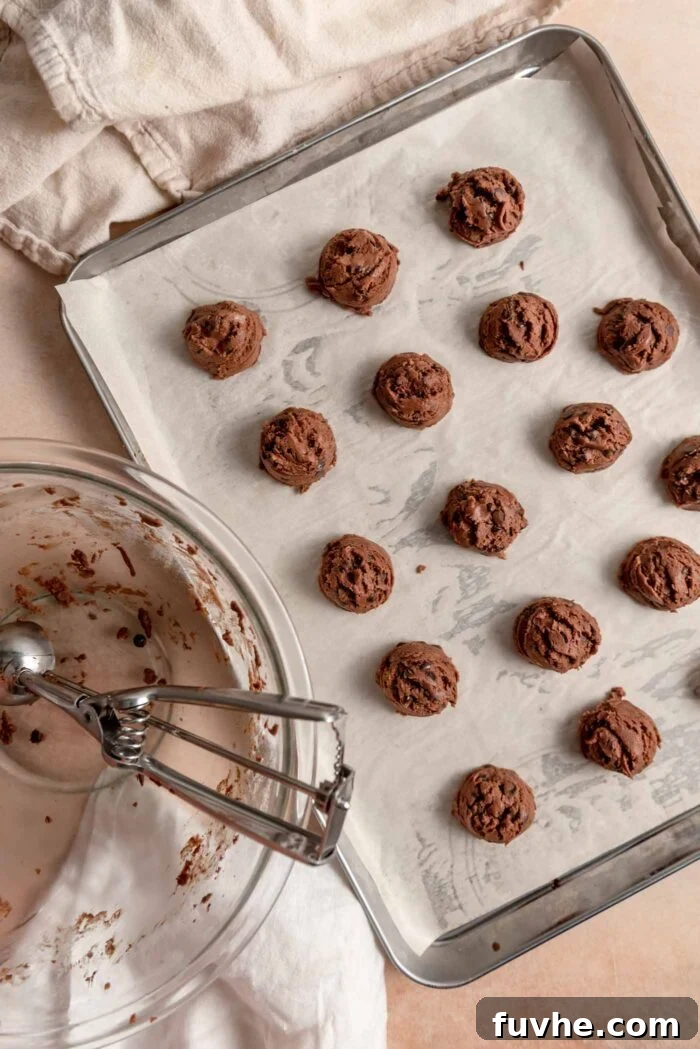
Step 4: Prepare for Baking. When you’re ready to bake, preheat your oven to 350°F (177°C). Line a large baking sheet with parchment paper to prevent sticking and ensure even baking. Remove the chilled dough from the refrigerator. Using a 1-tablespoon cookie scoop or a measuring tablespoon, scoop out portions of dough. Gently roll each portion into a smooth, round ball. Place these dough balls evenly spaced out on your prepared baking sheet, leaving about 1-2 inches between each cookie to allow for slight spreading.
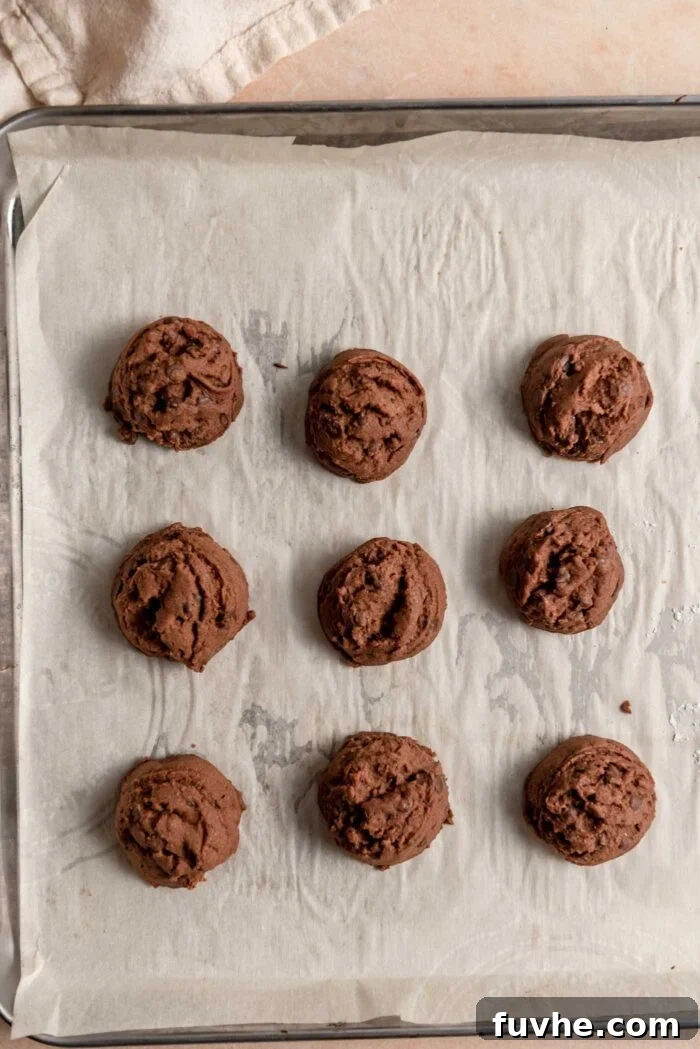
Step 5: Bake the Cookies. Transfer the baking sheet to the preheated oven and bake the cookies for 13-15 minutes. Keep a close eye on them; they are ready when the bottoms are lightly browned and the cookies appear set, though they will still be a bit soft to the touch. It’s better to slightly underbake than overbake these, as overbaking can lead to a dry, crumbly texture. Once baked, remove the baking sheet from the oven and allow the cookies to cool on the pan for 10 minutes. This crucial cooling period on the hot pan allows them to firm up without breaking.
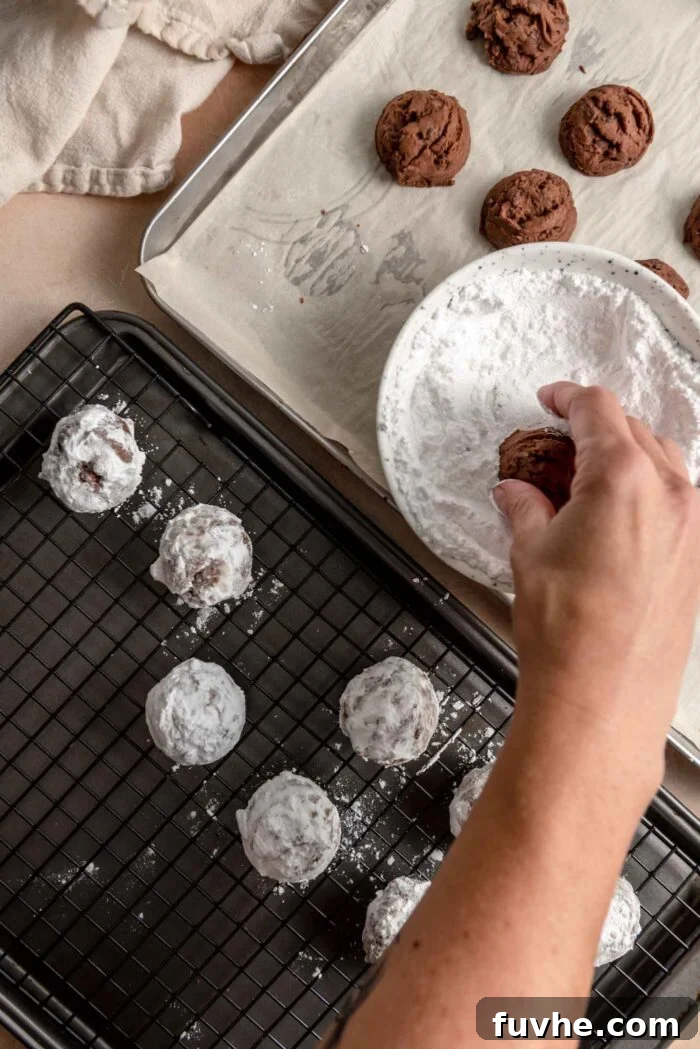
Step 6: Coat with Powdered Sugar. While the cookies are still warm but cool enough to handle, gently roll each cookie in a bowl filled with additional powdered sugar, ensuring it’s completely coated on all sides. You can place a cooling rack over a baking pan to catch any excess sugar, making cleanup easier. After the initial coating, transfer the sugar-dusted cookies to a wire cooling rack to finish cooling completely. As the cookies continue to cool, some of the powdered sugar will melt into their warm surfaces, creating a delicate, slightly translucent layer.
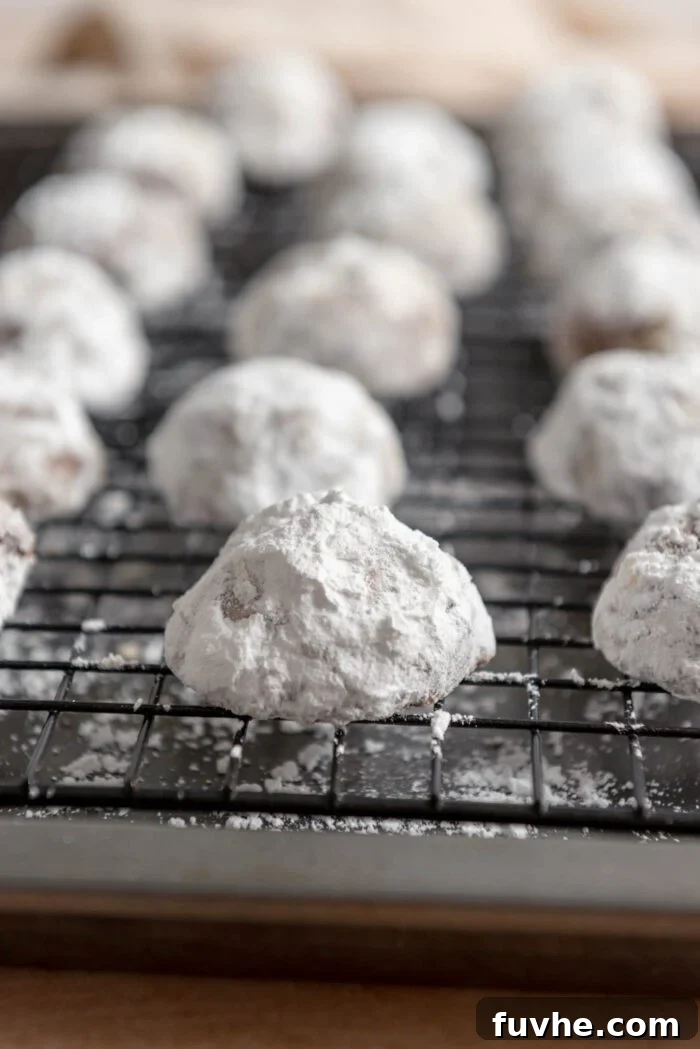
To achieve that signature “snowball” look with a thick, opaque white coating, you’ll need to roll the cookies in powdered sugar a second time. Wait until the cookies have fully cooled to room temperature. Then, roll them again in the powdered sugar, gently pressing to ensure a generous, even coating. For an extra-fluffy appearance, you can even repeat this step a third time if desired. This multi-coat method ensures a beautiful, festive finish.
Your delightful chocolate snowball cookies are now ready to be savored! Serve them immediately to enjoy their fresh-baked goodness, or follow our storage instructions below to keep them fresh for later enjoyment.
Frequently Asked Questions About Chocolate Snowball Cookies
Absolutely! These chocolate snowball cookies freeze exceptionally well, making them perfect for meal prep or enjoying later. To freeze them, first ensure they have cooled completely to room temperature. You can then arrange them in a single layer on a baking sheet and flash-freeze them for about 1-2 hours until firm. Once frozen, transfer them to an airtight, freezer-safe container or a heavy-duty freezer bag. For best results and to prevent sticking, you can layer the cookies with pieces of parchment or wax paper in between. They will keep beautifully in the freezer for up to 4 months. When ready to enjoy, simply thaw them at room temperature for an hour or two.
Yes, this recipe is incredibly adaptable for a gluten-free diet! To make these delicious cookies gluten-free, simply substitute the all-purpose flour with a high-quality 1:1 gluten-free baking flour blend. Brands like Bob’s Red Mill 1-to-1 Baking Flour are excellent choices as they are formulated to be used cup-for-cup in place of regular flour in most recipes. Ensure you are using a blend that contains xanthan gum (or add a small amount if your blend doesn’t) for optimal texture and binding. Avoid using single-grain gluten-free flours like almond flour or coconut flour without significant recipe adjustments.
Absolutely! This recipe is very forgiving and can be easily doubled or even tripled if you’re baking for a large crowd or preparing for a big holiday event. When doubling, simply multiply all the ingredient quantities by two. You might need to work in batches if your mixing bowl or oven capacity is limited, but the process remains the same. Make sure you have enough baking sheets and space for chilling the larger amount of dough.
Flat cookies are a common baking woe, but often easily fixed! Here are a few reasons your snowball cookies might be spreading too much:
- Incorrect Ingredient Measurement: Baking is a science, and precise measurements are key. Too much butter or not enough flour can lead to excessive spreading. We highly recommend using a digital kitchen scale for accuracy, especially for flour and butter, as volume measurements can vary.
- Warm Dough: The most common culprit! If your dough is too warm, the butter will melt too quickly in the oven before the flour has a chance to set the cookie’s structure. It’s crucial to thoroughly chill the dough for at least 30 minutes, or even longer, as specified in the recipe. The cold butter solidifies and helps the cookies hold their shape during baking.
- Over-creaming Butter and Sugar: While creaming is important, over-creaming can incorporate too much air, which can cause cookies to puff up and then collapse.
- Softened Butter is Too Warm: “Softened” butter means it should be pliable but still cool, not melted or greasy. If your butter is too warm to start, the dough will also be too warm.
By paying attention to these details, you’ll be able to achieve perfectly round, beautifully shaped chocolate snowball cookies every time!
Expert Tips for Perfect Chocolate Snowball Cookies
Achieving bakery-worthy chocolate snowball cookies is simple with these expert tips:
- Don’t Skip the Chill Time: This is arguably the most critical step! Chilling the cookie dough for at least 30 minutes (or up to 24 hours) allows the plant-based butter to solidify. This prevents the cookies from spreading excessively in the oven, ensuring they maintain their delightful round shape and tender texture. Cold dough bakes better!
- Double (or Triple) Coat for the “Snowball” Effect: For that iconic, solid, and beautifully white powdered sugar coating, roll the cookies in sugar initially when they are still warm (after cooling on the pan for 10 minutes). Let them cool completely on a wire rack, then roll them again in powdered sugar. If you desire an even thicker, more dramatic “snow” effect, a third roll after they are fully cool works wonders.
- Embrace a Digital Kitchen Scale: For unparalleled accuracy in baking, especially with flour and butter, a digital kitchen scale is your best friend. Measuring by weight (grams) rather than volume (cups) ensures you use the precise amounts needed for consistent results, guaranteeing success with this recipe every single time. It also simplifies the process—just tare your bowl and add ingredients directly!
- Use Room Temperature Butter: Start with softened, room temperature butter. It should be pliable enough to leave a slight indentation when pressed, but not melted or greasy. This ensures it creams smoothly with the powdered sugar, creating a light, airy base for your dough.
- Avoid Overbaking: Snowball cookies are meant to be tender and delicate. Overbaking them will result in dry, crumbly cookies. Keep an eye on them; they are done when the bottoms are just lightly browned and the cookies look set, even if they still feel a bit soft. They will continue to firm up as they cool on the baking sheet and cooling rack.
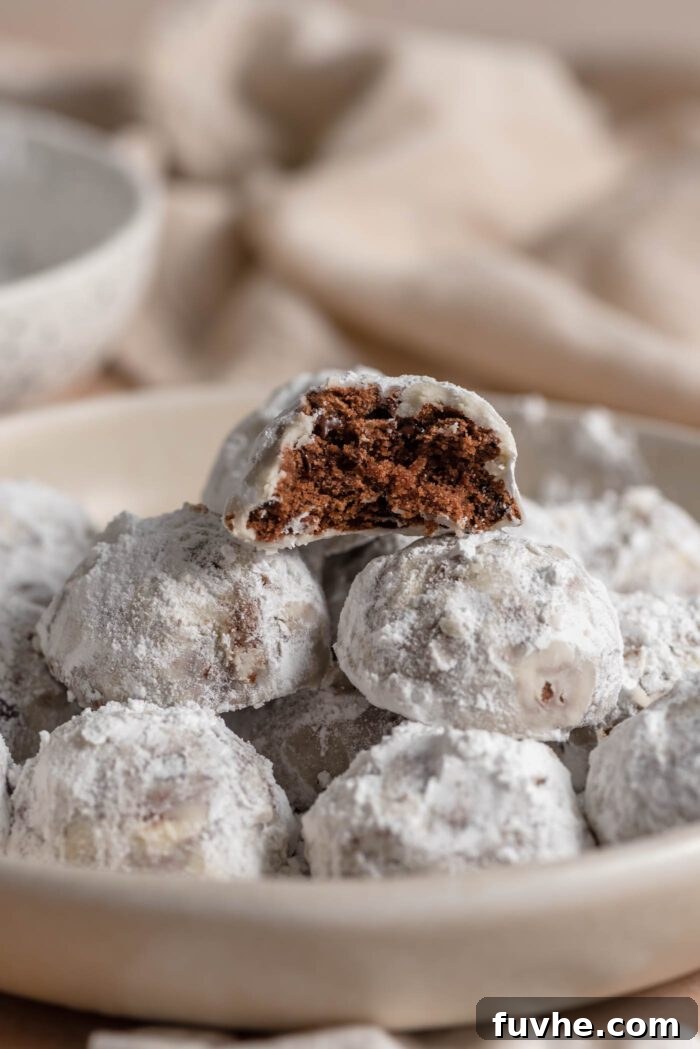
Storing Your Delicious Chocolate Snowball Cookies
To ensure your chocolate snowball cookies remain fresh and delicious for as long as possible, proper storage is key:
- Always let the cookies cool completely to room temperature before storing them. This prevents condensation which can make them soggy.
- Room Temperature: Store the cooled cookies in a sealed, airtight container at room temperature for up to 5 days. Keep them away from direct sunlight or heat sources.
- Refrigerator: For slightly extended freshness, you can store these cookies in an airtight container in the refrigerator for up to 1 week or even a bit longer. Just be aware that chilled cookies might be slightly firmer.
- Freezing: For long-term storage, flash-freeze the cooled cookies on a baking tray for about an hour until solid. Then, transfer them to a freezer bag or a freezer-safe airtight container. To prevent them from sticking together, you can layer them with pieces of parchment or wax paper between layers. They can be stored in the freezer for up to 3-4 months. When you’re ready to enjoy, simply take them out and let them thaw at room temperature for a few minutes. They are surprisingly delicious straight from the freezer too!
More Festive & Delicious Cookie Recipes to Explore
If you loved these chocolate snowball cookies, you’ll definitely want to try some of our other delightful holiday and everyday cookie recipes:
- Lemon Shortbread Cookies: A must-have for Christmas, Easter, or any time you crave a bright, zesty, and buttery treat!
- Vegan Thumbprint Cookies: Enjoy these tender, gluten-free thumbprints made with pecans and coconut, filled with your favorite jam.
- Vegan Matcha Cookies: Unique almond flour cookies infused with the earthy, vibrant flavor of matcha powder.
- No-Bake Vegan Nanaimo Bars: These Canadian classics are incredibly delicious and surprisingly fun to make without any baking required.
- Vegan Rum Balls: A no-cook, alcohol-free twist on the classic rum balls – so easy and full of flavor.
- Coconut Almond Macaroons: Simple, gluten-free, and incredibly chewy and satisfying.
Pin this recipe now to easily find it later!
Pin It
Decadent Chocolate Snowball Cookie Recipe
Rate Recipe
Print Recipe
Ingredients
- ½ cup + 2 tbsp vegan butter, softened (140 g)
- ⅓ cup powdered sugar, 40 g + ⅓ cup for rolling (40 g)
- 1 tsp pure vanilla extract
- 2 tbsp cocoa powder, 12.5 g
- 1 cup + 2 tbsp all-purpose flour, 135 g
- 1 tsp cornstarch
- ¼ tsp salt
- ½ cup dairy-free mini chocolate chips, 80 g
Instructions
-
Cream Butter and Sugar: In a large bowl, beat the vegan butter using a hand mixer or stand mixer fit with a paddle attachment until smooth and creamy. Add ⅓ cup of powdered sugar. Beat for 2-3 minutes until evenly combined, light and fluffy.
-
Add Vanilla and Cocoa: Add the vanilla and cocoa powder to the bowl and continue beating until fully mixed in and no streaks remain.
-
Add Remaining Ingredients: Add the flour, cornstarch, and salt to the bowl. Start mixing on low-speed and gradually increase the speed to high until you have a uniform dough. Add the mini chocolate chips and beat briefly to mix them in, or fold them in with a wooden spoon.
-
Chill Dough: Cover the bowl with plastic wrap or a kitchen towel and place in the refrigerator for at least 30 minutes. For best results, or if preparing in advance, you can chill the dough for up to 24 hours.
-
Prepare for Baking: Preheat the oven to 350˚F (177˚C) and line a baking sheet with parchment paper.
-
Create Snowballs: After chilling, remove the bowl from the refrigerator and scoop the dough into approximately 1 tbsp mounds using a tablespoon or small cookie scoop. Roll each mound into a smooth ball and place them evenly spaced out on the prepared baking sheet.
-
Bake Cookies: Bake for 13-15 minutes, until the bottoms are just lightly browned and the cookies appear set. Avoid overbaking.
-
Cool then Coat in Icing Sugar: Let cookies cool on the baking sheet for 10 minutes. After 10 minutes, gently roll the still-warm cookies in the additional powdered sugar until fully coated. Place on a wire drying rack to finish cooling completely. Once cooled, roll them again in powdered sugar for a more opaque and solid coating, repeating one more time if needed. You may need a bit more than the initial ⅓ cup powdered sugar for rolling.
Video
For a visual guide, watch the recipe video here: Chocolate Snowball Cookies Video
Notes
For the most accurate results and guaranteed recipe success, it is highly recommended to use a digital kitchen scale to weigh the ingredients according to the listed gram amounts.
Nutrition Information
Serving: 1 snowball
Calories: 112 kcal
Carbohydrates: 15 g
Protein: 2 g
Fat: 5 g
Sodium: 99 mg
Fiber: 1 g
Sugar: 8 g
Enjoyed this recipe? Please consider rating and leaving a comment below!