
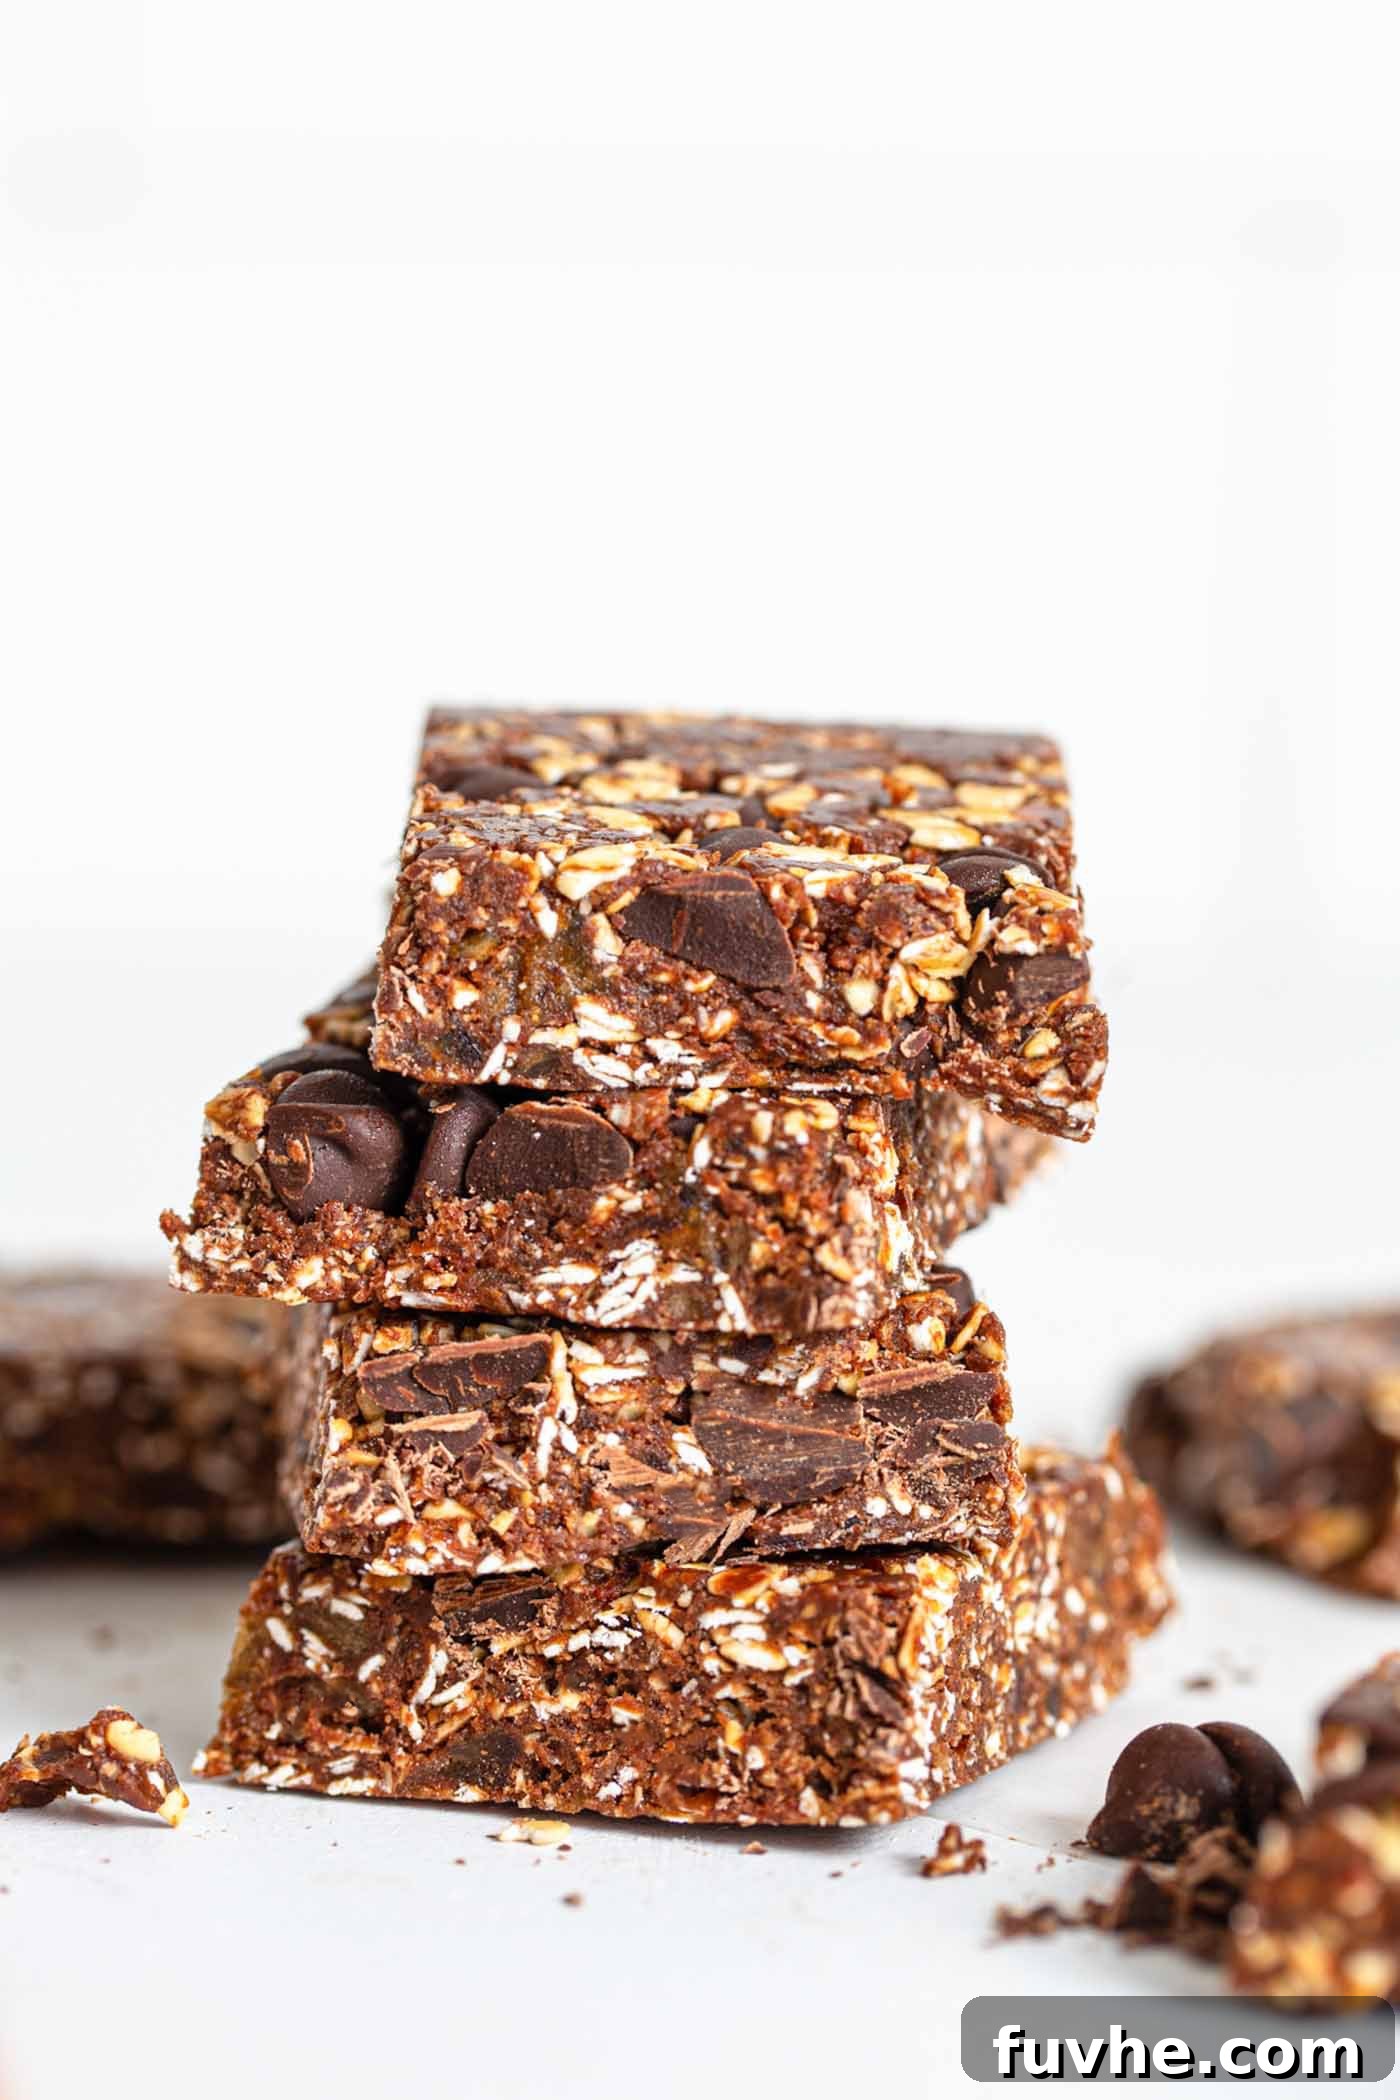
Indulge your cravings guilt-free with these incredible Chocolate Peanut Butter Granola Bars. Crafted with just 6 wholesome ingredients, these no-bake wonders effortlessly blend the rich decadence of a dessert with the sustained energy of a healthy snack. Perfect for a quick pick-me-up, a satisfying treat, or a portable breakfast, they offer a delightful fusion of flavors and textures any time of day.
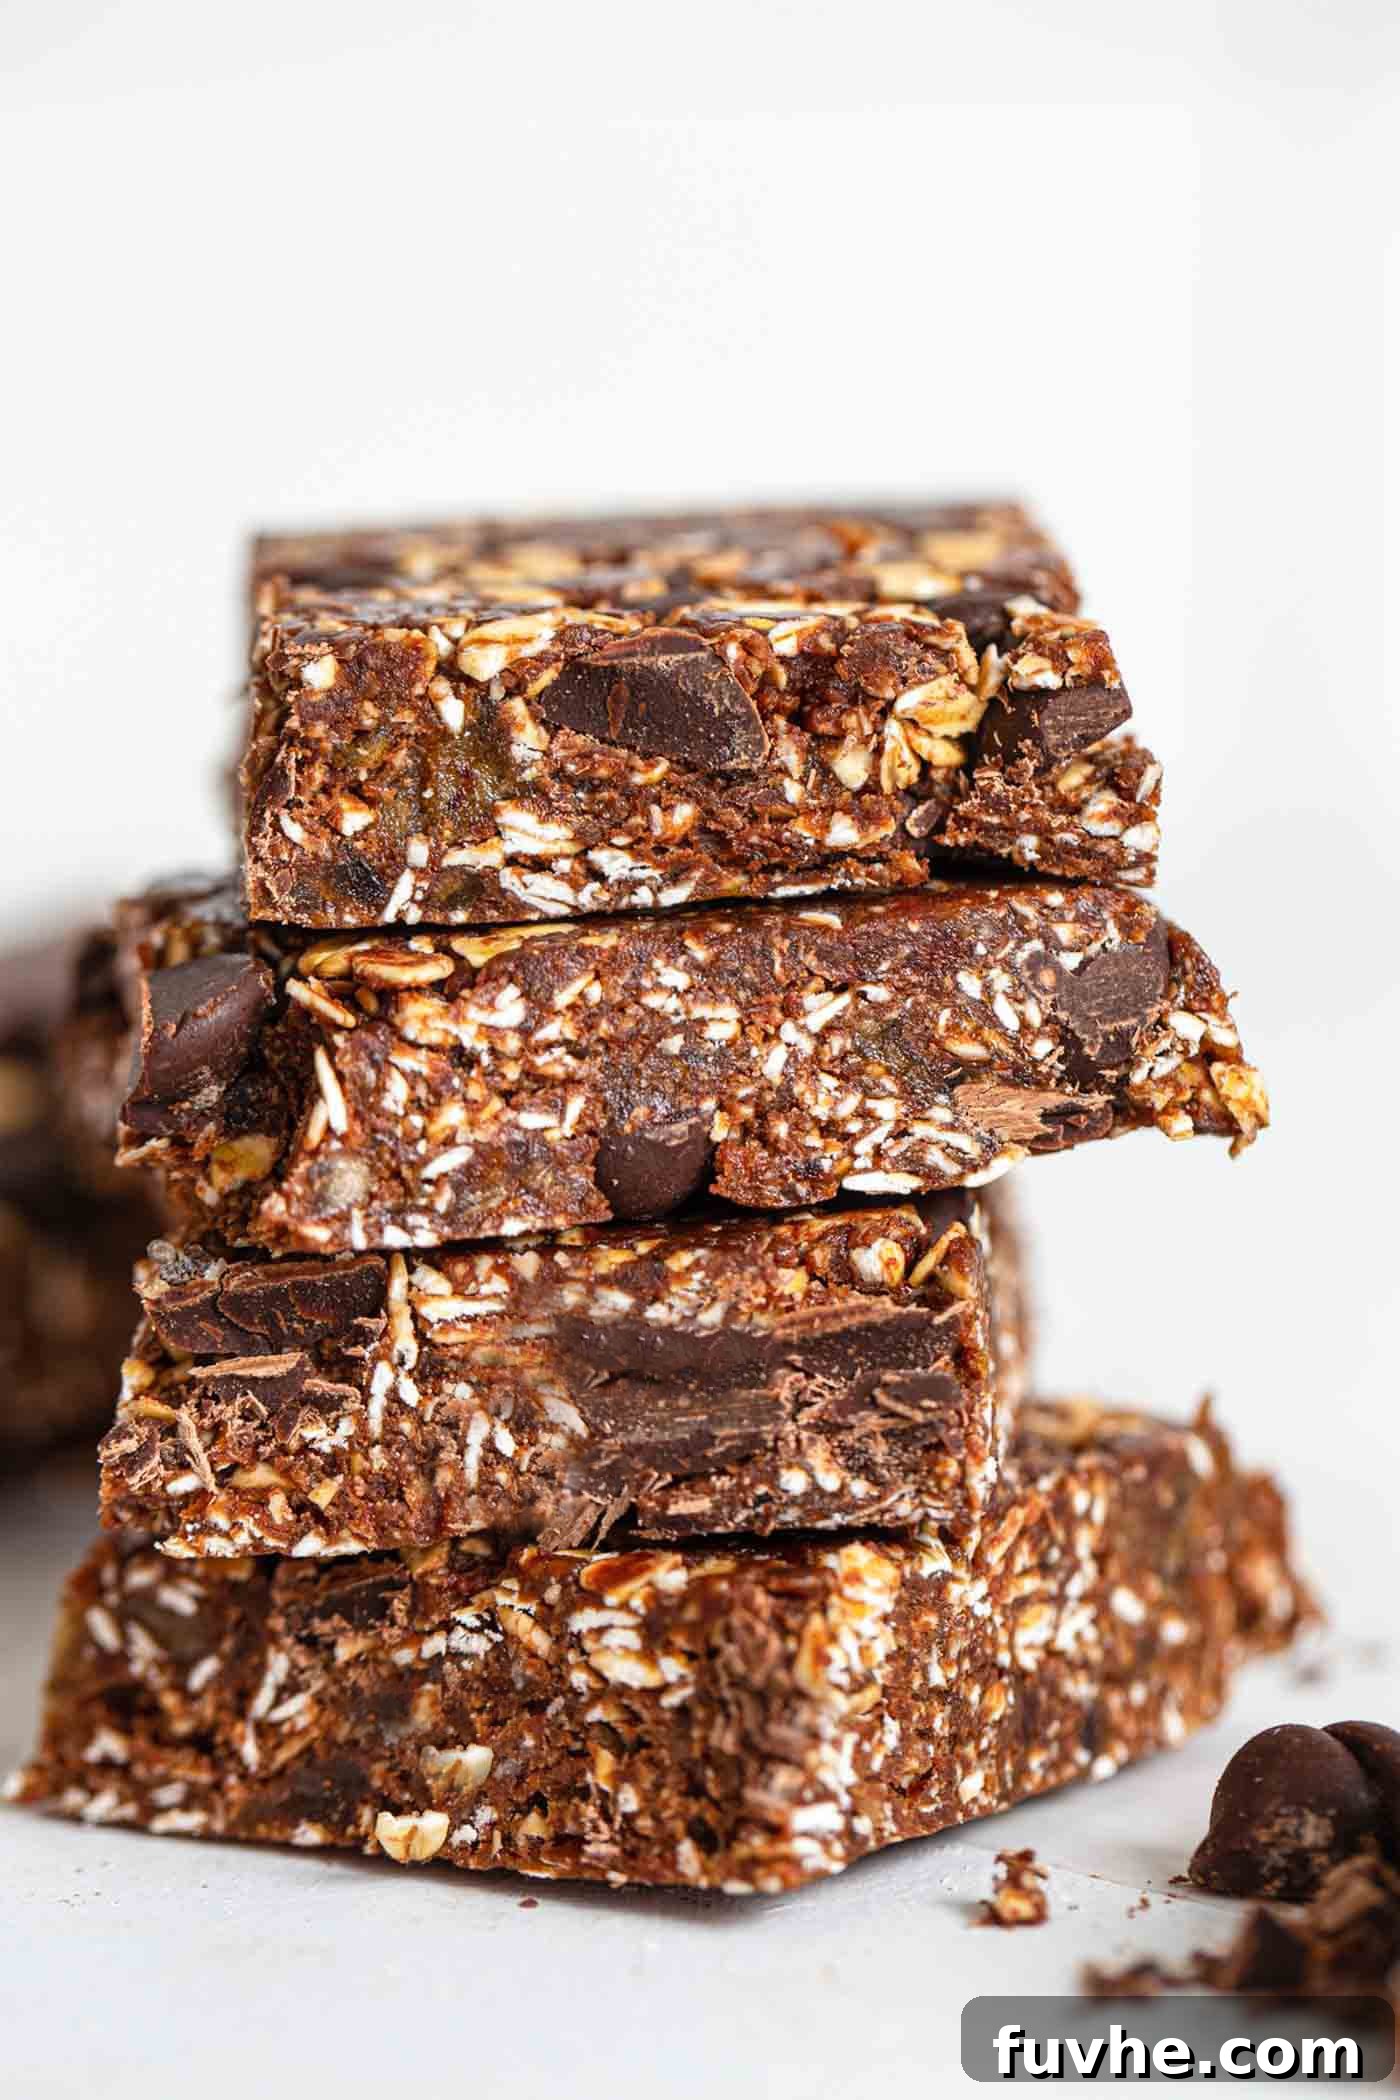
About This Irresistible No-Bake Recipe
If you’re a devoted fan of the classic chocolate and peanut butter combination, get ready to fall in love with these incredibly easy no-bake granola bars. Designed for simplicity and maximum flavor, they come together with minimal effort and are bursting with delicious chocolatey goodness. These bars aren’t just tasty; they’re also packed with attributes that make them a go-to for healthy snacking:
- Dietary Friendly: Naturally vegan and gluten-free (just ensure you use GF-certified oats). They cater to a wide range of dietary preferences without compromising on taste.
- Effortless & Quick: Absolutely no baking required, making them perfect for hot days or when you’re short on time. With only 6 simple ingredients, prep is a breeze.
- Homemade Perfection: An ideal choice for a wholesome homemade dessert or a nutritious snack that you can feel good about.
- Travel-Ready: Their firm, portable nature makes them excellent for taking on hikes, to work, school, or any adventure.
- Customizable for Allergies: Easily adaptable to be nut-free, making them suitable for lunchboxes or those with peanut allergies.
For more delightful chocolate peanut butter recipes, be sure to explore our Peanut Butter Banana Chocolate Chip Oatmeal Bars, Easy No-Bake Chocolate Peanut Butter Protein Balls, and No-Bake Peanut Butter Bars.
Why You’ll Adore These No-Bake Chocolate Peanut Butter Granola Bars
These bars are more than just a recipe; they’re a convenient and delicious solution for satisfying your sweet tooth while nourishing your body. Here’s why they’ll quickly become a staple in your kitchen:
- Effortless Preparation: Forget the oven! These no-bake bars come together in minutes using just a food processor. This makes them ideal for busy weekdays, preparing snacks for the week ahead, or when you simply don’t want to heat up your kitchen. The minimal cleanup is an added bonus!
- Dietary Inclusivity: Catering to various dietary needs, these bars are inherently vegan and can be easily made gluten-free by opting for certified gluten-free oats. This makes them a fantastic option for sharing with friends and family who follow specific diets, ensuring everyone can enjoy a delicious treat.
- Wholesome Ingredients: Made with natural, real food ingredients like dates, oats, cocoa, and natural peanut butter, these bars are a far cry from store-bought alternatives laden with artificial additives. You’ll know exactly what’s going into your body, making them a smart choice for a healthier lifestyle. Dates provide natural sweetness and fiber, oats offer sustained energy, and peanut butter contributes healthy fats and protein.
- The Ultimate Flavor Combination: There’s a reason why chocolate and peanut butter is such a beloved pairing! The rich, slightly bitter notes of cocoa perfectly complement the creamy, salty sweetness of peanut butter, creating a harmonious and deeply satisfying flavor profile that’s hard to resist.
- Perfectly Portable: Whether you’re heading to the gym, packing a lunch, or need a quick snack during a busy day, these bars are incredibly convenient. They hold their shape well and are easy to transport, providing a burst of energy and flavor wherever you go.
- Kid-Friendly & Customizable: Kids absolutely love the taste of these bars, making them a healthier alternative to sugary store-bought snacks. Their simple ingredient list also means they’re easy to customize. You can adjust the nut butter, add different mix-ins, or even make them sugar-free, tailoring them to individual preferences and needs.
Ingredient Deep Dive: What You’ll Need
Making these delicious granola bars requires just six simple ingredients, most of which you likely already have in your pantry. Here’s a closer look at each component and how you can make substitutions if needed:
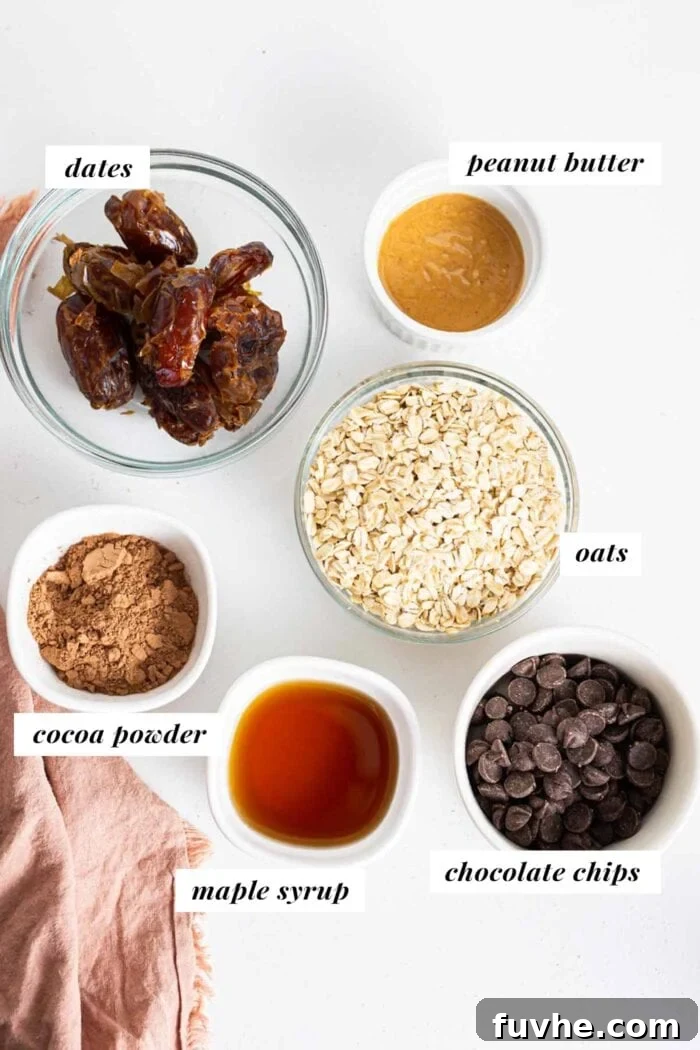
The precise measurements for each ingredient can be found in the comprehensive recipe section at the end of this article.
- Dates: These sticky fruits are the natural backbone of our bars, acting as both a sweetener and a binder. Medjool, Sayer, or Deglet Noor dates all work wonderfully, provided they are soft and moist. If your dates feel a bit dry or firm, a quick soak in hot water for about 15 minutes, followed by thorough draining, will rehydrate them perfectly. Dates are also a great source of fiber and potassium, adding a healthy boost.
- Cocoa Powder: This is where the rich chocolate flavor comes from! You can use regular unsweetened cocoa powder for a classic taste, or opt for dark cocoa powder for a more intense, deeper chocolate experience. For an extra nutritional punch, consider using raw cacao powder, which retains more antioxidants due and minerals compared to processed cocoa.
- Maple Syrup: Serving as another natural sweetener and a crucial liquid binder, pure maple syrup contributes a subtle, warm sweetness. If you don’t have maple syrup on hand, agave syrup is an excellent 1:1 substitute. For those not adhering to a strict vegan diet, honey can also be used, though it will alter the flavor slightly.
- Chocolate Chips: These are essential for pockets of melted chocolatey goodness throughout your bars. To keep the recipe strictly vegan, ensure you choose your favorite dairy-free chocolate chips. However, if dietary restrictions aren’t a concern, any type of chocolate chip (milk, semi-sweet, dark) will work. For a less sweet or more rustic bar, you can also use cacao nibs or finely chopped dark chocolate.
- Oats: Oats form the hearty base of these granola bars, providing texture and sustained energy. Rolled oats (also known as old-fashioned oats) are highly recommended for their chewiness and structural integrity. Quick oats can also be used, but may result in a slightly less chewy bar. If you require a gluten-free option, be sure to select oats that are certified gluten-free to avoid cross-contamination.
- Natural Peanut Butter: This creamy ingredient delivers rich flavor, healthy fats, and protein, making the bars incredibly satisfying. It’s important to use natural peanut butter, which typically contains only peanuts and salt, without added sugars or hydrogenated oils. If you have a peanut allergy or simply prefer another flavor, almond butter, cashew butter, or even sunflower seed butter (for a nut-free option) are fantastic substitutions. Tahini can also be used for a unique, savory-sweet profile.
- Sea Salt: A small pinch of sea salt is a game-changer! It doesn’t just add a touch of salinity; it expertly balances the sweetness of the dates and maple syrup, enhancing all the other flavors in the bar and preventing them from tasting overly sweet.
Tailoring Your Bars: Recipe Adjustments
One of the best aspects of this recipe is its versatility. You can easily adapt it to suit various dietary needs or personal preferences:
- Nut-Free Option: To make these bars safe for school lunchboxes or for those with nut allergies, simply substitute the peanut butter with an equal amount of sunflower seed butter (often called “Sunbutter”) or tahini. Both alternatives provide a similar creamy texture and binding properties.
- Gluten-Free Option: While oats are naturally gluten-free, they are often processed in facilities that also handle wheat, leading to cross-contamination. To ensure your bars are truly gluten-free, always use oats that are specifically labeled and certified as gluten-free.
- Sugar-Free Option: If you’re looking to reduce or eliminate added sugars, you can make a few simple swaps. Replace the maple syrup with a monk fruit sweetener or another sugar-free liquid sweetener of your choice. Additionally, use sugar-free chocolate chips, such as those from brands like Lily’s. Be aware that texture might vary slightly with sugar-free alternatives.
Step-by-Step Guide to Perfection
Making these chocolate peanut butter granola bars is incredibly straightforward. Just follow these simple steps for a perfect batch every time:
- Begin by placing the pitted dates into your food processor. Process for about 30 seconds until they start to break down and form a sticky ball. This initial step helps to ensure the dates are well-incorporated and provide optimal binding.
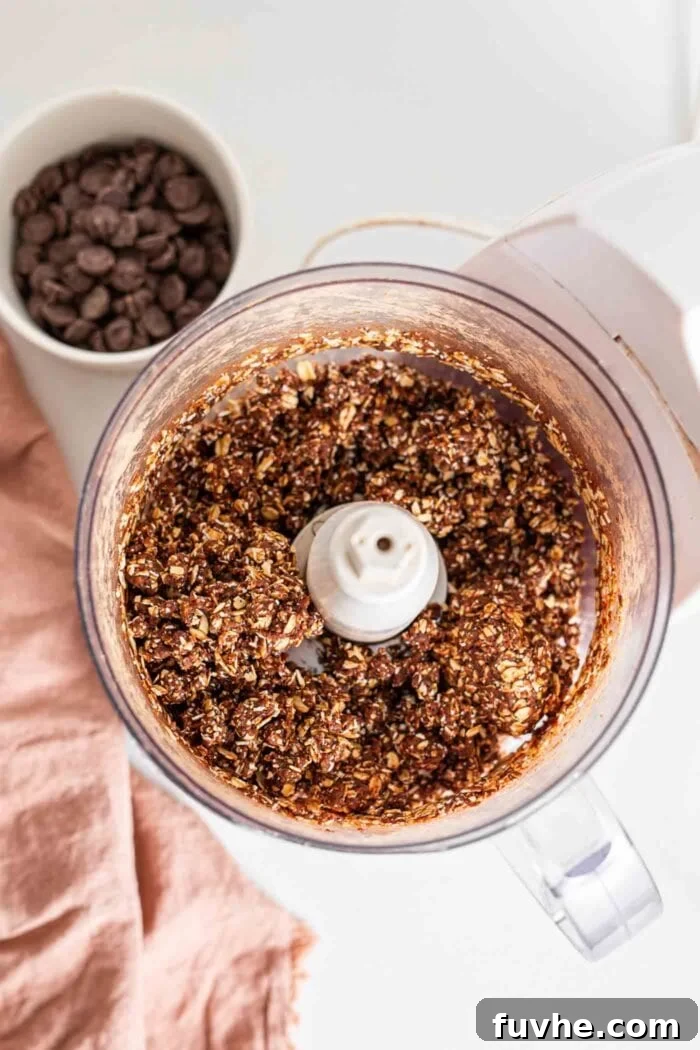
- Next, add all the remaining ingredients, except for the chocolate chips, to the food processor. This includes the oats, cocoa powder, maple syrup, natural peanut butter, and sea salt. Continue to process until a thick, cohesive, and sticky dough forms. The dough should easily hold together when pressed between your fingers.
- Note on Consistency: The dough should be sticky but manageable. If it appears too dry or crumbly (which can happen if your dates were on the drier side), add 1-2 tablespoons of warm water, one tablespoon at a time, and process again until the desired consistency is reached. Avoid adding too much water, as this can make the bars too soft.
- Once your dough is perfectly blended, add the dairy-free chocolate chips to the food processor. Pulse a few times, just enough to evenly distribute the chips throughout the dough without fully breaking them down. We want distinct chocolate chunks!
- Prepare a standard-sized loaf pan by lining it with parchment paper. Make sure to leave an overhang on two opposite sides; this will create “handles” that make it incredibly easy to lift the finished bars out of the pan.
- Transfer the dough into the prepared loaf pan. Using your fingers or the back of a spoon, press the dough very firmly and evenly into the pan. Compacting the dough well is key to ensuring your bars hold together beautifully once sliced.
- Pop the entire loaf pan into the freezer for at least 1 hour. This chilling period is crucial for allowing the bars to firm up properly, making them much easier to slice and giving them their ideal chewy texture.
- Once the bars are firm, use the parchment paper overhangs to lift the entire block of granola bar dough out of the pan. Place it on a cutting board and slice it into 8 large squares or 16 smaller bars, depending on your preferred serving size.
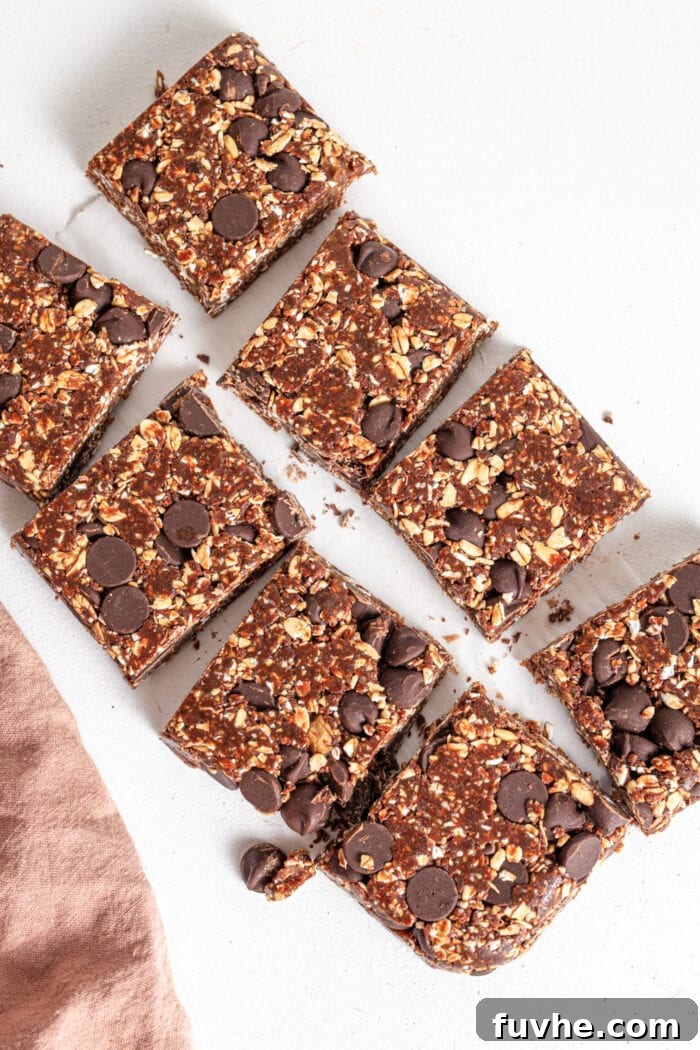
Expert Tips for Granola Bar Success
Achieving perfectly chewy and well-structured chocolate peanut butter granola bars is simple with a few insider tips:
- The Importance of Soft Dates: The consistency of your dates is paramount. Soft, plump dates contribute to the ideal sticky texture and act as an excellent binder. If your dates feel firm or dry, make sure to soak them in hot water for 15 minutes, then drain them thoroughly before adding to the food processor. This step ensures the dough comes together beautifully.
- Achieving the Right Dough Consistency: After processing, the dough should be thick, sticky, and hold its shape when pressed. If it’s too crumbly, add warm water one teaspoon at a time until it reaches the desired consistency. If it’s too wet, you can try adding a tablespoon or two of extra oats or a little more cocoa powder, though this is less common.
- Compact the Dough Firmly: When pressing the dough into the loaf pan, use significant pressure. The more firmly you compact the mixture, the better your bars will hold together when cut, preventing them from crumbling. You can use your hands or the bottom of a glass for this.
- Don’t Rush the Chill Time: The freezer time isn’t optional; it’s essential for firming up the bars. A solid hour in the freezer ensures they are easy to slice cleanly and maintain their shape when handled. If you’re really in a hurry, you can skip the full firming process, but they will be softer and messier to cut and eat.
- Use a Sharp Knife: For clean, precise cuts, especially through the chocolate chips, use a sharp, heavy knife. You can also run your knife under hot water and wipe it dry between cuts to prevent sticking.
- Customize Your Mix-Ins: While chocolate chips are fantastic, feel free to get creative! Add a handful of chopped nuts (if not making nut-free), shredded coconut, a sprinkle of chia seeds or flax seeds for extra nutrition, or even some dried cranberries for a tart contrast.
Frequently Asked Questions (FAQs)
Here are some common questions about making and enjoying these homemade granola bars:
- How long do these bars last?
- When stored correctly in an airtight container, these bars will last for up to 2 weeks in the refrigerator and up to 2-3 months in the freezer. They are best enjoyed chilled.
- Can I use different types of nut butter?
- Absolutely! While peanut butter offers a classic flavor, you can easily substitute it with almond butter, cashew butter, or even a seed butter like sunflower seed butter or tahini for a nut-free option. The consistency might vary slightly depending on the brand, but the recipe should still work well.
- Are these bars genuinely healthy?
- Yes! Made with whole, natural ingredients like dates, oats, and natural nut butter, these bars are a much healthier alternative to many store-bought granola bars that often contain excessive sugar and artificial ingredients. They provide fiber, healthy fats, and some protein, making them a nutritious snack or treat.
- Why are my bars falling apart?
- The most common reasons for crumbly bars are using dates that were too dry (and not adequately softened), not processing the mixture enough to create a cohesive dough, or not pressing the dough firmly enough into the pan. Ensure your dates are moist and sticky, process until the dough holds together, and compact it tightly.
- Can I add other ingredients to the mixture?
- Yes, definitely! These bars are wonderfully customizable. Feel free to stir in a quarter cup of finely chopped nuts, seeds (like chia, flax, or hemp seeds), shredded coconut, or even a small amount of protein powder for an extra boost. Add these additional ingredients at the same time as the chocolate chips, or after the main dough has formed.
Serving Suggestions
These versatile chocolate peanut butter granola bars are perfect for a variety of occasions:
- Quick Breakfast: Grab a bar on your way out the door for a satisfying and energizing start to your day.
- Mid-Day Snack: Combat the afternoon slump with a wholesome bar that keeps you feeling full and focused.
- Pre/Post-Workout Fuel: Their blend of complex carbohydrates, healthy fats, and protein makes them an excellent choice for sustained energy before a workout or for recovery afterward.
- Healthy Dessert Alternative: Satisfy your sweet tooth without the guilt. These bars offer a rich, chocolatey experience in a much healthier package.
- Lunchbox Treat: A delicious and nutritious addition to any lunchbox, for both kids and adults.
- With Coffee or Tea: Enjoy a bar alongside your favorite hot beverage for a cozy and delightful pairing.
Storing Your Homemade Granola Bars
Proper storage is key to maintaining the freshness and optimal texture of your homemade chocolate peanut butter granola bars:
- Freezer: For long-term storage, place the bars in a single layer in an airtight container, separating layers with parchment paper if stacking. They will keep beautifully in the freezer for up to 3 months. Thaw at room temperature for a few minutes or enjoy straight from the freezer for a firmer, chewier treat.
- Fridge: Store the bars in an airtight container in the refrigerator for up to 2 weeks. This is the recommended storage method for daily snacking, as it keeps them firm and prevents the chocolate from melting.
- Room Temperature: While they are okay at room temperature for a short period, especially if the environment is cool, they will soften quickly. In warmer conditions, the chocolate chips may melt, and the bars can become quite sticky and lose their shape. For best results and longevity, always store them in the fridge or freezer.
More Delicious No-Bake Treats to Try
If you loved these bars, you’re in for a treat! Explore some of our other favorite no-bake recipes for quick and healthy indulgences:
- Chocolate Peanut Butter Energy Bites
- Chocolate Peanut Butter Balls
- Vegan Chocolate Peanut Butter Cups
- Peanut Butter Blondies
- No-Bake Chocolate Almond Bars
- No-Bake Oatmeal Chocolate Bars
Chocolate Peanut Butter Granola Bars
By: Deryn Macey
These no-bake chocolate peanut butter granola bars are almost too easy to make! Whip everything into a thick and delicious batter, press into bars and enjoy.
Prep Time: 10 mins
Chill Time: 1 hr
Total Time: 1 hr 10 mins
Servings: 8 bars
Ingredients
- 1 cup tightly packed soft pitted dates (250 g)
- 1/4 cup maple syrup (80 g)
- 1.25 cup rolled oats (150 g)
- 1/4 cup cocoa powder (65 g)
- 1/4 cup natural peanut butter (75 g)
- 1/2 cup dairy-free chocolate chips (80 g)
- 1/4 tsp sea salt
Instructions
- Place the pitted dates in a food processor and process for about 30 seconds to start breaking them down.
- Add all other ingredients, except the chocolate chips (maple syrup, oats, cocoa powder, natural peanut butter, sea salt), to the food processor. Process until a thick, sticky dough forms. The dough should easily press together between your fingers. If it seems too dry or crumbly, add 1-2 teaspoons of warm water and process again until the desired consistency is achieved.
- Add the chocolate chips to the food processor and pulse a few times to gently mix them into the dough.
- Line a standard-sized loaf pan with parchment paper, ensuring there are two long strips hanging out over the sides of the pan. Press the dough very tightly and evenly into the pan using your fingers.
- Place the pan in the freezer for 1 hour to allow the bars to firm up completely.
- Once firm, use the parchment paper overhangs to lift the entire block of bars out of the pan. Place on a cutting board and cut into 8 squares or 16 smaller bars.
Notes
It’s important to use soft, moist dates in this recipe. If your dates are on the dry side, soak them in hot water for 15 minutes, then drain well before using.
You can skip the full firming in the freezer if you’re eager to enjoy them immediately. Just press firmly into the pan, lift the bars out, slice, and enjoy. Be aware they will be softer and potentially messier.
Store in an airtight container in the fridge for up to 2 weeks or in the freezer for up to 2 months.
Nutrition Information (per bar)
Serving: 1 bar
Calories: 171 kcal
Carbohydrates: 29g
Protein: 4g
Fat: 5g
Enjoyed making these bars? We’d love to hear from you! Please consider leaving a rating and comment below to share your experience.