
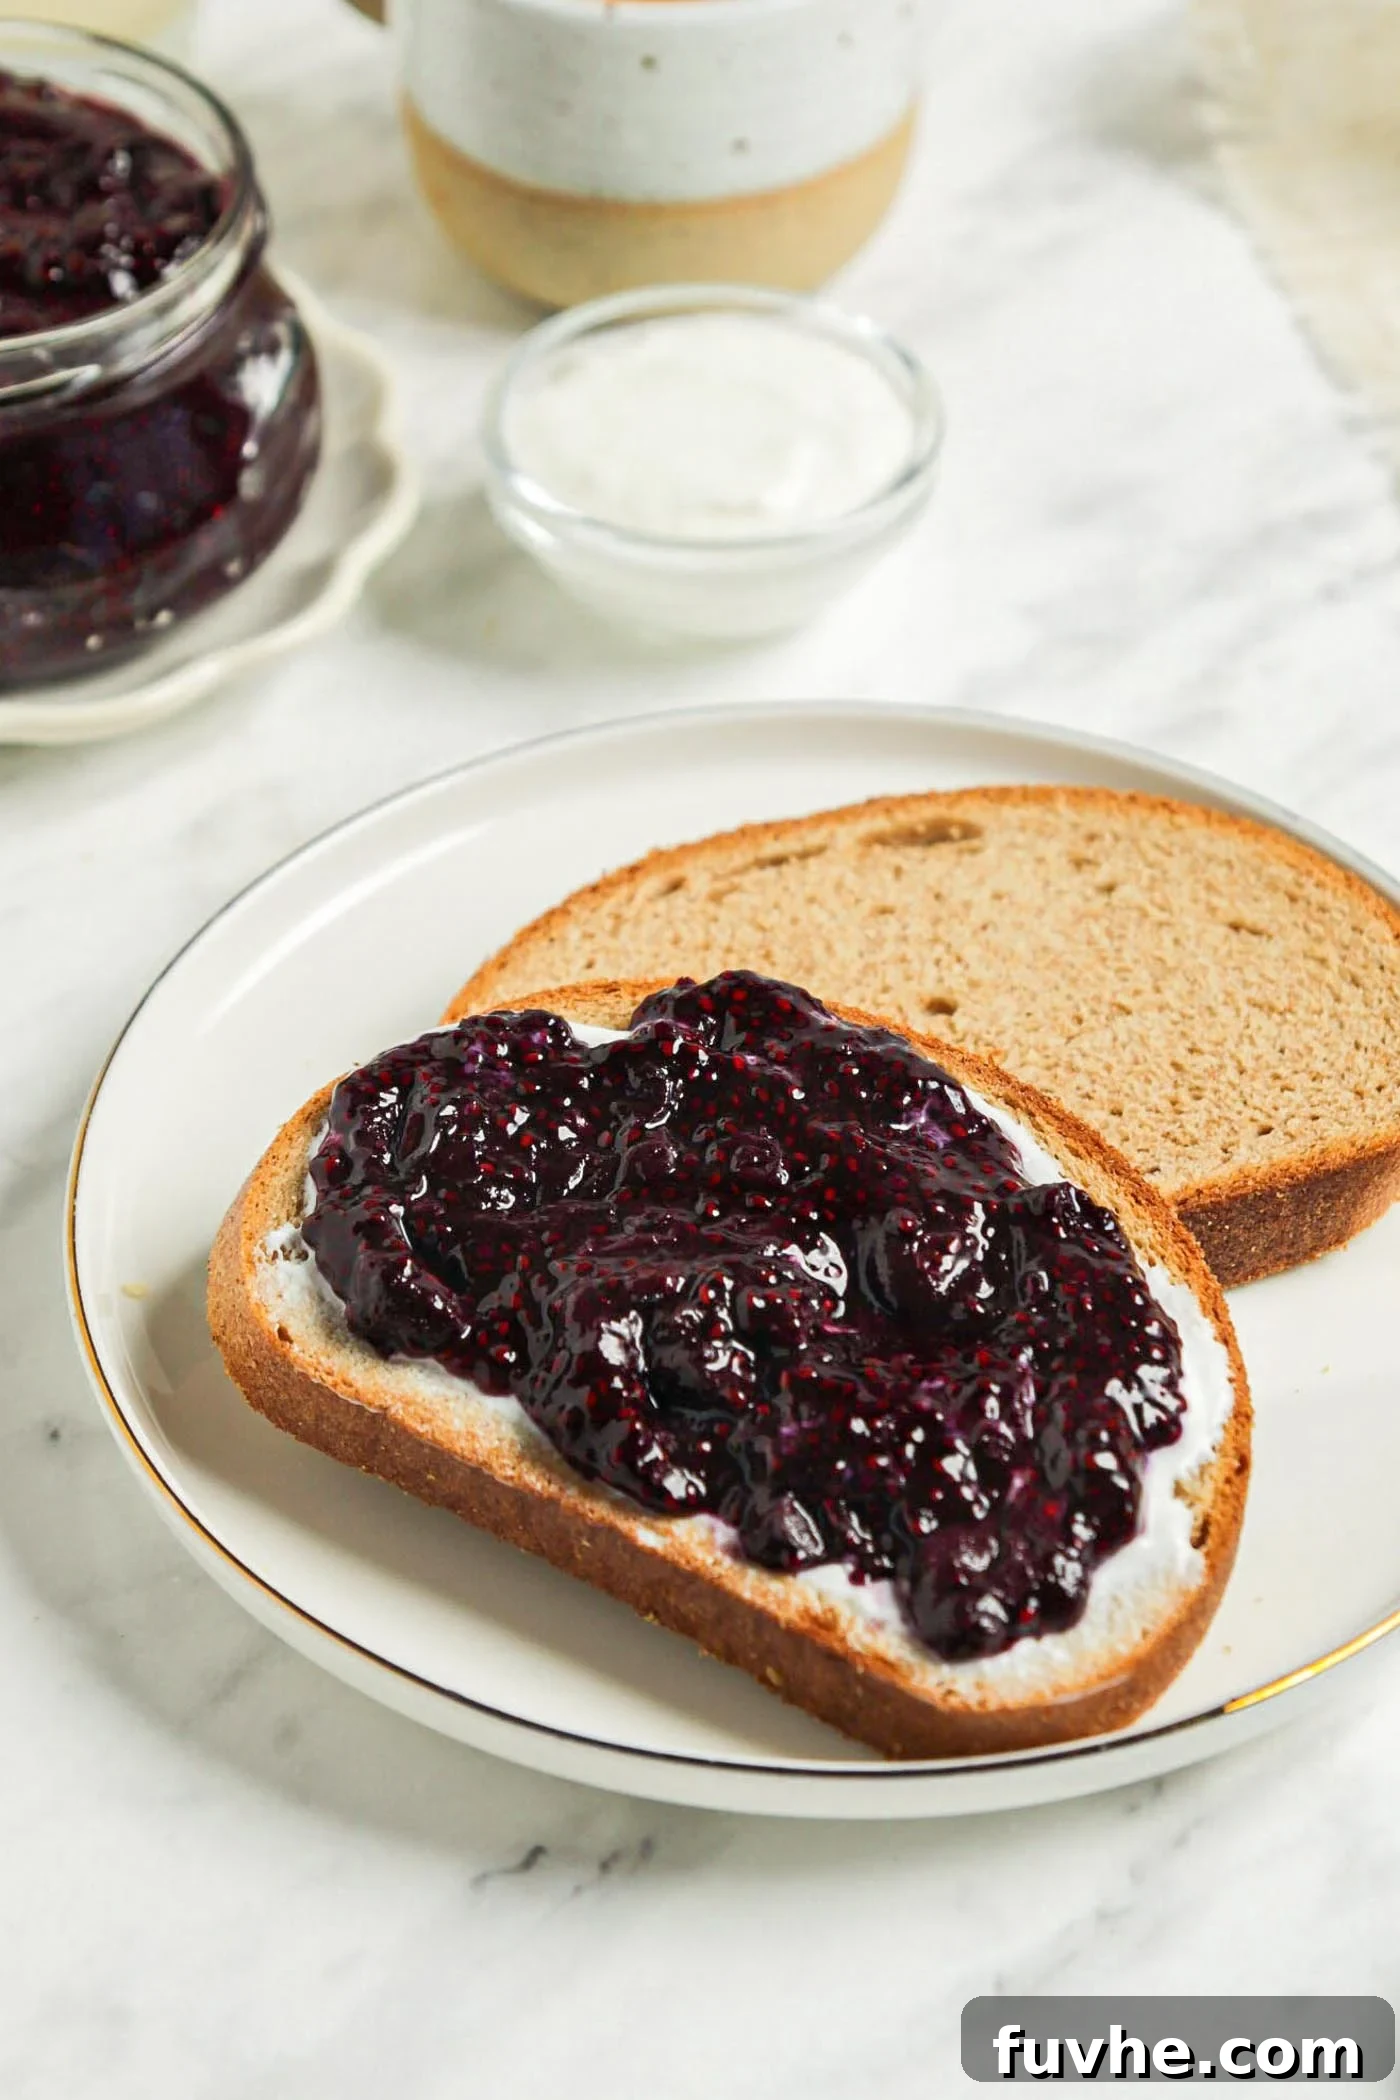
Discover how to create the most delicious and **health-conscious berry chia seed jam** right in your own kitchen! This incredibly simple recipe transforms fresh or frozen berries into a vibrant, thick, and utterly delightful jam in just about 10 minutes, making it a perfect, wholesome alternative to traditional store-bought jams that are often loaded with refined sugars and artificial thickeners. Prepare to revolutionize your breakfast routine with this superfood-packed spread!
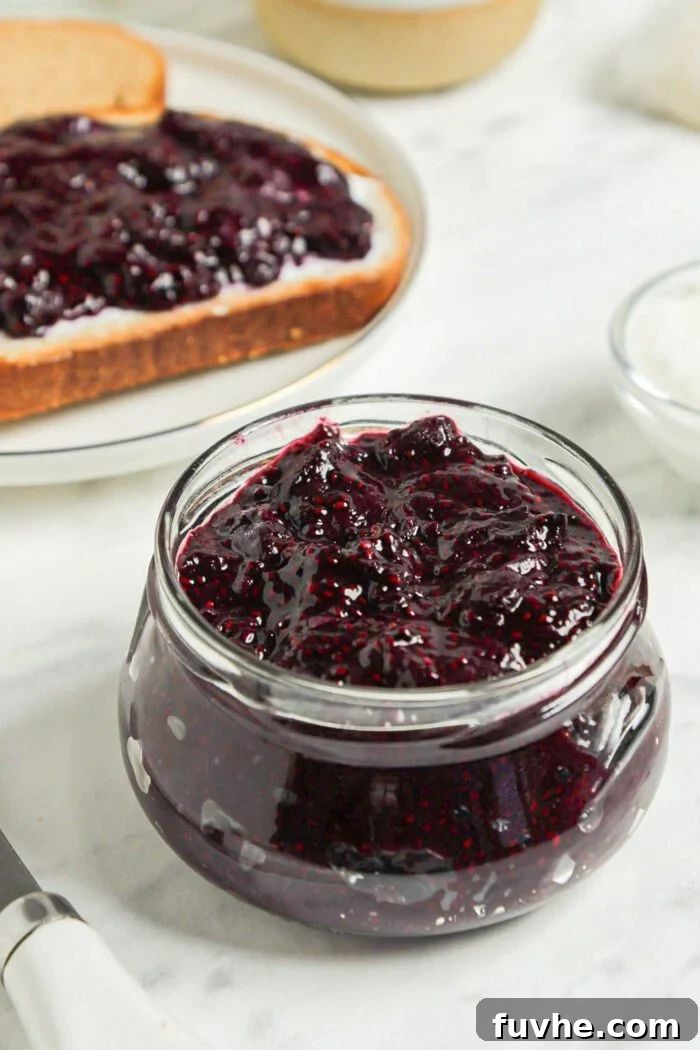
What is Chia Seed Jam?
At its heart, chia seed jam is a brilliant culinary innovation that offers all the delightful taste and texture of traditional fruit preserves but with a significantly healthier profile and an incredibly straightforward preparation process. Unlike conventional jams that rely on pectin or copious amounts of sugar to achieve their signature thick consistency, chia seed jam harnesses the natural gelling power of tiny **chia seeds**.
These remarkable seeds are hydrophilic, meaning they have an extraordinary ability to absorb liquid—up to 10-12 times their weight! When mixed with mashed fruit, they swell and create a natural gel, effectively thickening the fruit mixture into a spreadable, jam-like consistency without the need for any artificial additives, cornstarch, or excessive cooking. This ingenious method not only simplifies the jam-making process but also preserves more of the raw nutritional goodness and vibrant flavor of the fruit.
Chia jam is inherently versatile, allowing you to use a wide array of fruits, from classic berries like strawberries and blueberries to more exotic choices like mango or kiwi. You also have complete control over the sweetness level, making it easy to create a sugar-free, low-sugar, or naturally sweetened spread to fit any dietary preference. This flexibility makes homemade chia jam a truly superior choice for those seeking a healthier, more customizable alternative.
Beyond its health benefits, homemade chia seed jam is wonderfully flavorful and surprisingly adaptable. Enjoy this wholesome and delicious spread on your morning toast, swirled into creamy oatmeal or yogurt, stacked in delightful pancakes, or even incorporated into various baking recipes for a fruity burst. Its fresh taste makes it an instant favorite for any meal.
If you’re looking for more creative ways to incorporate the nutritional power of chia seeds into your diet, explore these delicious recipes: try a refreshing Mango Chia Pudding, indulge in a rich Chocolate Chia Pudding, or build an impressive Banana Split Chia Seed Pudding Parfait. Chia seeds are also excellent for naturally thickening stovetop oatmeal and overnight oats, and can even be added directly to pancake batter for an extra boost of fiber and omega-3s.
Why Choose Homemade Chia Seed Jam? (Recipe Features & Benefits)
Making your own chia seed jam isn’t just a fun kitchen project; it’s a step towards a healthier lifestyle. Here’s why this recipe stands out:
- Naturally Vegan & Dairy-Free: Made entirely from plant-based ingredients, perfect for vegan diets.
- Gluten-Free: A safe and delicious option for those avoiding gluten.
- Customizable Sweetness: Easily made sugar-free or with minimal natural sweeteners, giving you full control over sugar content.
- Significantly Less Sugar: Compared to conventional jams, which can contain up to 50-60% sugar, chia jam is a low-sugar hero.
- Rapid Preparation: Ready in under 15 minutes, making healthy eating convenient even on busy days.
- High in Dietary Fiber: Chia seeds are renowned for their fiber content, promoting digestive health and satiety.
- Rich in Healthy Omega-3 Fatty Acids: A fantastic source of essential fatty acids, crucial for brain and heart health.
- Versatile Usage: Perfect for spreading on toast, stirring into oatmeal, topping yogurt, or incorporating into baking.
- Adaptable to Any Soft Fruit: While berries are popular, this recipe works beautifully with a wide variety of soft fruits.
- Freezer-Friendly: Prepare a larger batch and freeze for future enjoyment, extending its shelf life without compromising quality.
- No Pectin Required: The natural gelling properties of chia seeds eliminate the need for commercial pectin.
- Preservative-Free: Enjoy a fresh, natural product without any added artificial preservatives.
Essential Ingredients for Your Jam
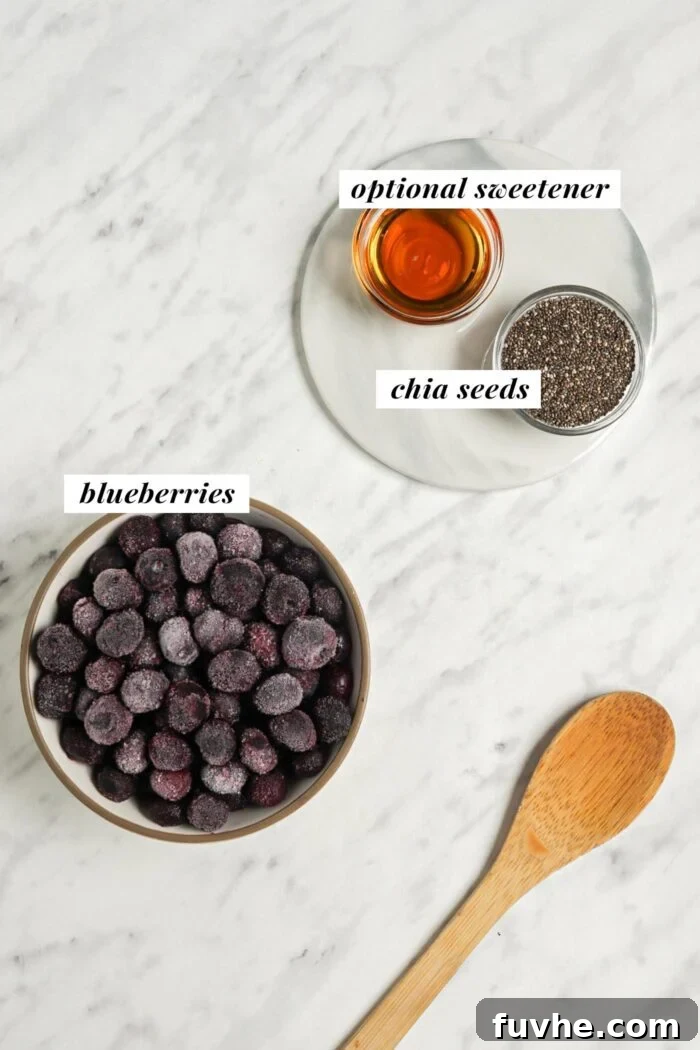
Crafting delicious chia seed jam requires just a couple of primary ingredients, with a few optional additions to elevate the flavor. Always refer to the recipe card at the end of this guide for precise measurements and detailed instructions.
- Berries: While this particular recipe focuses on luscious blueberry jam, the beauty of chia jam lies in its adaptability. Feel free to experiment with strawberries, raspberries, blackberries, or any combination of your favorite mixed berries. Juicy stone fruits like peaches or apricots, or even tropical fruits such as mango or kiwi, also yield fantastic results. I often find that **frozen fruit** works exceptionally well for chia seed jam, as it releases more juice upon thawing, which the chia seeds readily absorb. Fresh fruit, however, is equally suitable and provides a vibrant, seasonal flavor.
- Chia Seeds: These tiny powerhouses are the star of the show, responsible for the jam’s thick and gel-like consistency. Both black and white chia seeds are equally effective and nutritionally similar; simply ensure they are fresh for optimal gelling. A general rule of thumb is to use about 1-2 tablespoons of chia seeds per cup of fruit, adjusting based on your desired thickness.
- Optional Sweetener: The natural sweetness of ripe fruit is often enough, but if you prefer a jam that’s a bit sweeter or closer to a traditional jam profile, you can easily add 1-2 tablespoons of a natural sweetener. Popular choices include pure maple syrup, agave syrup, date syrup, or even a sugar-free alternative like monk fruit or stevia. Adding a small splash of **lemon juice** is also highly recommended (and optional!), as it brightens the fruit flavors and adds a subtle tangy note that perfectly balances the sweetness.
Creative Variations & Flavor Enhancements
One of the best aspects of homemade chia seed jam is how easily you can customize it to suit your taste preferences. Get creative with these variations and additions:
- Mixed Fruit Medley: Don’t limit yourself to a single fruit! Combine your favorite berries such as strawberries, blueberries, raspberries, and blackberries for a complex and delightful mixed berry jam. Tropical fruit combinations like mango and pineapple also work wonderfully.
- A Hint of Vanilla: A touch of pure vanilla extract (1/2 teaspoon) can significantly enhance the overall aroma and depth of flavor, adding a warm, comforting note to your jam.
- Warming Spices: Infuse your jam with warmth and character using a pinch of cinnamon, cardamom, or nutmeg. These spices pair particularly well with berry and apple-based jams. Start with 1/4 teaspoon and adjust to taste.
- Tropical Coconut Twist: For an exotic flair, stir in some unsweetened shredded coconut or a few drops of coconut extract. This complements tropical fruits beautifully and adds a lovely texture.
- Zesty Ginger Kick: Add up to 1 tablespoon of freshly grated ginger for a spicy, slightly tangy kick. Ginger especially shines with berry and stone fruit jams, offering a vibrant contrast.
- Natural Sweetness from Apple or Pear: Grate a small apple or pear into your jam mixture for added natural sweetness, extra fiber, and a slightly different texture. This works well with almost any berry.
- Bright Citrus Zest: Incorporate up to 1 tablespoon of orange zest or lemon zest for a bright, zesty, and aromatic flavor. Citrus notes complement the sweetness of berries and can make the jam feel more vibrant.
- Caramel-Like Dates: For natural sweetness and a rich, caramel-like undertone, stir in some finely chopped pitted dates while the fruit is cooking.
- Sugar-Free Alternatives: If you’re keen on reducing sugar intake, stevia, monk fruit, or erythritol can be used as calorie-free sweeteners to achieve your desired sweetness level without the sugar.
- Exotic Fruit Infusions: Mix in diced mango or pineapple for a truly tropical berry jam experience, perfect for summer breakfasts or desserts.
- Herbal Notes: For an unexpected twist, consider adding finely chopped fresh mint, basil, or even a sprig of rosemary during the cooking process (remove before storing).
Easy Step-by-Step Guide to Making Cooked Chia Jam
Making chia seed jam is incredibly straightforward, perfect for beginners and seasoned cooks alike. Follow these simple steps for a perfect batch every time:
Step 1: Prepare and Heat the Berries
Begin by adding your frozen berries to a small saucepan. Place the saucepan over low to medium heat, stirring occasionally. The goal is to allow the berries to thaw completely and release their juices. This process typically takes about 5-7 minutes. As they soften, use a fork or a potato masher to gently break them down to your desired chunky or smoother consistency. If you prefer a completely smooth jam, you can use an immersion blender at this stage, or transfer the cooked mixture to a regular blender once slightly cooled.
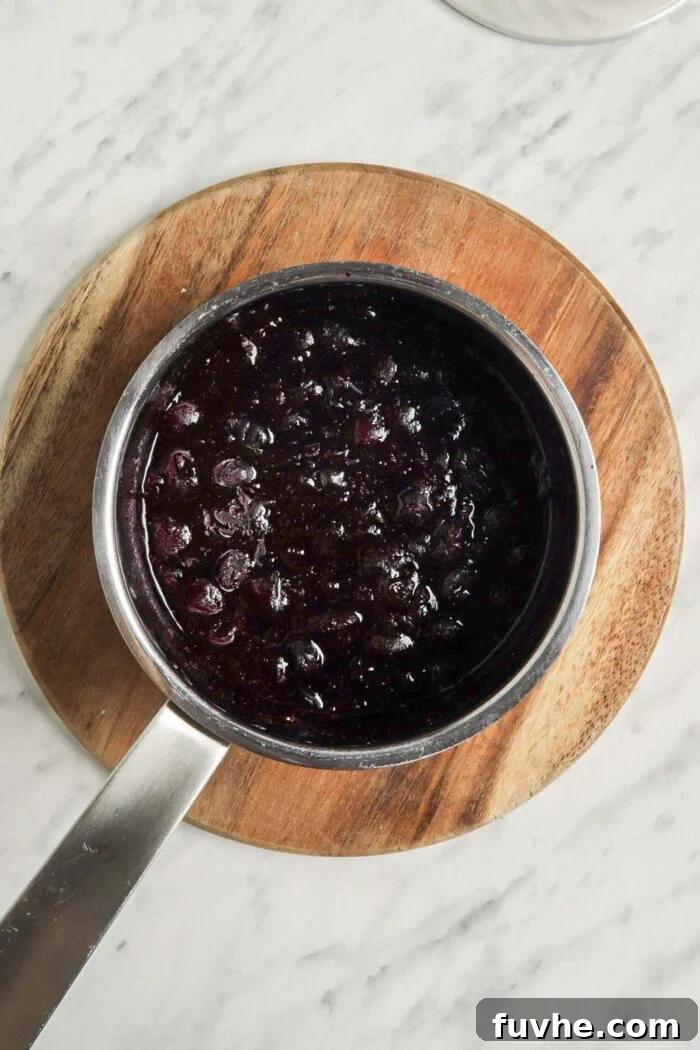
Step 2: Add Chia Seeds and Flavor Enhancements
Once your berries have reached the desired consistency and are juicy, remove the saucepan from the heat. Stir in 2 tablespoons of fresh chia seeds, ensuring they are well distributed throughout the fruit mixture. If you plan to add any sweetener (like maple syrup) or other flavorings such as vanilla, ginger, lemon zest, or cinnamon, now is the time to incorporate them. Stir everything thoroughly. Allow the pot to sit on the warm element (with the heat off) for about 5-10 minutes. During this time, the chia seeds will begin to absorb the fruit juices and thicken the jam. Taste and adjust the sweetness or any other flavors as needed.
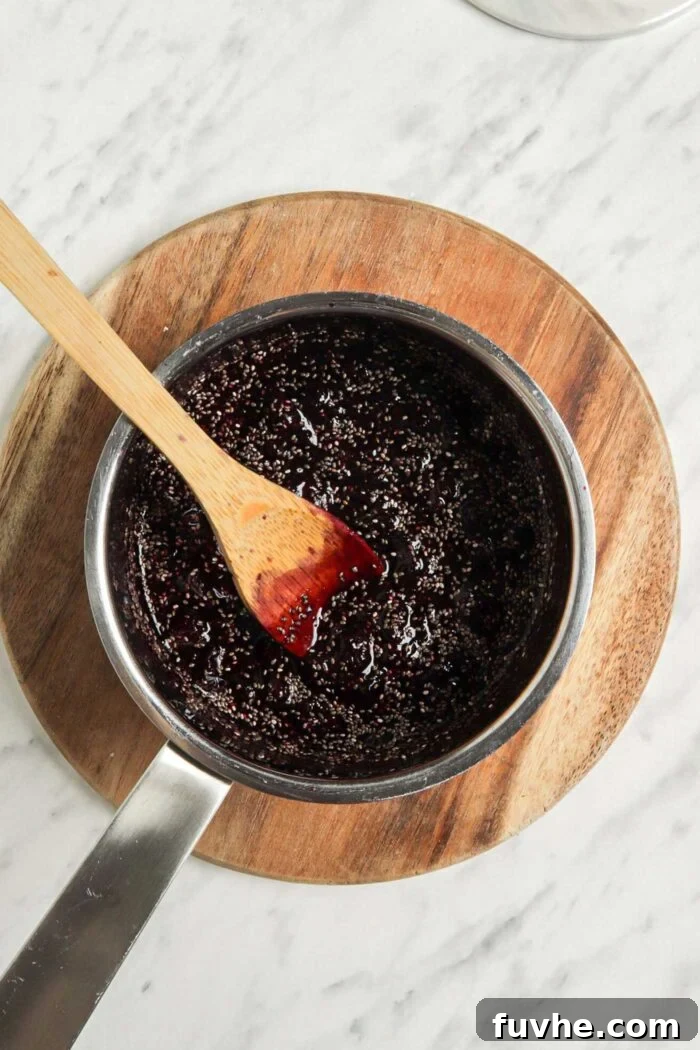
The jam will visibly start to thicken within 5-10 minutes. While you can enjoy it warm immediately, it will develop a much firmer, jelly-like consistency as it cools. For best results, allow it to cool completely before chilling.
Step 3: Store Your Homemade Jam
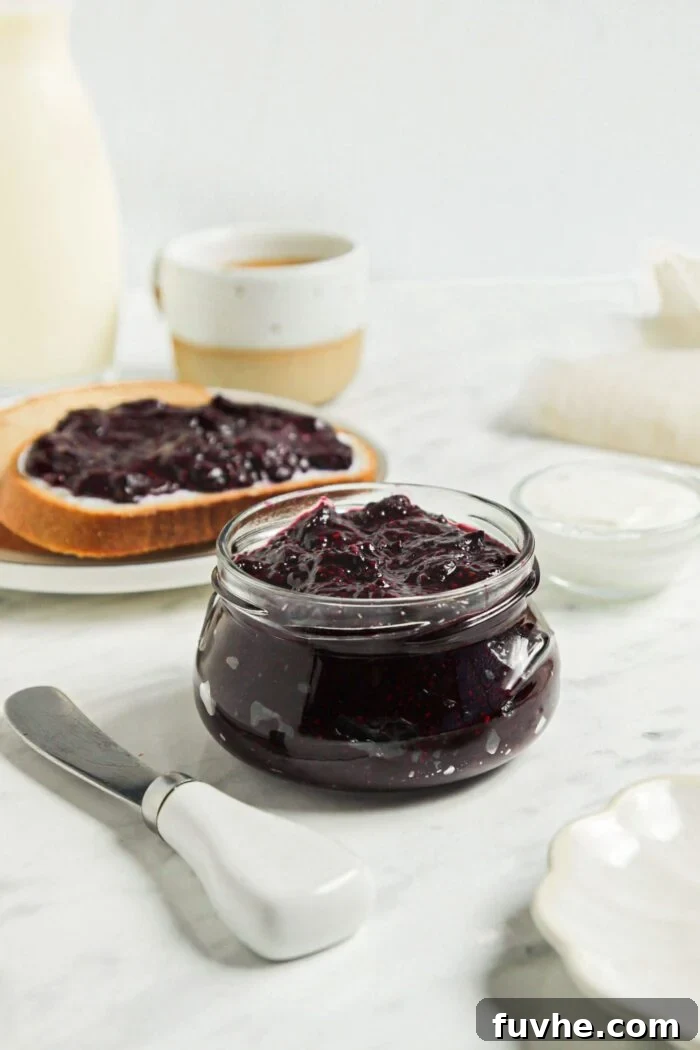
Once cooled, transfer your delicious chia seed jam to a clean, sealable container, such as a glass mason jar. Store it in the refrigerator, where it will continue to thicken and can be enjoyed for up to 1 week. For longer storage, see our freezing tips below.
Frequently Asked Questions About Chia Seed Jam
The beauty of chia jam is its versatility with fruits! You can use virtually any soft fruit. Popular choices include strawberries, cherries, blackberries, blueberries, raspberries, or a mix of several berries for a vibrant medley. Stone fruits like peaches, apricots, and plums also work wonderfully. Don’t shy away from other juicy fruits such as kiwi and mango for a more tropical flavor profile. The key is using ripe, juicy fruit to provide enough liquid for the chia seeds to absorb.
Absolutely, and it’s actually my preferred method! Frozen fruit often thaws to become incredibly juicy, creating the perfect liquid environment for the chia seeds to swell and thicken. Plus, frozen berries are convenient, readily available year-round, and often more cost-effective. Simply add them directly to your saucepan and allow them to thaw and cook down until soft and saucy before adding the chia seeds.
Homemade chia seed jam, stored in an airtight container in the refrigerator, will typically last for about 1 week. For longer preservation, it freezes beautifully! You can freeze individual portions in an ice cube tray, then transfer the frozen cubes to a freezer-safe bag or container. It will keep well in the freezer for up to 3 months. Thaw frozen jam in the refrigerator overnight or at room temperature for a few hours before use.
You have many excellent options to sweeten your chia jam to taste, making it more akin to traditional jam. Natural sweeteners like maple syrup, agave syrup, and honey are popular choices. For a completely sugar-free option, consider using natural, calorie-free sweeteners such as monk fruit extract or stevia. Add your chosen sweetener a tablespoon at a time, tasting and adjusting until you reach your desired level of sweetness. Remember that the fruit’s ripeness will also affect the final sweetness.
If your jam turns out too thick after cooling, simply stir in a tablespoon or two of water, fruit juice, or a little more mashed fruit until you reach your desired consistency. If it’s too thin, you can add another teaspoon of chia seeds, stir well, and let it sit for another 10-15 minutes (or longer in the fridge) for the seeds to absorb more liquid and thicken further. Remember, chia seeds continue to swell as they sit, so give it time!
The No-Cook Chia Jam Method: Preserving Freshness
For those who prefer to keep things raw or want to preserve the maximum nutritional benefits and vibrant flavors of fresh fruit, the no-cook method for chia seed jam is an absolute game-changer. This simple technique requires minimal effort and no heat, making it perfect for summer berries or when you’re short on time. Feel free to customize with different fruits and sweeteners to create your perfect fresh jam.
- Prepare the Berries: If you’re using frozen berries, allow them to thaw completely at room temperature or in the refrigerator. Once thawed, or if using fresh fruit, mash the berries thoroughly in a bowl using a fork or potato masher. For a smoother jam, a food processor or blender can be used to puree the fruit.
- Add Chia Seeds: Evenly sprinkle the chia seeds over the mashed berry mixture. Stir very well, ensuring the seeds are fully incorporated and moistened by the fruit juices. This even distribution is crucial for proper gelling.
- Sweeten and Flavor: Incorporate your sweetener of choice (if desired) into the mashed berries. A squeeze of fresh lemon juice is highly recommended here, as it brightens the flavors without heat. Stir thoroughly to combine all ingredients. Taste the mixture and adjust the sweetness or tartness as needed before it sets.
- Allow to Set (The Waiting Game): Cover the mixture and let it sit at room temperature for at least 15-30 minutes. During this time, the chia seeds will work their magic, absorbing the liquid and beginning to thicken the jam. For optimal consistency, stir the mixture every 5-10 minutes to prevent the seeds from clumping at the bottom.
- Check Consistency: After 15-30 minutes, your chia seed jam should have visibly thickened. If you prefer a firmer jam, you can add an additional teaspoon of chia seeds, stir, and let it sit for another 10-15 minutes. Continue this process until your desired jam-like consistency is achieved. Remember it will continue to thicken slightly as it chills.
- Store for Enjoyment: Once you’re satisfied with the thickness, transfer your freshly made no-cook chia jam to an airtight container or a clean jar. Refrigerate it to chill and allow it to set even further. The jam will be ready to enjoy once fully cooled and will keep in the fridge for up to a week.
Delicious Ways to Enjoy Your Homemade Chia Jam
Once you’ve made your delicious, healthy chia seed jam, the possibilities for enjoyment are endless! Here are some yummy ideas to inspire you:
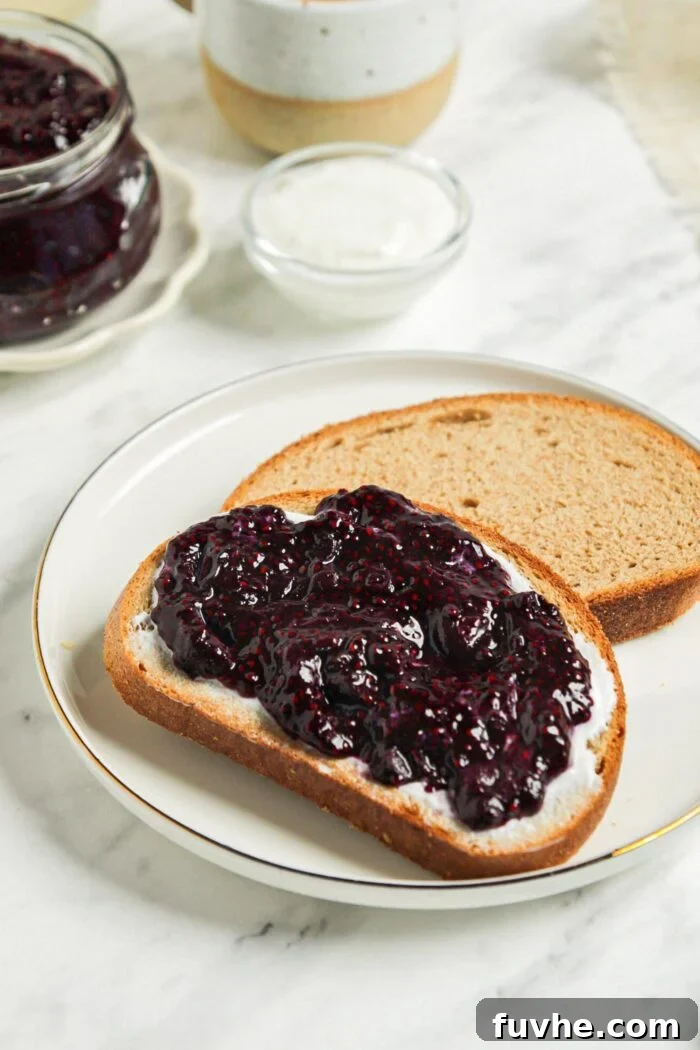
- Classic Spreads: The most obvious and beloved way to enjoy jam is by spreading it generously on warm toast, bagels, English muffins, or even freshly baked scones.
- Breakfast Boost: Stir a spoonful or two into your morning oatmeal, breakfast quinoa, or creamy yogurt for an instant flavor and nutrition upgrade.
- Yogurt Parfait Perfection: Create a vibrant and wholesome yogurt parfait by layering your favorite yogurt, homemade chia jam, and crunchy granola.
- Peanut Butter & Jam Sandwiches: Elevate the classic PB&J with your healthier homemade jam for a nostalgic yet guilt-free treat.
- Overnight Oats Enhancement: Mix a dollop into your overnight oats preparation for added flavor, texture, and a nutritional punch that sets overnight.
- Sweet Potato Breakfast Bowls: Top baked sweet potato halves or mashed sweet potatoes with a generous spoon of chia jam for a unique and nutritious breakfast bowl.
- Baking Adventures: Use your chia jam as a healthier filling for baked goods. It’s fantastic in cranberry crumble bars, as the center of thumbprint cookies, or swirled into muffins.
- Muffins, Breads & Baked Goods: Spread it on freshly baked muffins, slices of banana bread, zucchini bread, or alongside baked oatmeal cups for extra flavor.
- Homemade Ice Cream Topping: Swirl it into homemade banana “nice” cream or your favorite dairy-free ice cream for a fruity dessert.
- Pancake & Crepe Companion: Drizzle over fluffy whole wheat vegan pancakes, chia seed pancakes, or delicate buckwheat crepes for a delightful breakfast or brunch.
- Artisan Bread Spreads: Pair it with savory cheeses or nut butters on slices of homemade seed bread or your favorite artisan bread.
Storage and Freezing Tips for Chia Seed Jam
Proper storage ensures your homemade chia seed jam stays fresh and delicious for as long as possible:
- Refrigeration: Store your chia jam in a clean, airtight container (a mason jar works perfectly) in the refrigerator. It will maintain its freshness and quality for up to 1 week. Always ensure the container is sealed tightly to prevent air exposure.
- Freezing for Extended Storage: Chia jam is incredibly freezer-friendly, making it ideal for meal prep or preserving seasonal fruits. Once the jam has cooled completely, you can freeze it in a couple of ways:
- Portion Control: Spoon portions into an ice-cube tray. Once frozen solid, transfer the jam cubes to a zip-top freezer bag or a freezer-safe container. This allows you to thaw only what you need.
- Batch Storage: Alternatively, store a larger batch directly in any freezer-safe container, leaving a little headspace as liquids can expand when frozen.
- Thawing Frozen Jam: Frozen chia jam can be safely stored for up to 3 months. To thaw, simply transfer it from the freezer to the refrigerator overnight, or allow it to come to room temperature on the counter for a few hours. Stir well before serving, as some separation might occur.
★
★
★
★
Blueberry Chia Seed Jam: Quick & Healthy
Deryn Macey
2
10
12
1 cup
Save Recipe
Pin Recipe
Rate Recipe
Print Recipe
Ingredients
Instructions
-
Heat Berries: Add the frozen berries to a small saucepan and heat over medium heat, stirring occasionally. Cook for about 5-7 minutes, until they are thawed, soft, and juicy.
-
Mash Berries: Once softened, use a fork or potato masher to mash the berries to your preferred consistency. For a smoother jam, you can briefly blend the mixture with an immersion blender.
-
Thicken with Chia: Stir in 2 tablespoons of chia seeds. If using optional sweetener (like maple syrup) or other flavorings (vanilla, lemon juice, spices), add them now and mix well. Turn off the heat and let the pot sit on the warm element for 5-10 minutes, allowing the jam to thicken as the chia seeds absorb the liquid. Taste and adjust sweetness if desired.
-
Store: Enjoy your fresh jam immediately, or transfer it to a sealed container. Store in the fridge where it will continue to thicken as it cools. It will keep for up to 1 week.
Notes
Nutrition Information
Calories: 37 kcal
Carbohydrates: 7 g
Protein: 1 g
Fat: 1 g
Sodium: 1 mg
Potassium: 41 mg
Fiber: 2 g
Sugar: 4 g
Vitamin A: 1 IU
Vitamin C: 4 mg
Calcium: 22 mg
Iron: 0.4 mg
Enjoyed this recipe? We’d love to hear from you! Please rate and leave a comment below!