
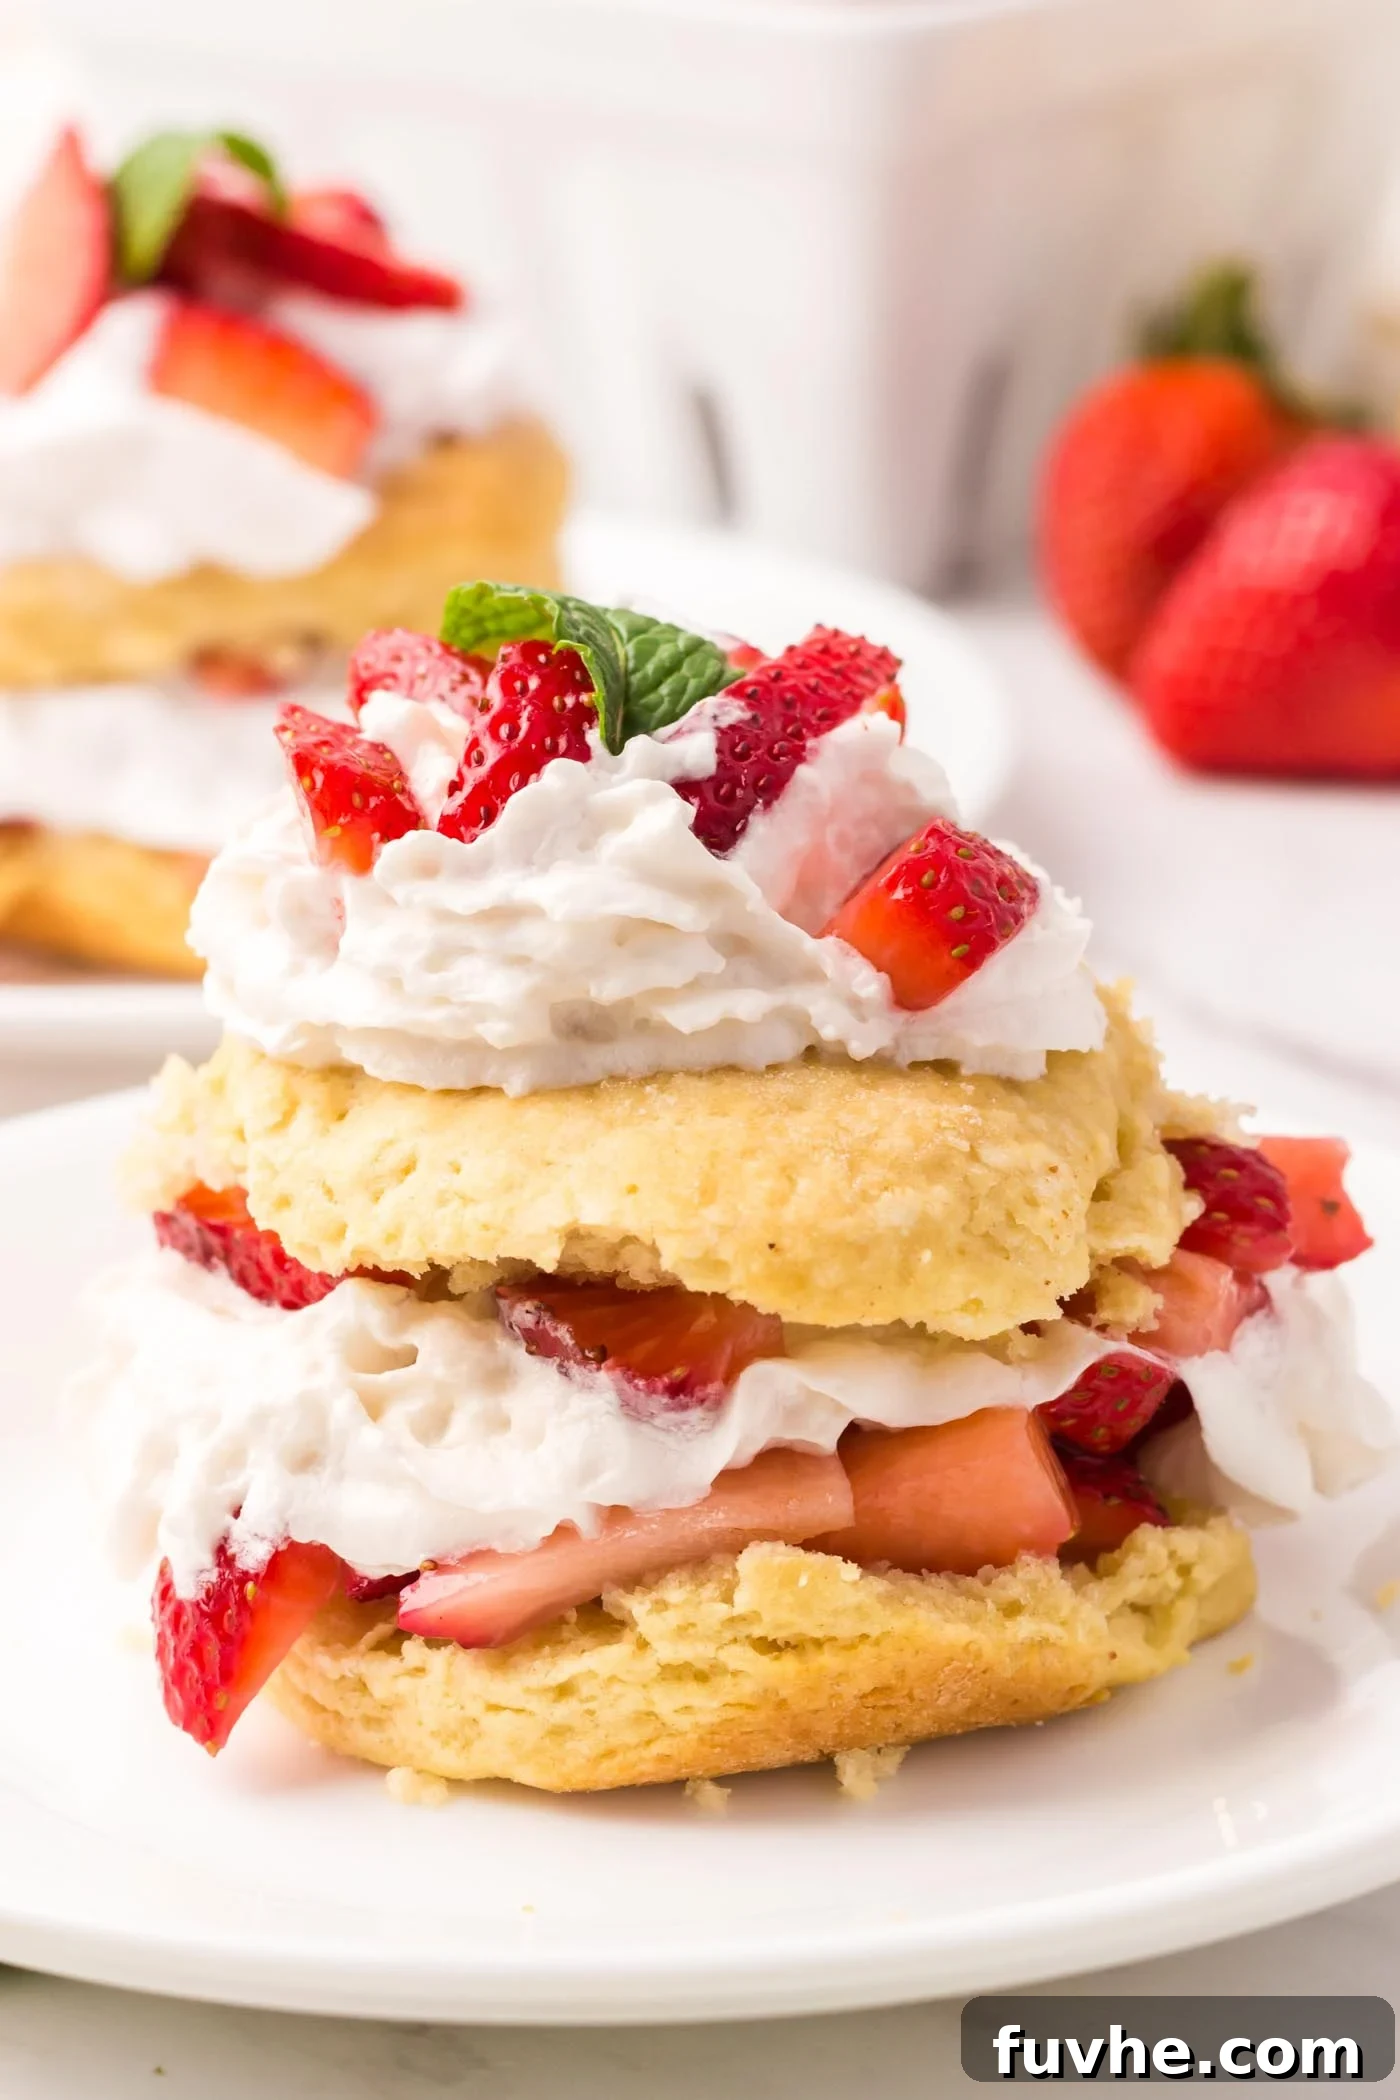
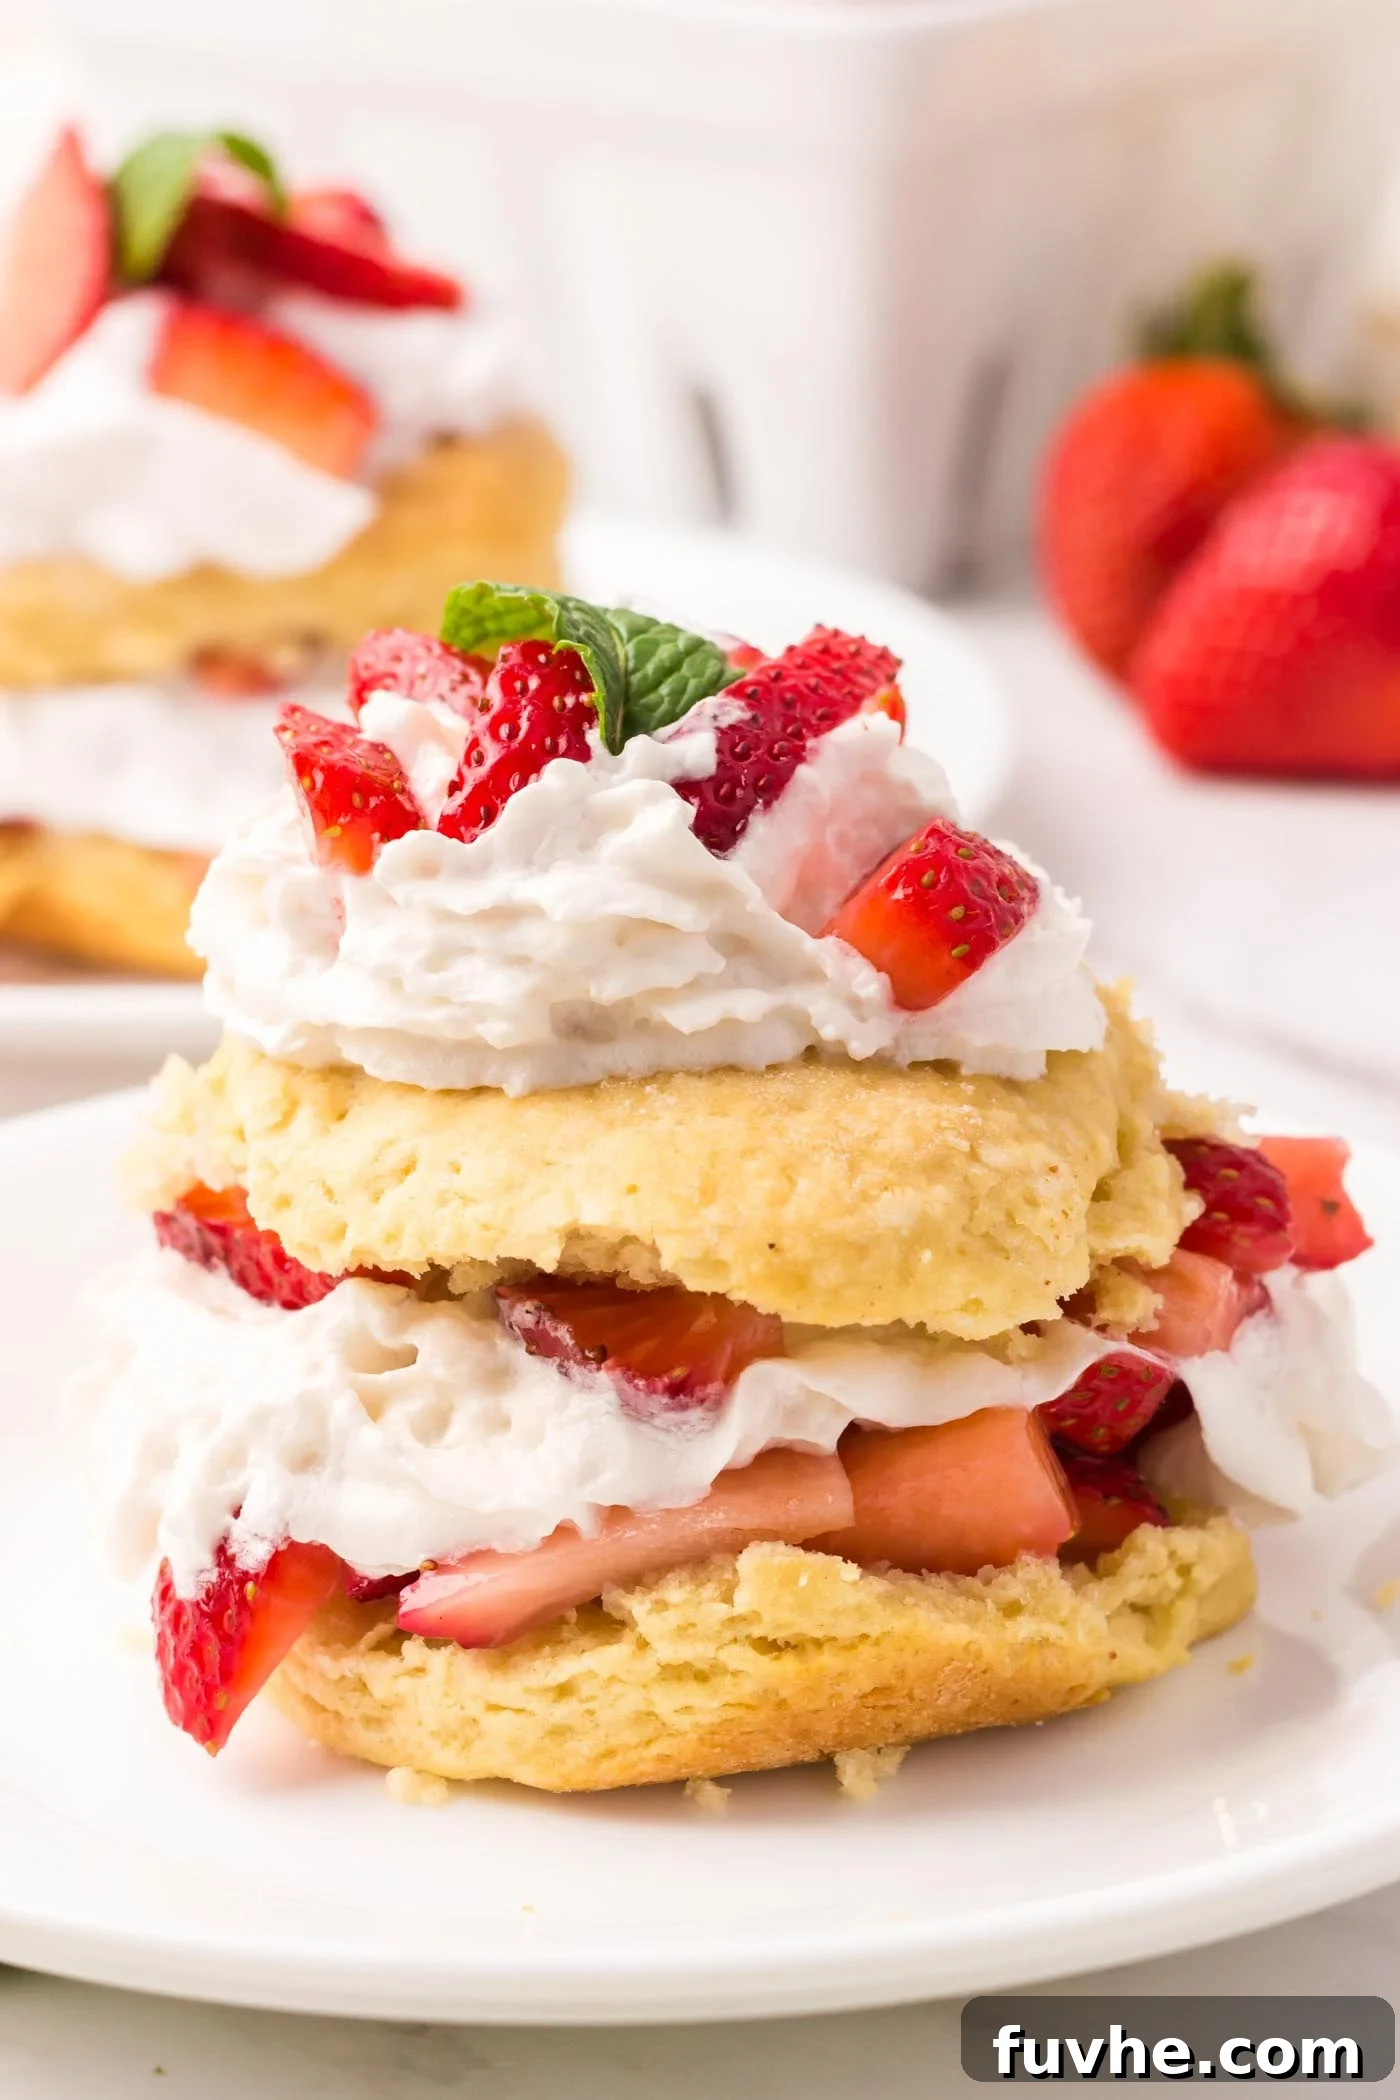
Indulge in the ultimate sweet escape with this delightful vegan strawberry shortcake recipe. Featuring layers of vibrant, fresh strawberries, luscious dairy-free whipped cream, and perfectly fluffy, homemade biscuits, this dessert is a true masterpiece of flavor and texture. Quick and easy to prepare, it’s a guaranteed crowd-pleaser that adds a touch of charm to any gathering, making it an irresistible finale to any meal.
This recipe transforms simple, wholesome ingredients into a luxurious treat. Imagine biting into a tender, buttery biscuit that yields to a burst of sweet, macerated strawberries and a cloud of airy whipped cream. It’s a symphony for the senses, proving that plant-based desserts can be every bit as decadent and satisfying as their traditional counterparts.
Crafted with basic, everyday pantry staples, this recipe is designed for accessibility and affordability. You likely have most of these ingredients on hand, or they can be easily found at any local grocery store. Best of all, this recipe requires no eggs or dairy, making it a fantastic, budget-friendly option for vegan lifestyles or those with dietary restrictions without compromising on taste or quality.
Whether you’re celebrating Valentine’s Day with a sweet gesture, bringing joy to your Easter table, adding a festive touch to the 4th of July BBQ, or honoring Mom on Mother’s Day, this vegan strawberry shortcake is the perfect no-fuss dessert. Its elegant simplicity and delightful flavors will have you eagerly returning to this recipe again and again, solidifying its spot as a cherished family favorite for years to come.
If you’re looking to explore more delightful plant-based treats, we highly recommend trying some of our other popular vegan dessert recipes. Expand your sweet repertoire with our vegan lemon loaf, enjoy the vibrant flavors of our vegan blueberry crumble bars, or savor the wholesome goodness of vegan strawberry oatmeal bars. For a rich, fruity experience, don’t miss our vegan blackberry crumble, and for a classic reborn, indulge in our vegan carrot cake. Each offers a unique and satisfying plant-based dessert experience.
Recipe Highlights: Why You’ll Love This Vegan Strawberry Shortcake
This vegan strawberry shortcake isn’t just a dessert; it’s an experience, designed to bring joy and ease to your kitchen. Here’s why this recipe stands out:
- Completely Vegan: This recipe is entirely plant-based, meaning it’s 100% egg-free and dairy-free. It’s a fantastic option for those following a vegan diet, managing allergies, or simply looking to incorporate more plant-based foods into their lifestyle without sacrificing flavor or indulgence.
- Nut-Free Friendly: We’ve carefully crafted this recipe to be nut-free, making it suitable for individuals with nut allergies. Enjoy this delicious dessert with peace of mind, knowing it caters to a wider range of dietary needs.
- Ideal for Celebrations: With its elegant presentation and refreshing taste, this shortcake is a perfect fit for special occasions. It’s particularly lovely for spring holidays like Easter and Mother’s Day, bringing a light, festive touch to your table.
- Budget-Friendly Ingredients: Utilizing common, readily available ingredients ensures this recipe won’t break the bank. You can create a gourmet-tasting dessert using staples often found in your pantry or easily purchased at any grocery store, proving that delicious vegan eating can be economical.
- Stunning Presentation: Beyond its incredible taste, this strawberry shortcake boasts a naturally beautiful appearance. The vibrant red strawberries, creamy white whipped cream, and golden biscuits create a visual feast that is sure to impress your guests and elevate any dessert spread.
- Quick & Easy Preparation: Designed for convenience, this recipe comes together without complicated steps or specialized equipment. It’s perfect for busy individuals who want to create a homemade dessert without spending hours in the kitchen.
- The Quintessential Summertime Dessert: There’s nothing quite like fresh strawberries in the summer, and this shortcake harnesses their peak flavor. It’s light, refreshing, and perfectly suited for warm weather, offering a delightful way to cool down and savor the season’s bounty.
- Made with Just 9 Simple Ingredients: Achieving such incredible flavor and texture with only nine core ingredients is a testament to the recipe’s efficiency and brilliance. Fewer ingredients mean less shopping and a simpler cooking process.
- No Mixer Required: Forget lugging out heavy kitchen appliances! This recipe is entirely mixer-free, relying on simple hand mixing techniques. This makes cleanup a breeze and keeps the preparation process straightforward and enjoyable for all skill levels.
Essential Ingredients for Your Vegan Strawberry Shortcake
Creating this irresistible vegan strawberry shortcake relies on a harmonious blend of simple, high-quality ingredients. Each component plays a crucial role in achieving the perfect balance of flavor and texture, from the juicy berries to the tender biscuits and rich whipped cream.
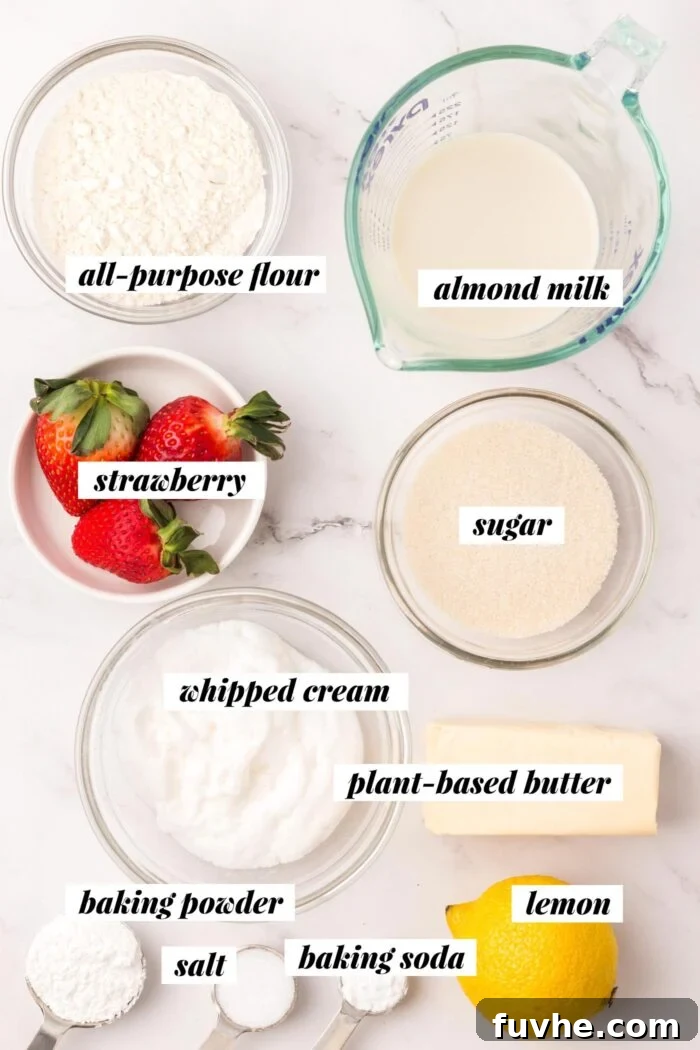
For precise ingredient measurements and comprehensive step-by-step instructions, please refer to the detailed recipe card conveniently located at the conclusion of this article.
- Fresh Strawberries: The star of the show! Opt for ripe, vibrant, and sweet fresh strawberries for the best flavor and texture. While frozen strawberries can be used in a pinch, fresh ones truly elevate this dessert. If using frozen, ensure they are thoroughly thawed and gently drained to remove excess moisture before proceeding with the recipe, as this prevents a watery shortcake.
- Granulated Sugar: You’ll need this versatile sweetener for both macerating the strawberries, which helps them release their natural juices and sweetens them beautifully, and for adding a touch of sweetness to the fluffy biscuit dough. Standard cane sugar or organic granulated sugar works perfectly.
- Vegan Whipped Cream: The creamy, dreamy topping that brings everything together! You have several excellent dairy-free options:
- Store-bought options: Look for brands like CocoWhip, canned plant-based whipped cream (often coconut or oat-based), or cartons of plant-based whipping cream that you can whip yourself.
- Homemade alternatives: If you’re feeling ambitious, you can easily make your own using chilled full-fat coconut cream (the thick cream from a can of coconut milk, separated from the liquid) whipped with a touch of powdered sugar, or even aquafaba whipped cream for a lighter option.
- Plant-Based Milk: Essential for creating a tender biscuit dough and for our homemade vegan buttermilk. Almond milk is specified, but this recipe is highly adaptable. Feel free to substitute with any other neutral-flavored plant-based milk you prefer, such as soy milk, cashew milk, or oat milk. Just ensure it’s unsweetened to maintain control over the sugar content.
- Lemon Juice: This ingredient is crucial for activating the baking soda in the biscuits and for creating our DIY vegan buttermilk when combined with plant-based milk. The acidity contributes to the biscuits’ light and tender crumb. If fresh lemon juice isn’t available, apple cider vinegar makes an excellent and equally effective substitute.
- All-Purpose Flour: The foundation of our fluffy biscuits. The recipe is specifically developed using standard all-purpose flour, which provides the ideal structure and texture. Please note that this particular recipe has not been extensively tested with gluten-free alternatives or other types of flour, so results may vary if substitutions are made.
- Baking Powder and Baking Soda: These two leavening agents work in tandem to ensure your biscuits rise beautifully and achieve that coveted light, airy texture. The baking powder provides an initial lift, while the baking soda reacts with the acidity from the lemon juice (or vinegar) to create additional aeration. It’s vital to use both and to measure them accurately, taking care not to confuse the two.
- Salt: A small but mighty ingredient, salt enhances all the other flavors in the biscuit dough. It balances the sweetness, deepens the overall taste, and also contributes to the biscuit’s structural integrity, ensuring they hold their shape during baking.
- Cold Vegan Butter: Key to achieving wonderfully flaky biscuits. Using cold butter, cut into small cubes, ensures that pockets of butter remain in the dough. As these melt in the oven, they release steam, creating distinct layers and a flaky texture. Any firm, high-quality plant-based butter will work well, such as popular brands like Earth Balance, Melt Organic, or Country Crock. Ensure it’s very cold before incorporating.
Creative Variations to Elevate Your Shortcake Experience
While the classic vegan strawberry shortcake is a timeless delight, this recipe is incredibly versatile, offering endless possibilities for customization. Don’t hesitate to get creative and tailor it to your preferences or what you have on hand.
- Cake-Based Shortcake: If you adore a more cake-like texture, adapt your favorite vegan vanilla layer cake recipe. Slice the cake into individual portions and layer it with generous amounts of homemade or store-bought vegan whipped cream and those beautifully macerated strawberries. The soft cake provides a different, yet equally delicious, base.
- Lemon Loaf Shortcake: For a delightful twist, consider piling whipped cream and the juicy macerated strawberries atop slices of this refreshing vegan lemon loaf. The bright citrus notes from the lemon loaf beautifully complement the sweetness of the strawberries, adding an extra layer of flavor complexity to your shortcake.
- Mixed Berry Medley: While strawberries are traditional, don’t limit yourself! This recipe shines with a variety of fresh berries. Experiment with fresh raspberries, blueberries, blackberries, or even a vibrant medley of mixed berries instead of just strawberries. Each berry type offers its unique tartness and sweetness, creating a different profile for your shortcake.
- Ice Cream Alternative: For an indulgent and cooling option, particularly on a hot day, a scoop of dairy-free vanilla ice cream works wonderfully in place of whipped cream. While traditional shortcake always features whipped cream, a creamy vegan ice cream adds a delightful richness and a different textural dimension, melting slightly into the warm biscuit for pure bliss.
- Chocolate Drizzle: For chocolate lovers, a light drizzle of melted vegan dark chocolate over the top of the assembled shortcakes would add a touch of decadence.
- Herbal Infusion: Consider adding a few finely chopped fresh mint leaves or a sprinkle of lemon zest to the macerated strawberries for an extra layer of freshness and aroma.
Effortless Step-by-Step Guide to Making Vegan Strawberry Shortcake
Creating this stunning vegan strawberry shortcake is a straightforward process, designed to be enjoyable for home bakers of all skill levels. Follow these detailed steps to achieve perfect, fluffy biscuits and perfectly sweetened strawberries, ready to be assembled into a truly memorable dessert.
Step 1: Macerate the Strawberries for Optimal Flavor
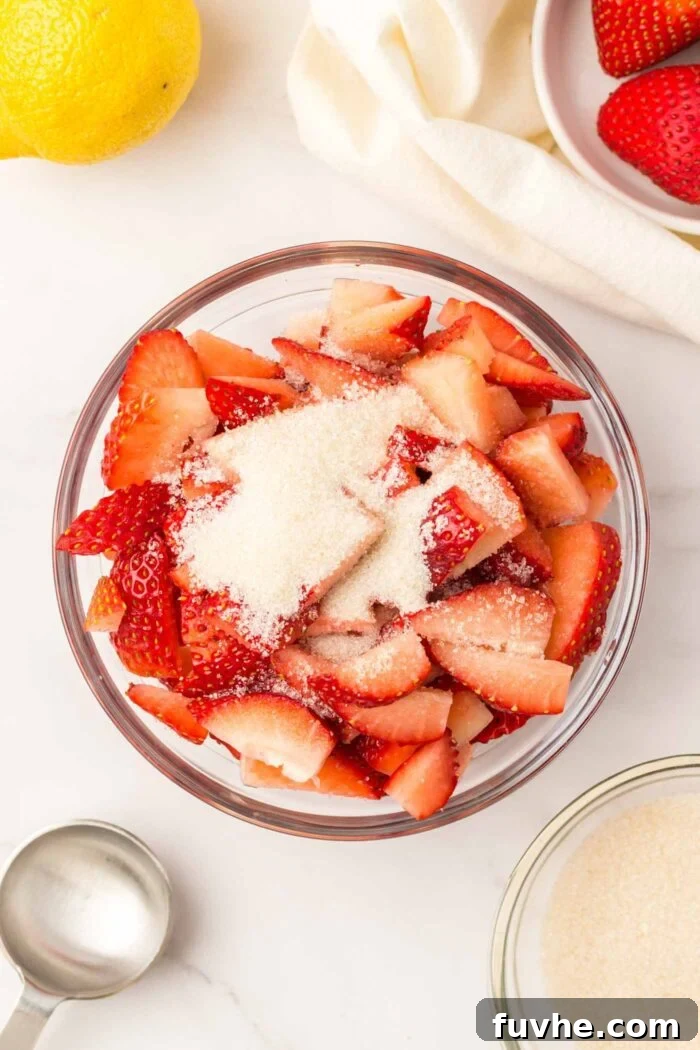
Begin by preparing your fresh strawberries. Wash them thoroughly, hull them, and then slice them into evenly sized pieces. Place the sliced strawberries into a medium-sized bowl. Sprinkle the granulated sugar evenly over the strawberries. Gently toss the mixture until all the strawberries are lightly coated. Set the bowl aside at room temperature while you prepare the biscuits. As the strawberries sit with the sugar, they will naturally release their delicious juices, creating a sweet, syrupy mixture that is bursting with flavor – this process is known as maceration and it’s key to a juicy shortcake filling!
Step 2: Prepare Your Oven and Vegan Buttermilk
Preheat your oven to 425°F (220°C). This high temperature is crucial for encouraging the biscuits to rise quickly and achieve a golden-brown exterior while remaining tender inside. While the oven preheats, lightly grease a 12-inch cast-iron skillet or a standard baking tray. Use either a small amount of vegan butter, ensuring full coverage, or a non-stick cooking spray for an even easier release. This step prevents your biscuits from sticking and promotes a lovely crust.
Next, prepare the homemade vegan buttermilk. In a glass or small bowl, combine the specified amount of almond milk (or your chosen plant-based milk) with the lemon juice (or apple cider vinegar). Give it a quick stir and then allow the mixture to sit undisturbed for 5-10 minutes. During this time, the acid from the lemon juice will react with the plant milk, causing it to visibly curdle and thicken slightly. This “buttermilk” is vital for the tender texture and slight tang of our vegan biscuits, mimicking the effects of traditional buttermilk in baking.
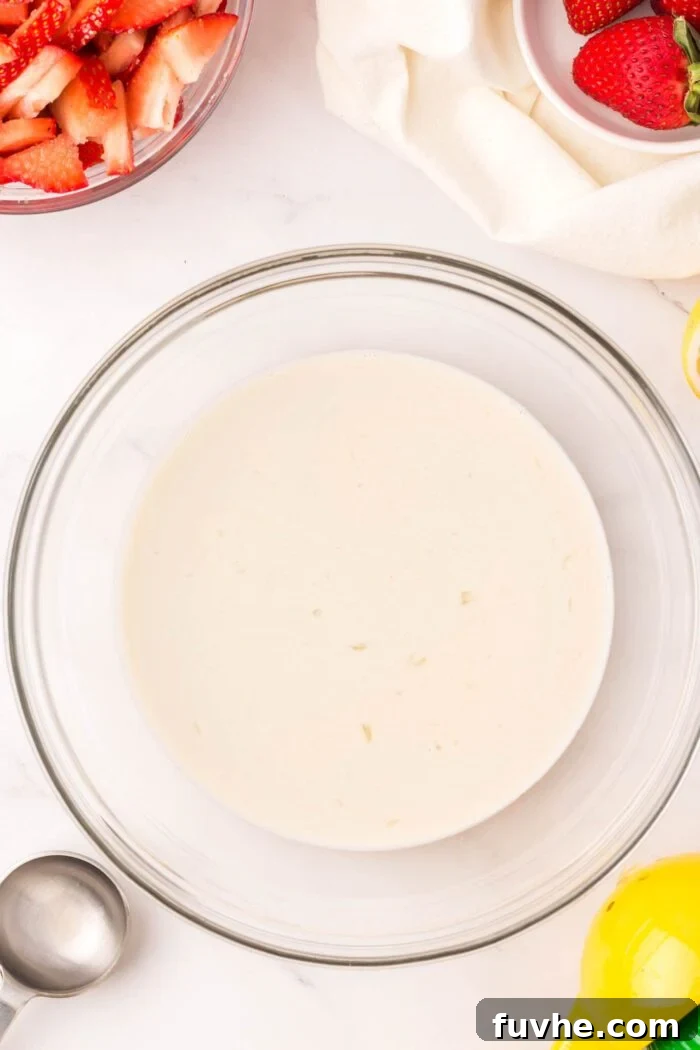
Step 3: Combine Dry Ingredients
While your vegan buttermilk is curdling and the strawberries are macerating, turn your attention to the dry ingredients for the biscuits. In a large mixing bowl, add the all-purpose flour, granulated sugar, baking powder, baking soda, and salt. Use a whisk or a spoon to thoroughly mix these ingredients until they are well combined. Ensuring an even distribution of the leavening agents (baking powder and baking soda) and salt at this stage is critical for uniform rising and consistent flavor throughout your biscuits.
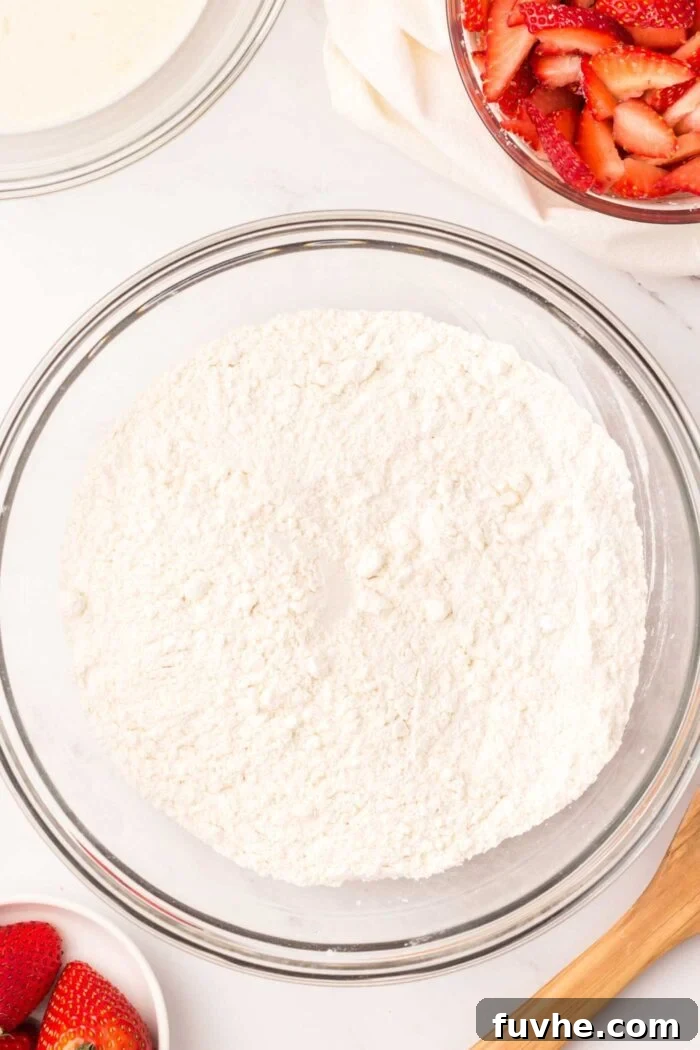
Step 4: Incorporate the Cold Vegan Butter
Now it’s time to add the cold vegan butter to your dry ingredients. Take your cubed vegan butter (ensure it’s very cold, as this is vital for flaky biscuits) and add it to the flour mixture. Using a pastry cutter, two forks, or even your clean fingertips, begin to cut the butter into the flour. Work quickly to prevent the butter from warming too much. Continue cutting and blending until the butter chunks are roughly the size of small peas and the entire mixture resembles coarse crumbs. This technique creates pockets of butter that will steam during baking, resulting in those desirable flaky layers in your biscuits.
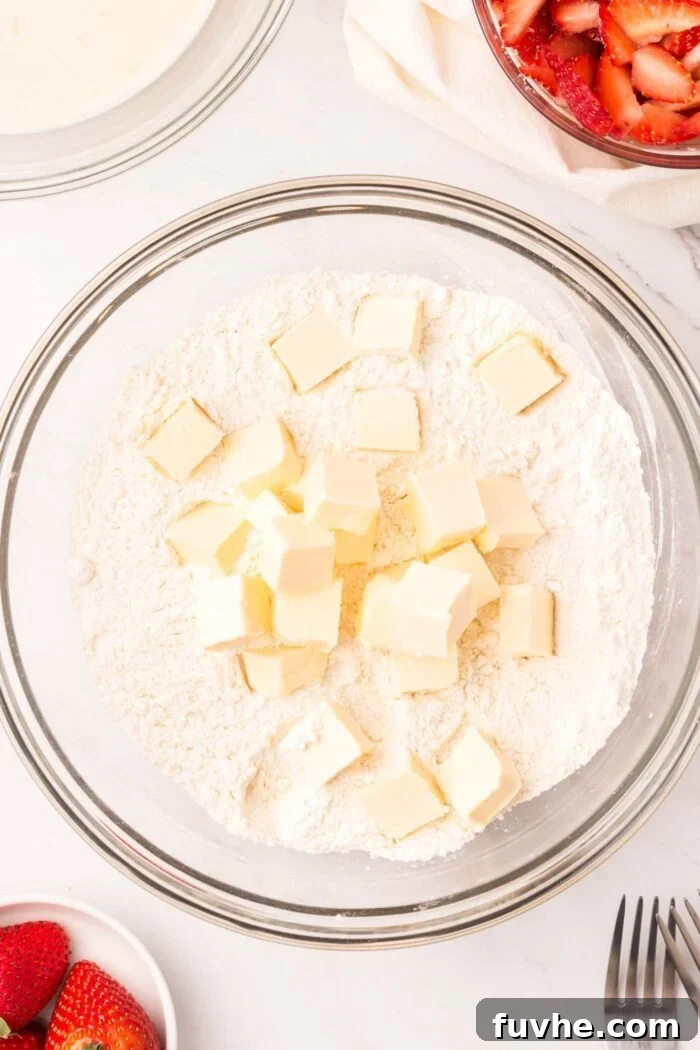
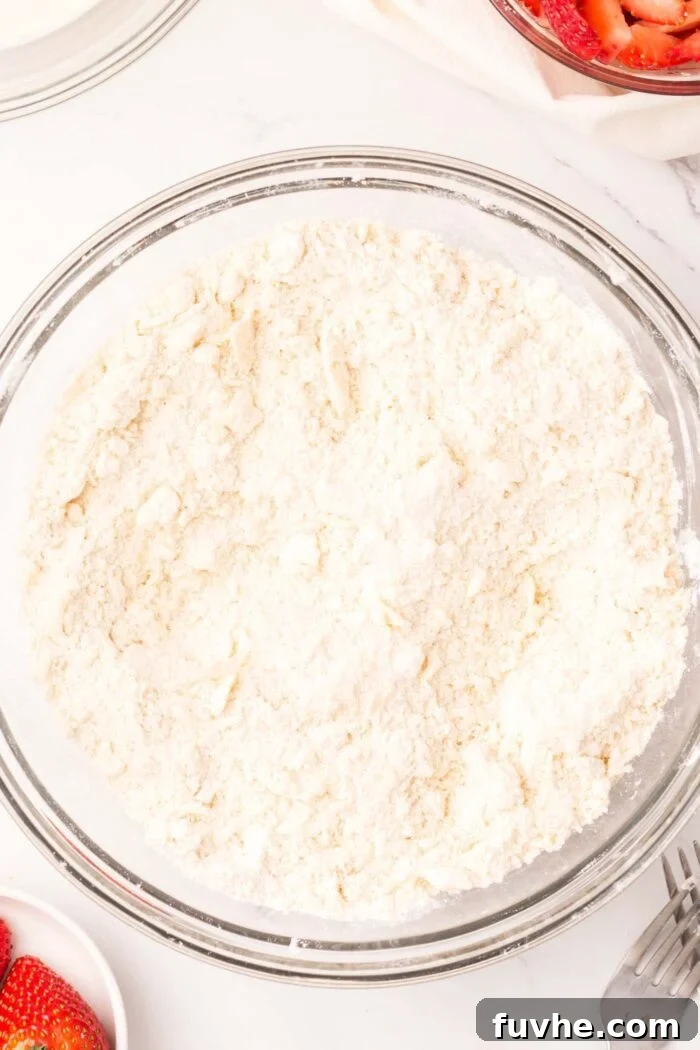
Step 5: Add Vegan Buttermilk and Form Dough
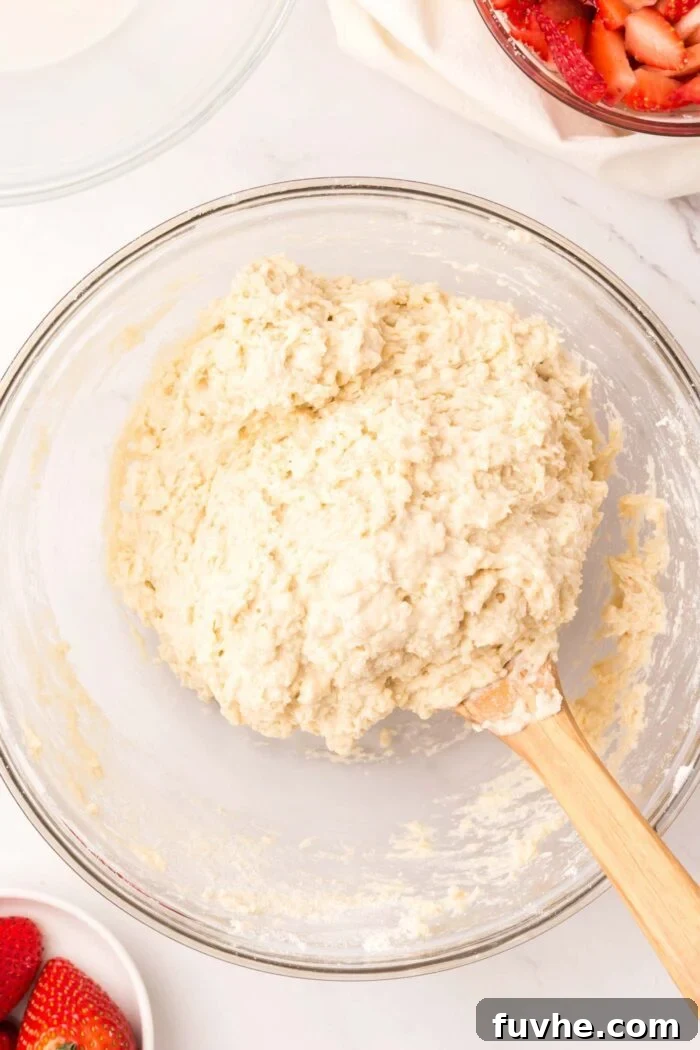
Once your dry ingredients and butter are perfectly combined, gently pour the prepared vegan buttermilk mixture into the bowl. Using a wooden spoon or a spatula, stir the ingredients just until they come together. The key here is to avoid over-mixing. Overworking the dough can develop the gluten too much, resulting in tough biscuits rather than the desired light and tender texture. The dough will be relatively thick and may feel just a little sticky, which is perfectly normal for a good biscuit dough. Stop mixing as soon as no dry streaks of flour remain.
Step 6: Laminate the Dough for Flakiness
Lightly flour a clean work surface. Transfer the biscuit dough from the bowl onto the floured surface. Use your hands to gently bring the dough together into a cohesive mass. Avoid kneading vigorously. Once gathered, lightly flour your rolling pin and carefully roll the dough into a rectangular shape, approximately 9×13 inches. This initial roll prepares the dough for the crucial folding step, which helps create extra flaky layers.
Now, fold the dough into thirds: bring one-third of the dough from one side over the middle, then fold the remaining third from the opposite side over the top of the previously folded section, much like folding a letter. This process, known as laminating, builds layers into the dough that will separate and become beautifully flaky during baking. Below, you can clearly see an image demonstrating how the dough has been folded over itself by thirds, showcasing the layered structure.
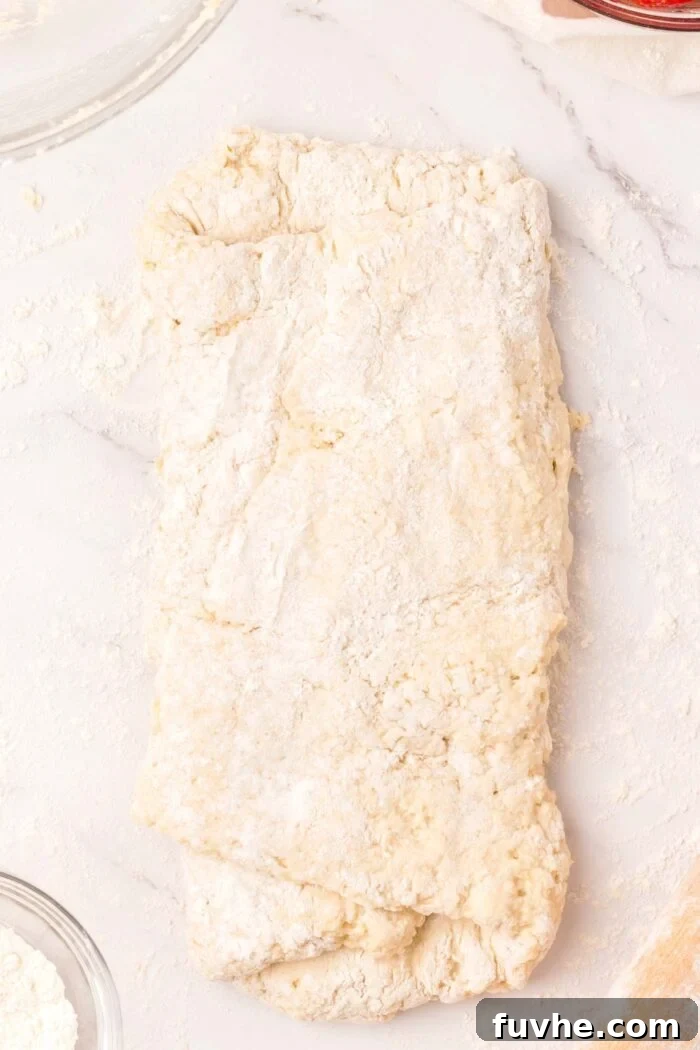
After the first fold, turn the dough horizontally on your work surface. Roll it out once again into another 9×13-inch rectangle. Repeat the folding process into thirds exactly as before. Then, roll it out one more time into a rectangle. By the end of this, the dough should be about 1/2-inch thick. This repeated rolling and folding technique is what creates those signature, towering, flaky layers in truly exceptional biscuits.
Step 7: Cut and Arrange the Biscuits
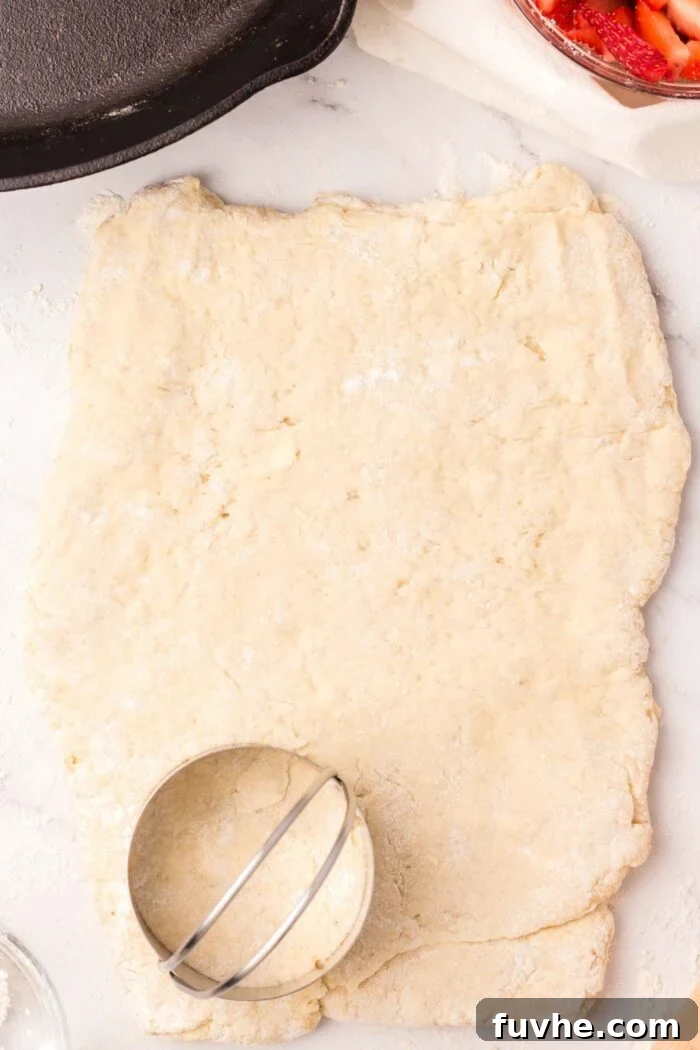
Once the dough is properly layered and rolled to the correct thickness, it’s time to cut your biscuits. Use a biscuit cutter, a clean drinking glass, or even a small Mason jar with a sharp rim to cut out round shapes. Press straight down firmly without twisting, as twisting can seal the edges and inhibit rising. Place the cut biscuits onto your greased skillet or baking sheet. Gather any dough scraps, gently press them together without overworking, re-roll, and cut out additional biscuits until you’ve used all the dough. You should yield approximately 14-18 biscuits, depending on the size of your cutter.
Important Tip for Tall, Fluffy Biscuits:
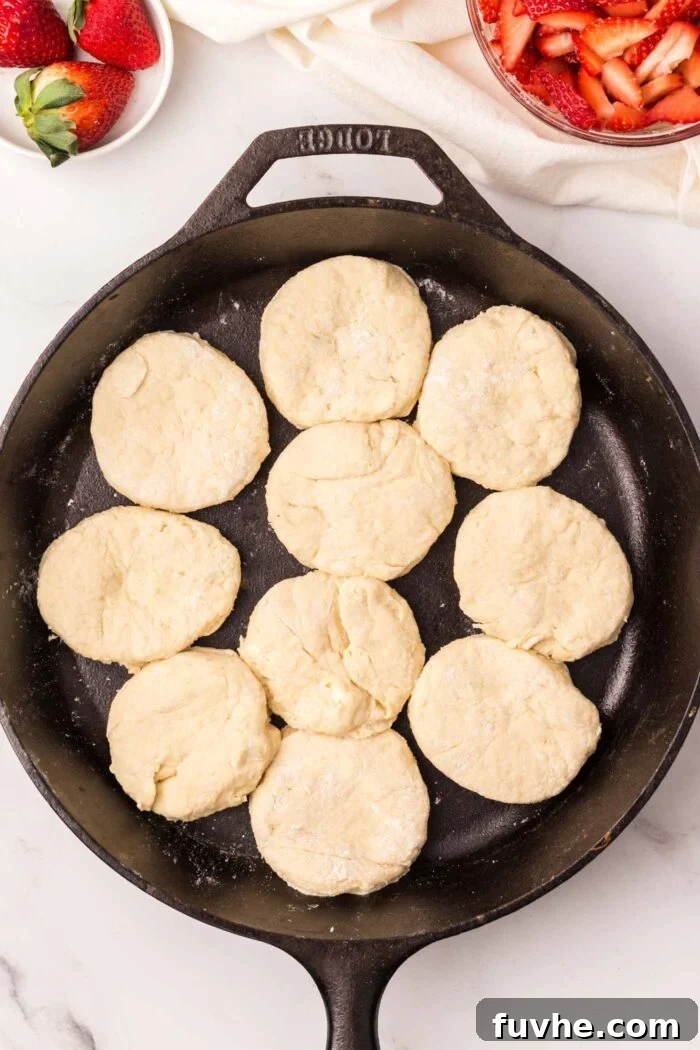
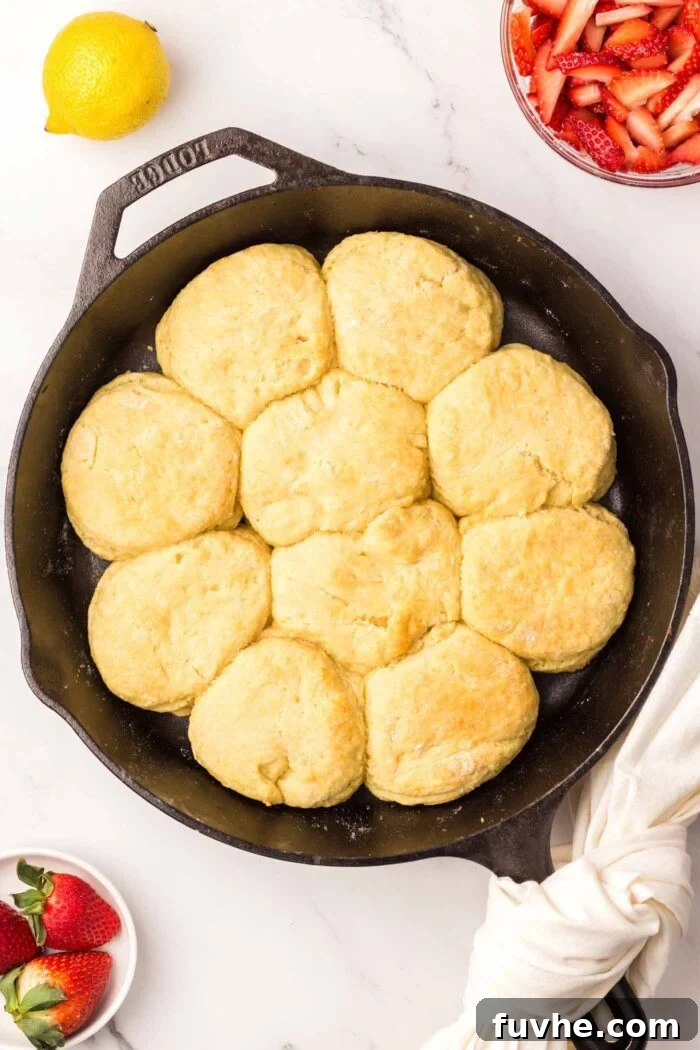
Arrange the biscuits closely together on the greased skillet or baking sheet. This might seem counter-intuitive, but placing them with their sides almost touching actually helps them rise taller and become extra fluffy. As they bake, they support each other, preventing them from spreading too much and encouraging upward expansion, resulting in beautifully tall and tender shortcakes.
Step 8: Bake to Golden Perfection and Cool
Carefully transfer your skillet or baking sheet with the arranged biscuits into the preheated 425°F (220°C) oven. Bake for approximately 13-15 minutes. Keep a close eye on them, as oven temperatures can vary. The biscuits are perfectly baked when their tops turn a beautiful golden brown and they have risen significantly. Once baked, remove the biscuits from the oven and allow them to cool on the baking sheet or skillet for about 10 minutes before attempting to handle them. This cooling period allows them to set slightly, making them easier to slice and assemble without crumbling, and also ensures they’re not too hot for the whipped cream.
Step 9: Assemble Your Heavenly Shortcakes
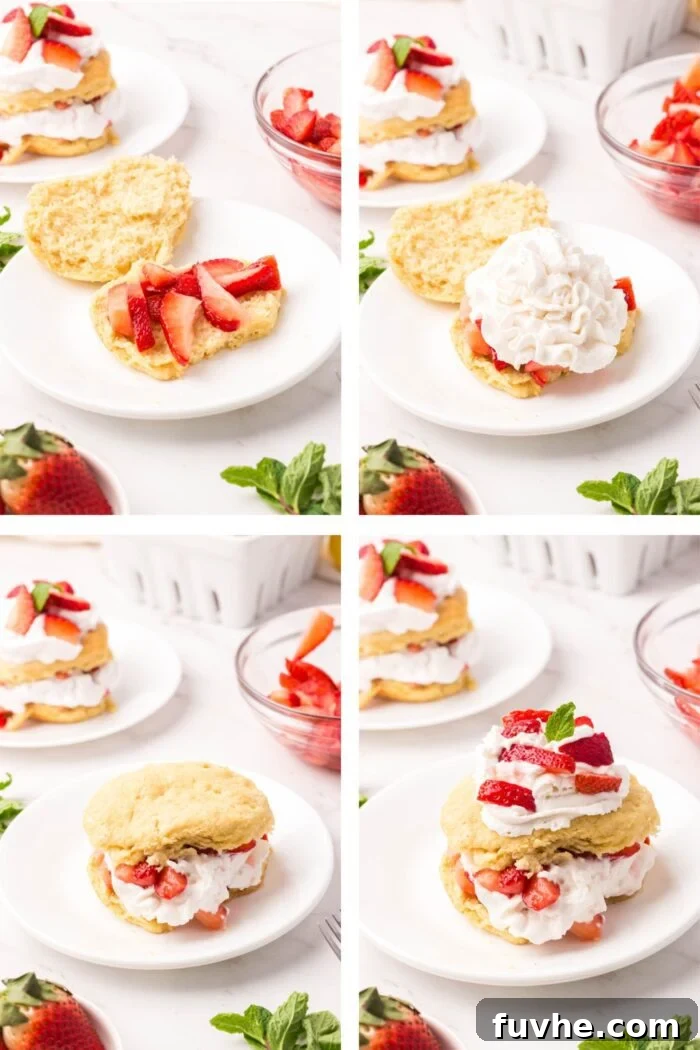
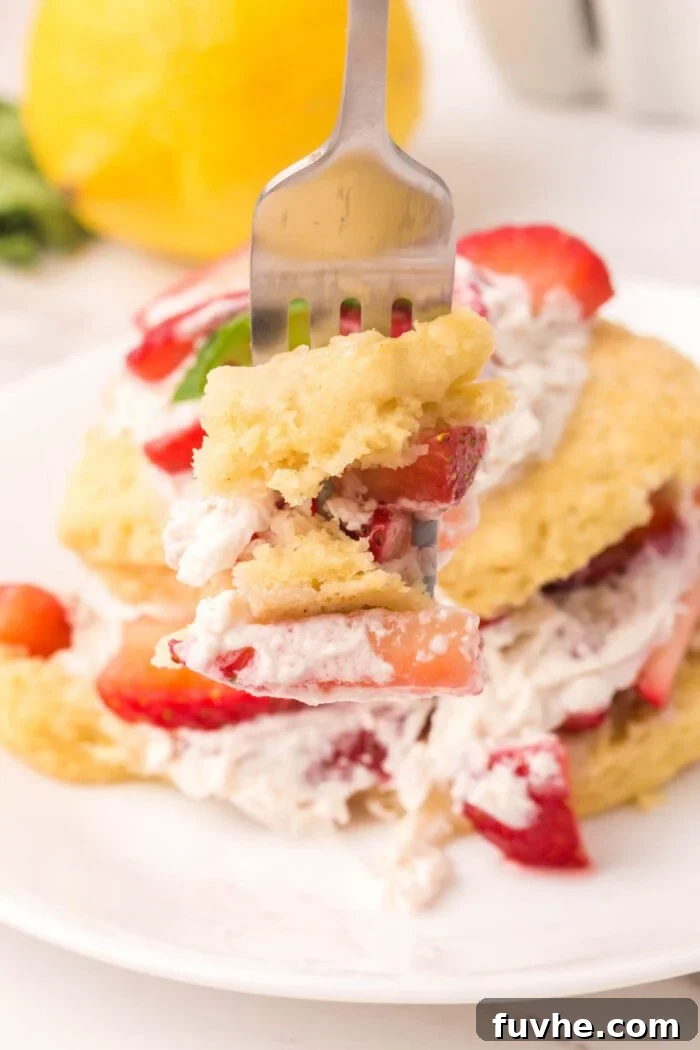
With the biscuits cooled and the strawberries perfectly macerated, it’s time for the best part: assembling your vegan strawberry shortcakes! Using a serrated knife, carefully slice each biscuit in half horizontally, creating a top and bottom layer. On the bottom half of each biscuit, generously spoon a portion of the sweet, juicy strawberries, allowing some of their natural syrup to soak into the biscuit. Follow this with a dollop or swirl of your chosen vegan whipped cream. Place the top half of the biscuit gently over the whipped cream and strawberries. For an extra touch of indulgence and visual appeal, add another smaller spoonful of strawberries and a final flourish of whipped cream on top. Serve immediately to enjoy the freshest flavors and textures.
Frequently Asked Questions About Vegan Strawberry Shortcake
The beauty of vegan whipped cream is its versatility! You can use any type you prefer. Popular store-bought options include canned coconut whip, such as So Delicious CocoWhip, or other brands of plant-based whipping cream found in the dairy-free section of your grocery store. If you’re feeling ambitious, homemade vegan whipped cream is also fantastic. This can be made by chilling a can of full-fat coconut milk overnight, scooping out the thick cream, and whipping it with a touch of powdered sugar until it’s light and fluffy. Another creative option is aquafaba whipped cream, which uses chickpea brine for a light, airy texture.
Absolutely! This vegan strawberry shortcake can certainly be made ahead, making it a convenient option for entertaining or meal prep, though the biscuits are undeniably at their peak freshness when served warm from the oven. For best results, prepare the components separately: the biscuits can be baked 2-3 days ahead of time and stored in an airtight container at room temperature. The macerated strawberries can also be prepared the day before assembly and kept in a sealed container in the refrigerator. Assemble the shortcakes just before serving to ensure the biscuits remain crisp and don’t become soggy from the strawberries and cream.
While fresh strawberries are truly ideal for this recipe, delivering the best texture and brightest flavor, you can certainly use frozen strawberries if that’s what you have on hand or if fresh ones are out of season. If opting for frozen berries, ensure you thaw them completely before use. Crucially, drain off any excess liquid that accumulates during thawing. Frozen strawberries tend to release more water, and removing this extra moisture will prevent your shortcake from becoming watery and ensure the flavors are concentrated and vibrant, much like with fresh berries.
The key to flaky vegan biscuits lies in two main techniques: using very cold vegan butter and proper dough handling. Ensure your butter is chilled right until you’re ready to use it, and cut it into pea-sized pieces. When mixing it into the flour, work quickly to keep it cold. Additionally, the process of rolling and folding the dough into thirds multiple times (lamination) creates distinct layers that expand in the oven, yielding that wonderfully flaky texture. Finally, avoid overworking the dough, which can lead to tough biscuits.
This particular recipe has been developed and tested with all-purpose flour for optimal results in texture and rise. While it hasn’t been specifically tested with gluten-free flour blends, you might be able to achieve a decent result by substituting a 1:1 gluten-free all-purpose flour blend that contains xanthan gum. However, be aware that the texture and rise of the biscuits may vary. It’s often helpful to start with a blend designed for baking, and be careful not to overmix the dough.
Expert Tips for Vegan Strawberry Shortcake Success
Achieving a truly outstanding vegan strawberry shortcake involves a few key techniques. Follow these expert tips to ensure your biscuits are perfectly flaky, your strawberries burst with flavor, and your overall dessert is nothing short of heavenly.
- Consider a Lower-Sugar Option: If you prefer a less sweet dessert or are mindful of sugar intake, you have the flexibility to adjust the sweetness. You can easily omit the granulated sugar entirely when macerating the strawberries. The natural sweetness of ripe strawberries is often enough, especially when paired with the sweetened biscuits and whipped cream. Taste your strawberries first and adjust accordingly.
- Crucial: Avoid Overmixing the Dough: This is arguably the most vital tip for achieving light, tender, and fluffy biscuits. Once you’ve added the liquid ingredients to the dry, mix only until the flour is just incorporated and no dry streaks remain. Overmixing develops the gluten in the flour, which will lead to dense, tough, and chewy biscuits instead of the desired airy texture. Gentle handling is key.
- Utilize a Digital Kitchen Scale for Accuracy: For superior baking results, especially with biscuits, precision in measuring ingredients is paramount. While cup measurements are provided, using a digital kitchen scale to measure your flour and other dry ingredients by weight (grams) offers far greater accuracy. This prevents common issues like adding too much flour, which can lead to dry and dense biscuits. Investing in a scale is highly recommended for all your baking endeavors.
- Keep Your Milk and Butter Ice Cold: The temperature of your ingredients significantly impacts the final texture of your biscuits. Ensure both your plant-based milk and vegan butter are kept in the refrigerator until the very moment you’re ready to use them. Cold butter creates steam pockets as it melts in the oven, leading to those signature flaky layers. Cold milk helps keep the butter from melting too soon during the mixing process, preserving its structure within the dough.
- Don’t Twist the Biscuit Cutter: When cutting out your biscuits, press the cutter straight down into the dough and then lift it straight up. Do not twist the cutter. Twisting can seal the edges of the biscuit dough, which can prevent the biscuits from rising as high and evenly as they should, resulting in shorter, less flaky shortcakes.
- Brush for a Golden Top: For an extra golden-brown and slightly crispy top, you can lightly brush the tops of your raw biscuits with a little extra plant-based milk (or even melted vegan butter) just before they go into the oven. This little trick adds a beautiful sheen and helps achieve a lovely crust.
Storing Your Vegan Strawberry Shortcake Leftovers
Proper storage is key to enjoying your delicious vegan strawberry shortcake for as long as possible. Since this dessert has multiple components, here’s how to best store each part to maintain freshness and flavor.
- Strawberry Mixture: Any leftover macerated strawberry mixture should be transferred to an airtight container and stored in the refrigerator. It will remain fresh and delicious for approximately 2-3 days. The strawberries will continue to soften and release juices, which can be delightful over other desserts or breakfast items.
- Biscuits: Baked vegan biscuits can be stored in a sealed airtight container at room temperature for a few days, retaining their tender texture. For longer storage, they can be kept in the refrigerator for up to 1 week. Alternatively, biscuits freeze exceptionally well: place them in a freezer-safe bag or container, and they can be frozen for up to 3 months. This is a great way to have fresh shortcake components on demand!
- Reheating Frozen Biscuits: When you’re ready to enjoy frozen biscuits, thaw them at room temperature for an hour or two, or overnight in the refrigerator. To restore their freshly baked warmth and flakiness, reheat them briefly in a toaster oven, a conventional oven set to a low temperature (around 300°F/150°C) for 5-10 minutes, or even a microwave for a very short burst until warmed through.
- Assembled Shortcakes: While best served immediately, if you have leftover assembled shortcakes, store them loosely covered in the refrigerator. However, be aware that the biscuits will start to soften from the moisture of the strawberries and whipped cream after a few hours. Consume assembled shortcakes within 12-24 hours for the best quality.
Explore More Delicious Vegan Desserts
If you’ve fallen in love with this vegan strawberry shortcake and are eager to expand your repertoire of plant-based sweets, you’re in luck! We have a treasure trove of delightful vegan dessert recipes waiting to be discovered. Each recipe is crafted to deliver exceptional flavor and texture, proving that ethical eating can be incredibly indulgent.
- No-Bake Vegan Blueberry Cheesecake: A refreshing, creamy, and vibrant dessert that comes together effortlessly without an oven.
- Healthy Baked Pears: A simple yet elegant dessert showcasing the natural sweetness of pears, perfect for a lighter treat.
- Baked Apple Slices: Comforting and wholesome, these warm, spiced apple slices are a delightful, easy-to-make dessert.
- Vegan Stuffed Apples: Apples baked until tender and filled with a flavorful, spiced plant-based mixture for a truly satisfying dessert.
- Vegan Apple Crumble Bars: All the joy of apple crumble in a convenient, portable bar form, perfect for snacks or dessert.
- Baked Vegan Donuts: Light, fluffy, and endlessly customizable, these baked donuts are a healthier alternative to fried versions.
Loved this recipe? Pin it now to save it for later!
Pin It
Delicious Vegan Strawberry Shortcake
Deryn Macey
20
15
35
15
Rate Recipe
Print Recipe
Ingredients
Strawberries and Whipped Cream
- 1 lb fresh sliced strawberries
- 1 tbsp granulated sugar
- store-bought or homemade vegan whipped cream
Biscuits
- 1 cup almond milk, 240 ml
- 1 tbsp lemon juice, 15 mL (or apple cider vinegar)
- 2 ¾ cup all-purpose flour (330 g) + additional ¼ cup for rolling (30 g)
- ¼ cup granulated sugar, 50 g
- 1 tbsp baking powder
- ½ tsp baking soda
- 1 tsp salt
- ½ cup vegan butter, cold and cut into cubes (113 g)
Instructions
Prep the Strawberries
-
Wash, hull, and slice your fresh strawberries. Place them into a bowl, then mix in the granulated sugar. Cover the bowl and let it sit at room temperature for 15-20 minutes while you prepare the biscuits. This allows the strawberries to macerate and release their sweet juices.
Make the Biscuits
-
Preheat your oven to 425˚F (220˚C). Lightly grease a 12-inch cast-iron skillet or a standard baking sheet with vegan butter or non-stick cooking spray to prevent sticking.
-
To create vegan buttermilk, combine the almond milk and lemon juice (or apple cider vinegar) in a glass or small bowl. Let the mixture sit for 5-10 minutes until it visibly curdles and thickens slightly.
-
In a large mixing bowl, whisk together the all-purpose flour, granulated sugar, baking powder, baking soda, and salt until they are well combined. Add the very cold, cubed vegan butter and use a pastry cutter, two forks, or your fingertips to cut the butter into the dry ingredients until the mixture resembles coarse crumbs with pea-sized butter chunks.
-
Pour the prepared vegan buttermilk mixture into the flour and butter mixture. Stir gently with a wooden spoon or spatula just until the ingredients are combined and no dry streaks of flour remain. Be careful not to overmix the dough.
-
Lightly flour a clean work surface. Turn the biscuit dough out from the bowl onto the floured surface. Gently bring the dough together with lightly floured hands to form a cohesive mass. Roll the dough into a rectangle approximately 9×13 inches. Fold the right side of the dough over the middle, then fold the left side over the top of the folded section (folding into thirds, like a letter). Turn the dough horizontally and roll it out again to 9×13 inches. Repeat the folding process, and roll out one more time to 9×13 inches. The dough should be about ½ inch thick. Use a biscuit cutter (or a glass/Mason jar) to cut round biscuits, pressing straight down without twisting. Gather the scraps, gently press them together, re-roll, and cut out any remaining biscuits. You should yield approximately 14-18 biscuits depending on their size.
-
Arrange the cut biscuits closely together in the greased cast-iron skillet or on the baking sheet. This helps them rise taller and creates a softer side. Bake in the preheated oven at 425˚F (220˚C) for 13-15 minutes, or until the tops of the biscuits are beautifully golden brown.
-
Once baked, remove the biscuits from the oven and allow them to cool on the skillet or baking sheet for at least 10 minutes before assembling. This cooling time helps them set and makes them easier to handle.
Assemble the Shortcakes
-
Carefully slice each cooled biscuit in half horizontally using a serrated knife.
-
On the bottom half of each biscuit, generously spoon a portion of the macerated strawberries, followed by a dollop of vegan whipped cream.
-
Place the top half of the biscuit over the whipped cream and strawberries. For an extra touch, add another spoonful of strawberries and a final dollop of whipped cream on top. Serve your delicious vegan strawberry shortcakes immediately and enjoy!
Notes
Apple cider vinegar can be used as a direct 1:1 substitute for lemon juice to create the vegan buttermilk if you don’t have fresh lemons available.
For added convenience, the biscuit dough can also be prepared using a food processor. Add the dry ingredients first, pulse to combine, then add the cold cubed butter and pulse until crumbly. Finally, add the vegan buttermilk and pulse just until the dough comes together. Be careful not to overmix when adding the liquid to maintain a tender biscuit.
Leftovers of the individual components (biscuits and strawberry mixture) should be stored separately in air-tight containers. Biscuits can be kept at room temperature for up to 3 days or in the freezer for up to 3 months. The strawberry mixture should be refrigerated and consumed within 2-3 days. Assemble shortcakes just before serving for the best texture.
Nutrition
Serving:
1shortcake
,
Calories:
150kcal
,
Carbohydrates:
25g
,
Protein:
3g
,
Fat:
4g
,
Sodium:
270mg
,
Fiber:
1g
,
Sugar:
6g
Enjoyed this recipe? Please take a moment to rate and leave a comment below!
Your feedback helps us and other home bakers.