
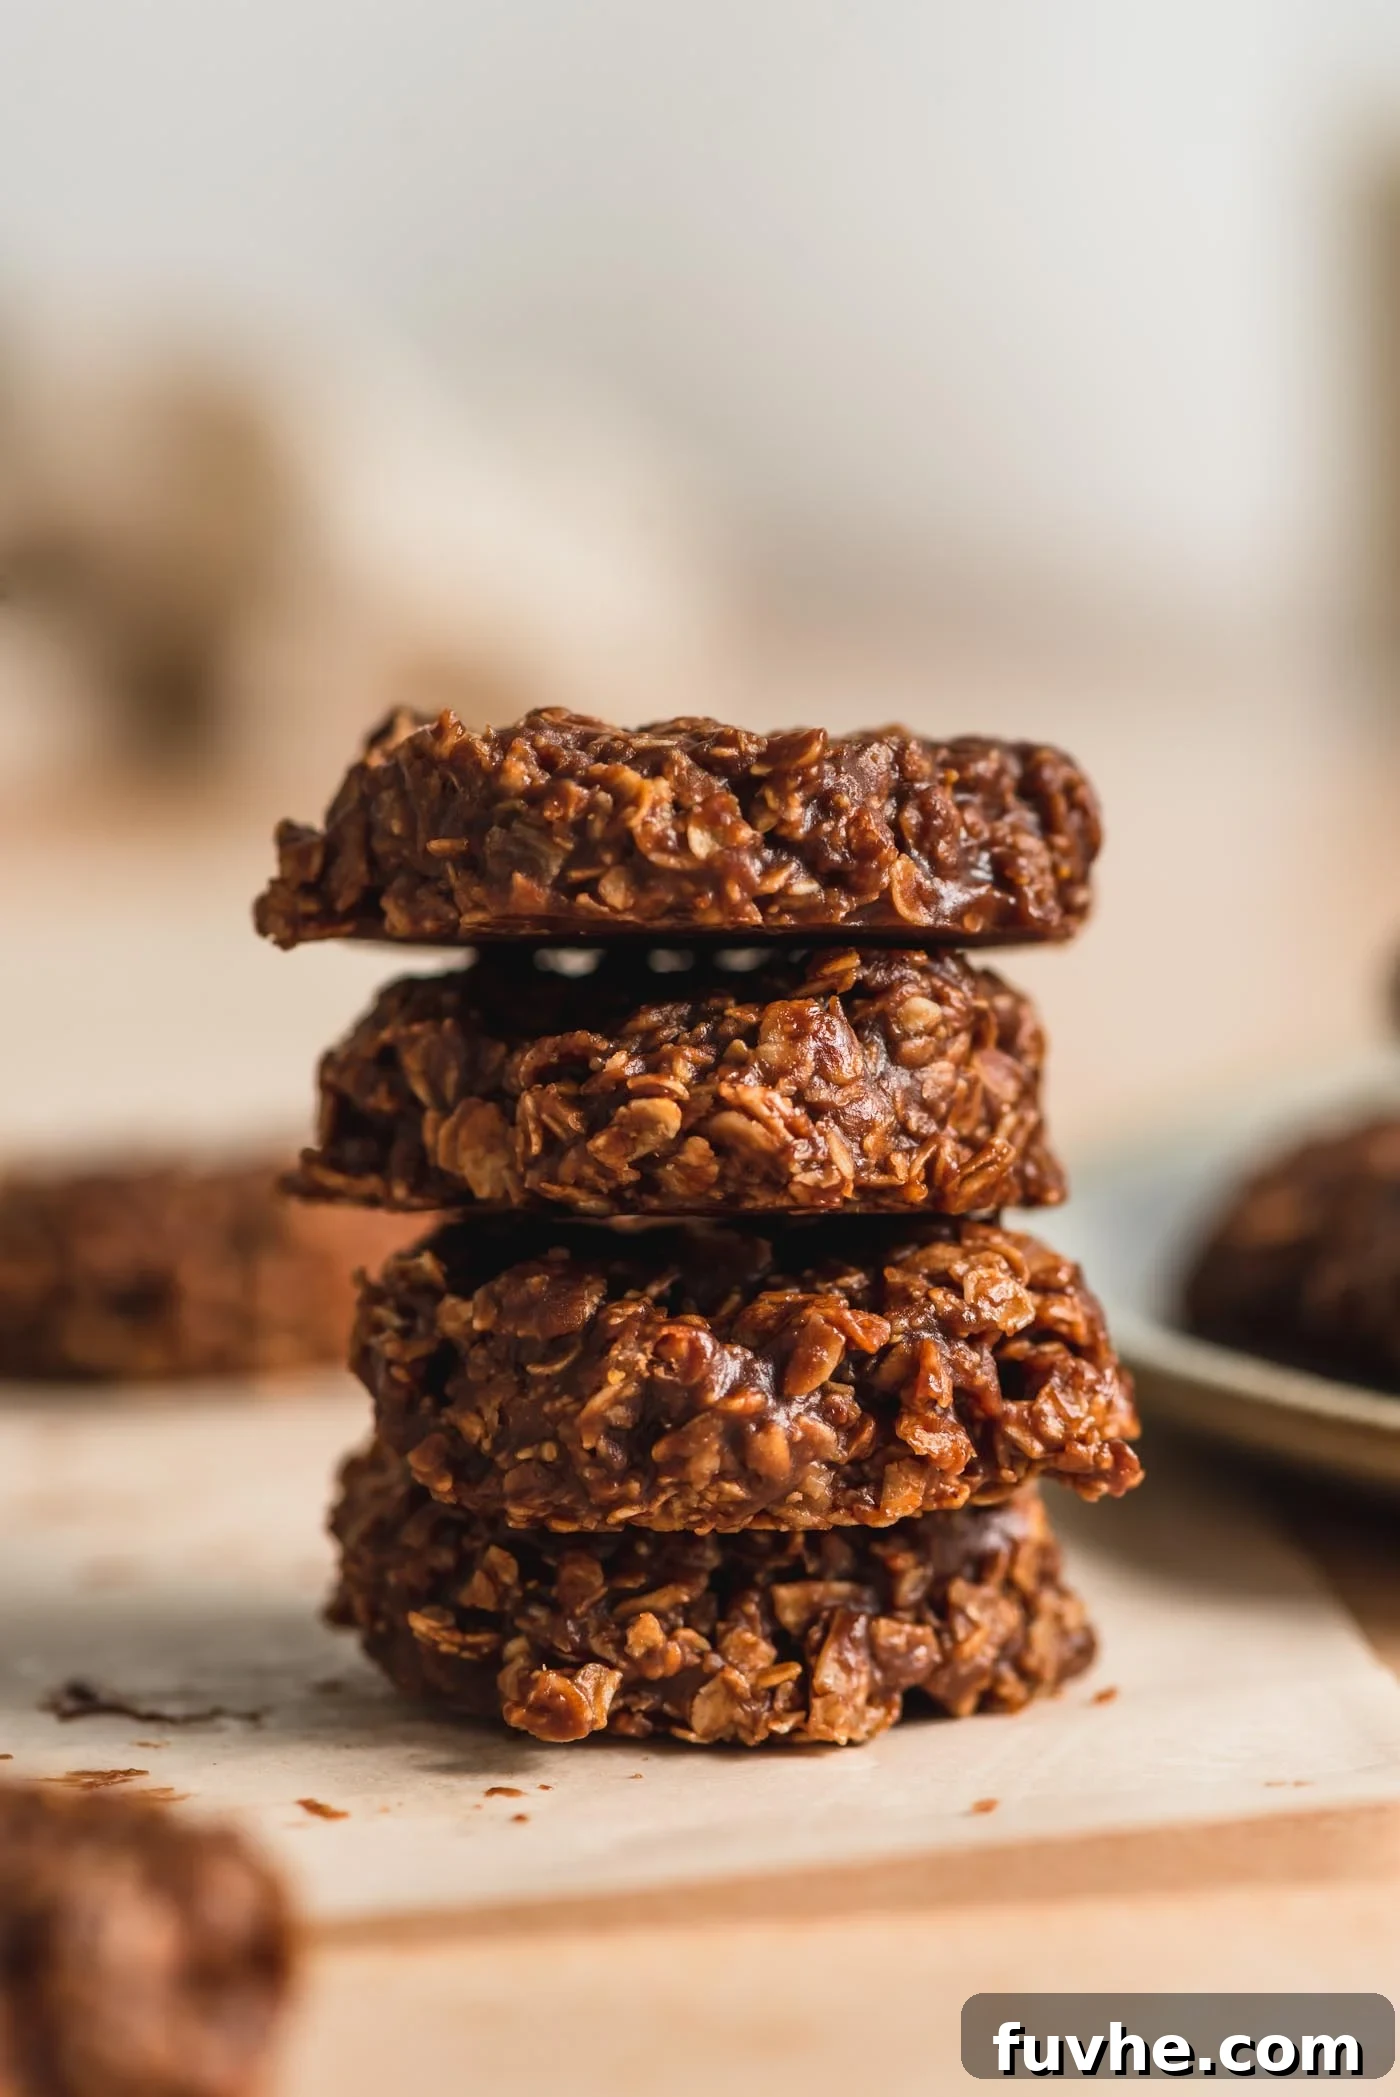
Craving a delightful sweet treat that requires absolutely no baking? Look no further than these classic vegan no-bake cookies! In just minutes, you can whip up a batch of rich, chewy, and decadent cookies using only 7 simple ingredients. Perfect for a quick dessert fix or a last-minute addition to any gathering, these cookies are a timeless favorite that everyone will adore. Get ready to discover your new go-to recipe for effortless deliciousness.
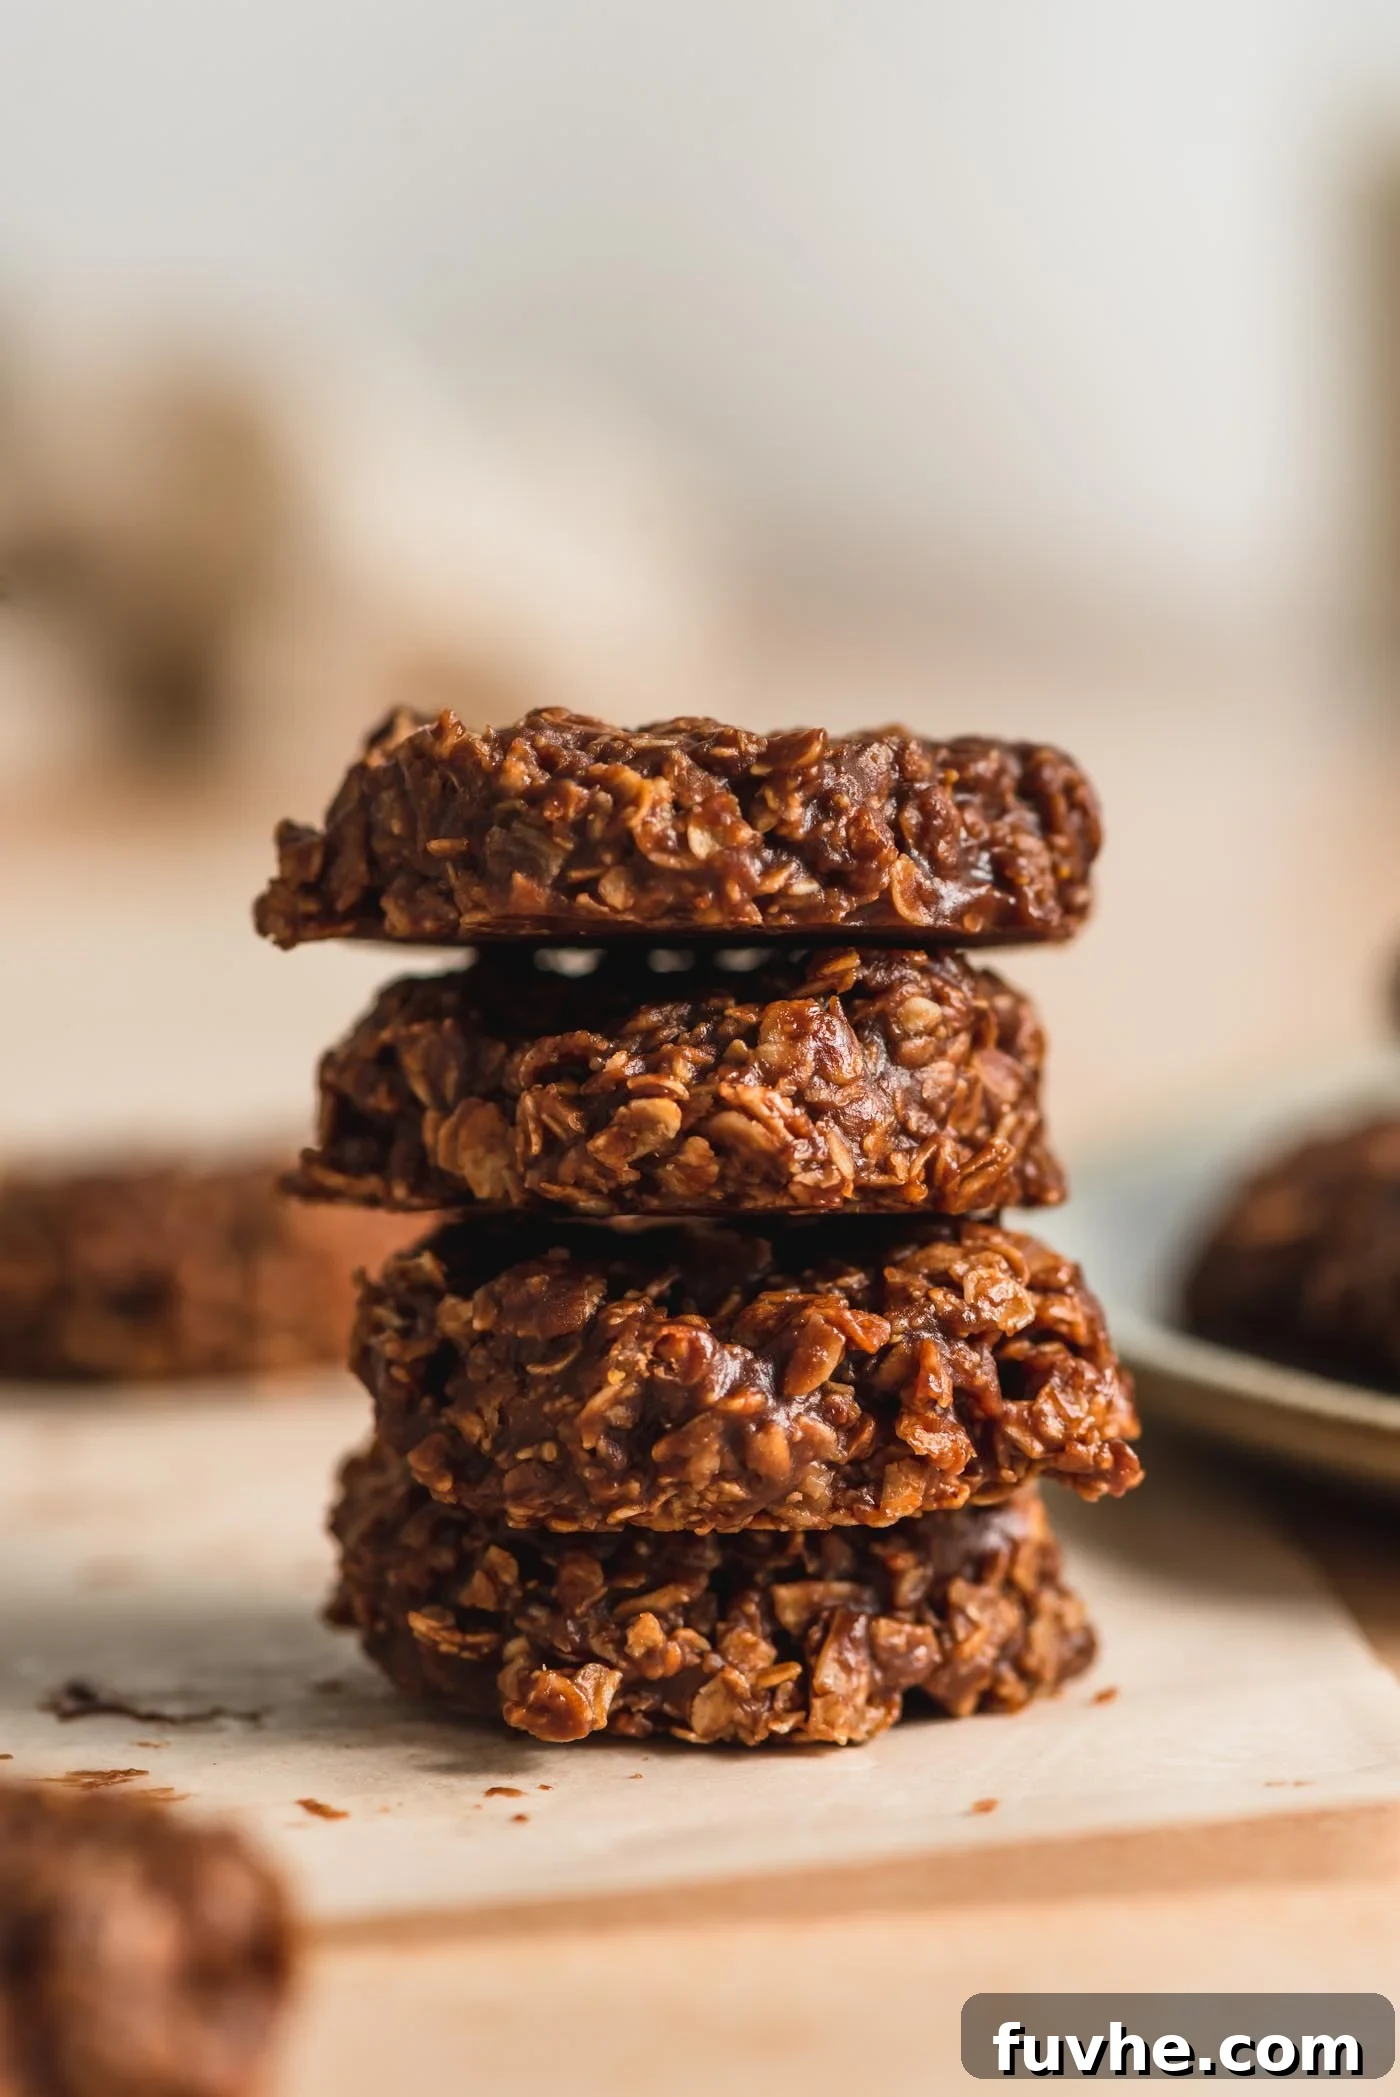
Indulge in Effortless Deliciousness: The Ultimate Vegan No-Bake Cookies
These vegan no-bake cookies are more than just a treat; they’re a revelation for anyone seeking convenience without compromising on flavor or texture. Boasting a rich, intensely chocolatey flavor perfectly balanced with creamy peanut butter and hearty oats, each bite delivers a wonderfully chewy experience. The best part? They come together with minimal effort, making them an ideal choice when time is short, but the desire for something sweet is strong.
Here’s why these classic no-bake cookies are destined to become a staple in your kitchen:
- No Oven Required: Say goodbye to heating up your kitchen! These cookies are prepared entirely on the stovetop and then chilled, making them perfect for hot summer days or busy schedules.
- Wholly Vegan and Gluten-Free: Crafted with plant-based ingredients, these cookies are naturally vegan. By using certified gluten-free oats, they also cater to those with gluten sensitivities, ensuring a delicious treat for almost everyone.
- Only 7 Simple Ingredients: You won’t need a lengthy shopping list for this recipe. With just a handful of pantry staples, you can create a truly impressive dessert that tastes far more complex than it is.
- A Festive Favorite for Any Occasion: While often associated with Christmas cookie platters, their universal appeal makes them suitable for birthdays, potlucks, or simply an everyday snack. They bring a comforting, nostalgic taste that evokes joyful memories.
- Kid-Friendly (and Easily Nut-Free): Kids absolutely adore these cookies, and they’re simple enough for them to help make. Plus, with easy substitutions, they can be made entirely peanut and tree-nut-free, ensuring a safe treat for school events or playdates.
- Excellent for Freezing: Prepare a large batch and store them in the freezer for future cravings. They thaw quickly and retain their perfect texture and flavor, making them ideal for meal prepping desserts.
- Irresistibly Chewy Texture: The combination of oats and the cooked sugar mixture creates a uniquely satisfying chewy texture that is both comforting and addictive.
- Decadently Rich Chocolatey Flavor: High-quality cocoa powder ensures a deep, intense chocolate flavor that pairs beautifully with the nutty undertones of the peanut butter, creating a truly luxurious taste profile.
- Super Quick and Easy to Make: From start to finish, these cookies require minimal active preparation time. They’re a fantastic option when you need a delicious dessert in a hurry, without the fuss of traditional baking.
The magic of no-bake cookies lies in their simplicity and versatility. If you’re a fan of quick, delicious treats, you’ll find plenty more to love in the world of no-bake recipes. Some of our other cherished no-bake creations include these No-Bake Chocolate Caramel Bars, the elegant Vegan Chocolate Ganache Tart, and these wholesome Vegan No-Bake Oatmeal Chocolate Bars. Each offers a unique flavor profile while adhering to the same easy-to-make, no-bake principle.
The Essential 7: Simple Ingredients for Perfect No-Bake Cookies
Achieving these wonderfully rich and chewy no-bake cookies requires just seven straightforward ingredients. The beauty of this recipe lies not only in its minimal components but also in the flexibility it offers for substitutions, allowing you to tailor it to your dietary needs or pantry availability. Below, we delve into each ingredient, offering insights and alternative options to ensure your no-bake cookies are perfect every time.
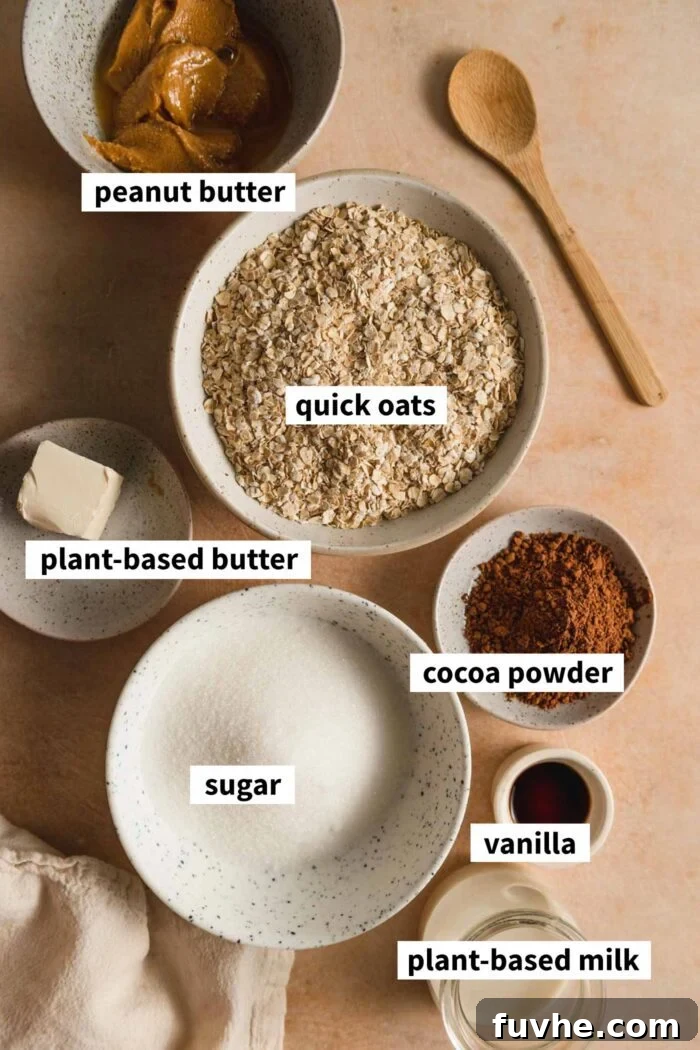
This section provides detailed notes on specific ingredients and potential substitutions. For precise measurements and step-by-step instructions, please refer to the complete recipe card further down the page.
- Vegan Butter: This forms the rich, foundational base of our cookies. High-quality plant-based butters like Miyoko’s, Country Crock, Melt Organic, or Earth Balance sticks are excellent choices for their flavor and ease of measurement. The stick form is particularly convenient for accurate portioning. For a slightly different texture and flavor, you can effectively substitute refined coconut oil. Refined coconut oil has a neutral taste, while unrefined will impart a subtle coconut flavor.
- Sugar: Classic granulated white sugar is typically used here to provide essential sweetness and contribute to the cookie’s structure and set. For those seeking alternatives, organic cane sugar is a great like-for-like swap. Light brown sugar can also be used, adding a deeper, more molasses-like note. Coconut sugar is another fantastic option; it introduces a lovely, almost caramel-like depth of flavor that complements the chocolate beautifully, though it may result in a slightly darker cookie.
- Almond Milk: Any unsweetened plant-based milk will work perfectly in this recipe. Almond milk is a popular choice for its neutral flavor profile, but feel free to use soy milk, oat milk, or cashew milk based on your preference or what you have on hand. Ensure it’s unsweetened to control the overall sweetness of the cookies.
- Cocoa Powder: This is where the magic of chocolate comes in! Standard unsweetened cocoa powder works wonderfully for a classic chocolate flavor. If you prefer a more intense, darker chocolate experience, Dutch-processed cocoa powder or even dark cocoa powder can be used. Just be aware that darker cocoa powders can sometimes result in a slightly drier final product, so adjust liquid very slightly if needed, although it’s usually not necessary for no-bake recipes.
- Peanut Butter: Creamy, natural peanut butter is highly recommended for its smooth texture and rich flavor, which blends seamlessly into the chocolate base. If you’re looking to avoid peanuts, almond butter or cashew butter are excellent substitutes, offering similar creaminess and nutty notes. For a completely nut-free option, sunflower seed butter (SunButter) works remarkably well, providing a delicious alternative that’s safe for those with nut allergies. Ensure whichever butter you choose is smooth and somewhat runny for the best consistency.
- Vanilla Extract: While optional, a good quality pure vanilla extract significantly enhances the overall flavor profile of these cookies, adding a warm, aromatic depth that rounds out the chocolate and peanut butter. If you only have artificial vanilla extract, that will also work, though pure extract generally offers a superior flavor. Don’t skip it if you want that extra touch of gourmet taste!
- Oats: Quick oats are generally preferred for this recipe because their finer texture integrates smoothly into the mixture, creating a more uniform and cohesive cookie. However, if rolled oats (old-fashioned oats) are all you have, they will certainly work too, resulting in a slightly chewier cookie with more discernible oat texture. For gluten-free cookies, always ensure you use certified gluten-free oats to prevent cross-contamination. A mix of quick oats and rolled oats can also be used to achieve a balanced texture.
Get Creative: Exciting No-Bake Cookie Variations
While the classic vegan no-bake cookie is a masterpiece on its own, this recipe is incredibly adaptable, inviting you to experiment with various add-ins and flavor twists. Customizing your batch can be a fun way to cater to different tastes or to simply add a new dimension to this beloved treat. Here are a few ideas to spark your culinary imagination:
- Introduce Delightful Add-ins: Boost flavor and texture by mixing in up to 1 cup of your favorite additions along with the oats. Consider shredded coconut for a tropical twist, finely chopped nuts (like walnuts, pecans, or almonds) for extra crunch, or vegan chocolate chips for an even richer chocolate experience. Mini marshmallows can also create a delightful Rocky Road effect.
- Elevate with Toppings: Before chilling, gently press additional chocolate chips, chocolate chunks, or even a sprinkle of sea salt into the top of each cookie. This not only adds visual appeal but also provides an extra burst of flavor and texture with every bite. You could also drizzle them with melted vegan white chocolate for an elegant finish.
- Explore Peanut Butter Only: For those times you crave pure peanut butter goodness without the chocolate, simply omit the cocoa powder from the recipe. This yields a wonderfully creamy, rich peanut butter no-bake cookie that’s equally addictive and perfect for PB lovers.
- Spice It Up: Add a pinch of cinnamon or a dash of chili powder (for a Mexican hot chocolate vibe) to the cocoa mixture during the boiling stage. This can introduce a warm, intriguing complexity to the chocolate flavor.
- Coffee Kick: Stir in 1-2 teaspoons of instant espresso powder with the cocoa powder to deepen the chocolate flavor and add a subtle coffee undertone.
- Nutty Swirls: Instead of mixing all the peanut butter in, reserve a tablespoon or two and swirl it over the top of the formed cookies before chilling for an artistic marbling effect.
Crafting Perfection: Your Step-by-Step Guide to No-Bake Cookies
Making these vegan no-bake cookies is a straightforward process, but paying close attention to each step, especially the boiling time, is key to achieving that perfect chewy texture and ensuring they set properly. Follow these detailed instructions to create a batch of irresistible cookies that will impress everyone.
Step 1: Boil the Butter, Milk, Sugar, and Cocoa Powder.
Begin by lining a large baking sheet with wax paper or parchment paper. This preparation step is crucial as the cookies will need to be placed directly onto a non-stick surface for chilling.
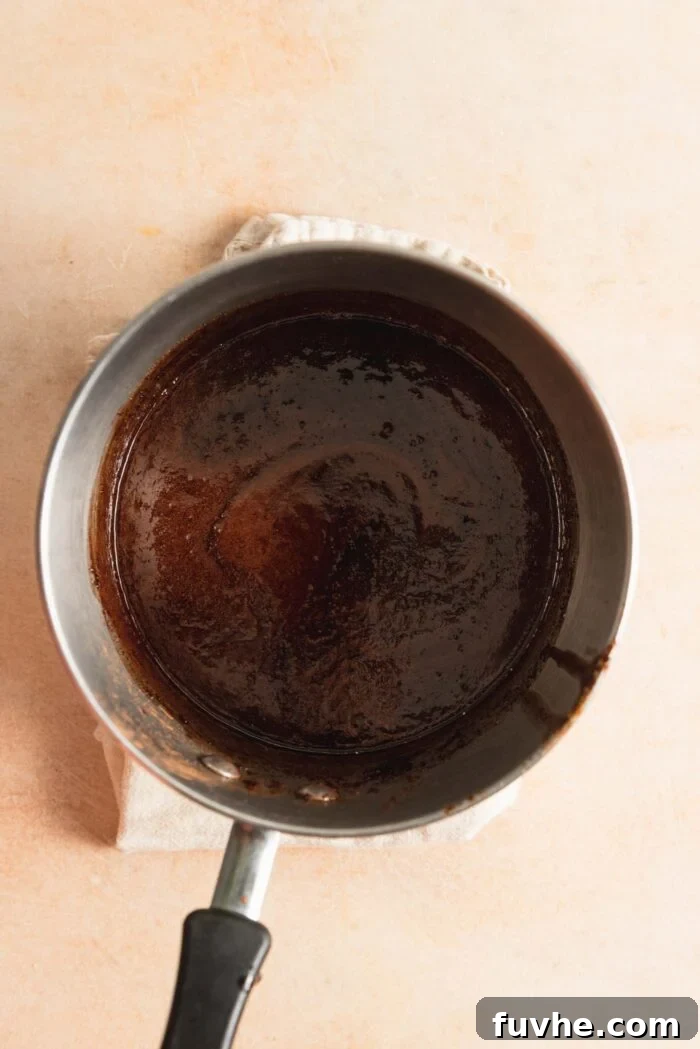
In a medium to large-sized saucepan, melt the vegan butter over medium heat. Once the butter is fully melted and shimmering, whisk in the granulated sugar, almond milk, and cocoa powder. Continue to whisk gently until all ingredients are thoroughly combined and the mixture appears smooth and uniform. Increase the heat to medium-high and bring this mixture to a full, rolling boil. As soon as you see large bubbles breaking the surface consistently, set a timer for exactly 2 minutes. Allow the mixture to boil lightly but continuously for the full 2 minutes. This boiling time is absolutely critical for the cookies to set correctly. Immediately remove the saucepan from the heat once the timer goes off.
IMPORTANT NOTE: The boiling duration in this step is the most crucial factor determining whether your cookies will set firm or remain too soft. It’s not enough to simply bring it to a boil; the mixture needs to boil actively for the full 2 minutes to reach the correct consistency and sugar concentration. If the mixture is not boiled long enough, the sugar won’t crystallize properly, and your cookies will likely stay gooey and soft, failing to hold their shape. Use a timer to ensure precision.
Step 2: Incorporate the Peanut Butter, Vanilla, and Oats.
With the saucepan removed from the heat, immediately add the creamy peanut butter and vanilla extract to the hot chocolate mixture. Stir vigorously with a spoon or whisk until the peanut butter is completely melted and smoothly incorporated, creating a rich, homogeneous chocolate-peanut butter base. There should be no streaks of peanut butter visible.
Next, add the quick-cooking oats. Stir well, ensuring that every oat flake is thoroughly coated with the warm, luscious chocolate mixture. Continue mixing until the entire dough appears uniform in color and texture. The mixture will be thick and sticky, but pliable.
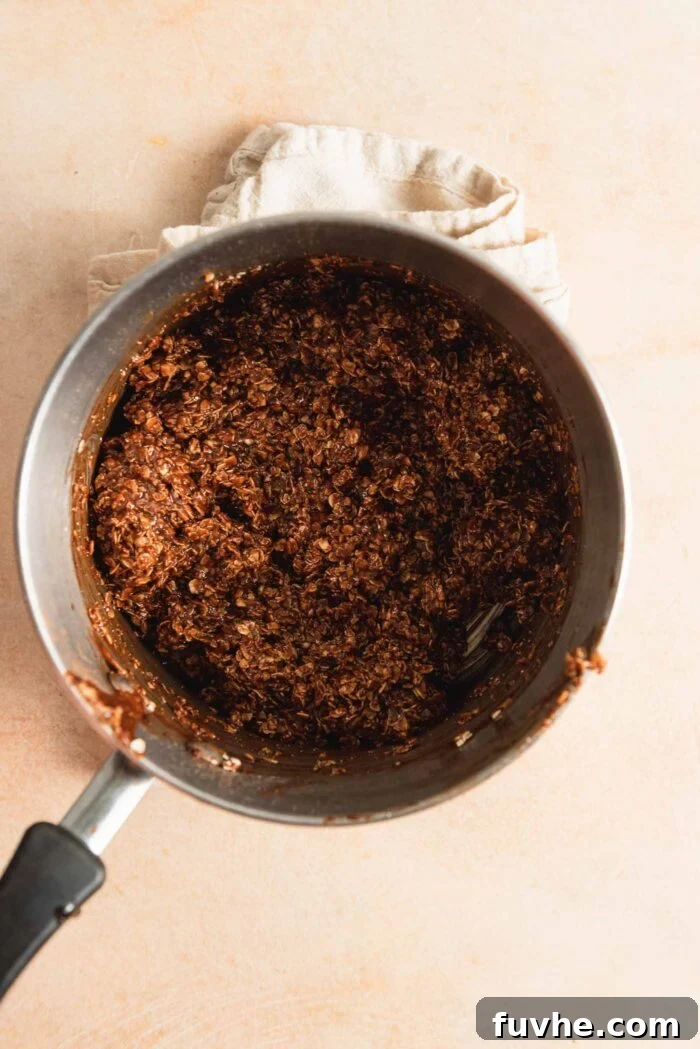
Step 3: Shape the Cookies and Chill to Perfection.
Working quickly while the mixture is still warm and pliable, use a tablespoon or a small cookie scoop to portion out drops of the cookie dough onto your prepared baking sheet. Aim for roughly 1-tablespoon sized mounds. You can leave them as rustic, haystack-style mounds, or gently press them down a little with the back of the spoon to create flatter, more uniform discs, if preferred. The choice is yours and affects only the aesthetic.
Once all the cookie dough has been scooped onto the baking sheet, transfer the sheet to the refrigerator. Allow the cookies to chill for at least 1 hour, or until they are completely firm to the touch. If you’re in a hurry and need them to set faster, you can place the baking sheet in the freezer for about 15-20 minutes, keeping a close eye on them to prevent them from freezing solid.
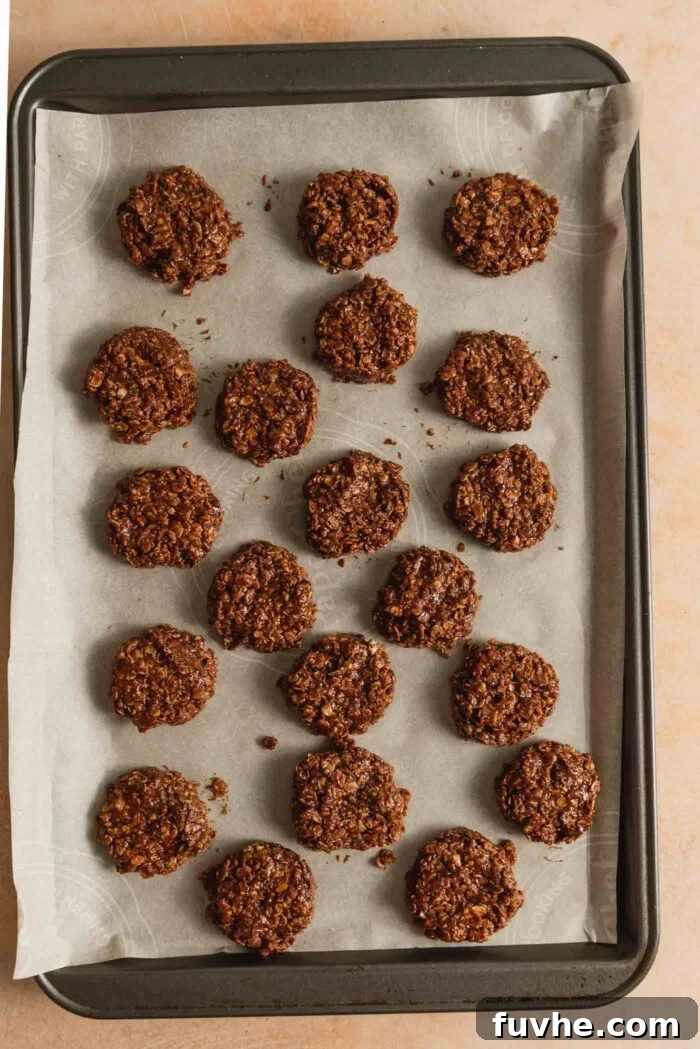
Once the cookies have fully firmed up in the fridge, they are ready to be enjoyed! Their chewy texture and rich chocolate-peanut butter flavor will be at their peak. If you’re not planning to serve them immediately, transfer the set cookies to an airtight container. They can be stored in the refrigerator or frozen for longer-term enjoyment. These cookies are always a crowd-pleaser and disappear fast, so you might want to make a double batch!
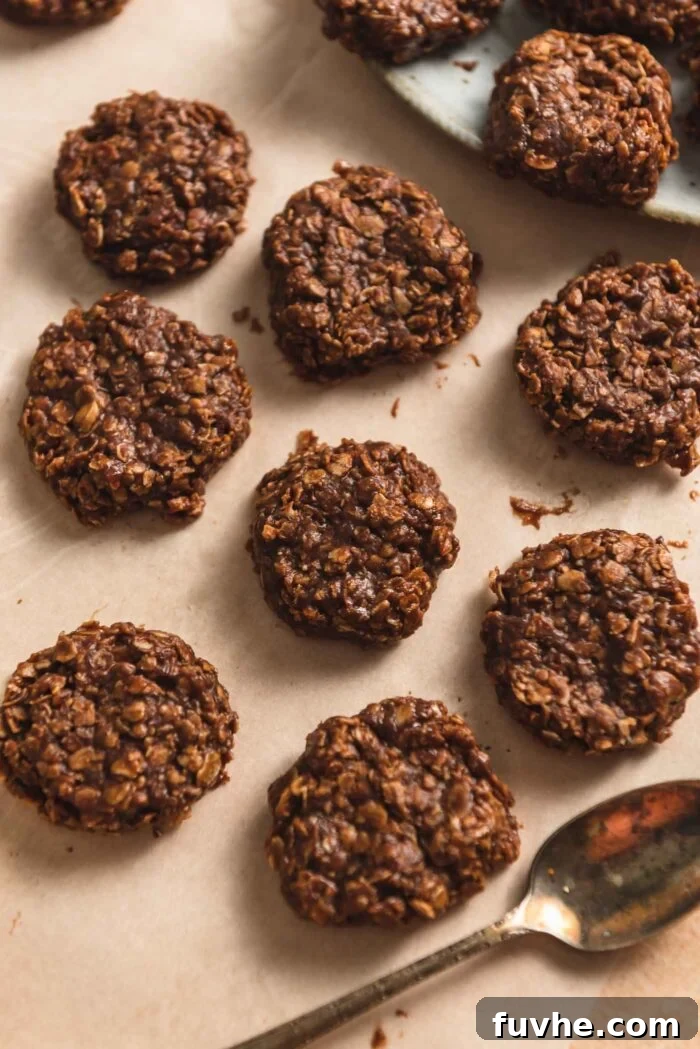
Frequently Asked Questions About No-Bake Cookies
Absolutely! This recipe is very forgiving and scales up beautifully. Doubling the ingredients will yield approximately 40 cookies, making it perfect for parties, gatherings, or simply stocking up your freezer. Just ensure you use a larger saucepan to accommodate the increased volume of liquid during the boiling stage.
Yes, coconut oil works wonderfully as a direct substitute for vegan butter in this recipe. If you prefer a neutral flavor, opt for refined coconut oil. Unrefined coconut oil will impart a subtle, pleasant coconut aroma and taste to your cookies. The fat content and melting properties are similar enough to ensure success.
To ensure your no-bake cookies are entirely nut-free and safe for those with allergies, simply substitute the peanut butter with an equal amount of sunflower seed butter (often sold as SunButter). It provides a similar creamy texture and rich flavor profile, ensuring a delicious and safe treat for everyone.
Yes, it is possible to make sugar-free no-bake cookies. For a sugar-free alternative, replace the granulated sugar with a granulated monk fruit sweetener or a similar cup-for-cup sugar substitute. Be aware that the texture might be slightly different as sugar contributes to the chewiness and setting, but they will still be delicious.
The most common reason for no-bake cookies not setting is insufficient boiling time in Step 1. It is crucial to let the butter, milk, sugar, and cocoa mixture come to a full, rolling boil and then simmer for a precise 2 minutes. This allows the sugar to reach the proper consistency for setting. If boiled for too short a period, the cookies will remain soft and gooey.
Quick-cooking oats are generally preferred because their finer texture blends more smoothly into the mixture, resulting in a more uniform and slightly softer cookie. However, old-fashioned rolled oats can also be used; they will give the cookies a chewier texture with more noticeable oat flakes.
Mastering No-Bake Cookies: Essential Expert Tips
While vegan no-bake cookies are famously easy, a few expert tips can elevate your baking (or rather, no-baking) game, ensuring a perfect batch every single time. Pay attention to these details to achieve that ideal chewy texture and rich flavor.
- Adjust Salt for Unsalted Peanut Butter: If you opt to use unsalted peanut butter, or any other unsalted nut/seed butter, remember to add a small pinch (about ⅛ to ¼ teaspoon) of fine sea salt to the cookie mixture. This tiny addition significantly enhances all the other flavors, particularly the chocolate, and balances the sweetness beautifully. Salt is a crucial flavor enhancer.
- Utilize Runny Nut/Seed Butter: The success of these no-bake cookies largely depends on the consistency of your nut or seed butter. Aim for a natural, creamy peanut butter that has a smooth, almost pourable consistency. Avoid using the very thick, dry peanut butter often found at the bottom of a jar, as it can make the cookie mixture too stiff and difficult to work with, impacting the final texture. Stir your nut butter thoroughly before measuring if it has separated.
- Precise Boiling Time is Non-Negotiable: This is arguably the single most important tip for perfect no-bake cookies. The mixture of butter, sugar, milk, and cocoa powder MUST boil actively for at least 2 minutes. As soon as you observe a consistent, rolling boil over medium heat, start your timer for precisely two minutes. This critical boiling period allows the sugar to dissolve completely and reach a specific temperature and concentration, which is essential for the cookies to set firmly once chilled. Removing the mixture from the heat too soon will result in cookies that remain soft, gooey, and fail to hold their shape.
- Work Quickly After Boiling: Once the mixture has boiled for the correct duration and you’ve added the peanut butter, vanilla, and oats, it’s important to work relatively quickly to scoop the cookies. As the mixture cools, it will thicken and become harder to portion. Have your parchment-lined baking sheet ready before you start boiling.
- Chill Thoroughly: While it’s tempting to dive in, allow the cookies to chill completely until firm. This usually takes about an hour in the refrigerator. Proper chilling ensures they hold their shape, develop their signature chewy texture, and are easy to handle without falling apart.
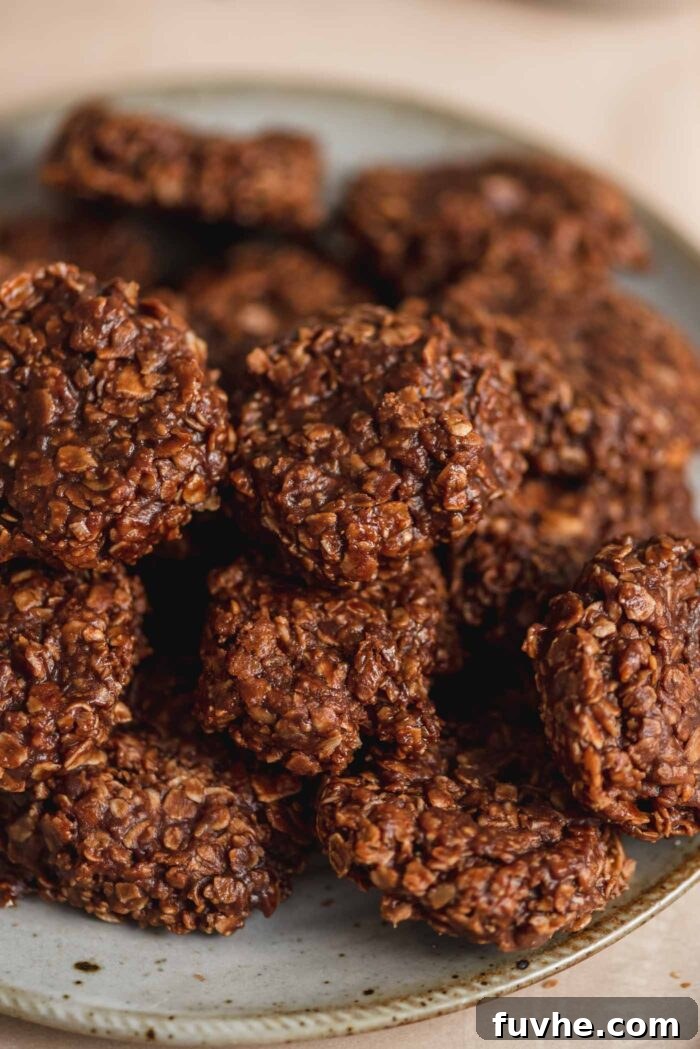
Optimal Storage for Long-Lasting Freshness
One of the many benefits of no-bake cookies is how wonderfully they store, allowing you to enjoy them for days or even weeks after preparation. Proper storage ensures they maintain their delightful texture and flavor. Here’s how to keep your vegan no-bake cookies fresh and delicious:
- Refrigeration is Key: No-bake cookies are best stored chilled. After they have fully firmed up on the baking sheet, transfer them to an airtight container. Arrange them in a single layer or separate layers with parchment paper to prevent sticking. Stored in the refrigerator, they will remain fresh and chewy for up to 1 week.
- Freezing for Extended Enjoyment: For longer-term storage, no-bake cookies freeze exceptionally well. Once completely firm, place them in a freezer-safe airtight container or a heavy-duty freezer bag, again separating layers with parchment paper. They can be frozen for up to 3 months without compromising quality. To enjoy, simply remove them from the freezer and let them thaw at room temperature for a few minutes, or eat them directly from the freezer for a delightful, firm chew.
- Preventing Sticking: Always use parchment or wax paper between layers of cookies when storing them, whether in the fridge or freezer. This prevents them from sticking together, making it easy to grab just one or two without damaging the batch.
- Avoid High Temperatures: Since these cookies don’t contain traditional binding agents activated by baking, they are susceptible to melting or becoming too soft if left at warm room temperatures for extended periods. Always keep them chilled for the best experience.
Discover More Irresistible No-Bake Recipes
If you’ve fallen in love with the ease and deliciousness of these vegan no-bake cookies, you’ll be thrilled to explore other incredible recipes that skip the oven entirely. The world of no-bake treats is vast and varied, offering everything from fudgy bars to creamy desserts. Here are a few more favorites to expand your no-bake repertoire:
- No-Bake Oatmeal Chocolate Bars: A delightful combination of chewy oats and rich chocolate, perfect for a quick snack or dessert.
- No-Bake Peanut Butter Bars: Pure peanut butter bliss in a simple, satisfying bar form.
- No-Bake Chocolate Almond Bars: A sophisticated blend of chocolate and almond, offering a rich and nutty flavor.
- No-Bake Chocolate Chip Cookies: The classic cookie reinvented, offering all the joy without the oven.
- No-Bake Oatmeal Bars: A wholesome and customizable treat, great for breakfast or a healthy energy boost.
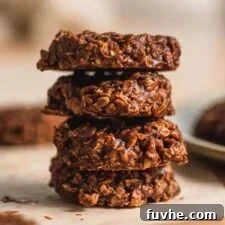
Vegan No-Bake Cookies
Deryn Macey
10 mins
2 mins
20
Ingredients
- 3 tbsp plant-based butter, 42 g
- ¾ cup granulated sugar, 150 g
- ⅓ cup almond milk, 78 mL
- 3 tbsp cocoa powder, 18 g
- ½ cup creamy salted peanut butter, 125 g
- 1 tsp vanilla extract
- 2 cups quick-cooking oats, 188 g
Instructions
- Prepare: Line a baking sheet with wax or parchment paper and set aside.
- Melt Butter: In a medium or large saucepan over medium heat, melt the vegan butter.
- Add Sugar, Milk and Cocoa Powder: Once melted, whisk in the granulated sugar, almond milk, and cocoa powder until well combined. Bring to a boil and let simmer for 1:30-2 minutes. Then remove from heat. Note: It’s important to let the mixture boil for long enough (at least 90 seconds, ideally 2 minutes) so your cookies set properly. Set a timer as soon as the mixture reaches a full boil.
- Mix in Peanut Butter and Vanilla: Mix in the peanut butter and vanilla extract until well combined and smooth.
- Stir in Oats: Then, mix in the oats until the mixture is uniform and all oats are coated.
- Form Cookies and Chill: Scoop the mixture into approximately 1 tbsp drops and place on the lined baking sheet. Let chill in the refrigerator for 1 hour to firm up.
Notes
Nutrition
Calories: 122 kcal
Carbohydrates: 16 g
Protein: 3 g
Fat: 5 g
Sodium: 44 mg
Fiber: 2 g
Sugar: 8 g
Enjoyed this recipe? Share your thoughts below!