
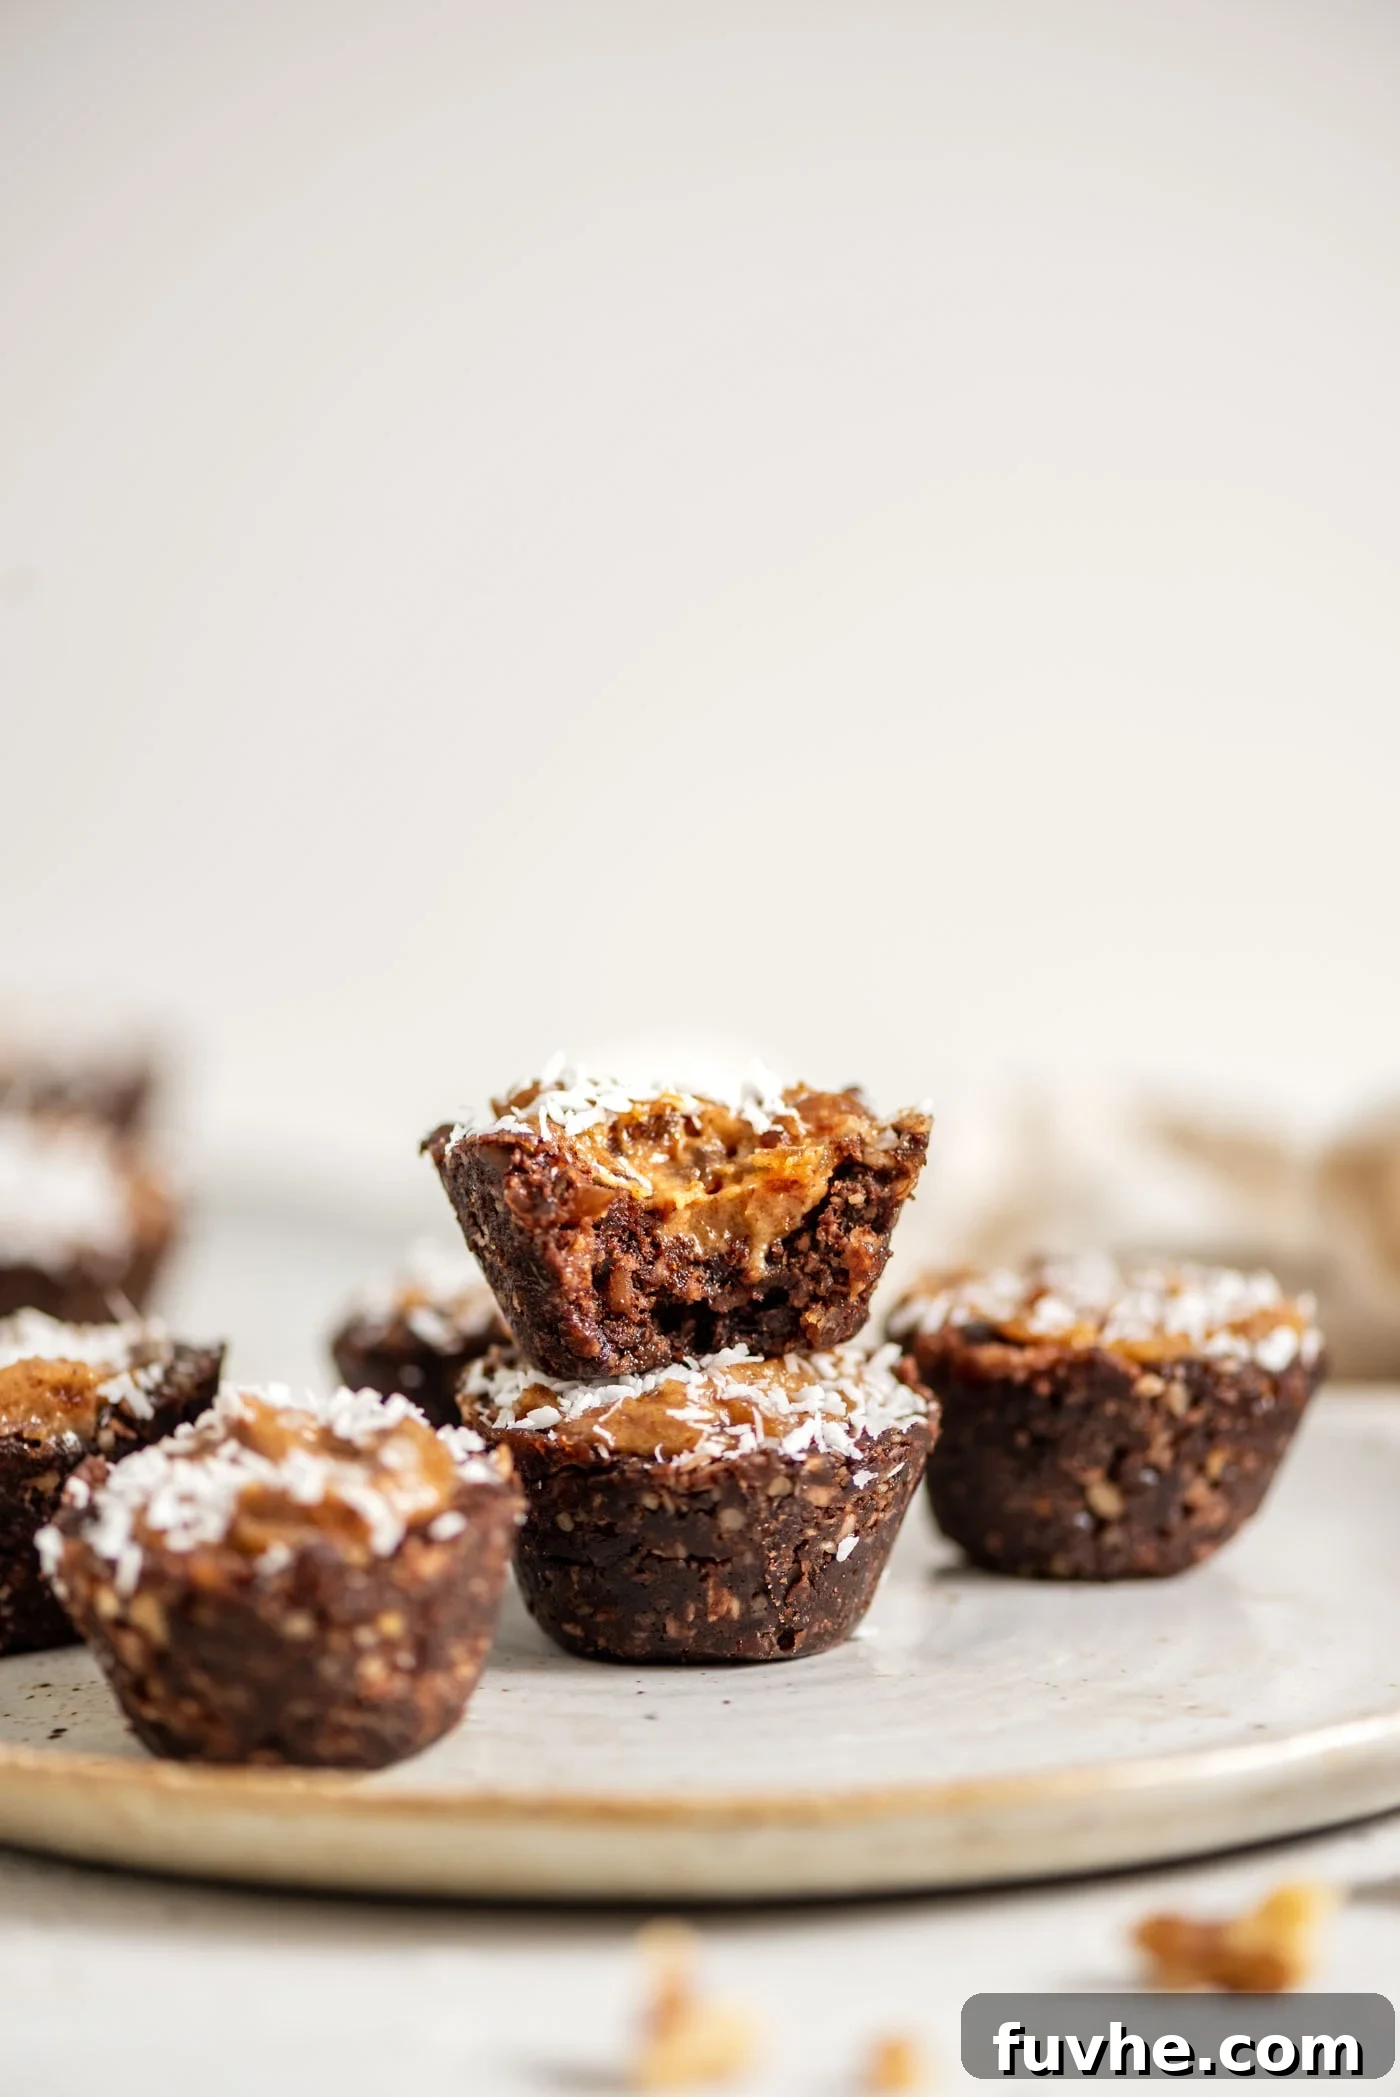
No-Bake Chocolate Caramel Tarts: Your Ultimate Healthy Indulgence
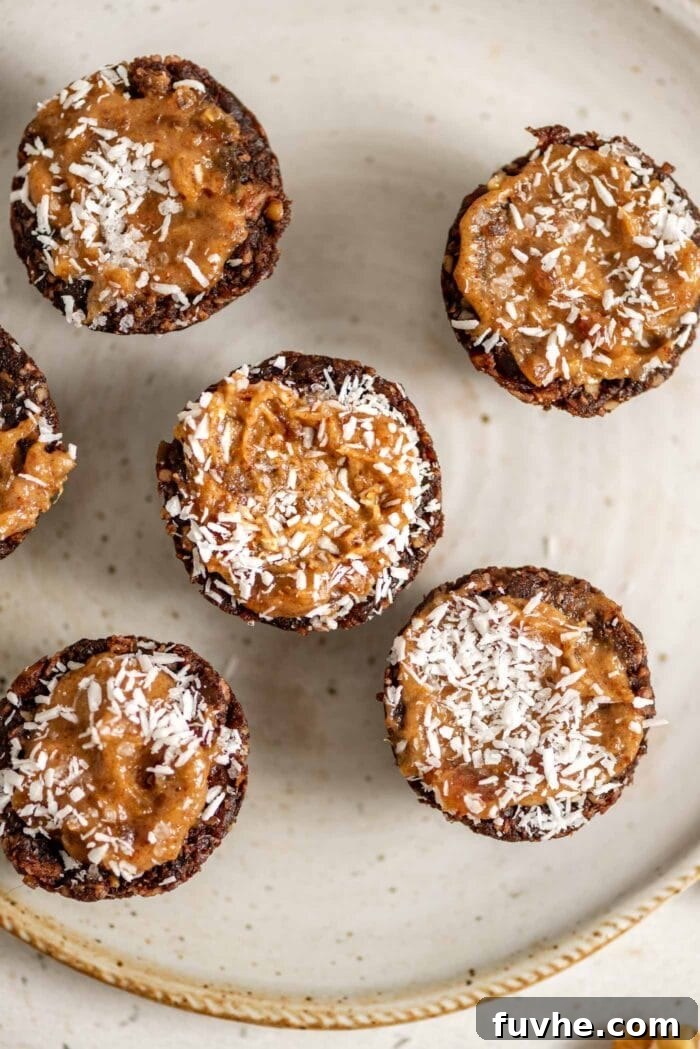
Dive into a world of decadent flavors without ever turning on your oven! These exquisite no-bake chocolate caramel tarts are a true revelation, boasting a rich, chocolatey walnut and coconut crust perfectly paired with a sweet, irresistibly creamy caramel filling. Crafted with wholesome ingredients, they offer a guilt-free indulgence that satisfies your sweet cravings in the most delightful way.
Why These No-Bake Tarts Are a Must-Try
Prepare to fall in love with these miniature chocolate coconut caramel-filled tarts! While shaping them might be a tad messy, the minimal ingredient list and straightforward process make them surprisingly quick and easy to create. Beyond their incredible taste, these tarts come with a host of benefits that make them a fantastic choice for any occasion:
- Completely Vegan & Dairy-Free: Made entirely from plant-based ingredients, these tarts are perfect for anyone following a vegan lifestyle or looking to reduce their dairy intake without compromising on flavor.
- Gluten-Free Goodness: The crust is crafted from walnuts and coconut, making these tarts naturally gluten-free and suitable for those with gluten sensitivities or celiac disease.
- Oil-Free & Refined Sugar-Free: You won’t find any added oils or refined sugars here. The natural sweetness comes solely from dates, offering a healthier alternative to traditional desserts.
- Minimal Baking, Maximum Flavor: The beauty of a no-bake recipe is its simplicity. No need to preheat the oven, just a little chilling time to firm them up.
- Versatile & Customizable: Whether you stick to the classic caramel or experiment with other fillings, these tarts are incredibly adaptable to your taste preferences.
If you’re looking for a similar treat in a different form, be sure to try our No-Bake Chocolate Caramel Bars, offering the same irresistible flavor profile in a convenient bar shape.
Essential Ingredients for Your No-Bake Tarts
Crafting these delectable tarts requires just a handful of simple, wholesome ingredients. Each component plays a vital role in achieving the perfect balance of texture and flavor. Here’s a closer look at what you’ll need and some helpful notes for selection:
-
Walnuts: The Hearty Crust Base
For the optimal crust, seek out plain, raw walnuts that are free from added oils or salt. Walnuts provide a wonderful earthy flavor and a sturdy base for the tarts. If walnuts aren’t available or you prefer a different flavor, pecans or cashews can be excellent substitutes, offering slightly different but equally delicious nuances.
-
Cocoa Powder: The Rich Chocolate Foundation
The cocoa powder is key to the deep, satisfying chocolate flavor of the crust. You can use standard unsweetened cocoa powder, but for a nutritional boost and a more intense flavor, consider using raw cacao powder. Both options will deliver a fantastic chocolate experience.
-
Unsweetened Coconut: Texture and Aroma
Choose unsweetened fine or medium shredded coconut, sometimes labeled as desiccated coconut. This adds a lovely texture and a subtle tropical aroma that complements the chocolate and caramel beautifully. Ensure it’s unsweetened to control the overall sweetness of the tarts.
-
Dates: Nature’s Sweetener and Binder
Dates are the unsung hero of this recipe, forming the natural sugar base for both the crust and the luscious caramel filling. Medjool or Sayer dates are highly recommended for their soft, chewy texture and rich flavor. Medjool dates are often larger and softer, while pitted Sayer dates are incredibly convenient for blending, saving you prep time.
-
Almond Butter: Creaminess and Depth
Natural almond butter, with its smooth texture and subtle nutty flavor, provides essential creaminess and binds the caramel together. If almond butter isn’t on hand, natural peanut butter works equally well and lends a delightful peanut-caramel twist to the filling.
-
Full-Fat Coconut Milk or Cream: The Secret to Silky Caramel
For the ultimate smooth and creamy caramel, you’ll need thick, full-fat coconut milk or coconut cream. It’s best to chill the can beforehand and scoop out the thick cream from the top. While the caramel can be made without it, adding coconut milk contributes to a firmer, more luxurious texture that we highly recommend. This recipe calls for just 2 tablespoons, so you can save the rest of the can for other delicious recipes like our Vegan Panang Curry with Tofu, Vegan Coconut Red Lentil Dahl, or a refreshing Mango Coconut Milk Smoothie.
This ingredient overview highlights the key components. For precise measurements and a comprehensive list, please refer to the detailed recipe section at the end of this post.
Step-by-Step: Crafting Your Chocolate Caramel Tarts
Embark on your dessert-making journey with these easy-to-follow instructions. With a little care and attention, you’ll create a batch of stunning and delicious no-bake chocolate caramel tarts.
-
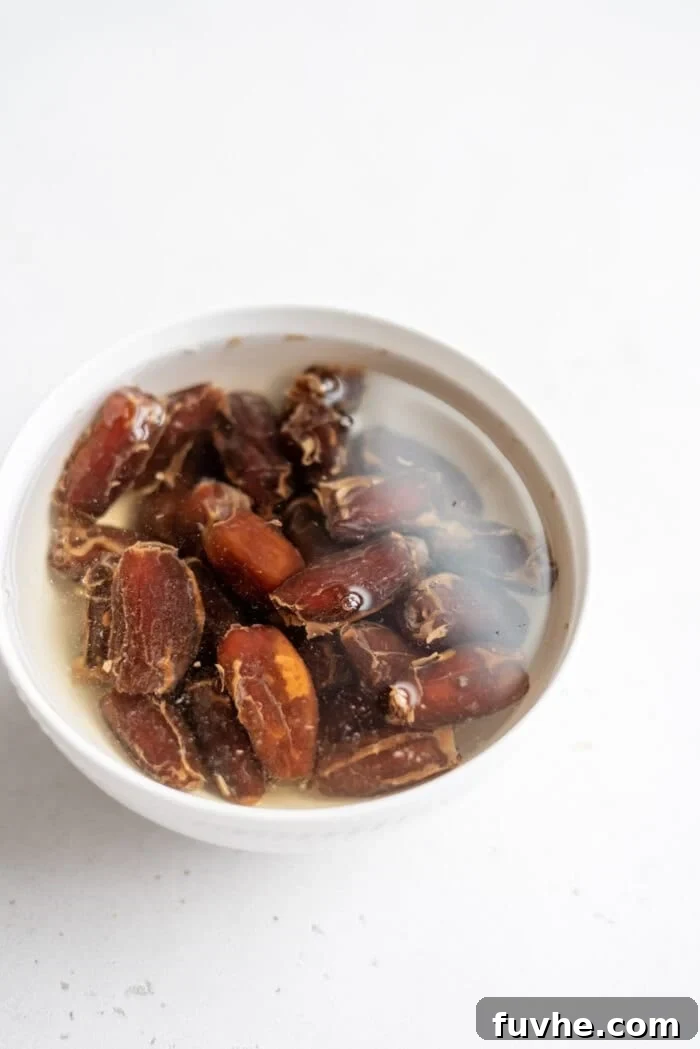
Step 1: Prepare Your Dates for the Caramel
Begin by preparing the dates designated for your rich, luscious caramel filling. This initial soaking step is crucial for achieving an incredibly smooth and creamy caramel consistency.

Place the pitted dates (for the caramel) in a small heatproof bowl. Cover them completely with hot water and allow them to soak for a minimum of 20 to 30 minutes. This softens them considerably, making them much easier to blend into a velvety smooth caramel.
-
Step 2: Assemble the Irresistible Chocolate Crust
While your caramel dates are softening, you can focus on building the sturdy and flavorful chocolate crust that will perfectly cradle your filling. This foundation provides a delightful contrast in texture and taste.
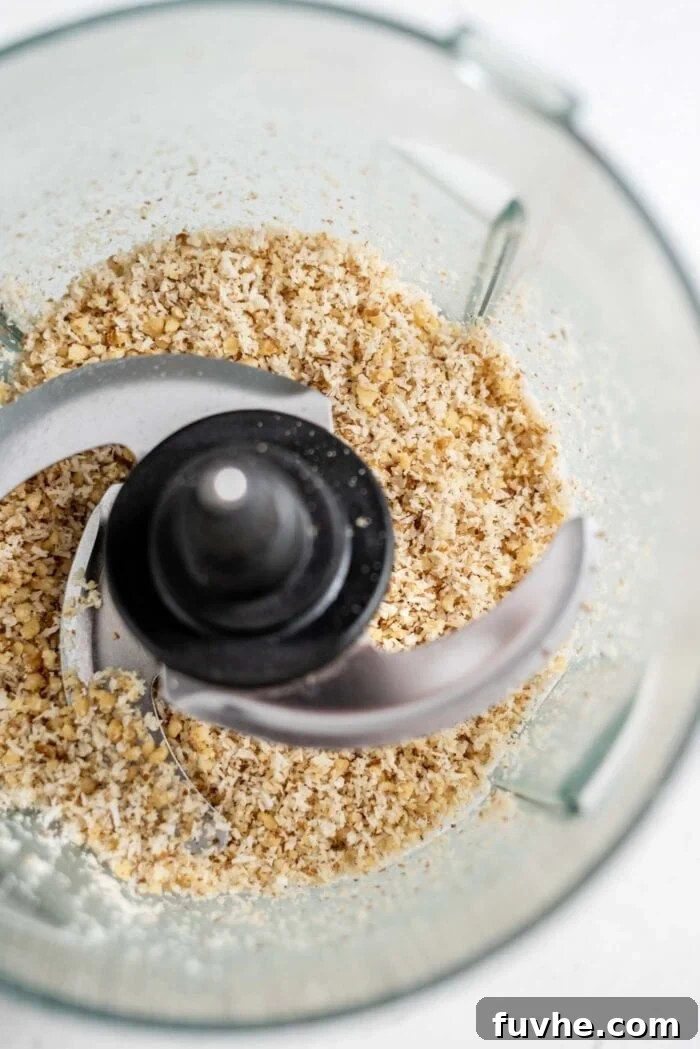
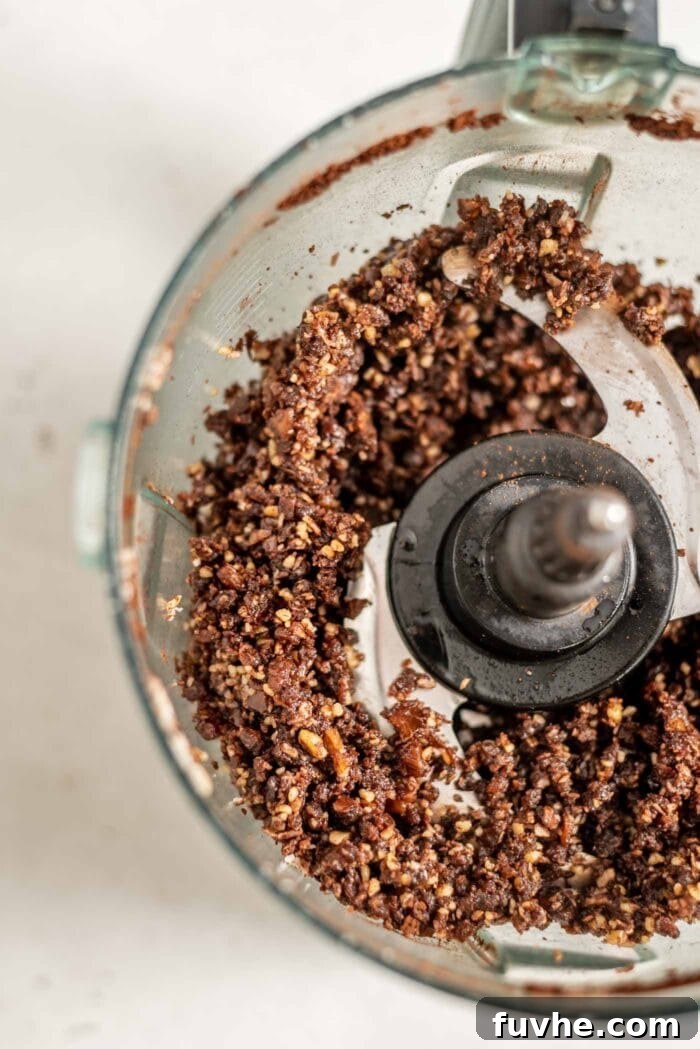
In the bowl of a food processor, combine the walnuts and shredded coconut. Pulse the mixture several times until these ingredients are well-broken down and resemble a coarse, flaky flour. Next, add the remaining pitted dates (for the crust) and cocoa powder to the food processor. Continue processing until the ingredients come together to form a thick, cohesive dough. The dough should stick together when pressed between your fingers.
Quick Tip for Flawless Flavor: After you’ve finished preparing the chocolate crust, take a moment to give your food processor a thorough wipe or rinse. This will prevent any chocolate residue from mixing into your delicate caramel filling.
-
Step 3: Shape Your Tart Shells with Ease
Now, it’s time to transform your rich chocolate dough into perfectly shaped tart shells. You’ll need a mini muffin tin and some parchment paper for this step, which will ensure effortless removal of your finished tarts.
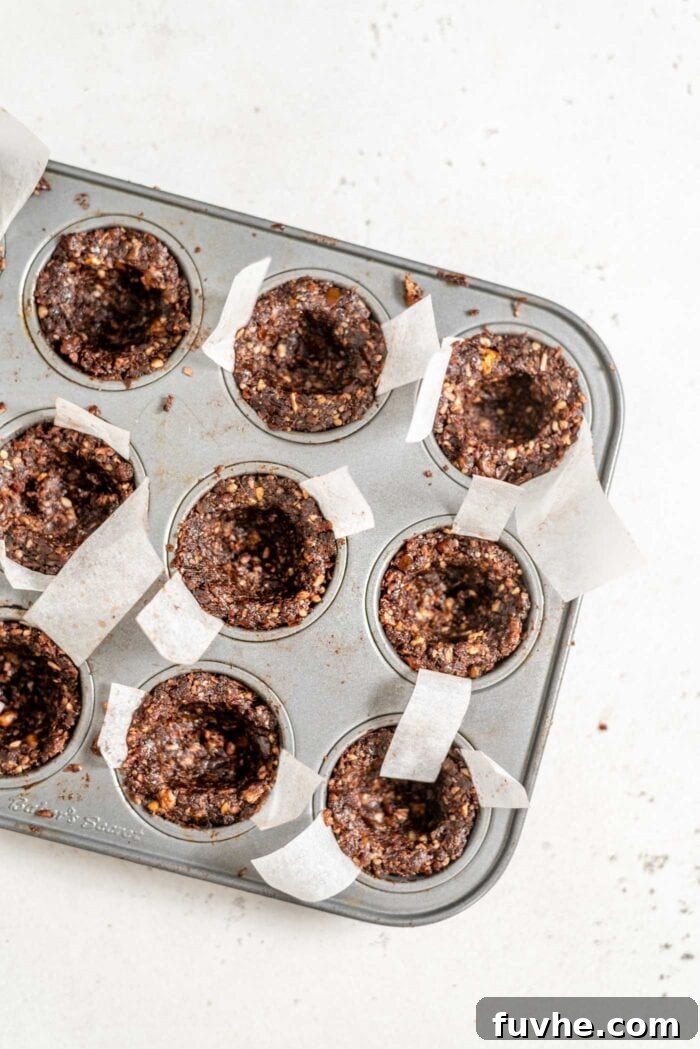
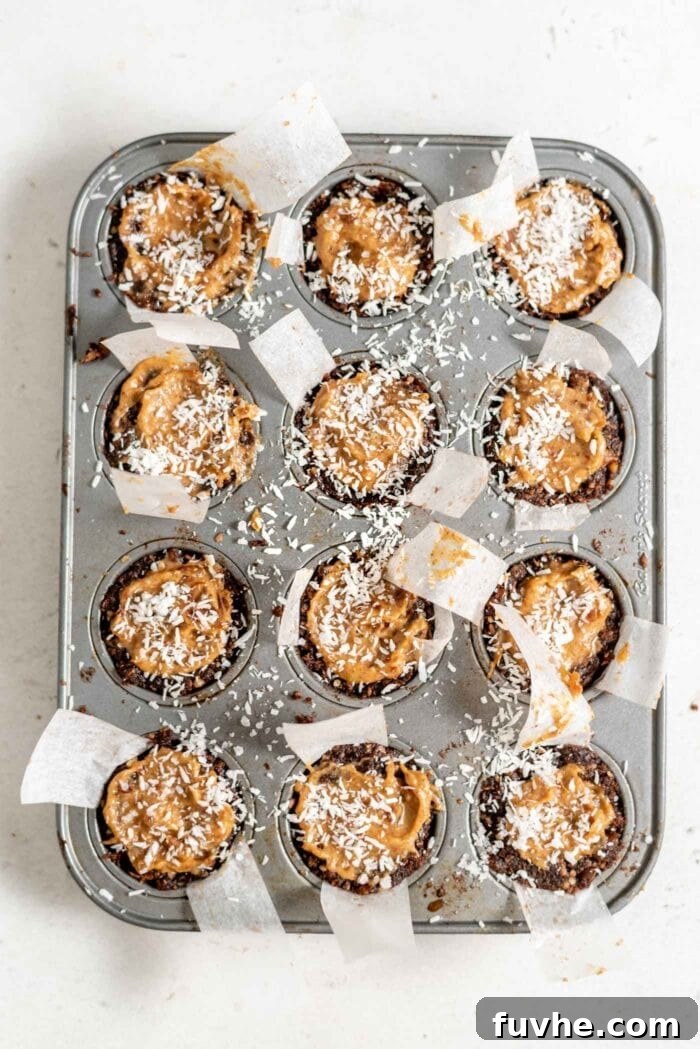
Ingenious Trick: Cut thin strips of parchment paper, long enough to drape across each muffin cup with ends sticking out. Lay these strips in the muffin cups before adding the dough. These “parchment slings” will act as handles, making it incredibly simple to lift the set tarts out of the tin without any sticking!
Divide the chocolate coconut dough evenly among 12 mini muffin cups. Press the dough firmly into the bottom and up the sides of each cup, making sure to create a flush edge with the top of the muffin tin. Then, use your thumb or the back of a spoon to press a distinct indentation or “hole” in the center of each, widening it enough to create ample space for the forthcoming caramel filling. This step can get a little sticky, but it’s well worth the effort for beautifully formed shells!
-
Step 4: Create the Creamy, Dreamy Caramel Filling
With your crusts patiently waiting, it’s time to craft the star of these tarts: the unbelievably smooth and rich date-based caramel. This step will bring all the elements together.
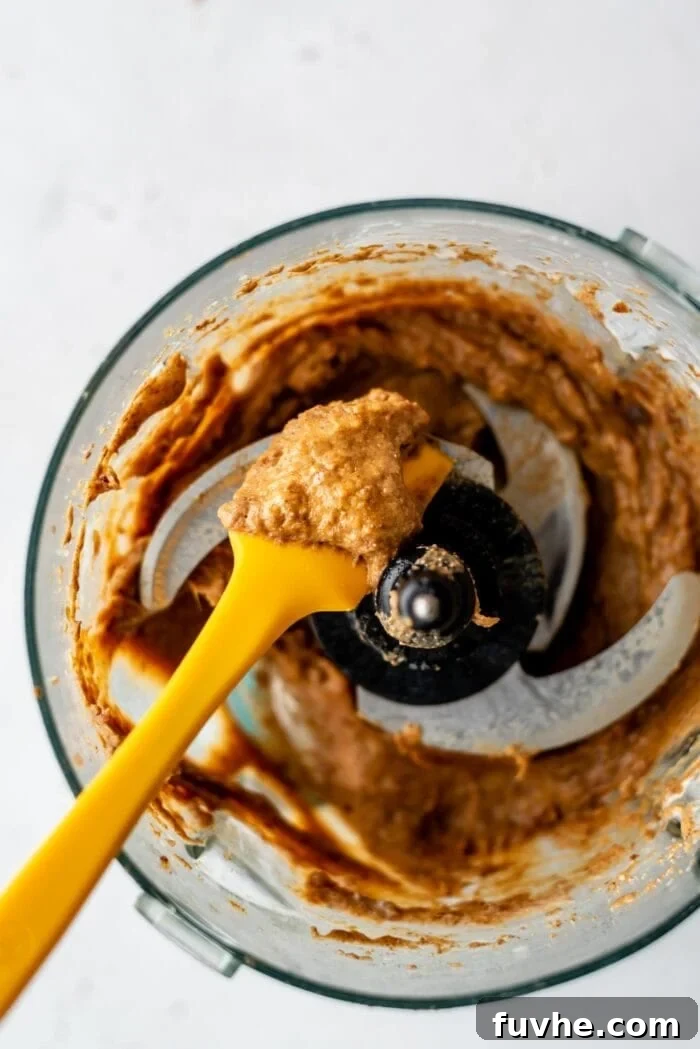
Carefully drain the water from the soaked dates. Transfer these softened dates into your now-cleaned food processor. Add the natural almond butter (or peanut butter), a generous pinch of sea salt, and the full-fat coconut milk or cream. Process all ingredients on high until the mixture transforms into a luxuriously smooth and creamy caramel.
Patience is key here! You may need to pause the food processor a few times to scrape down the sides, ensuring all ingredients are fully incorporated. Continue blending until you achieve a truly beautiful, thick, and perfectly smooth caramel with the consistency of a luxurious dip. Its glossy appearance will let you know it’s ready.
-
Step 5: Fill, Garnish, and Chill to Perfection!
You’re almost there! The final assembly is quick and incredibly satisfying, bringing all the delicious elements into one harmonious bite.
Using a small spoon or teaspoon, carefully and evenly divide the prepared creamy caramel filling among the 12 chocolate tart shells. Once all the tarts are filled, give each one a generous sprinkle of extra shredded coconut on top. This not only adds a beautiful visual appeal but also an extra layer of texture and flavor that complements the other components.
Place the entire muffin tin into the freezer. Allow the tarts to set and firm up for at least 30 minutes. Once fully chilled and firm, remove them from the freezer. To effortlessly pop them out, gently hold either end of the parchment paper strips (if used) sticking out of the tarts and wiggle back and forth until they release. Your delightful no-bake chocolate caramel tarts are now ready to be savored! Enjoy every blissful bite!
Tips for Perfect No-Bake Chocolate Caramel Tarts Every Time
Achieving the perfect no-bake tart is simple with a few helpful pointers:
- Date Quality Matters: Always use fresh, soft dates for both the crust and caramel. Dry, hard dates will not blend as smoothly, even after soaking. If your dates are on the firmer side, increase soaking time.
- Food Processor Power: A sturdy food processor is your best friend for this recipe. It ensures both the crust and caramel achieve their desired smooth consistency. A blender might work for the caramel, but a food processor is ideal for the crust.
- Parchment Paper Trick is Gold: Don’t skip the parchment paper strips in the muffin tin. It’s a small step that saves a lot of frustration when removing the tarts.
- Chill Time is Key: While it’s tempting to dig in immediately, the freezer time is essential for the tarts to firm up and hold their shape. This also enhances their texture.
- Scrape Down the Processor: When making the caramel, frequently stop and scrape down the sides of the food processor. This ensures all ingredients are fully incorporated and prevents any gritty bits.
- Don’t Over-Process the Crust: For the crust, process just until a dough forms. Over-processing can release too much oil from the nuts, making it greasy.
Creative Variations & Customizations
While the classic chocolate caramel combination is simply divine, don’t hesitate to experiment with these tarts! They’re incredibly versatile and open to various creative customizations:
- Mousse Fillings: For a delightful twist, consider replacing the caramel with a light and airy mousse. Try our Aquafaba Chocolate Mousse for a rich, fluffy option, a seasonal Pumpkin Mousse, or the creamy peanut butter mousse from these Vegan Peanut Butter Mousse Parfaits.
- Nut-Free Crust: If you have nut allergies, you can create a nut-free crust using sunflower seeds or oats (ensure certified gluten-free if needed) processed with the dates and coconut.
- Flavor Boosts: Add a pinch of cinnamon or a dash of vanilla extract to either the crust or the caramel for an extra layer of flavor. A tiny sprinkle of flaky sea salt on top of the finished caramel also enhances its sweetness.
- Different Toppings: Beyond shredded coconut, try a sprinkle of chopped toasted nuts, mini chocolate chips, a drizzle of melted dark chocolate, or fresh berries for an elegant finish.
- Other No-Bake Tart Ideas: If you enjoy the ease of no-bake tarts, you’ll love exploring our other recipes, such as the comforting No-Bake Pecan Pie Tarts and the seasonal delight of No-Bake Pumpkin Pie Tarts.
Storage Instructions for Freshness
To keep your delicious no-bake chocolate caramel tarts fresh and firm, store them in an airtight container. They will last wonderfully in the refrigerator for up to 7 days. For longer enjoyment, these tarts freeze exceptionally well. Place them in a freezer-safe airtight container or bag, and they can be stored for up to 3 months. If you’re serving from frozen, simply let them sit at room temperature for 10-15 minutes before serving to allow the caramel to soften slightly to its ideal creamy texture.
Frequently Asked Questions About No-Bake Tarts
- Can I use other nuts for the crust?
- Yes, absolutely! While walnuts are recommended, pecans or cashews can be used as direct substitutes for the crust, offering a slightly different flavor profile that is equally delicious.
- What if my caramel isn’t smooth?
- If your caramel isn’t as smooth as desired, it’s usually because the dates weren’t soaked long enough or your food processor needs more time. Continue blending and scraping down the sides. If it’s still too thick, you can add another teaspoon of coconut milk until it reaches the desired consistency.
- How long do these tarts last?
- When stored in an airtight container, these tarts will last up to 7 days in the refrigerator and up to 3 months in the freezer. Remember to thaw frozen tarts for a few minutes before serving.
- Can I make these tarts ahead of time?
- These tarts are perfect for making ahead! They need to chill for at least 30 minutes, but you can easily prepare them a day or two in advance and keep them in the refrigerator until you’re ready to serve.
- Are these tarts suitable for a special diet?
- Yes, these tarts are highly versatile! They are naturally vegan, gluten-free, oil-free, and refined sugar-free, making them an excellent choice for various dietary needs and preferences.
No-Bake Chocolate Caramel Tarts: The Full Recipe
A delicious, decadent, and easy-to-make dessert, these caramel-filled chocolate tarts are crafted with just 6 simple, wholesome ingredients. They are entirely vegan, gluten-free, oil-free, and refined sugar-free.
- Prep Time: 20 minutes
- Chill Time: 30 minutes
- Total Time: 50 minutes (excluding date soaking)
- Yields: 12 tarts
- Author: Deryn Macey
Ingredients
For the Chocolate Crust:
- 1 cup (220 g) packed, soft pitted dates
- 1/2 cup (75 g) chopped walnuts or walnut pieces
- 1/2 cup (50 g) unsweetened medium or fine shredded coconut
- 2 tbsp (14 g) cocoa powder (or raw cacao powder)
For the Caramel Filling:
- 1/2 cup (115 g) tightly packed, pitted dates
- 3 tbsp (45 g) natural almond or peanut butter
- 2 tbsp full-fat coconut milk or coconut cream (from a chilled can)
- Generous pinch of sea salt
Instructions
- Soak Dates for Caramel: Place the 1/2 cup of dates (for the caramel) in a small bowl, cover with hot water, and let them soak for 20-30 minutes to soften.
- Prepare the Chocolate Crust: In a food processor, combine the walnuts and 1/2 cup shredded coconut. Process until finely ground and crumbly. Add the 1 cup of dates (for the crust) and cocoa powder. Continue processing until a thick, cohesive dough forms.
- Shape the Tart Shells: Line a 12-cup mini muffin tin with thin strips of parchment paper (optional, but highly recommended for easy removal). Divide the chocolate dough evenly among the 12 muffin cups. Press the dough firmly into the bottom and up the sides of each cup, creating a well in the center for the filling.
- Make the Creamy Caramel: Drain the soaked dates thoroughly. Add them to the cleaned food processor along with the almond butter, sea salt, and full-fat coconut milk/cream. Blend until completely smooth and creamy, stopping to scrape down the sides as needed.
- Fill and Chill: Spoon the caramel filling evenly into each of the 12 chocolate tart shells. Sprinkle generously with additional shredded coconut if desired. Place the muffin tin in the freezer for at least 30 minutes, or until the tarts are firm.
- Serve: Once firm, gently remove the tarts from the muffin tin by holding the parchment paper strips. Let them sit at room temperature for 5-10 minutes before serving for the best texture.
Notes
Store these no-bake chocolate caramel tarts in an airtight container in the refrigerator for up to 7 days. For longer storage, freeze them for up to 3 months. If frozen, allow them to thaw at room temperature for 10-15 minutes before enjoying.
Nutrition Information (per 1 tart serving)
- Calories: 159 kcal
- Carbohydrates: 24 g
- Protein: 2.5 g
- Fat: 8 g
- Fiber: 3 g
- Sugar: 19 g
More Irresistible No-Bake Desserts to Try
If you’ve fallen in love with the convenience and deliciousness of these no-bake chocolate caramel tarts, we have even more treats for you to explore! Expand your repertoire of easy, healthy, and incredibly tasty no-bake desserts with these fantastic recipes:
- Peanut Butter Blondies
- No-Bake Almond Joy Bars
- No-Bake Vegan Pumpkin Fudge
- Vegan No-Bake Oatmeal Chocolate Bars
- Vegan No-Bake Peanut Butter Bars
We hope you thoroughly enjoy making and savoring these delightful no-bake chocolate caramel tarts. They are a testament to how simple, wholesome ingredients can come together to create something truly extraordinary. Don’t forget to share your creations with us and spread the joy of healthy indulgence!