
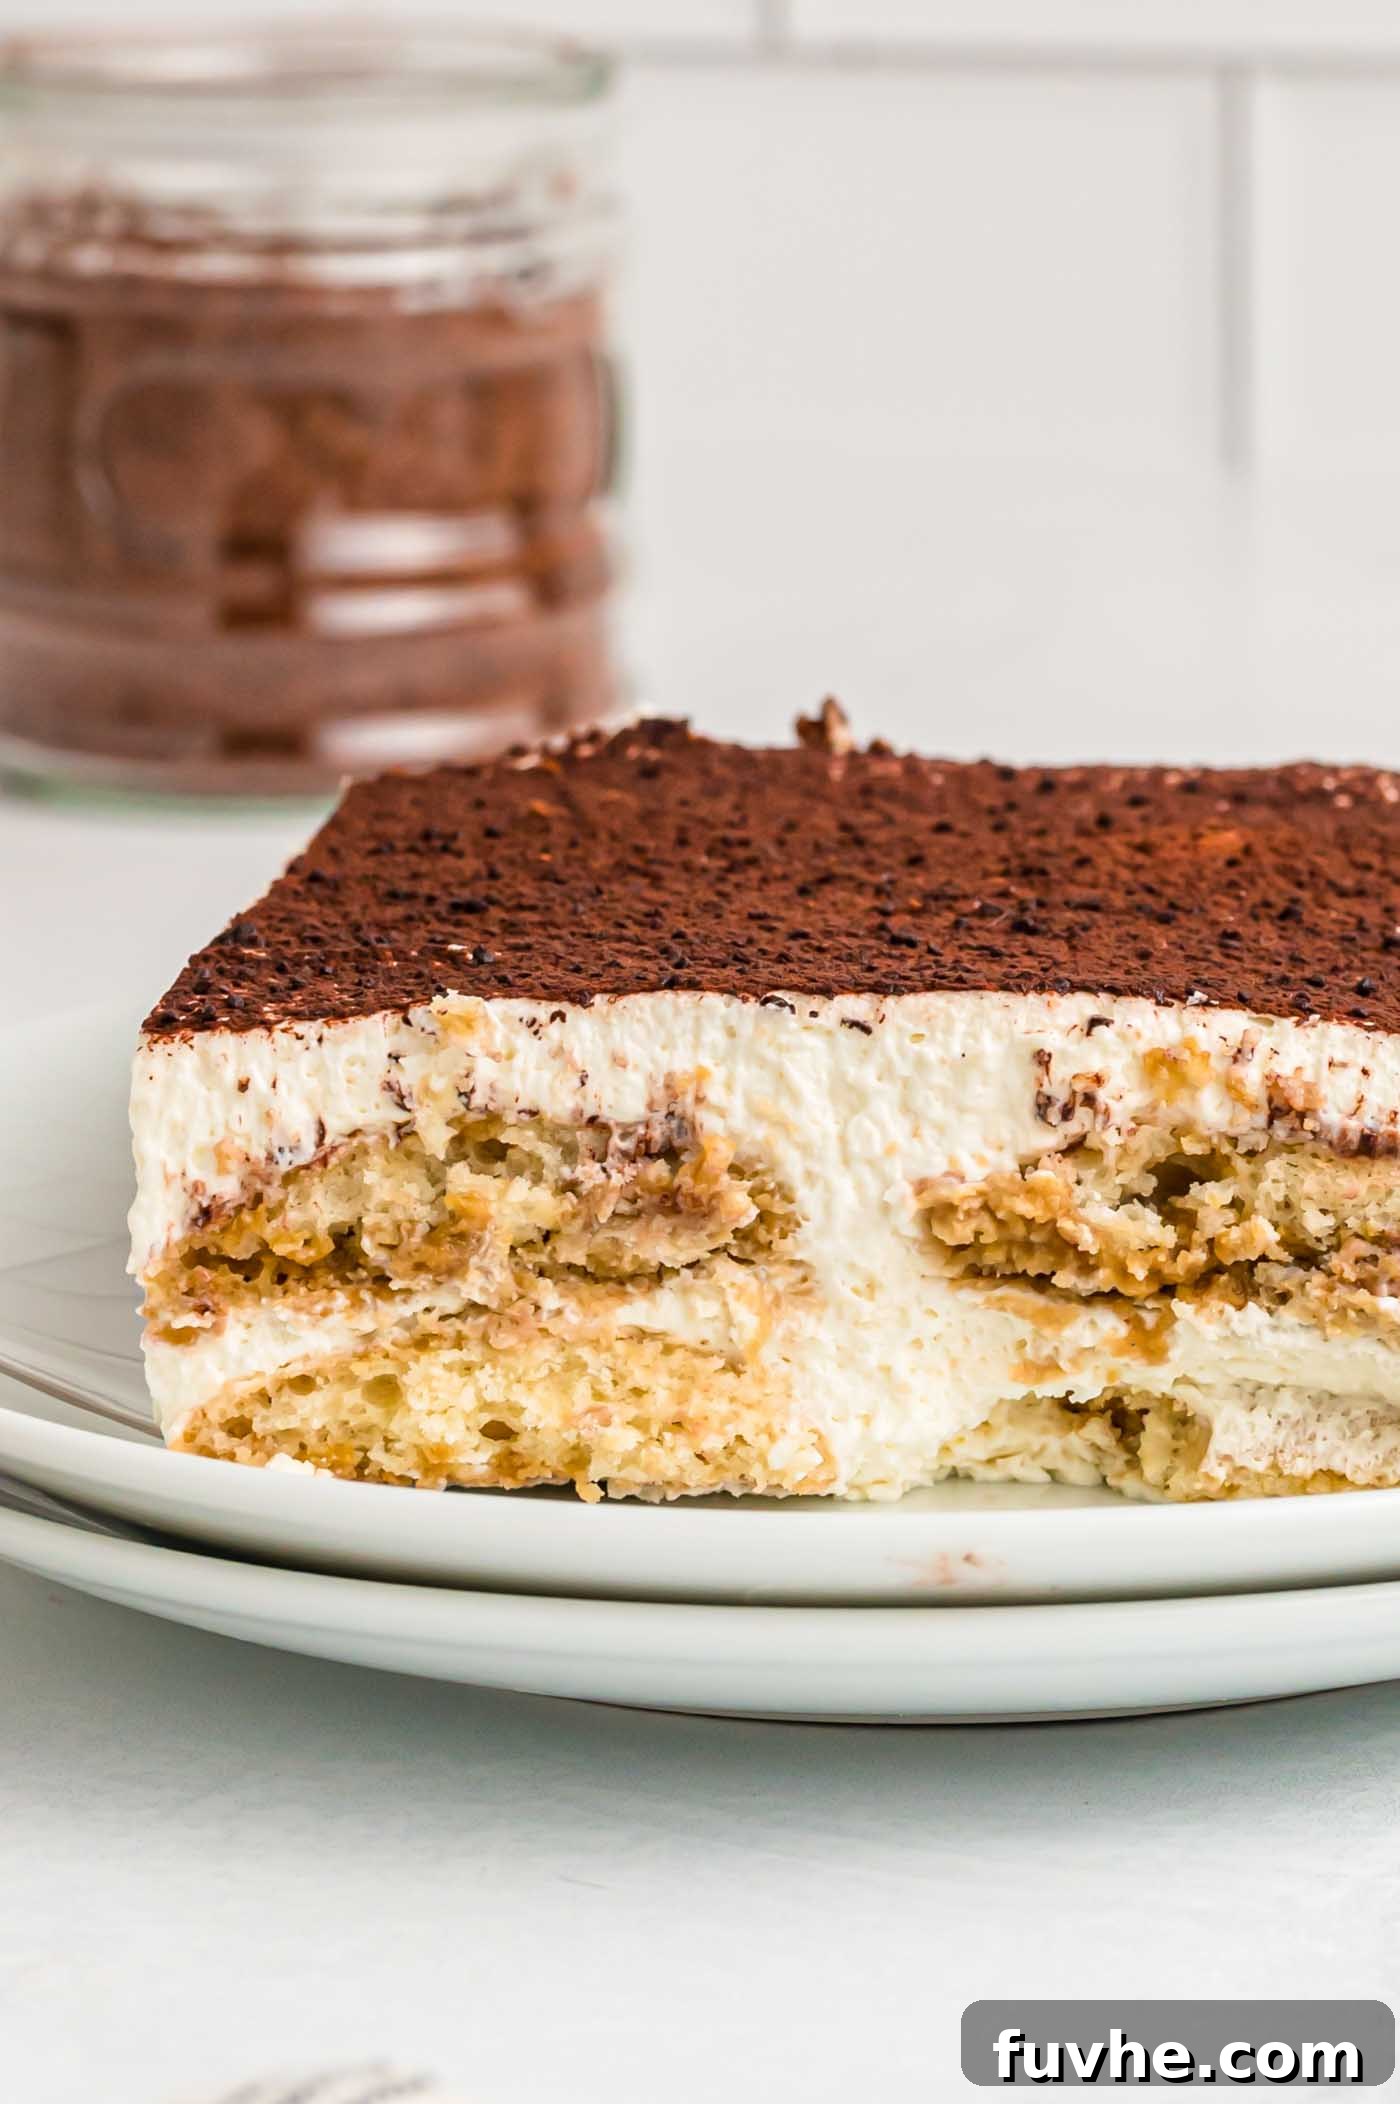
Indulge in the ultimate dessert experience with this exquisite vegan tiramisu recipe. A masterpiece of plant-based baking, this dairy-free and eggless tiramisu features delicately homemade vegan ladyfingers, artfully soaked in rich coffee, and layered with an incredibly smooth and luscious dairy-free mascarpone-style cream. Topped with a generous dusting of cocoa powder, this elegant dessert is not just a treat for the taste buds but also a feast for the eyes, perfect for impressing guests at any special occasion, from holiday gatherings to sophisticated dinner parties.
If you’re a connoisseur of classic Italian tiramisu but are seeking a plant-based alternative that doesn’t compromise on flavor or texture, your search ends here. This recipe captures the authentic essence of tiramisu, delivering that signature balance of sweet, creamy, and coffee-infused bliss, all without a single animal product.
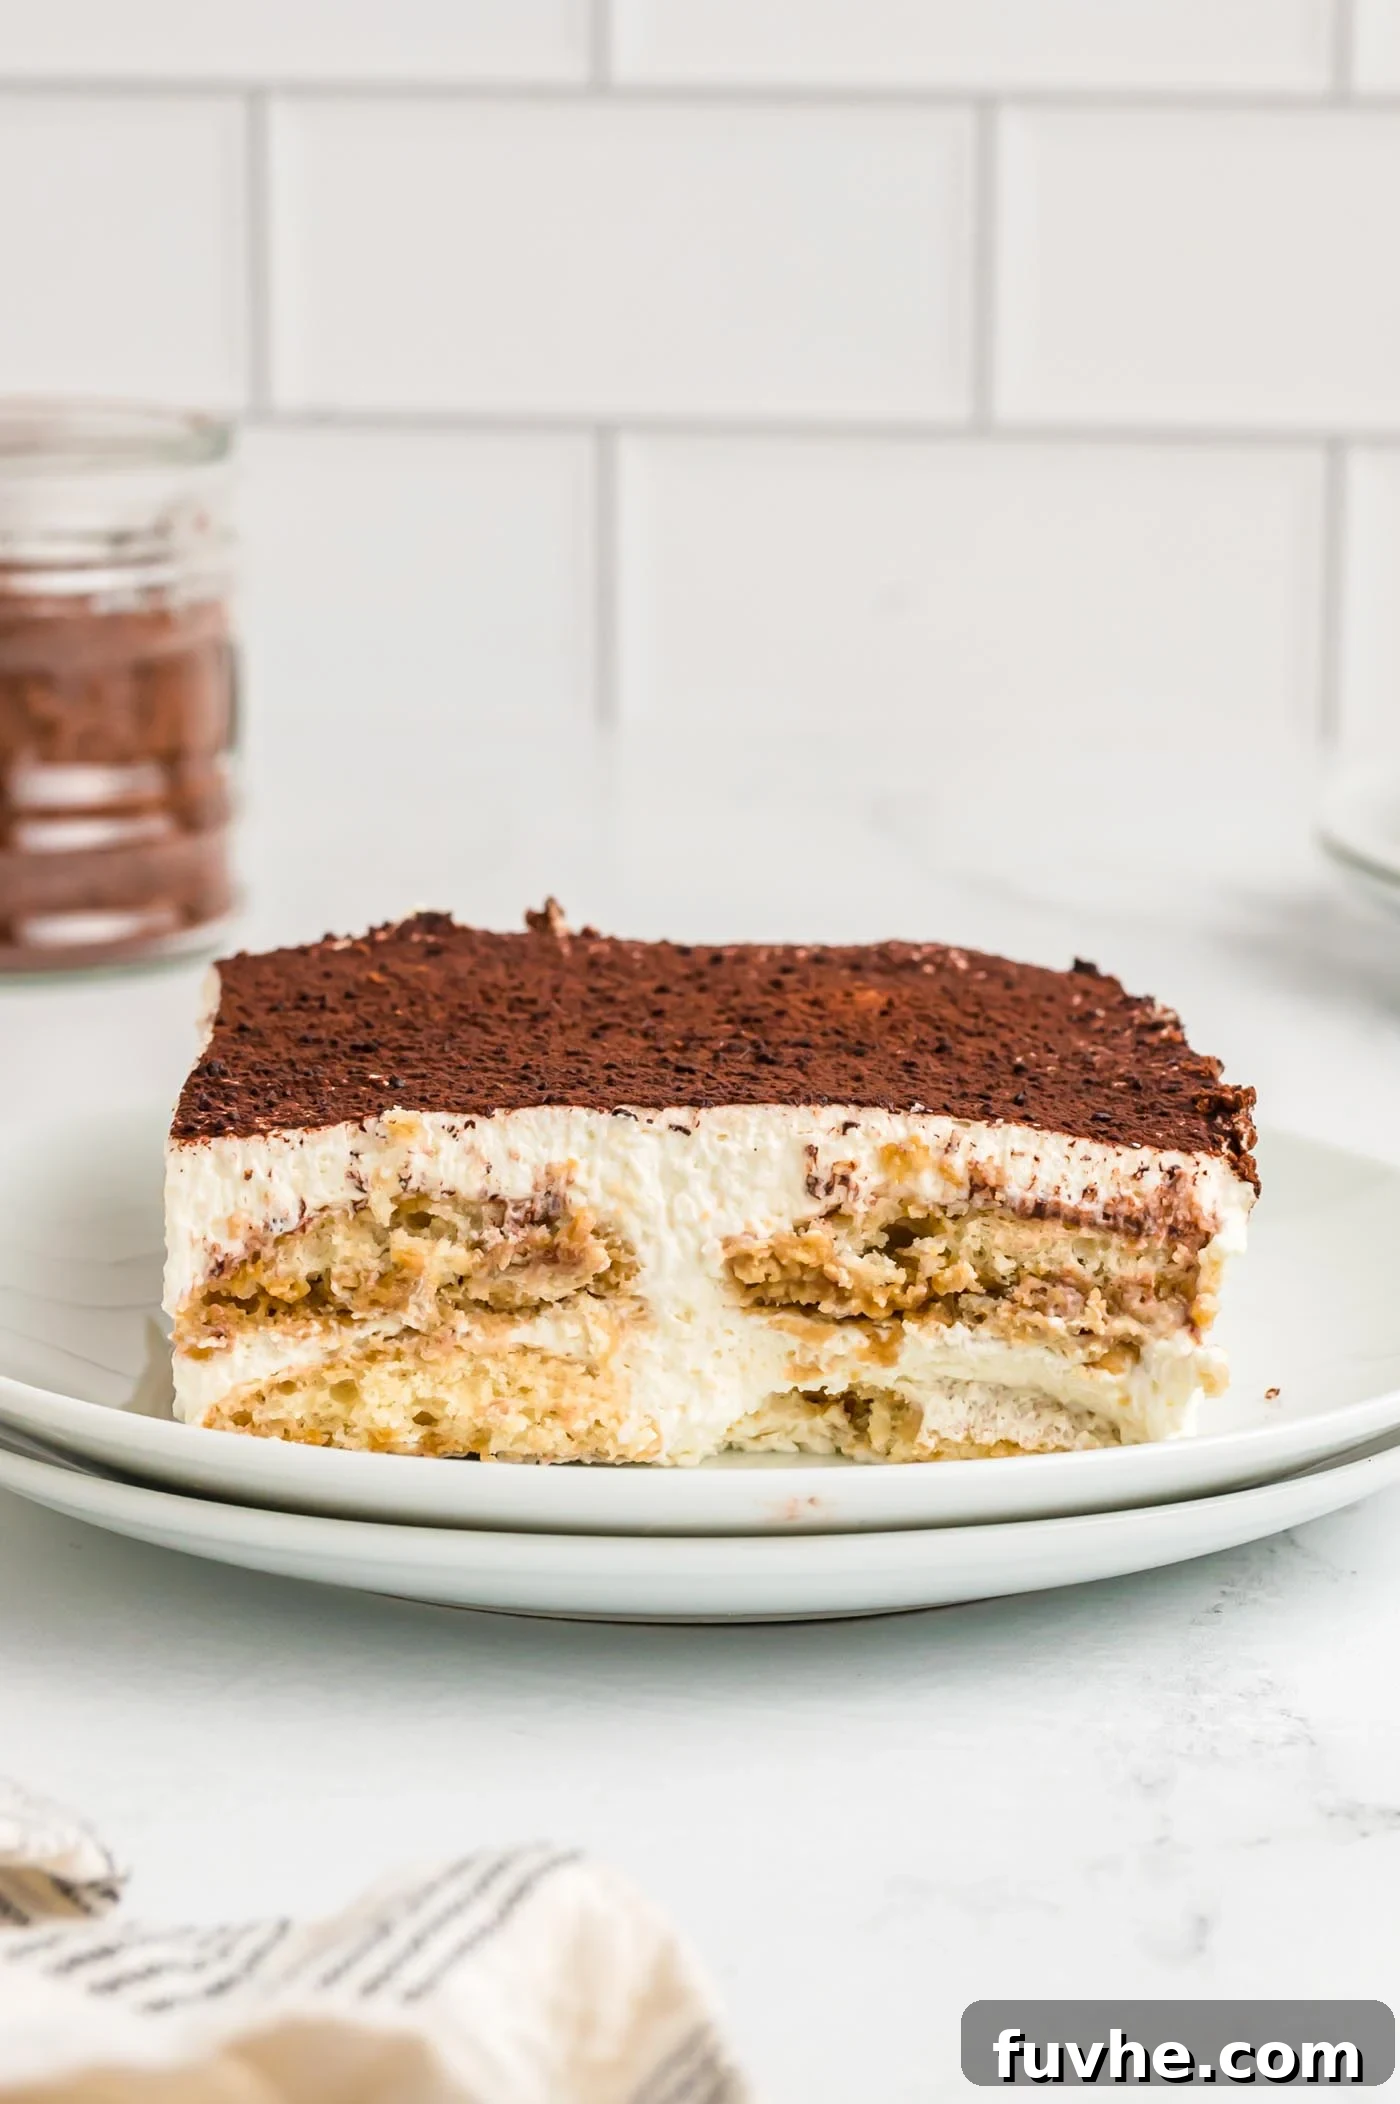
The magic of this recipe lies in its carefully crafted components: tender, coffee-soaked vegan ladyfingers that provide the perfect structural and flavorful foundation, paired with a cloud-like creamy vegan mascarpone. Each layer builds upon the next, creating a symphony of textures and tastes, culminating in that delightful bitterness from the cocoa powder on top. While making vegan tiramisu involves a few steps and some waiting time for chilling, the process is straightforward and the effort is undoubtedly rewarded with a dessert that tastes as though it came straight from a gourmet Italian patisserie.
One of the many advantages of this recipe is its make-ahead friendly nature. In fact, tiramisu often tastes even better the day after it’s assembled, allowing the flavors to fully meld and the cream to firm up to perfection. This makes it an ideal choice for busy hosts who want to prepare a show-stopping dessert in advance, freeing up time to enjoy their guests.
Recipe Highlights: Why You’ll Love This Vegan Tiramisu
This plant-based tiramisu isn’t just a delicious dessert; it’s a culinary triumph that offers numerous benefits and delights:
- Completely Vegan: Made entirely without dairy or eggs, it’s suitable for vegan diets and those with allergies or sensitivities to dairy and eggs.
- Decadent Mascarpone Filling: Experience the rich, creamy texture and tangy sweetness of traditional mascarpone, reinvented with plant-based ingredients for an equally luxurious mouthfeel.
- Elegant Christmas Dessert: Its sophisticated appearance and rich flavors make it an impeccable choice for holiday feasts, adding a touch of Italian elegance to your festive table.
- Impress Your Friends and Family: This dessert is a proven crowd-pleaser, guaranteed to delight even non-vegan guests with its authentic taste and beautiful presentation.
- For the Coffee Lovers: Infused with strong espresso or coffee, it delivers that signature robust coffee flavor that tiramisu enthusiasts adore.
- Customizable with or without Rum: Enjoy it with a hint of dark rum for a classic boozy kick, or opt for a rum essence or omit it entirely for an alcohol-free version suitable for all ages.
- Surprisingly Approachable: While it appears elaborate, the recipe is fairly easy to follow, with most of the time dedicated to chilling and setting, making it accessible for home bakers of all skill levels.
- Perfect for Planning Ahead: This dessert shines when made in advance, allowing flavors to deepen and textures to set, making your party preparations stress-free.
Mastering Your Vegan Tiramisu: Essential Ingredient Notes and Substitutions
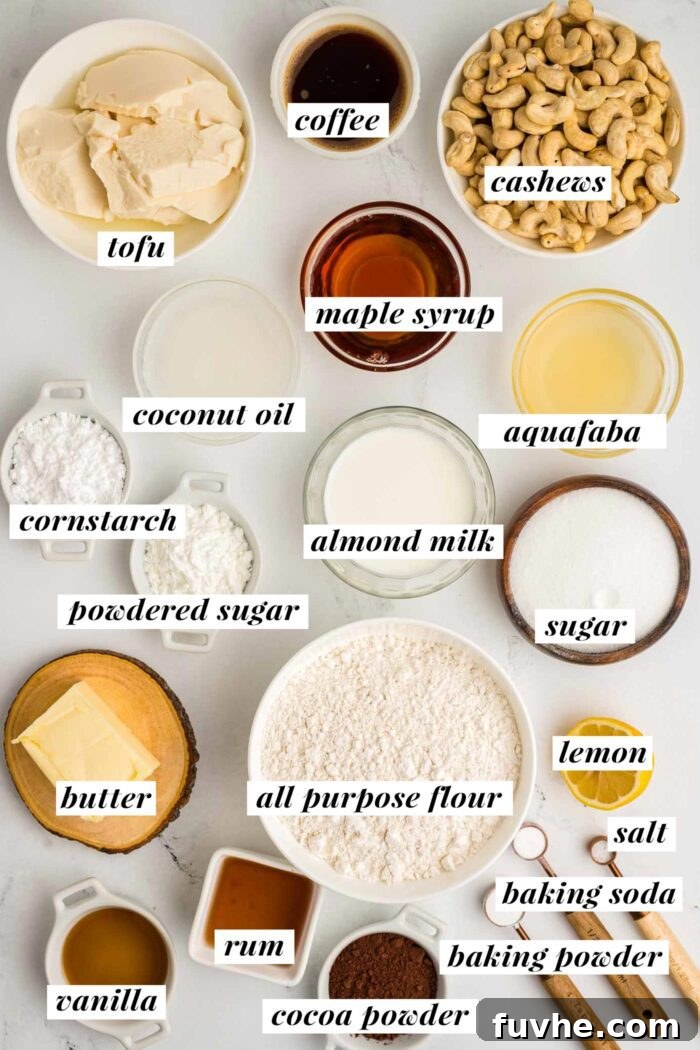
This comprehensive section details the best ingredients for achieving a flawless vegan tiramisu and offers valuable insights into possible substitutions to suit your preferences or pantry. For a complete list of ingredients with precise measurements, please refer to the detailed recipe card at the conclusion of this post.
Crafting the Perfect Vegan Ladyfingers
- All-Purpose Flour: This forms the primary structure of your ladyfingers. The recipe has been meticulously developed and tested using standard all-purpose flour. While not personally tested for gluten-free versions, if you’re experienced with gluten-free baking, a high-quality 1:1 gluten-free baking flour blend should offer comparable results, though texture may vary slightly.
- Cornstarch: In this vegan recipe, cornstarch brilliantly takes on the role of eggs, providing essential binding and helping to create that delicate, cake-like crumb. Arrowroot starch is generally a suitable alternative if cornstarch is unavailable, though results haven’t been directly tested.
- Baking Powder & Baking Soda: Both leavening agents are crucial for achieving light and airy ladyfingers. Ensure both your baking powder (1 tsp) and baking soda (1/2 tsp) are fresh and active for optimal rise. Always check expiration dates.
- Plant-Based Butter: A good quality vegan butter is key for flavor and texture. Look for solid stick varieties in the refrigerated section of most well-stocked grocery stores, often alongside dairy butters. Brands like Miyoko’s Kitchen, Country Crock Plant Butter, or Earth Balance Vegan Butter sticks are excellent choices. If you’re not vegan, unsalted dairy butter can be used as a direct substitute.
- Granulated Sugar: Any standard granulated white sugar will work. For a strictly vegan recipe, opt for organic cane sugar, which is processed without bone char.
- Aquafaba: This incredible liquid from a can of chickpeas acts as a fantastic egg white substitute, whipping up beautifully to create lift and tenderness in the ladyfingers. Simply open a can of chickpeas, drain, and measure out 1/4 cup (60 g) of the liquid. Save the chickpeas for another delicious meal!
- Non-Dairy Milk: Any unsweetened non-dairy milk will work here. Almond milk, cashew milk, or soy milk are all excellent options that won’t overpower the delicate flavor of the ladyfingers.
Creating the Creamy Vegan Mascarpone
- Raw Cashews: These are the backbone of our rich and creamy mascarpone. Ensure you use plain, raw cashews without any added oils or salt. Soaking them is crucial for achieving a super smooth, velvety texture.
- Non-Dairy Milk: As with the ladyfingers, any unsweetened dairy-free milk will work perfectly to blend into the creamy base.
- Maple Syrup: Pure maple syrup adds a lovely natural sweetness and a subtle depth of flavor. Agave syrup or another liquid sweetener can be used as a 1:1 substitute.
- Coconut Oil: This ingredient is essential! It helps the mascarpone cream firm up beautifully when chilled, giving it that classic thick, scoopable texture. I do not recommend substitutions for coconut oil in this component of the recipe.
- Fresh Lemon Juice: A touch of fresh lemon juice adds a crucial tangy note, mimicking the slight tartness found in traditional mascarpone and brightening the overall flavor. Approximately 2 tablespoons of freshly squeezed juice should suffice.
- Silken Tofu: This is a secret weapon for an incredibly light and airy cream. Use either soft silken tofu or regular soft tofu. Its neutral flavor and smooth texture make it an ideal base for our dairy-free cream.
- Powdered Sugar: Also known as icing sugar or confectioners’ sugar, powdered sugar is vital for a smooth, lump-free cream. Do not substitute with granulated sugar, as it will result in a grainy texture.
Finishing Touches: Other Key Ingredients
- Strong Coffee or Espresso: The heart of tiramisu! Use freshly brewed, very strong coffee or espresso. It must be at room temperature or chilled before use to avoid cooking the ladyfingers.
- Dark Rum (Optional): For that traditional boozy warmth, a good quality dark rum is recommended. If you prefer to avoid alcohol, rum essence or rum extract can be added to taste, or simply omit the rum entirely for a family-friendly, alcohol-free dessert.
- Cocoa Powder: Essential for the classic tiramisu finish. Any unsweetened cocoa powder or raw cacao powder will work beautifully for dusting.
Visual Guide: Step-by-Step Instructions for Vegan Tiramisu
To ensure your vegan tiramisu turns out perfectly, take a moment to review these detailed step-by-step instructions accompanied by helpful visuals. Preparation is key for a smooth baking and assembly process.
Before you begin making the ladyfinger batter, prepare your baking sheets. Line one large or two smaller baking sheets with parchment paper. These sheets should be sized to fit comfortably in your refrigerator for chilling the piped ladyfingers.
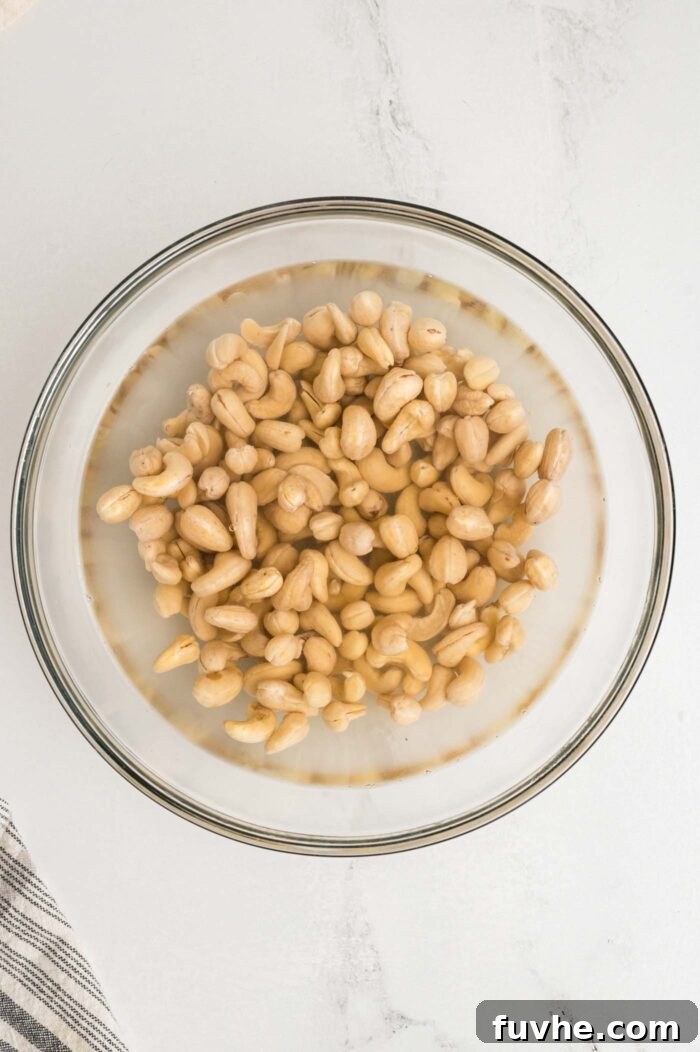
Next, you’ll need to prepare your cashews for the mascarpone cream. Bring water to a rapid boil, then pour it over the raw cashews placed in a heat-safe bowl. Allow them to soak while you work on the ladyfingers. This quick soak will soften them, but for the smoothest cream, a longer soak is ideal.
Quick Note for Creamiest Results: If you do not have access to a high-speed blender or a powerful food processor, I highly recommend soaking your cashews for at least 8 hours, or even better, overnight. The longer the cashews soak, the softer they become, resulting in an exceptionally smooth and creamy “mascarpone” that’s free of any grainy texture.
Part 1: Crafting the Homemade Vegan Ladyfingers
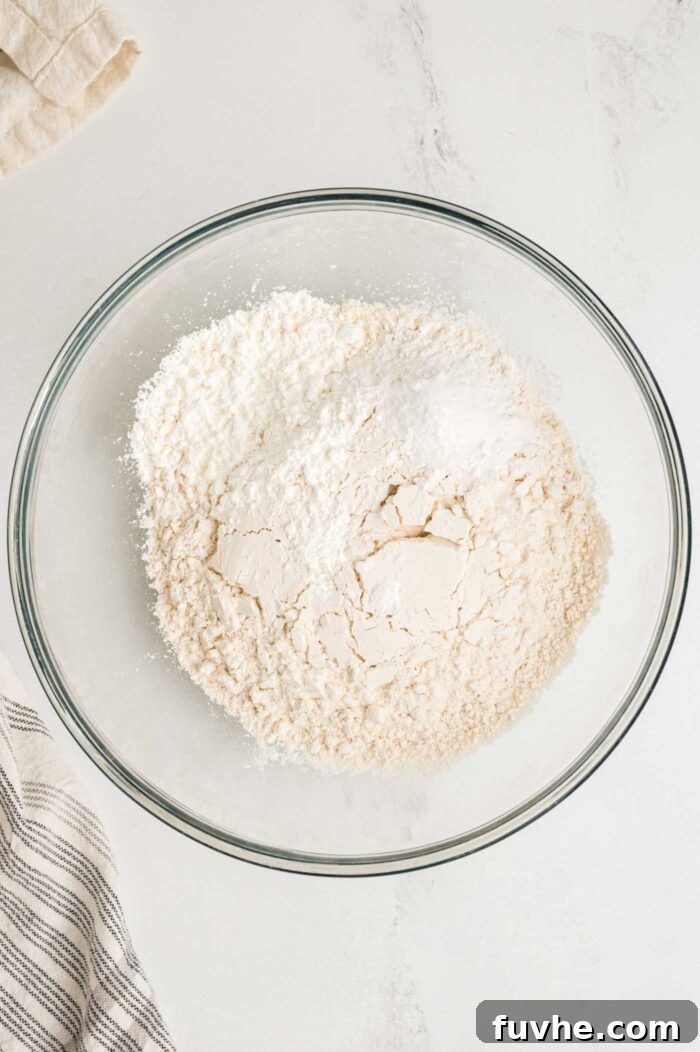
Step 1: Combine Dry Ingredients. In a medium-sized bowl, thoroughly whisk together the cornstarch, all-purpose flour, salt, baking powder, and baking soda. Ensure they are well combined before setting this mixture aside.
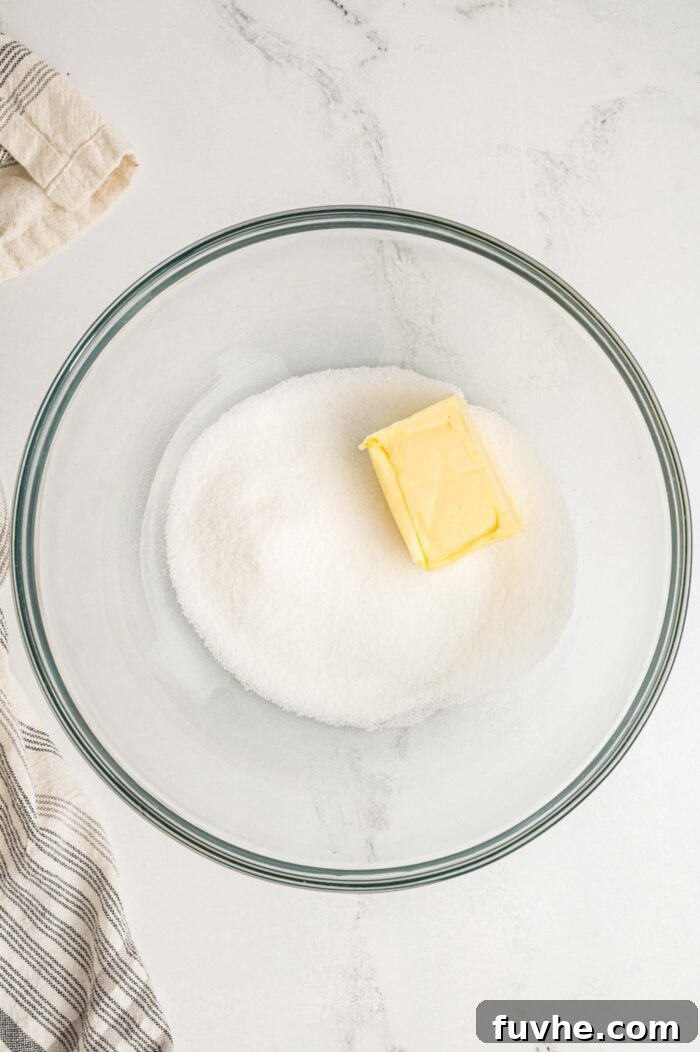
Step 2: Cream Butter and Sugar. In a separate, larger mixing bowl, use a hand-held electric mixer (or a stand mixer with a paddle attachment) to cream together the softened plant-based butter and granulated sugar. Beat for approximately 1 minute, or until the mixture is light and fully combined.
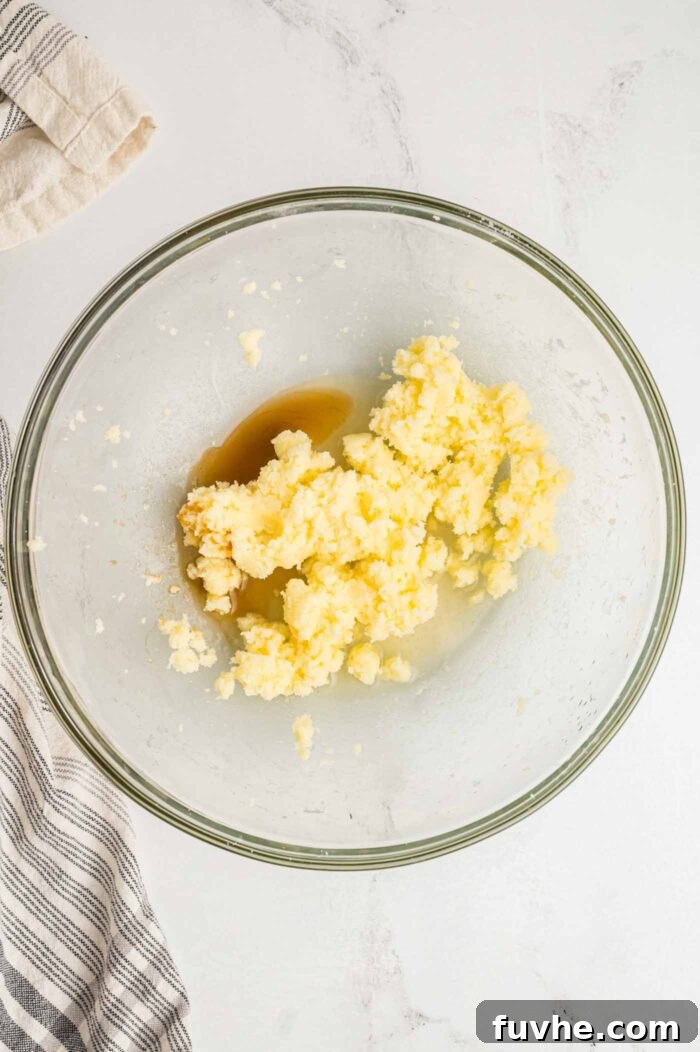
Step 3: Incorporate Liquid Enhancers. Add the vanilla extract and aquafaba to the butter and sugar mixture. Continue creaming with the electric mixer for another 3 minutes. The mixture should become noticeably lighter and fluffier. Don’t be concerned if it appears a bit chunky at this stage; it will smooth out once the dry ingredients are fully incorporated.
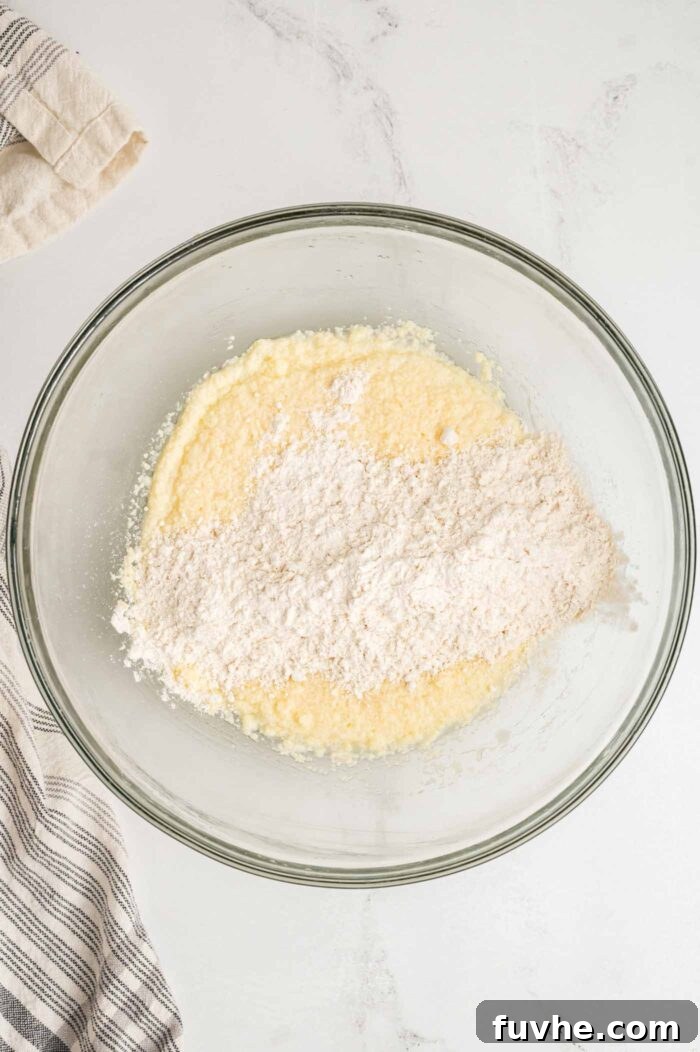
Step 4: Gradually Add Dry Ingredients. Add approximately half of your prepared dry flour mixture to the creamed butter mixture. Mix briefly with the electric mixer on low speed until just combined, taking care not to overmix.
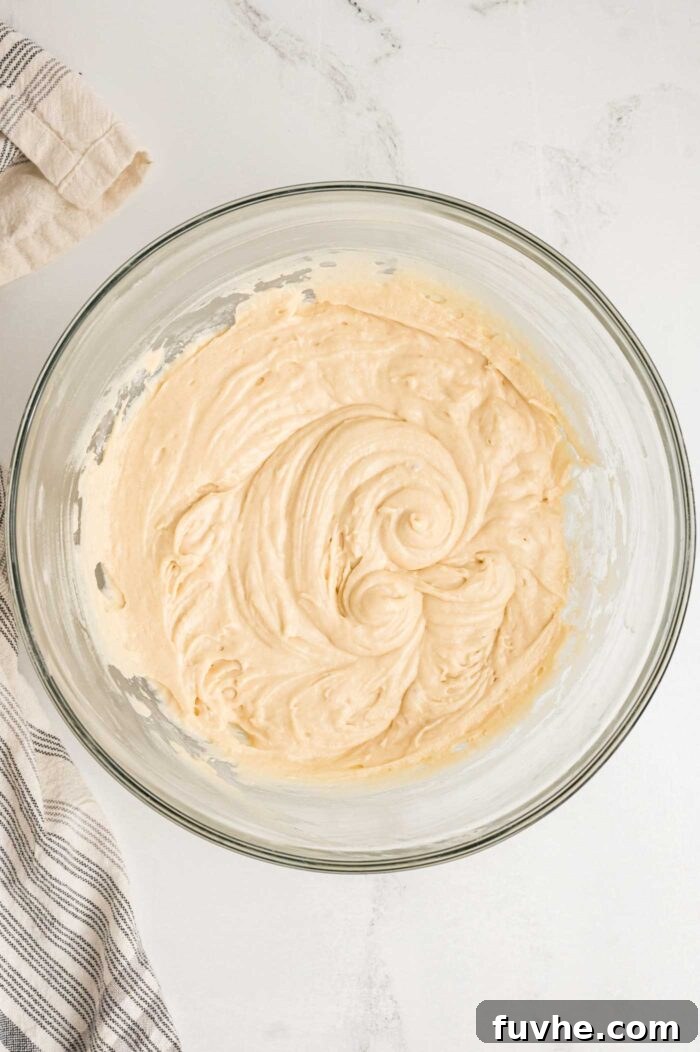
Step 5: Complete the Batter. Pour in the non-dairy milk and add the remaining half of the flour mixture. Continue beating with the hand mixer until the batter is thoroughly combined, smooth, and acquires a somewhat fluffy consistency. Be cautious not to overmix, as this can toughen the ladyfingers.
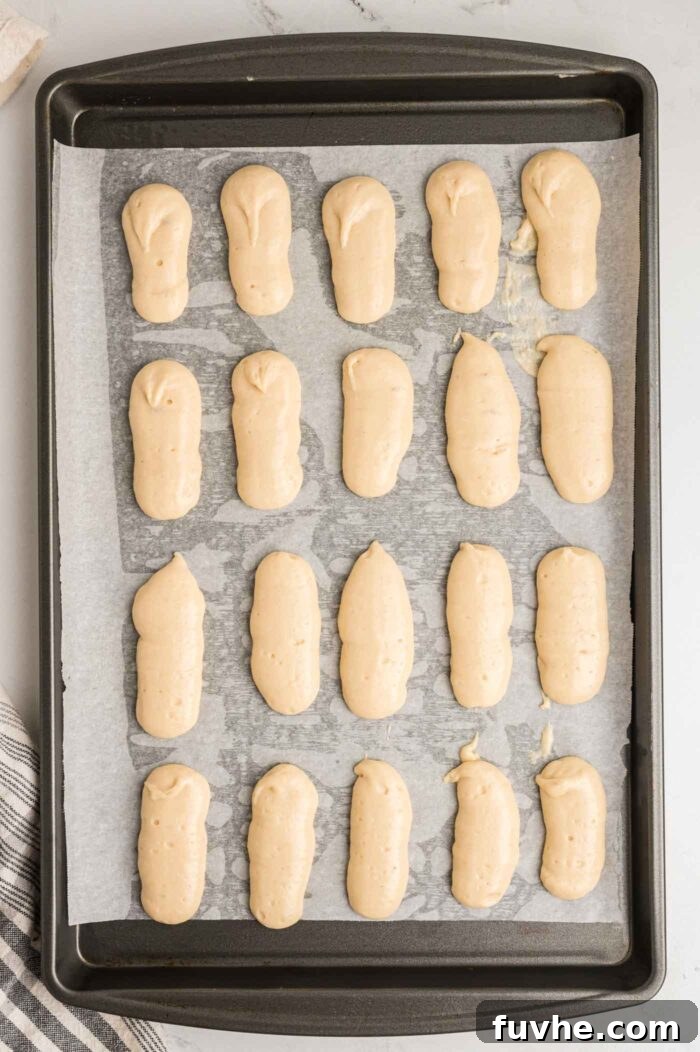
Step 6: Pipe and Chill. Transfer the ladyfinger batter into a piping bag fitted with a round tip (or a large freezer-safe ziplock bag with a small corner snipped off). Pipe uniform ladyfingers onto your prepared baking sheets, leaving about 1 inch of space between each. Aim for roughly 25-30 ladyfingers. Once piped, place the baking sheets into the refrigerator to chill for 30 minutes. After 20-25 minutes of chilling, preheat your oven to 350°F (175°C).
Helpful Tip: Shaping Ladyfingers Without a Piping Bag: If you don’t have a piping bag or feel comfortable piping, you can easily shape the ladyfinger batter by hand. Scoop small portions of the batter and gently roll and shape them into individual “fingers” on the parchment-lined baking sheet. Each cookie should be approximately 1-inch wide and 2 to 2.5-inches long for optimal dipping and layering.

Step 7: Bake to Golden Perfection. Bake the chilled ladyfingers in the preheated oven for approximately 15 minutes. They should be lightly golden brown around the edges and slightly crispy. Carefully remove the pans from the oven and allow the ladyfingers to cool completely on the baking sheets. They will firm up as they cool.
Part 2: Preparing the Velvety Vegan “Mascarpone” Cream
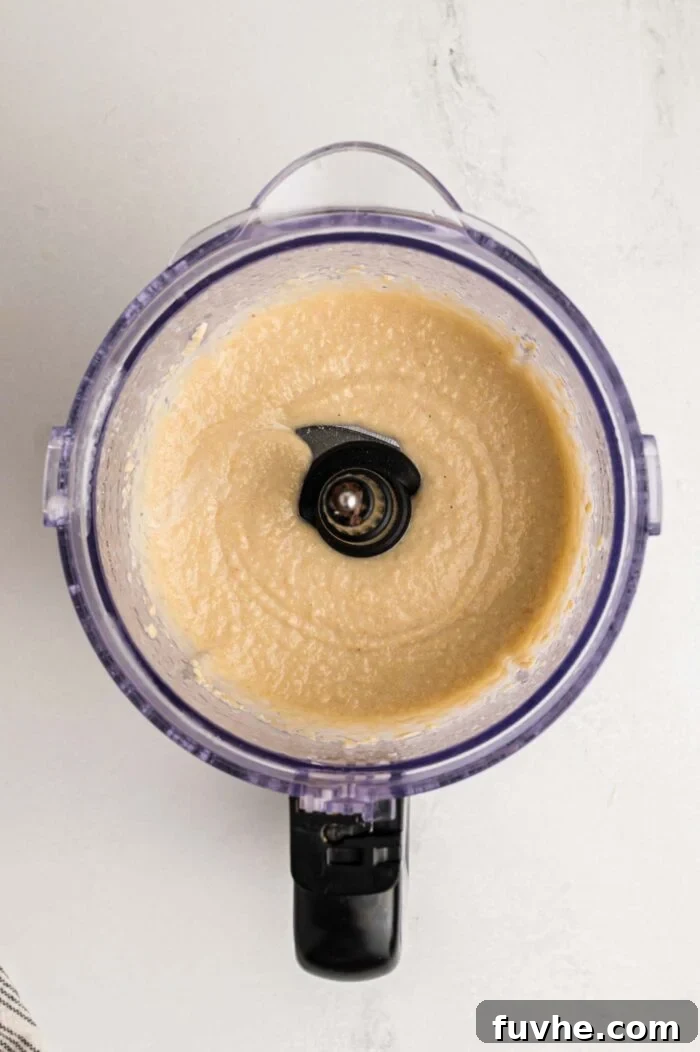
Step 1: Blend the Cashew Base. Once your cashews have softened (from either the quick soak or overnight soak), drain and rinse them thoroughly. Transfer the soaked cashews to a high-speed blender or powerful food processor. Add the non-dairy milk, maple syrup, melted coconut oil, salt, and lemon juice. Blend until the mixture is incredibly smooth and creamy, with no detectable cashew pieces. This may take a few minutes, depending on your blender’s power. Set this rich cashew cream aside.
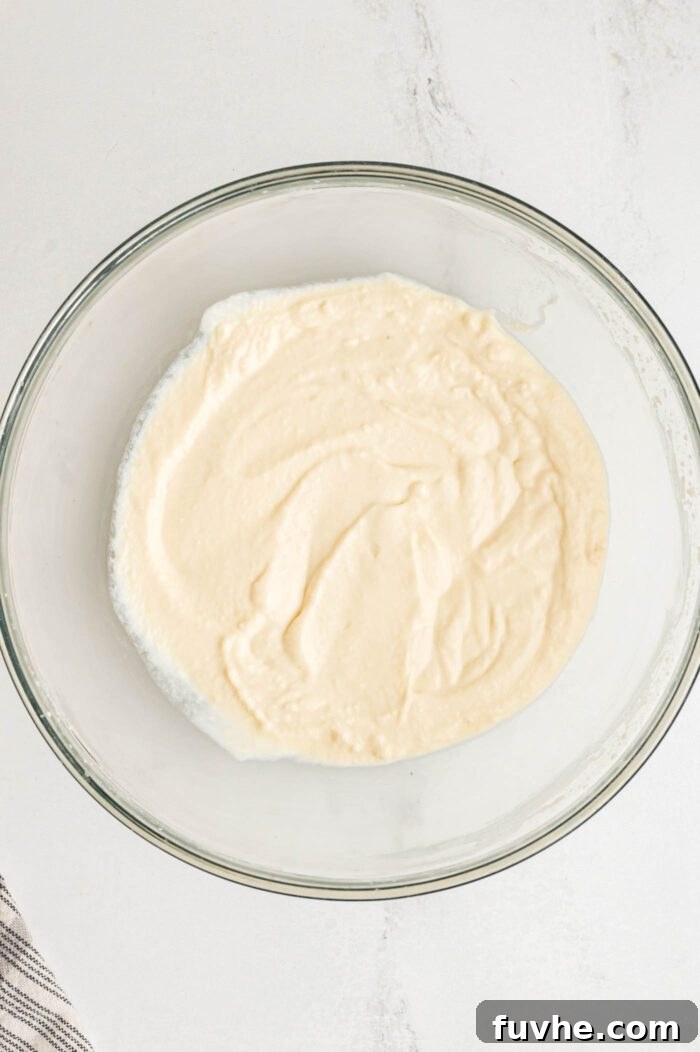
Step 2: Whip Tofu and Powdered Sugar. In a separate large mixing bowl, use a hand-held electric mixer (or a stand mixer) to whip the silken tofu and powdered sugar together. Continue beating for about 3-4 minutes, until the mixture becomes light, airy, and fluffy, resembling whipped cream. This step adds essential lightness to our mascarpone.
Important Note on Temperature: Ensure your non-dairy milk for the cashew cream is at room temperature. If your milk is cold, it can cause the melted coconut oil to solidify rapidly, resulting in a lumpy cream. If needed, briefly warm the milk in the microwave to bring it to room temperature before blending.
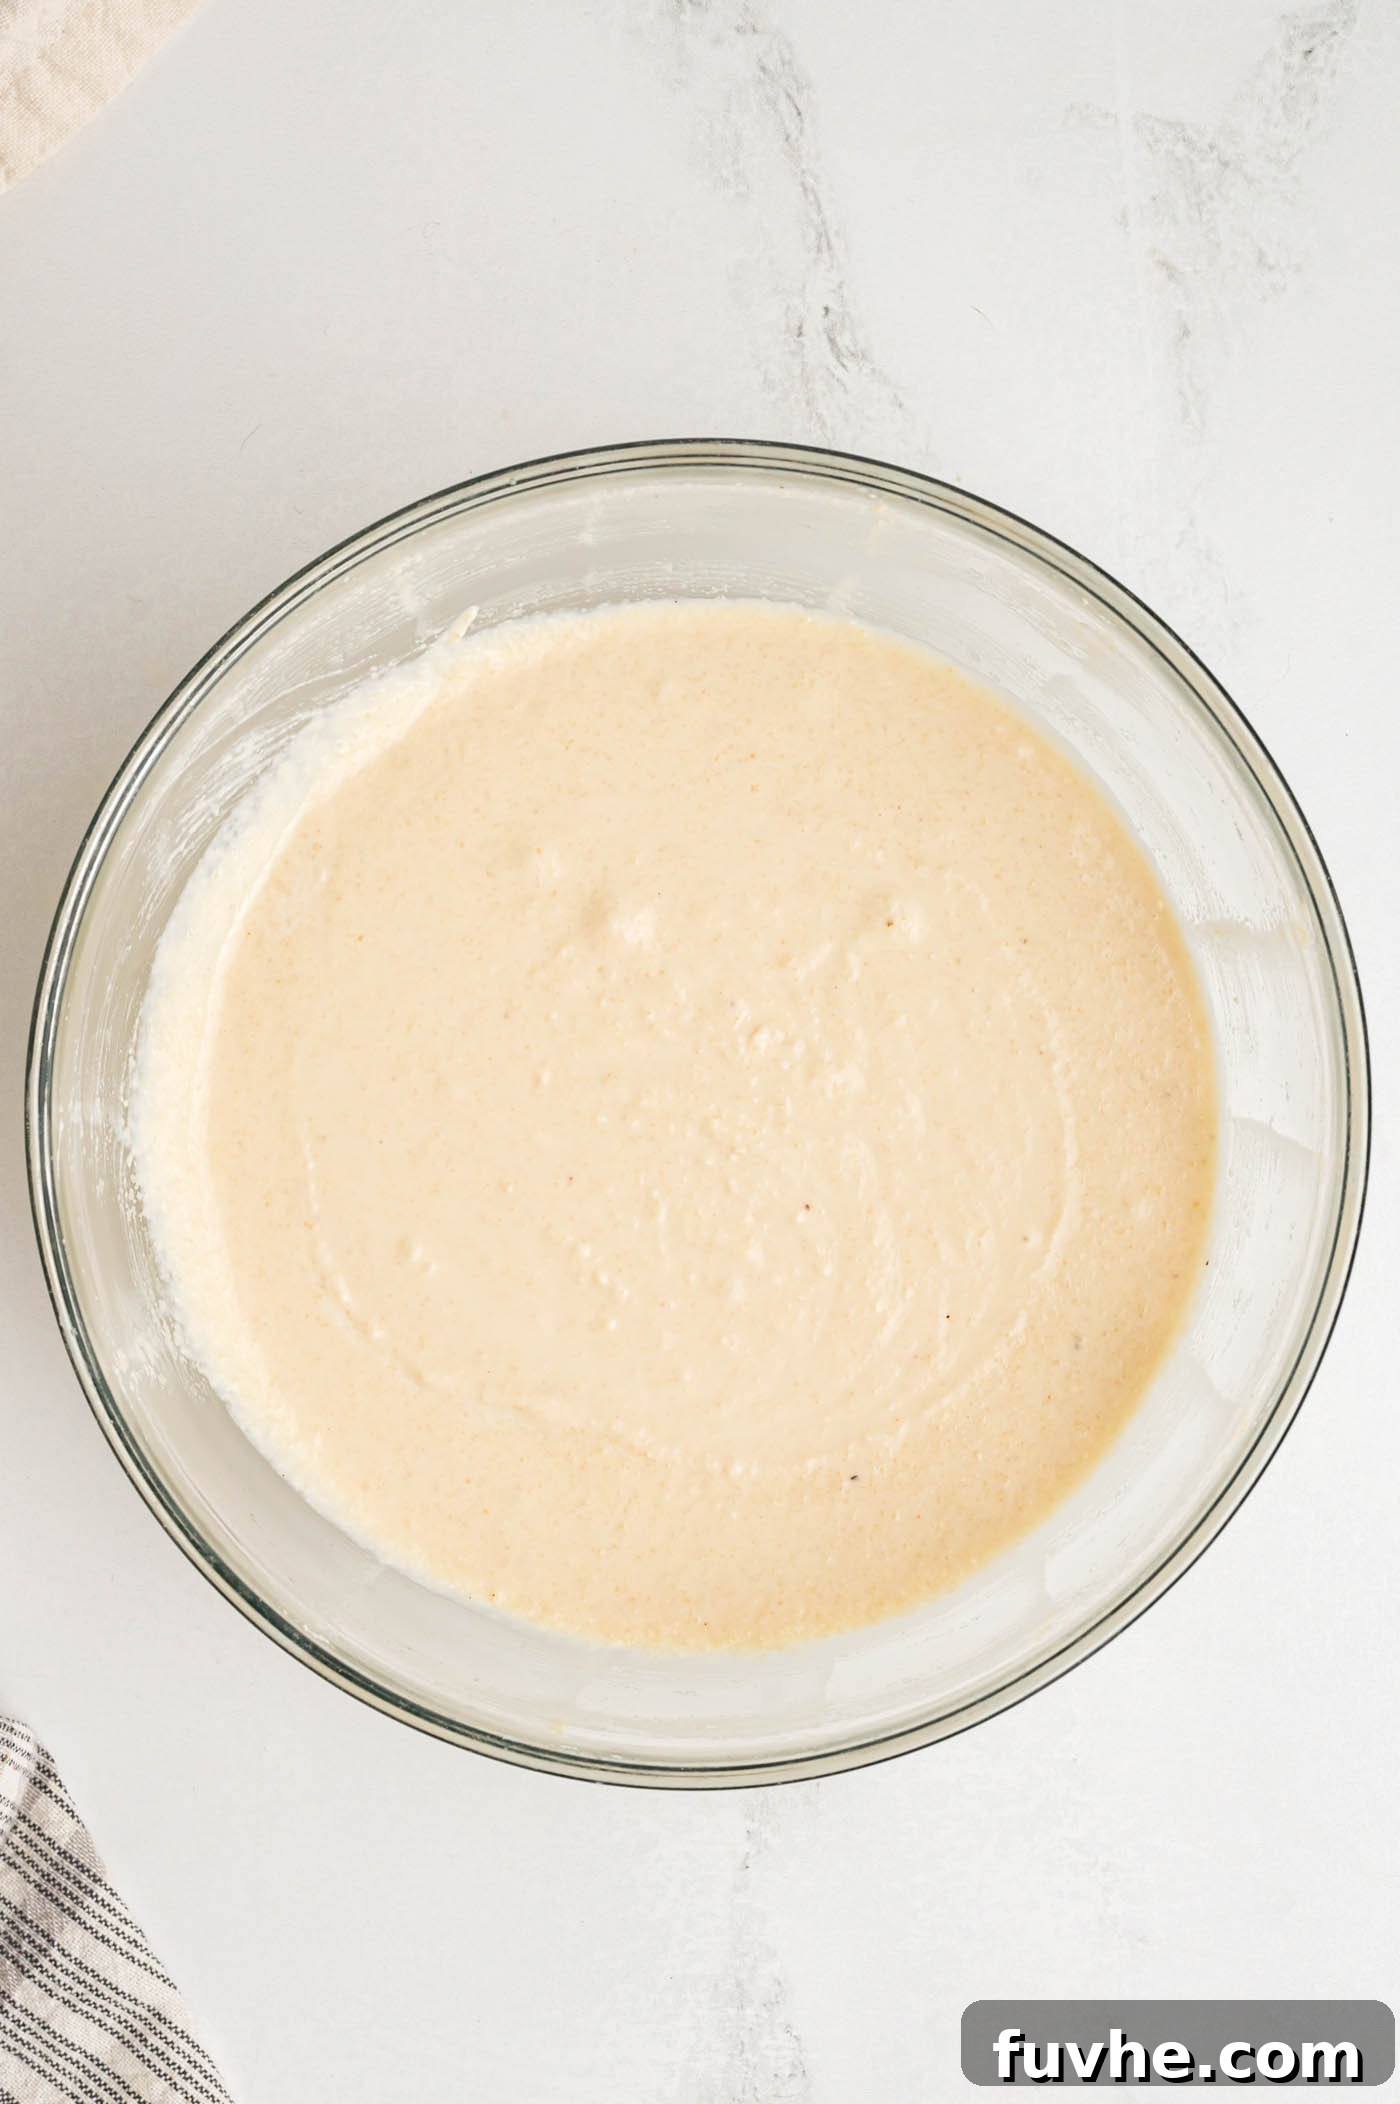
Step 3: Gently Fold Together. Carefully add the blended cashew mixture from your food processor or blender into the whipped tofu mixture in the bowl. Using a rubber spatula or a wooden spoon, gently fold the two mixtures together until they are fully combined and homogenous. Be careful not to deflate the airy tofu mixture. Set this combined mascarpone-style cream aside.
Part 3: Assembling Your Magnificent Vegan Tiramisu
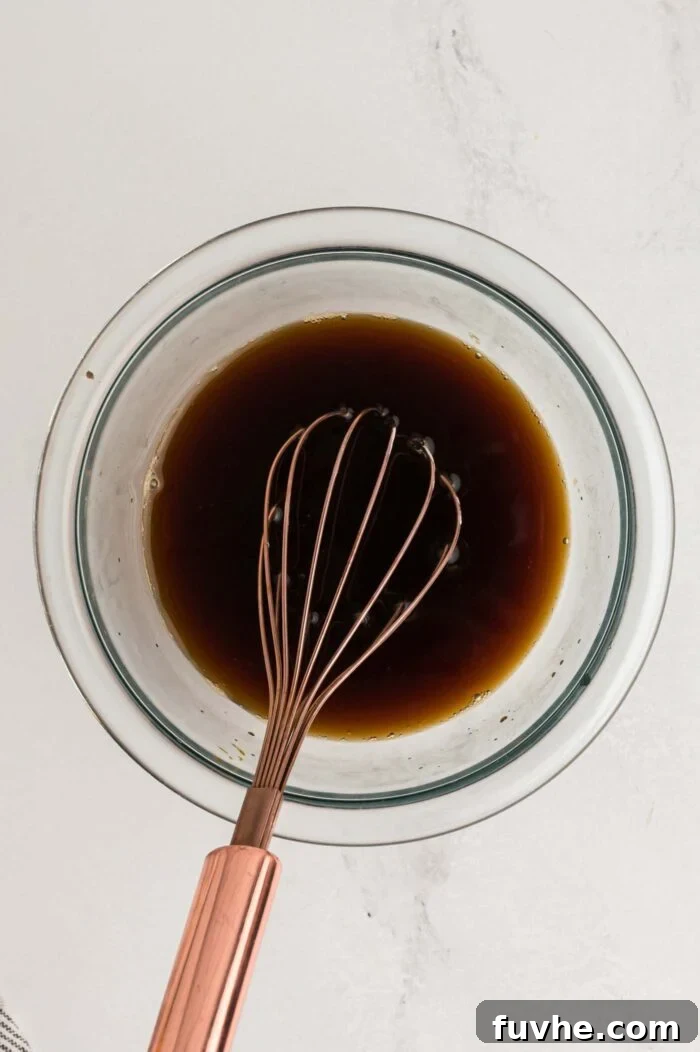
Step 1: Prepare the Coffee Dip. In a small bowl, combine the cooled espresso or strong coffee with the dark rum, if you’re using it. Whisk gently to ensure they are well mixed. If opting for an alcohol-free tiramisu, simply pour the strong coffee into a shallow dish or bowl for dipping.
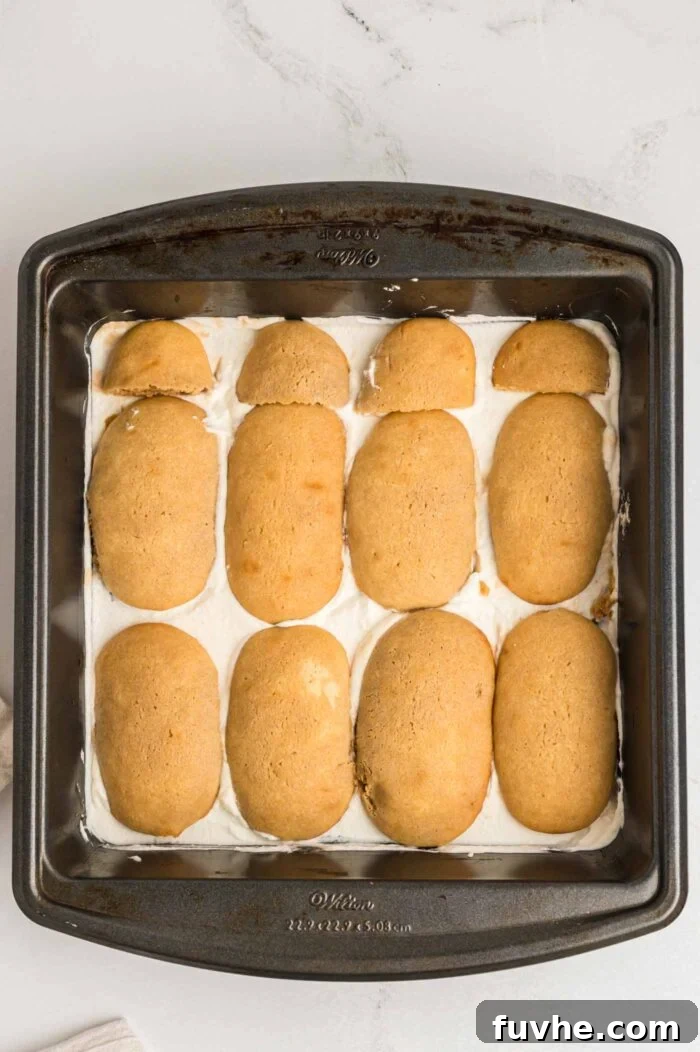
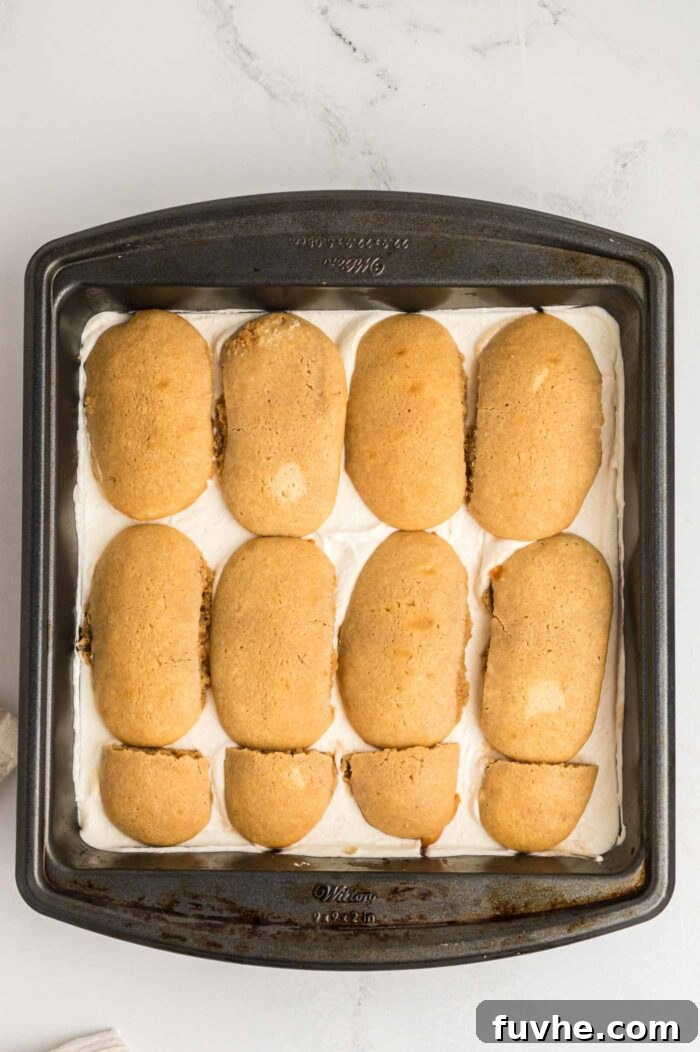
Step 2: First Layers – Cream and Ladyfingers. Begin assembly in a 9×9-inch baking dish (or a similar sized dish for individual servings). Spread about 1/2 cup of the vegan mascarpone cream evenly across the bottom of the dish. Next, take each cooled ladyfinger and quickly dip it into the coffee mixture – a quick dunk on both sides is sufficient; avoid soaking them too long to prevent sogginess. Arrange these dipped ladyfingers in a single layer over the cream. You may need to gently break or cut some ladyfingers to fill any gaps and create a seamless base layer.
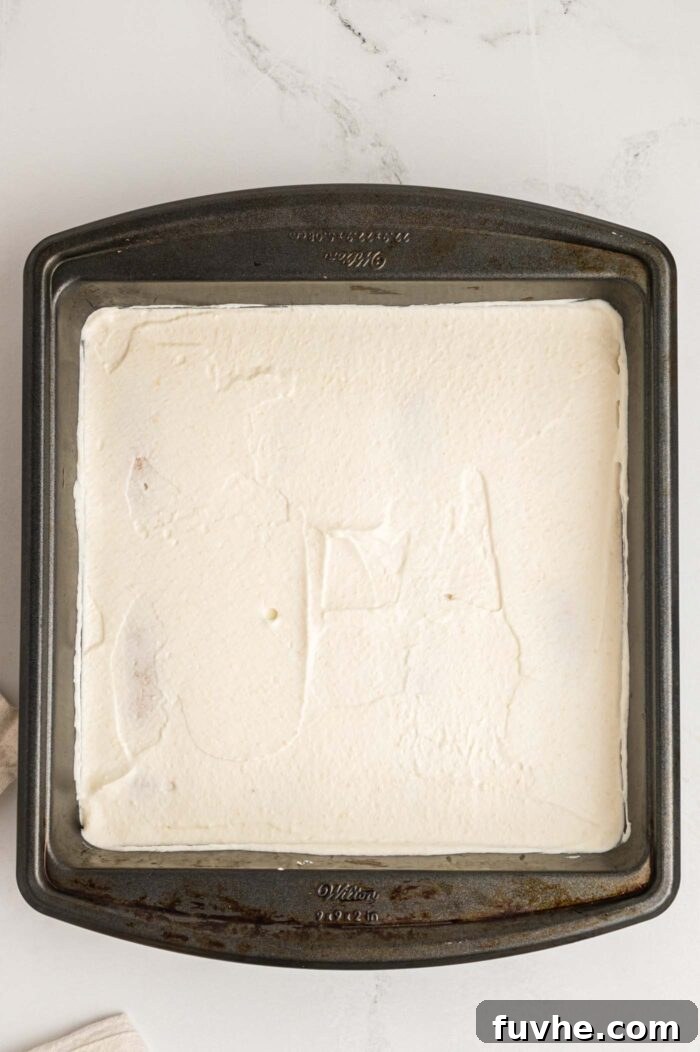
Step 3: Second Layers – Cream and Ladyfingers. Spread approximately half of the remaining mascarpone mixture evenly over your first layer of coffee-soaked ladyfingers. Now, repeat the dipping process with more ladyfingers and arrange them to form a second complete layer on top of the cream.
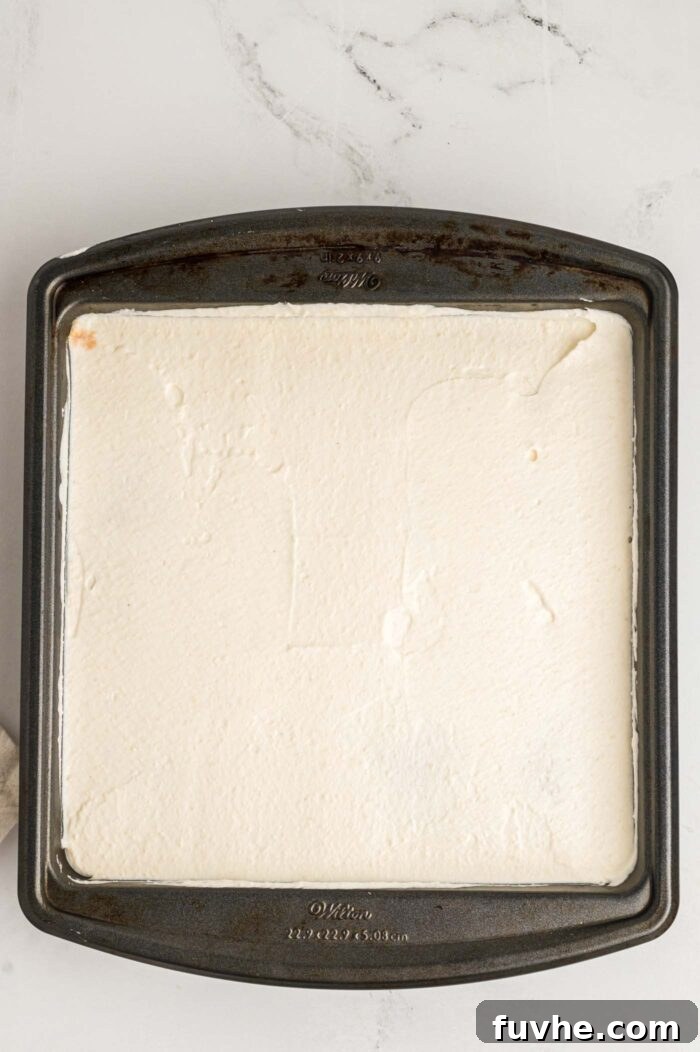
Step 4: Final Cream Layer and Chill. Add the remaining mascarpone cream over the second layer of ladyfingers, spreading it out smoothly and evenly to cover the entire surface. This is your top cream layer. Once assembled, transfer the tiramisu to the refrigerator to chill for a minimum of 4 hours, though ideally overnight (12-24 hours). While you could technically serve it sooner, the chilling time is crucial for the cream to firm up and for the flavors to fully develop and meld, resulting in a truly exceptional tiramisu.
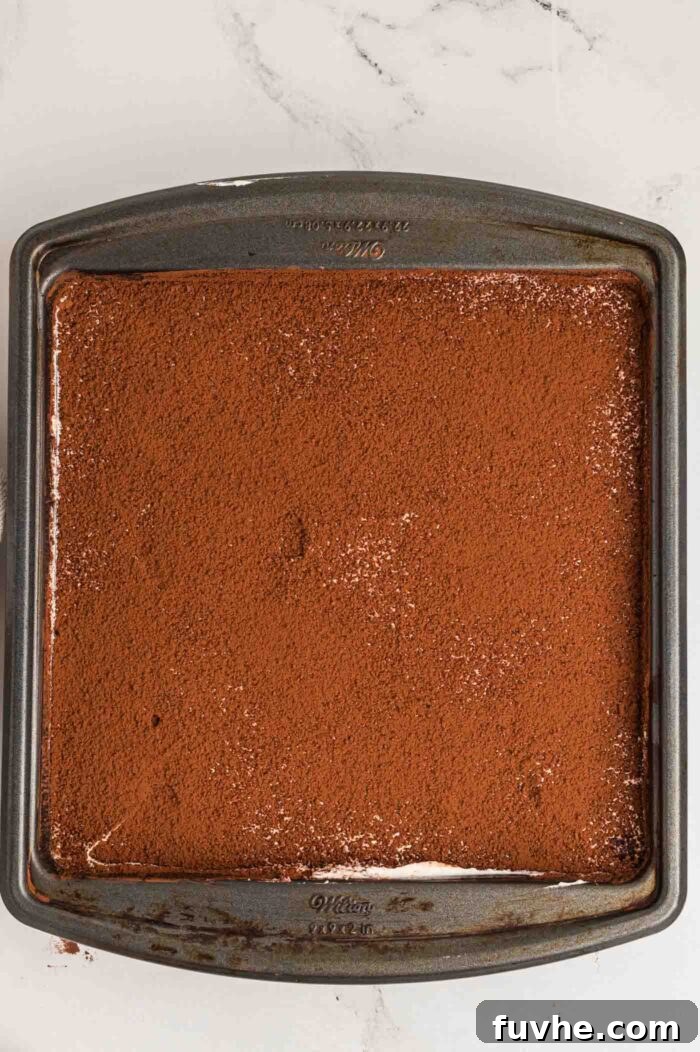
Step 5: The Finishing Dusting. Just before serving, generously dust the top of your tiramisu with cocoa powder. Aim for a beautiful, even layer that completely covers the entire cake. For an extra touch of indulgence and visual appeal, you can also finely grate some vegan dark chocolate over the top. The contrast of the dark cocoa powder against the pale cream is a hallmark of classic tiramisu.
Step 6: Slice and Serve. Once dusted, your gorgeous vegan tiramisu is ready to be sliced and served. Carefully cut the cake into 9 generous portions. If you prefer smaller servings, you can easily cut it into 12 or even 16 squares, which is perfect for larger gatherings or lighter desserts. Serve immediately and watch your guests be amazed!
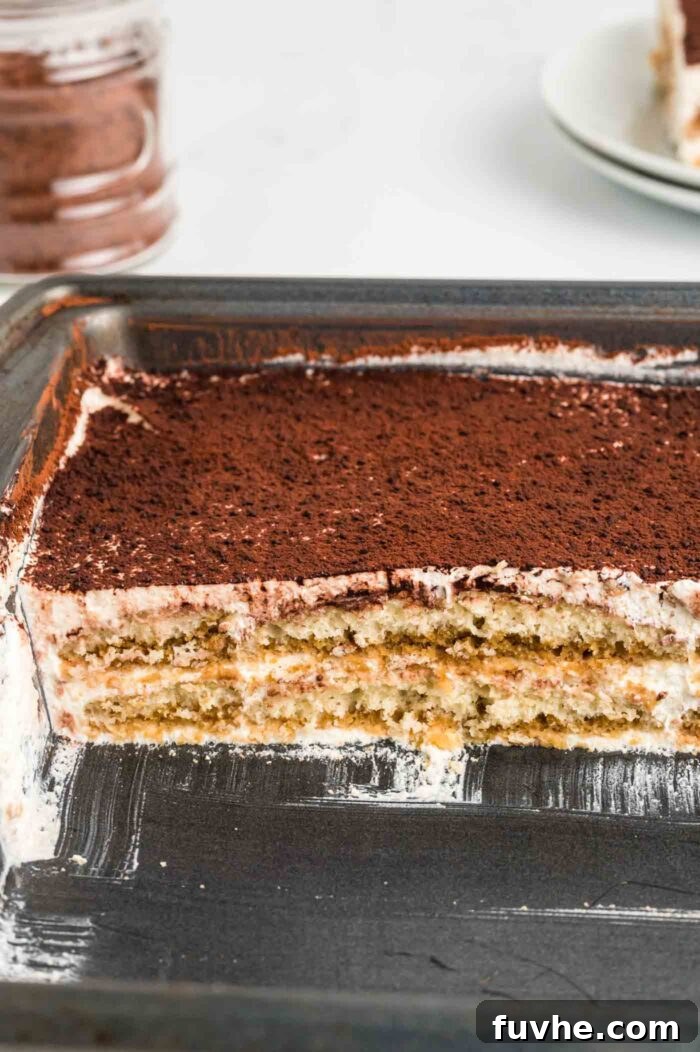
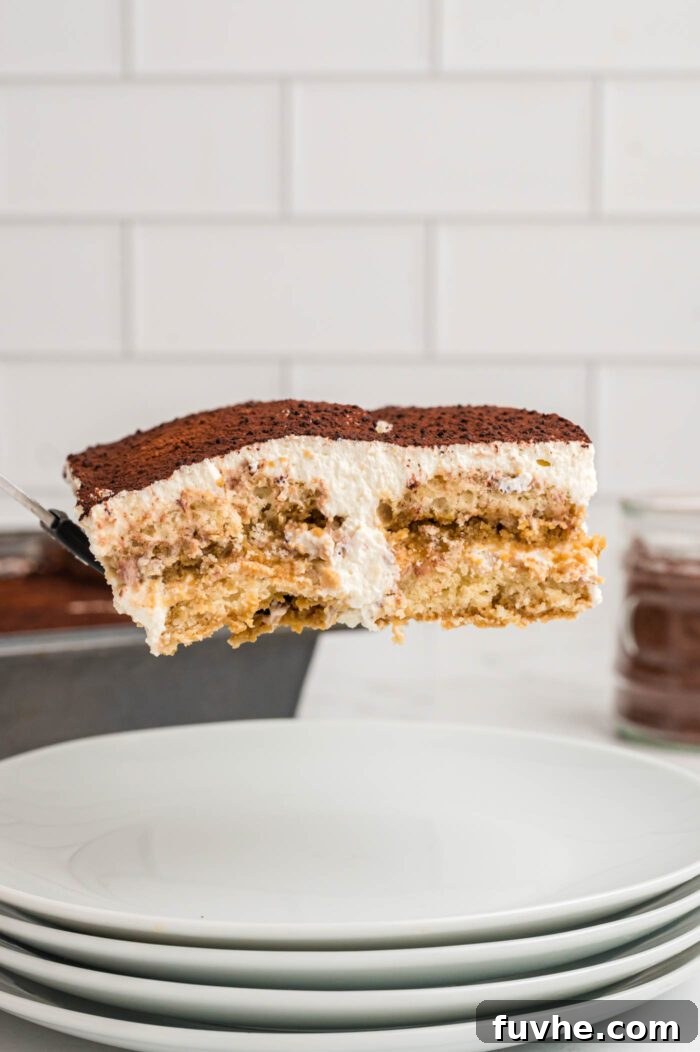
Carefully cut your beautifully layered cake into 9 perfect portions, or create smaller squares if desired. Each slice reveals the intricate layers of coffee-soaked ladyfingers and creamy mascarpone, making for an unforgettable dessert presentation. You can easily get up to 16 smaller square servings if you need to feed a crowd.
Achieving Tiramisu Perfection: Expert Tips for Success
Follow these crucial tips to ensure your vegan tiramisu is nothing short of spectacular:
- Precision in Measuring with a Kitchen Scale: For baking, accuracy is paramount. While cup measurements are provided, I highly recommend using a digital kitchen scale to measure ingredients by their listed weights (grams). This is the most reliable way to ensure consistent and successful results, as cup measurements can vary significantly depending on packing and individual technique.
- Strategic Dusting of Cocoa Powder: The cocoa powder topping is best added just before serving. If you dust it too far in advance, the moisture from the cream will absorb the cocoa, causing it to darken and lose its distinctive powdery, elegant finish. Keep it covered and chill, then dust right before presenting.
- Thorough Preparation and Review: Before you even start gathering ingredients, make sure you read the entire recipe from start to finish. Take your time to review all the step-by-step photos and notes. This will give you a clear understanding of the process, what each stage should look like, and help prevent any surprises or rushed moments during preparation.
- Optimal Cashew Soaking: For the silkiest mascarpone, remember that longer cashew soaking (8 hours to overnight) is always better, especially if you have a less powerful blender.
- Room Temperature Ingredients: Especially for the mascarpone cream, ensure your non-dairy milk and other liquid ingredients (except the melted coconut oil) are at room temperature. This prevents the coconut oil from seizing and creating a lumpy cream.
- Gentle Dipping of Ladyfingers: Speed is key when dipping the ladyfingers into the coffee. A quick dip on both sides is sufficient to absorb flavor without making them soggy. You want them moistened, not saturated.
Versatility and Variations for Your Vegan Tiramisu
- Individual Servings for Elegant Presentation: For a more refined presentation, you can assemble your tiramisu in individual ramekins, dessert glasses, or small jars. Simply continue the layering process in each serving vessel until all ingredients are used. Depending on the size and shape of your dishes, you may need to break the ladyfingers into smaller pieces to fit.
- Hand-Shaping Ladyfingers: If you don’t own a piping bag or a ziplock bag for piping the ladyfingers, don’t worry! You can easily shape the batter by hand. Scoop small amounts of batter, roll them into balls, and then gently shape them into the classic finger-like cookies (approximately 1-inch wide and 2-2.5 inches long) on your parchment-lined baking sheet.
- Flavor Variations: Experiment with different flavor profiles! Add a touch of almond extract to the ladyfingers or cream for an amaretto-like hint. For a chocolate lover’s dream, swirl some melted vegan chocolate into a portion of the mascarpone cream or add chocolate shavings between layers.
- Coffee Strength: Adjust the strength of your coffee soak to your preference. If you like a bolder coffee flavor, use a very concentrated espresso. For a milder taste, a slightly less strong brew will suffice.
Frequently Asked Questions About Vegan Tiramisu
Absolutely! Tiramisu freezes beautifully. Once assembled and before dusting with cocoa powder, cover the entire dish tightly with several layers of plastic wrap, then an additional layer of aluminum foil. You can freeze it for up to 3 months. When you’re ready to enjoy, transfer the frozen tiramisu to the refrigerator and allow it to thaw overnight. Dust with fresh cocoa powder just before serving for the best appearance.
This recipe is designed for a standard 9×9-inch square baking dish, which yields 9 generous servings. However, you have several flexible options. For charming individual desserts, prepare the tiramisu in pretty glasses, ramekins, or small jars – the number of servings will depend on their size. Alternatively, a 9×13-inch glass baking dish can be used, though this will result in a slightly thinner tiramisu. An 8 or 9-inch deep round pan or springform pan would also be suitable for a circular presentation.
The key to avoiding a soggy tiramisu lies in how you dip the ladyfingers. It’s crucial not to let them sit and soak in the coffee liquid. Instead, give each ladyfinger a very quick dip on both sides, just enough to moisten them. Alternatively, you can use a pastry brush to lightly brush the coffee onto the ladyfingers. The goal is to imbue them with coffee flavor without saturating them completely.
While the tiramisu can technically be eaten after a minimum of 4 hours of chilling, it truly reaches its peak flavor and texture when prepared the day before serving. An overnight chill (12-24 hours) allows the mascarpone cream to set perfectly and for all the incredible flavors to meld and deepen. This makes it an ideal make-ahead dessert. Although it will keep well in the fridge for 3-4 days, for the absolute best texture and taste, consuming it within 1-2 days of preparation is recommended.
Convenient Storage & Smart Make-Ahead Strategies
Planning ahead makes this decadent dessert even more enjoyable. Here’s how to store your tiramisu and prepare components in advance for effortless entertaining:
- Pre-Bake Ladyfingers & Brew Coffee: To significantly reduce preparation time on the day of assembly, you can bake your homemade ladyfingers and brew your strong coffee or espresso a day or two in advance. Allow both to cool completely before storing them. Ladyfingers can be kept in an airtight container at room temperature, and cooled coffee can be refrigerated.
- Store-Bought Ladyfingers Option: If you’re short on time or prefer a simpler approach, using high-quality store-bought ladyfingers is a perfectly acceptable shortcut. Just ensure they are vegan-friendly. Alternatively, a simple vanilla sheet cake, baked and cut into “fingers,” can serve as a substitute for the ladyfingers.
- Advance Cashew Soaking: The cashews for the mascarpone cream can be soaked well in advance. After boiling water and pouring it over them, you can let them soak at room temperature for several hours or cover them and refrigerate them overnight, ready for blending the next day.
- Enhanced Flavor with Time: Tiramisu is renowned for being even more delicious when served the day after it’s assembled. This allows the intricate flavors to fully integrate and the creamy layers to firm up beautifully. Feel free to prepare the entire dessert a day ahead and chill it in the fridge until you’re ready to serve.
- Refrigerator Storage: Once assembled, the tiramisu will keep wonderfully in the refrigerator for up to 4 days. If you’ve already dusted it with cocoa powder, it’s fine, but for the best visual presentation, it’s preferable to store the cake undusted and add the cocoa powder just before serving. Ensure it is tightly covered with plastic wrap to prevent it from absorbing refrigerator odors.
- Freezer Storage: Freezing is an excellent option for longer storage. If freezing the entire cake, wrap the pan tightly with multiple layers of plastic wrap, followed by a layer of aluminum foil to prevent freezer burn. For freezing individual leftover pieces, transfer them to a freezer bag or an airtight container. Tiramisu can be frozen for up to 3 months. To thaw, simply move it to the refrigerator and let it defrost overnight.
More Irresistible Vegan Desserts to Explore
If you’ve fallen in love with this vegan tiramisu, you’ll be thrilled to discover more delightful plant-based sweet treats:
- Vegan Chocolate Pie: An incredibly easy, no-bake dessert requiring just a few simple ingredients for a rich, chocolatey indulgence.
- Vegan Olive Oil Cake: A wonderfully light, moist, and flavorful cake that comes together effortlessly in just one bowl.
- Vegan Carrot Cake: The timeless classic, perfected with a vegan twist and generously topped with a luscious cream cheese frosting.
- No-Bake Matcha Cheesecake: A delightful cashew-based cheesecake featuring a subtle yet refreshing matcha flavor, perfect for green tea lovers.
- No-Bake Pumpkin Pie Tarts: Adorable mini pumpkin pies that are entirely no-bake, offering a convenient and charming seasonal treat.
Vegan Tiramisu: The Ultimate Dairy-Free & Eggless Delight
Pin Recipe
Rate Recipe
Print Recipe
Ingredients
For the Homemade Vegan Ladyfingers
- 2 cups all-purpose flour, 250 g
- 1 ½ tsp cornstarch
- 1 tsp baking powder
- ½ tsp baking soda
- ¼ tsp salt
- 5 tbsp plant-based butter, softened, 80 g
- ½ cup granulated sugar, 115 g
- 1 tsp vanilla extract
- 1/4 cup aquafaba (liquid from a can of chickpeas), 60 mL
- 1/4 cup non-dairy milk (e.g., almond milk), 60 mL
For the Vegan Mascarpone-Style Cream Filling
- 1 ¾ cup raw cashews, 230 g (soaked)
- 1/2 cup non-dairy milk, at room temperature, 120 ml
- 1/3 cup maple syrup, 80 ml
- 1/3 cup coconut oil, melted, 80 ml (essential for setting)
- ¼ tsp salt
- 2 tbsp fresh lemon juice, 30 ml
- 200 g silken tofu or soft tofu
- 2 tbsp powdered sugar
For the Coffee Soaking Liquid & Garnish
- 2/3 cup espresso or very strong coffee, cooled, 150 mL
- 3 tbsp dark rum, optional (or rum essence for alcohol-free)
- cocoa powder, for dusting
Instructions
-
Preparation: Line one large or two smaller baking sheets with parchment paper. Ensure they are sized to fit comfortably in your refrigerator.
-
Soak Cashews: Bring water to a boil in a pot or kettle. Pour the boiling water over the raw cashews in a heat-safe bowl and set them aside to soak. For an extra smooth cream (especially without a high-speed blender), an overnight soak is highly recommended.
Part 1: Make the Vegan Ladyfingers
-
Mix Dry Ingredients: In a bowl, whisk together the cornstarch, all-purpose flour, salt, baking soda, and baking powder until thoroughly combined. Set aside.
-
Cream Butter and Sugar: In a separate large bowl, use a handheld electric mixer (or stand mixer) to cream the softened plant-based butter and granulated sugar for about 1 minute until fully combined and light.
-
Add Aquafaba and Vanilla: Incorporate the aquafaba and vanilla extract into the butter-sugar mixture. Continue creaming for approximately 3 minutes until the mixture appears light and fluffy. Don’t worry if it looks a bit separated; it will come together with the flour.
-
Combine Batter: Add half of the flour mixture to the creamed mixture and beat until just incorporated. Then, add the non-dairy milk and the remaining flour mixture. Beat for another 30 seconds to 1 minute until the batter is smooth, combined, and slightly fluffy.
-
Pipe Ladyfingers: Transfer the batter to a piping bag with a round tip (or a zip-top bag with a corner cut off). Pipe 25-30 uniform ladyfingers onto the prepared baking sheets, leaving about 1 inch of space between each. If not piping, shape them by hand into approximately 1-inch wide, 2-2.5-inch long cookies.
-
Chill Ladyfingers: Place the baking sheets with piped ladyfingers into the refrigerator to chill for 30 minutes.
-
Preheat Oven: After 20-25 minutes of chilling time, preheat your oven to 350°F (175°C).
-
Bake Ladyfingers: Bake the ladyfingers for 15 minutes, or until their edges are lightly golden brown and slightly crispy. Remove from oven and allow them to cool completely on the pans.
Part 2: Prepare the Vegan Mascarpone Cream
-
Blend Cashew Base: Drain and thoroughly rinse the soaked cashews. Add them to a high-speed blender or powerful food processor along with the room temperature non-dairy milk, maple syrup, melted coconut oil, salt, and lemon juice. Blend until the mixture is exceptionally smooth and creamy. Set aside.
-
Cream Tofu & Sugar: In a large mixing bowl, use a handheld electric mixer to whip the silken tofu and powdered sugar for about 3-4 minutes, until the mixture becomes light and fluffy.
-
Combine Creams: Gently fold the blended cashew mixture into the whipped tofu mixture using a rubber spatula or wooden spoon until fully combined and smooth. Be careful not to deflate the airy texture. Set aside.
Part 3: Prepare the Coffee Dip
-
In a small, shallow bowl, whisk together the cooled espresso or strong coffee and the dark rum (if using). If omitting alcohol, simply use the coffee.
Part 4: Assemble the Vegan Tiramisu
-
First Mascarpone Layer: In a 9×9-inch square baking dish, spread about ½ cup of the prepared vegan mascarpone cream evenly across the bottom.
-
First Ladyfinger Layer: Quickly dip each cooled ladyfinger into the coffee mixture (just a quick dunk on both sides). Arrange them in a single layer over the cream in the pan, breaking or cutting them as needed to cover the base completely.
-
Second Layers: Spread half of the remaining mascarpone mixture over the first layer of ladyfingers. Then, add another layer of quickly dipped ladyfingers on top, again breaking them to fit as necessary. Spread the rest of the mascarpone cream smoothly over this second ladyfinger layer.
-
Chill: Transfer the assembled tiramisu to the refrigerator and chill for at least 4 hours, though 12-24 hours (overnight) is highly recommended for the best flavor and texture development.
-
Dust with Cocoa Powder: Just before cutting and serving, generously dust the entire top surface of the cake with cocoa powder. For an extra touch, add some finely grated vegan chocolate.
-
Slice and Serve: Cut the chilled tiramisu into 9 equal portions (or 12-16 smaller squares) and serve immediately. Enjoy your homemade vegan delight!
Recipe Notes
For the most accurate and consistent results, I strongly advise using a digital kitchen scale to measure all your ingredients by weight (grams), rather than relying solely on cup measurements, which can vary.
This recipe yields 9 generous servings of vegan tiramisu. However, for smaller portions or to serve a larger group, you can easily cut it into 12 or even 16 smaller squares.
Nutrition Information
Like this recipe? Rate and comment below!