
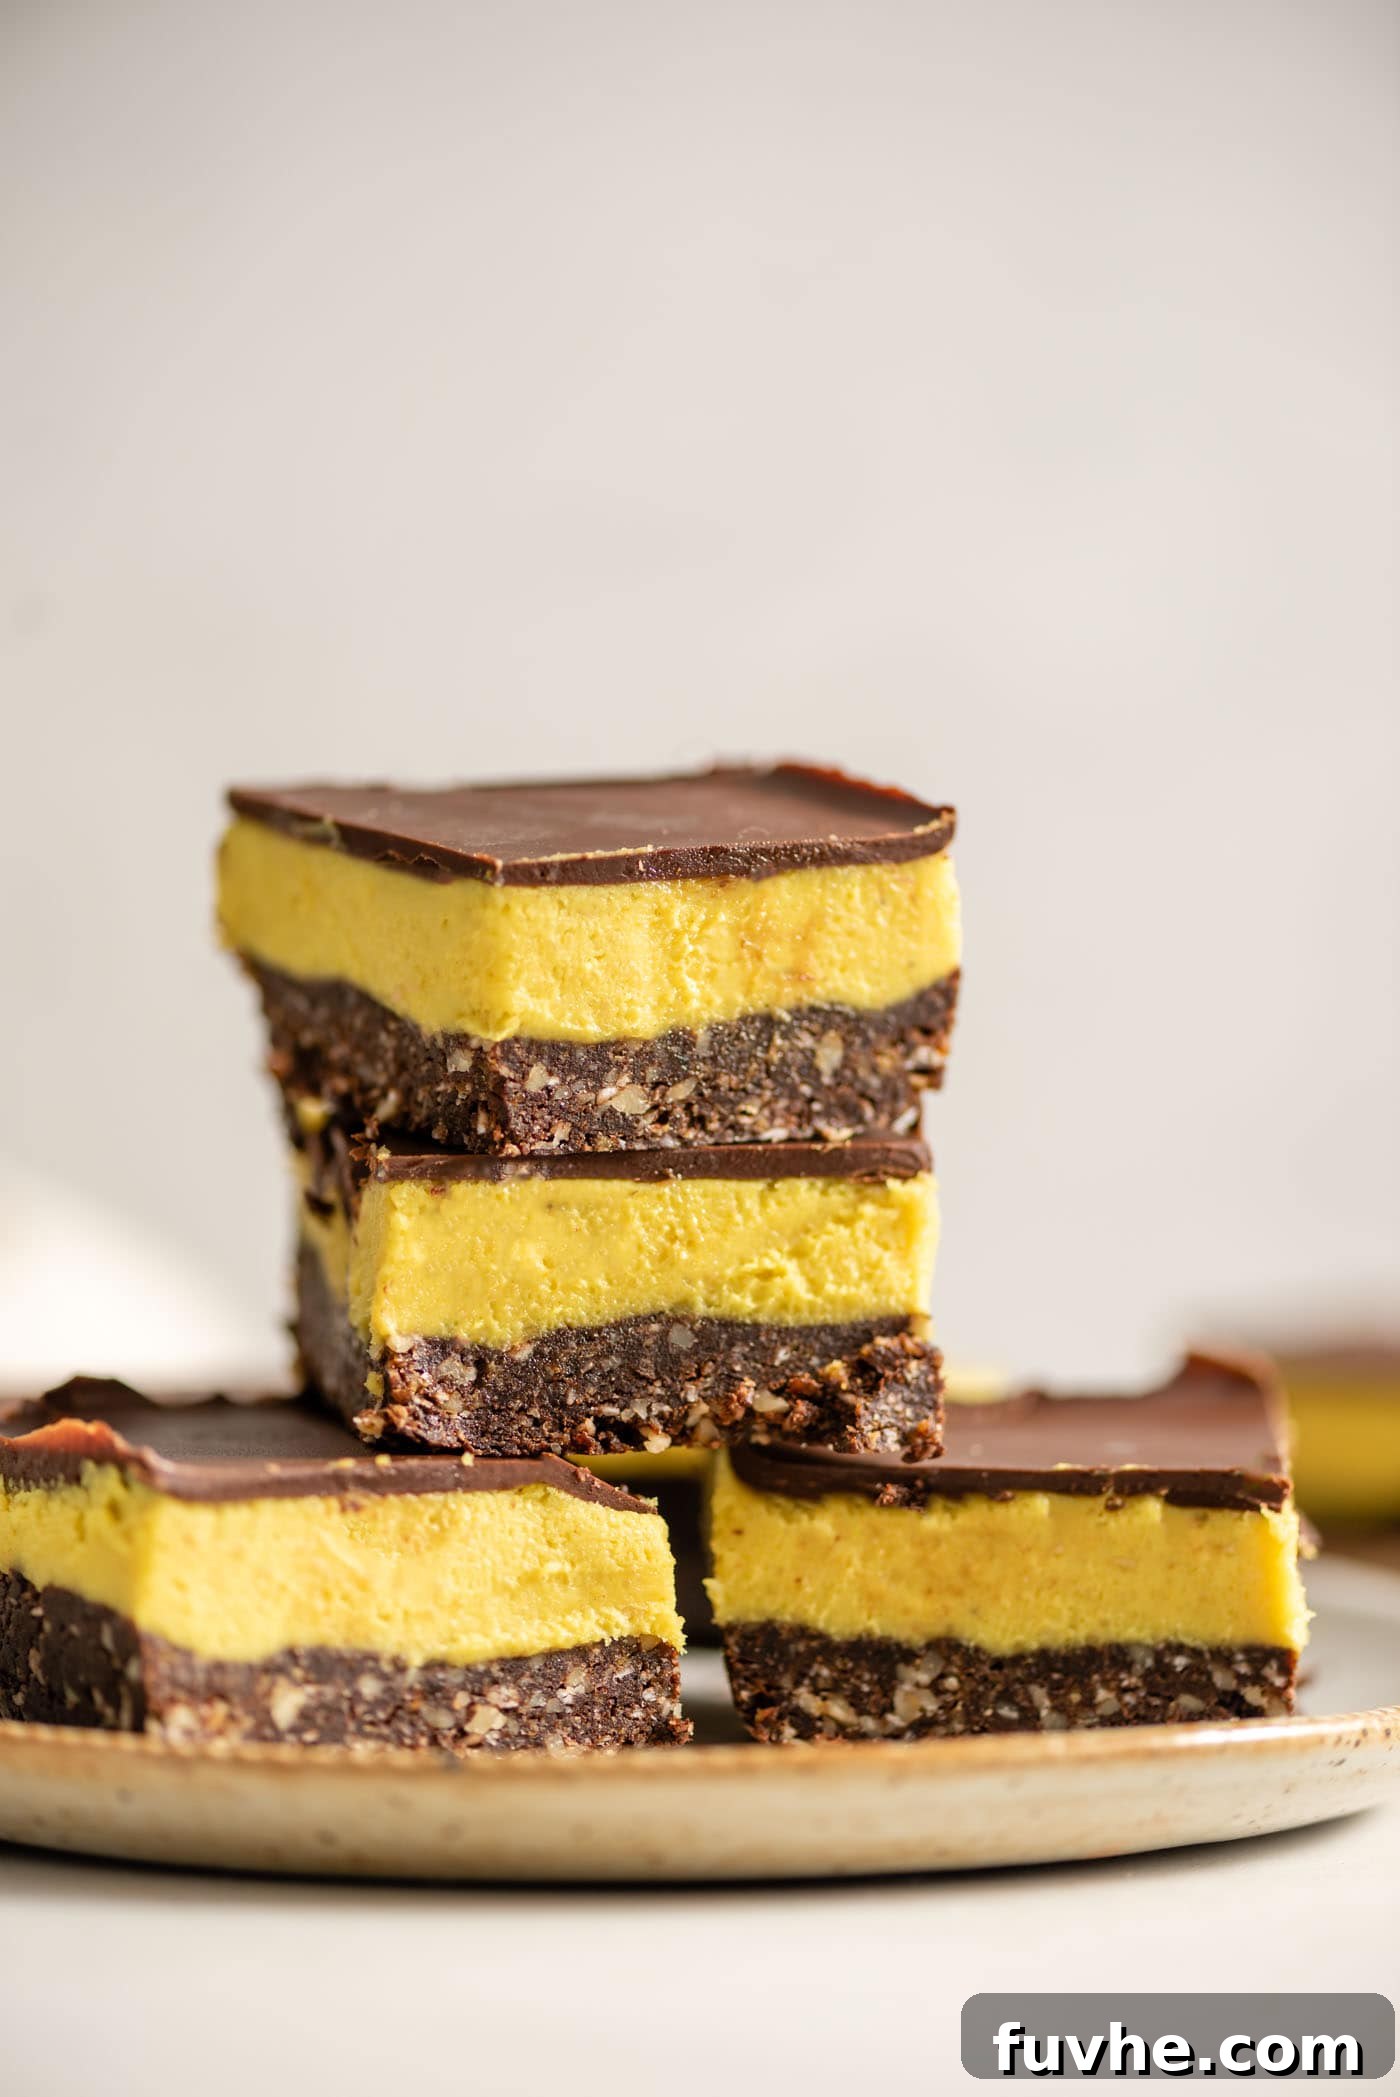
No-Bake Vegan Nanaimo Bars: A Wholesome Canadian Delight
Craving a classic Canadian dessert but looking for a healthier, plant-based twist? Look no further! These no-bake vegan Nanaimo bars are incredibly easy to prepare, using only a handful of wholesome ingredients, yet they deliver all the rich, decadent flavor of the traditional Christmas treat. Forget the butter, white sugar, powdered sugar, and heavy cream – these bars are a testament to how delicious and satisfying vegan desserts can be, without compromising on taste or texture.
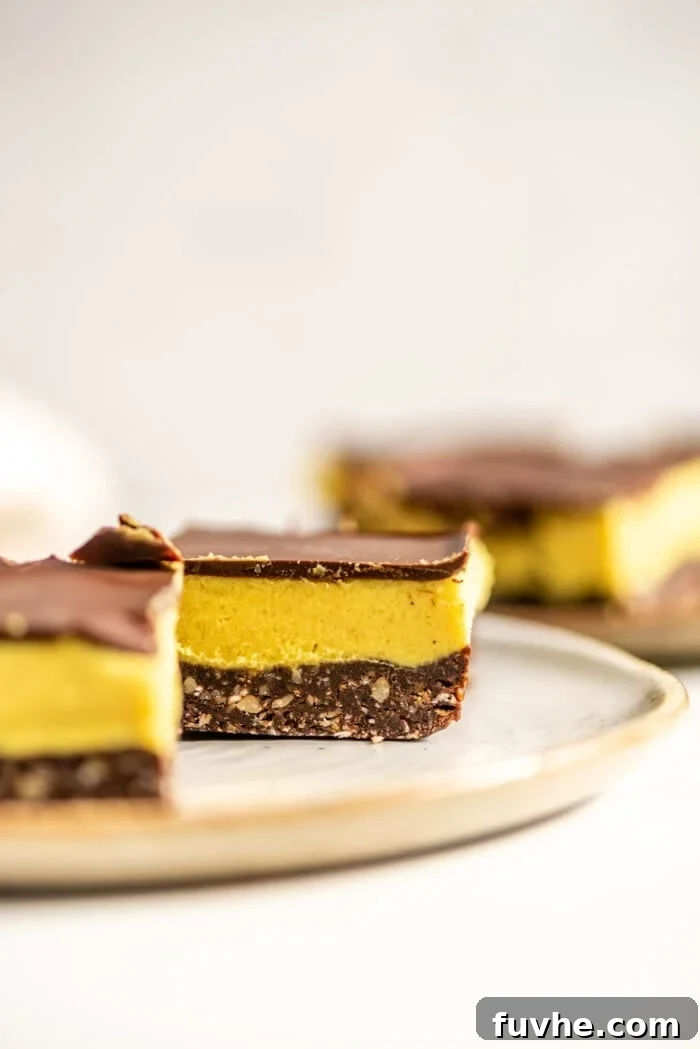
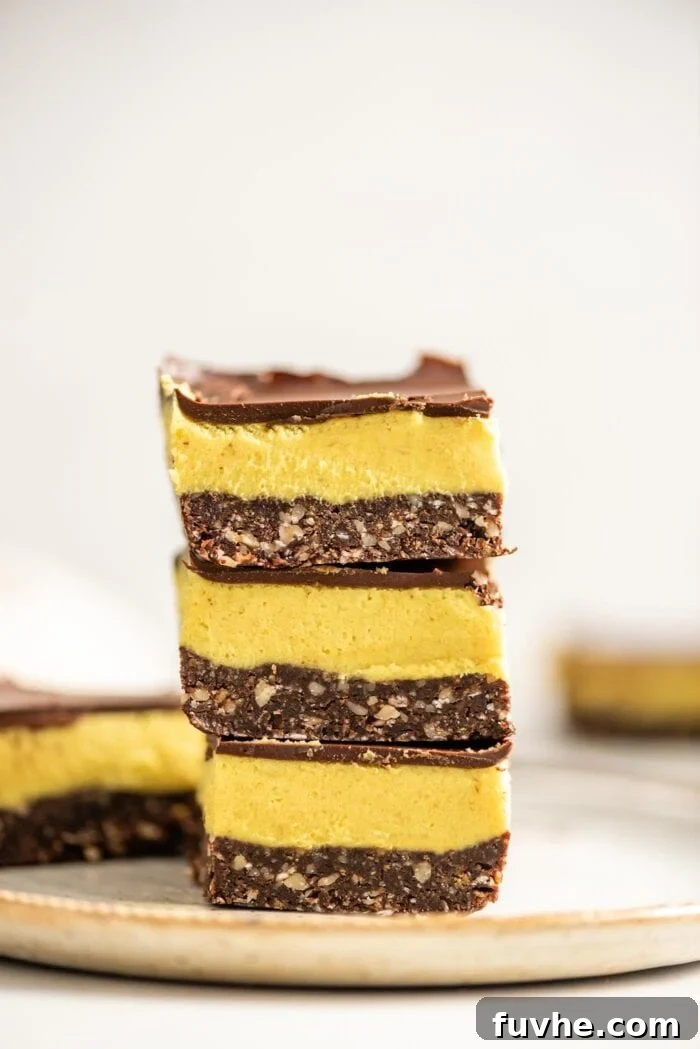
Each bite offers a harmonious blend of a rich chocolate, nut, and coconut base, a creamy, vibrant custard filling, and a luscious chocolate ganache topping. Whether you’re a seasoned vegan baker or just starting your plant-based journey, this recipe is designed for simplicity and guaranteed to impress. They’re perfect for holiday gatherings, a thoughtful homemade gift, or simply a delightful indulgence any time of the year.
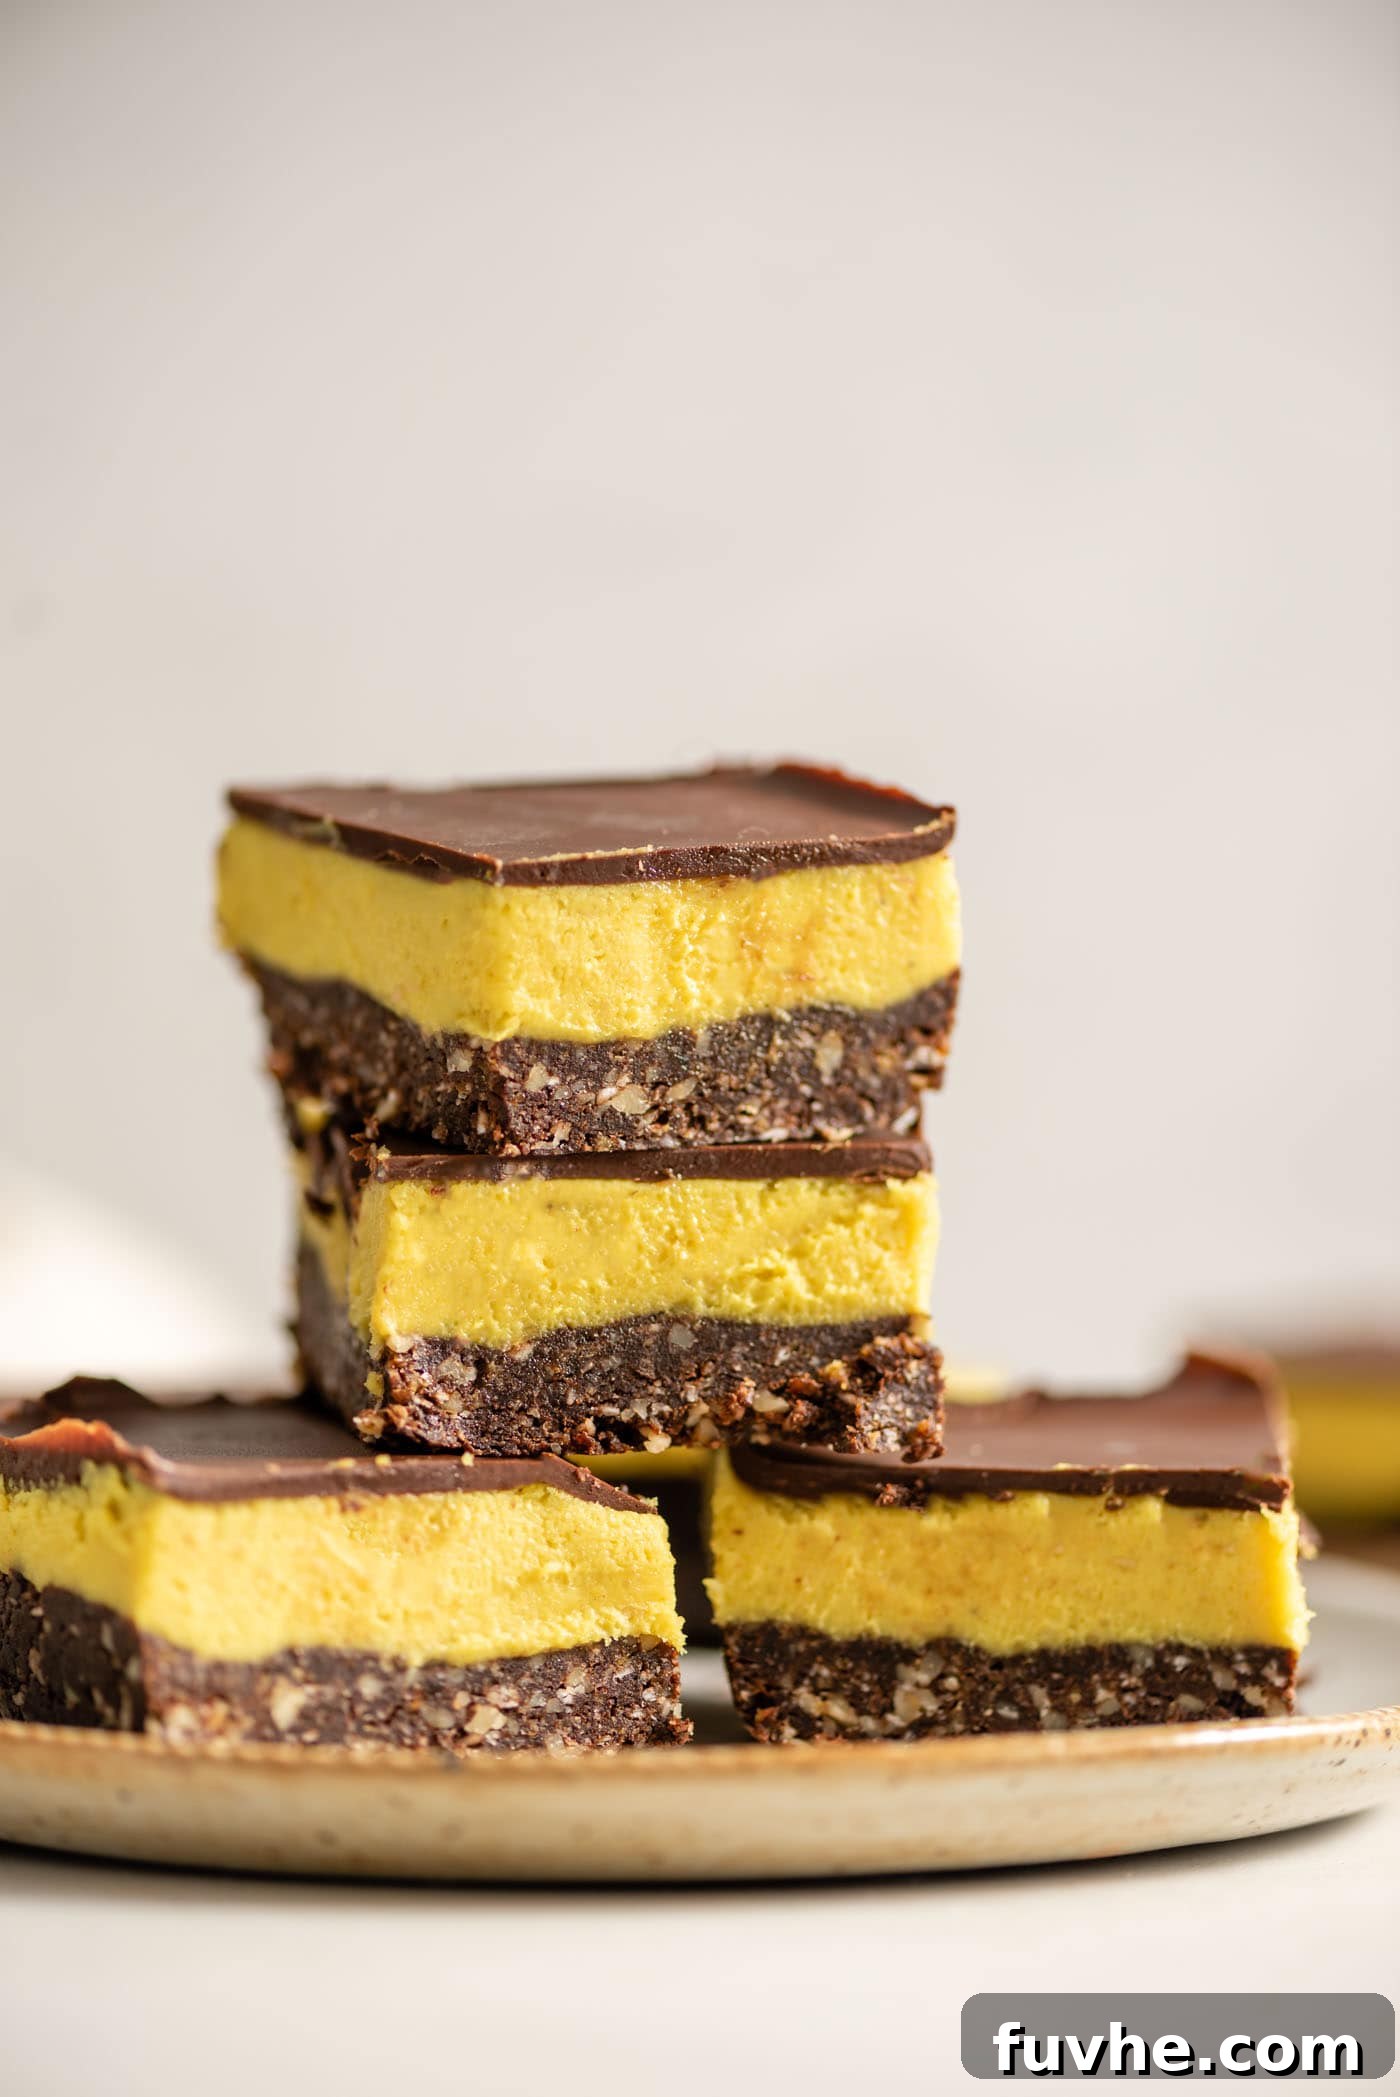
Preparing these bars requires minimal effort and no oven time, making them an ideal choice for busy schedules or warm weather. A bit of blending is involved to achieve those perfectly smooth layers, but no complex techniques are needed. Anyone can master this recipe!
If you’re looking for more delightful no-bake vegan Christmas treats, be sure to explore our homemade Vegan Turtles, rich Vegan Ferrero Rocher, and festive No-Bake Vegan Rum Balls. They’re all excellent additions to your holiday dessert platter.
What are Nanaimo Bars?
Nanaimo bars are an iconic Canadian no-bake dessert, famously named after the city of Nanaimo in British Columbia. This beloved treat is characterized by its distinct three-layer structure, offering a delightful interplay of textures and flavors in every square.
- The Crust: A rich, dense base made from a mixture of chocolate wafer crumbs (or in our vegan version, dates, nuts, and cocoa), shredded coconut, and sometimes nuts.
- The Custard Filling: A creamy, buttery, and often bright yellow middle layer, traditionally made with custard powder, butter, and powdered sugar. Our vegan recipe replaces these with a healthier, equally luscious cashew-based custard.
- The Chocolate Ganache: A glossy, smooth layer of melted chocolate that perfectly caps off the bar, adding a final touch of indulgence.
While Nanaimo bars are enjoyed throughout the year as a comforting treat, they hold a special place in Canadian culinary traditions, most notably as a quintessential Christmas dessert.
Why You’ll Adore These Vegan Nanaimo Bars
These no-bake vegan Nanaimo bars aren’t just a delicious treat; they offer a range of benefits that make them a standout dessert:
- Completely Vegan and Gluten-Free: Made without any dairy, eggs, or gluten-containing ingredients, these bars are suitable for a wide array of dietary preferences and restrictions.
- Effortless No-Bake Preparation: Skip the oven and complex baking techniques. These bars come together easily with just a food processor and a blender, making them perfect for novice bakers or hot days.
- Wholesome Ingredient Focus: Unlike traditional versions loaded with refined sugars and butter, this recipe uses natural sweeteners like dates and maple syrup, and healthy fats from cashews and coconut oil, offering a more nutritious indulgence.
- Taste Identical to the Classic: Despite their healthier, plant-based ingredients, these bars capture the authentic taste and texture of the original Canadian Nanaimo bars, ensuring a nostalgic and satisfying experience.
- Freezer-Friendly & Perfect for Meal Prep: These bars store beautifully in the freezer for up to 3 months, making them an ideal make-ahead dessert for entertaining or enjoying as a quick, delightful snack whenever a craving strikes.
Essential Ingredient Notes for Success
Achieving the perfect no-bake vegan Nanaimo bars starts with understanding your ingredients. Here’s a closer look at the main components and tips for selecting them:
- Raw Cashews: These are the star of our creamy custard filling. Look for raw, unsalted cashews that are pale in color and free from any added oils. Soaking them is a crucial step that we’ll detail below, ensuring a silky-smooth custard texture that’s impossible to achieve otherwise.
- Dates: The natural sweetness and binding power of dates form the delicious base of our crust. Medjool dates are often preferred for their soft, plump texture and rich caramel-like flavor. Sayer dates or Deglect Noor dates also work well. If your dates feel dry, a quick soak in hot water will revive them and make them easier to process.
- Walnuts: Providing a delightful crunch and earthy flavor to the crust, raw walnuts are ideal. Ensure they are unsalted and without added oils. You can also experiment with other nuts like pecans for a slight variation in flavor profile.
- Coconut (Shredded/Desiccated): Both medium and fine shredded coconut work for the crust. Fine shredded coconut will integrate more seamlessly into the crust, creating a smoother texture, while medium shreds will add a bit more chewiness. Always opt for unsweetened coconut to control the overall sweetness of the bars.
- Cocoa Powder: This gives our crust its deep chocolatey flavor. Dark cocoa powder will provide the most intense chocolate taste, but regular unsweetened cocoa powder or raw cacao powder can also be used. Adjust according to your preference for chocolate intensity.
- Dairy-Free Chocolate: For the top ganache layer, choose high-quality dairy-free chocolate chips (like Camino or Enjoy Life brands) or a dark chocolate bar. For the best flavor and texture, aim for chocolate with a maximum of 70% cocoa content to avoid an overly bitter ganache. Ensure it is explicitly labeled as dairy-free if you have allergies or strict vegan dietary requirements.
- Maple Syrup: Our liquid sweetener of choice, maple syrup adds a rich depth of flavor to the custard. Agave syrup is a suitable substitute. Avoid using granulated sweeteners as they won’t achieve the desired smooth consistency in the filling.
- Coconut Oil: This ingredient is essential for helping both the custard filling and the ganache to firm up properly when chilled. It’s crucial for the structural integrity of these no-bake bars, so there is no direct substitute for coconut oil in this recipe.
- Full-Fat Coconut Milk: The key to a truly creamy custard. When selecting canned coconut milk, look for a good quality brand that is thick and rich. A simple trick at the store: shake the can. If it feels almost solid and you hear minimal sloshing, it’s likely a good, thick can. If it’s watery, try another brand. Canned coconut cream, which is even thicker, can also be used for an extra-rich filling.
- Turmeric (Optional): A tiny pinch of turmeric is added to the custard solely for its natural yellow coloring, mimicking the traditional Nanaimo bar custard. Don’t worry, you won’t taste it! If you prefer, you can easily omit it without affecting the flavor or texture.
Pre-Preparation Steps: Setting Up for Success
Before diving into the mixing and layering, a little preparation goes a long way in ensuring a smooth and successful Nanaimo bar making experience. Here’s what you need to do:
- Soak the Cashews: This is a non-negotiable step for achieving that incredibly smooth, creamy custard. Refer to the next section for detailed instructions on how to properly soak your cashews, depending on your blender type.
- Prepare Your Loaf Pan: Line a standard-sized loaf pan (approximately 8.5 x 4.5 inches or similar) with parchment paper. It’s important to leave an overhang of parchment paper on two opposite sides. These “flaps” will act as handles, allowing you to easily lift the entire chilled bar out of the pan once it’s set, making slicing much simpler and cleaner.
- Assess Your Dates: Soft, moist dates are essential for a crust that binds well. If your dates feel firm or dry to the touch, or if you’re unsure of their moisture content, pit them and soak them in hot water for about 15 minutes. After soaking, drain them thoroughly before adding them to your food processor. This step ensures the crust dough comes together smoothly without requiring additional liquid.
The Art of Soaking Cashews for Ultimate Creaminess
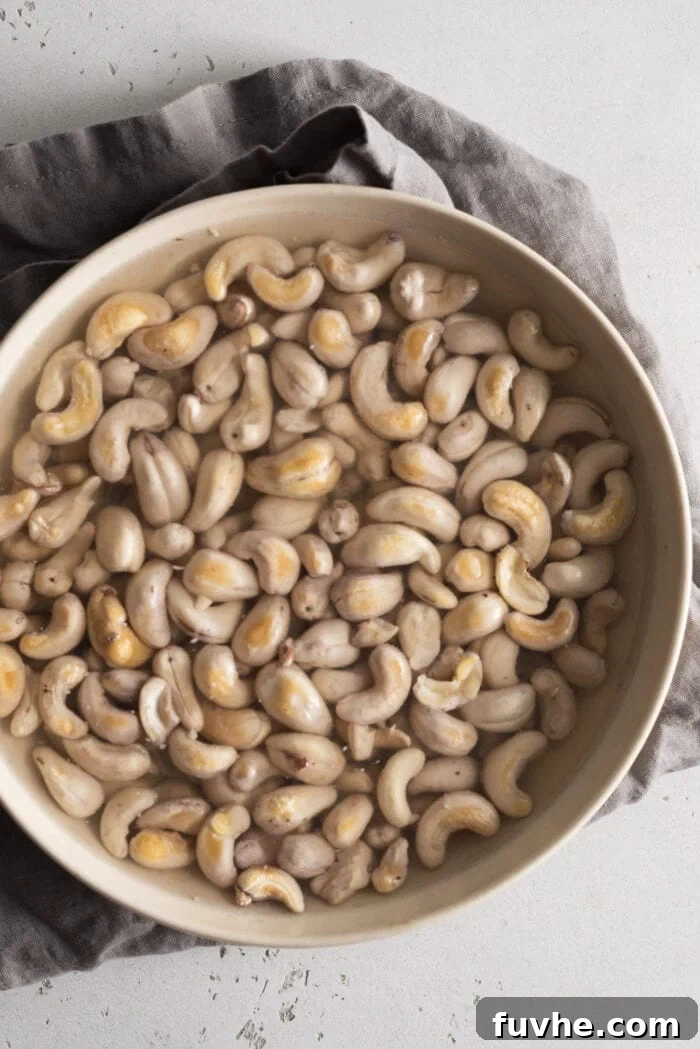
Soaking cashews is the secret weapon for creating an incredibly smooth and luxurious vegan custard filling. This process softens the cashews, allowing them to blend into a truly creamy texture, free of any grittiness. The method you choose depends on the power of your blender:
Quick Soak Method (for High-Speed Blenders)
If you own a powerful high-speed blender, such as a Vitamix or Blendtec, you can use a “quick soak” method. Simply place your raw cashews in a heat-proof bowl and pour freshly boiled water over them, ensuring they are fully submerged. Let them soak for at least 15 minutes. While 15 minutes is sufficient for high-speed blenders, there’s no harm in letting them soak longer, even up to an hour or two, if time allows.
Overnight Soak Method (for Regular Blenders)
For standard blenders that may not be as powerful, a longer soak is highly recommended to achieve the desired smooth consistency. Cover the cashews with cold water in a bowl and let them soak at room temperature for a minimum of 4 hours, and preferably 8-12 hours (soaking them overnight is perfect!). This extended soaking time ensures the cashews are thoroughly softened and will blend into a velvety cream.
Regardless of the method you choose, once the cashews have soaked, be sure to drain them thoroughly and rinse them under cold water before proceeding with the recipe. This washes away any residual starch and ensures the freshest flavor for your custard.
Step-by-Step Instructions for Your Perfect Nanaimo Bars
1: Crafting the Delectable Chocolate Coconut Crust
The base of our Nanaimo bars is a simple yet flavorful chocolate coconut crust. You’ll need just four ingredients: pitted dates, cocoa powder, shredded coconut, and walnuts. This combination creates a rich, fudgy, and slightly chewy base.
- Combine Ingredients: Add the packed, soft pitted dates, cocoa powder, unsweetened fine shredded coconut, and chopped walnuts to the bowl of a food processor.
- Process to a Dough: Pulse and process the mixture. Initially, it will appear crumbly, but as you continue to process, the natural oils from the nuts and dates will start to bind everything together, forming a thick, slightly sticky dough.
Quick Note on Consistency: The dough should feel somewhat crumbly but sticky enough to hold its shape when pressed between your fingers. If it appears too dry and isn’t coming together, add 1 teaspoon of warm water at a time and blend again until the desired consistency is achieved. Avoid adding too much water, as this can make the crust soggy.
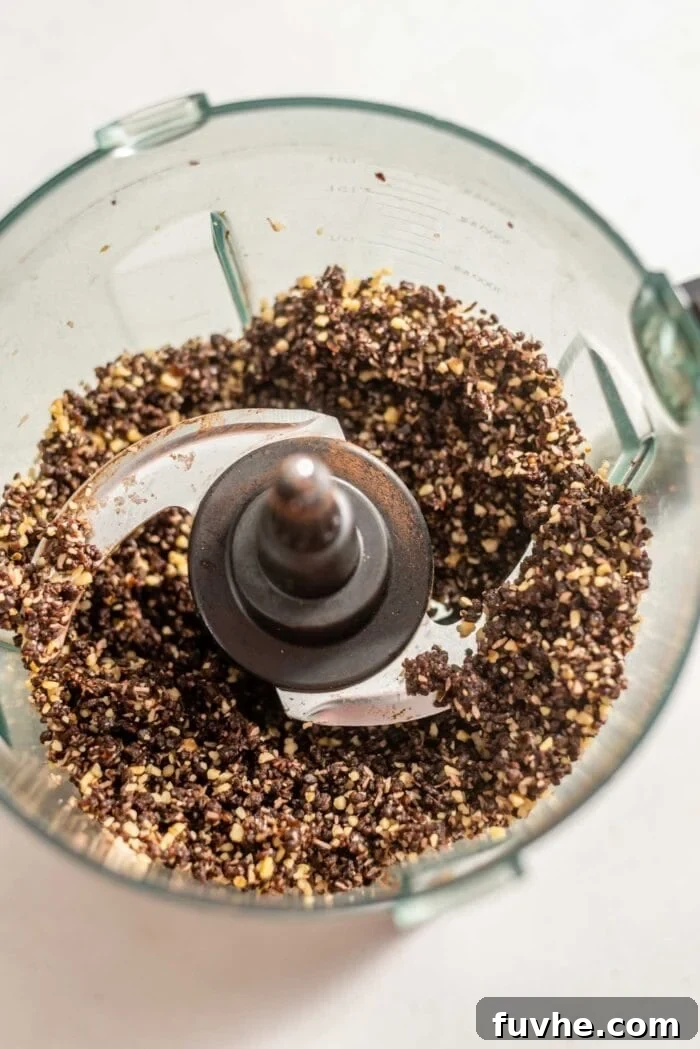
Once your crust mixture is ready, transfer it to the prepared loaf pan.
- Press into the Pan: Using your fingertips or the back of a spoon, firmly and evenly press the dough into the bottom of the parchment-lined loaf pan. Ensure the layer is compact and uniform for a sturdy base. This firm pressing is key to a crust that holds together well when sliced.
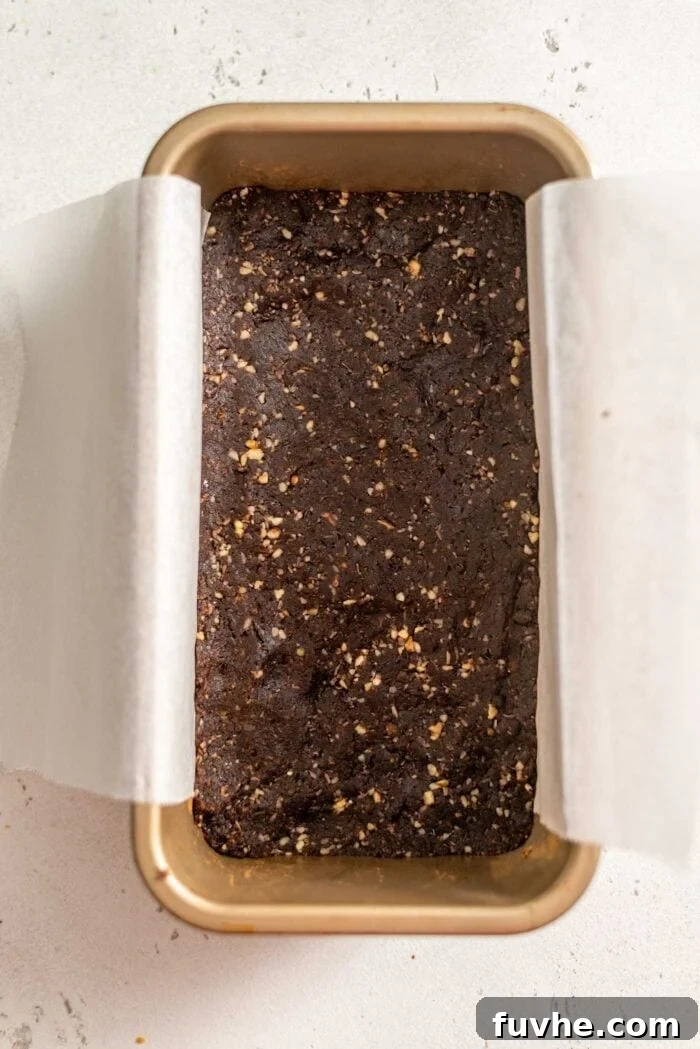
2: Preparing the Velvety Custard Filling
The creamy custard layer is what truly defines Nanaimo bars, and our vegan version is no exception. A high-speed blender is highly recommended here to achieve that perfectly smooth, lump-free texture.
- Blend All Ingredients: Drain and rinse your soaked cashews thoroughly. Add them to your high-speed blender along with the thick and creamy full-fat coconut milk, solid coconut oil, maple syrup, vanilla extract, and the optional pinch of turmeric for color.
- Achieve Creamy Smoothness: Start blending on a low speed, gradually increasing to high. Blend until the mixture is completely smooth and creamy, without any cashew bits. You may need to stop and scrape down the sides of the blender a few times to ensure everything is fully incorporated. The consistency should be thick, similar to a rich pudding.
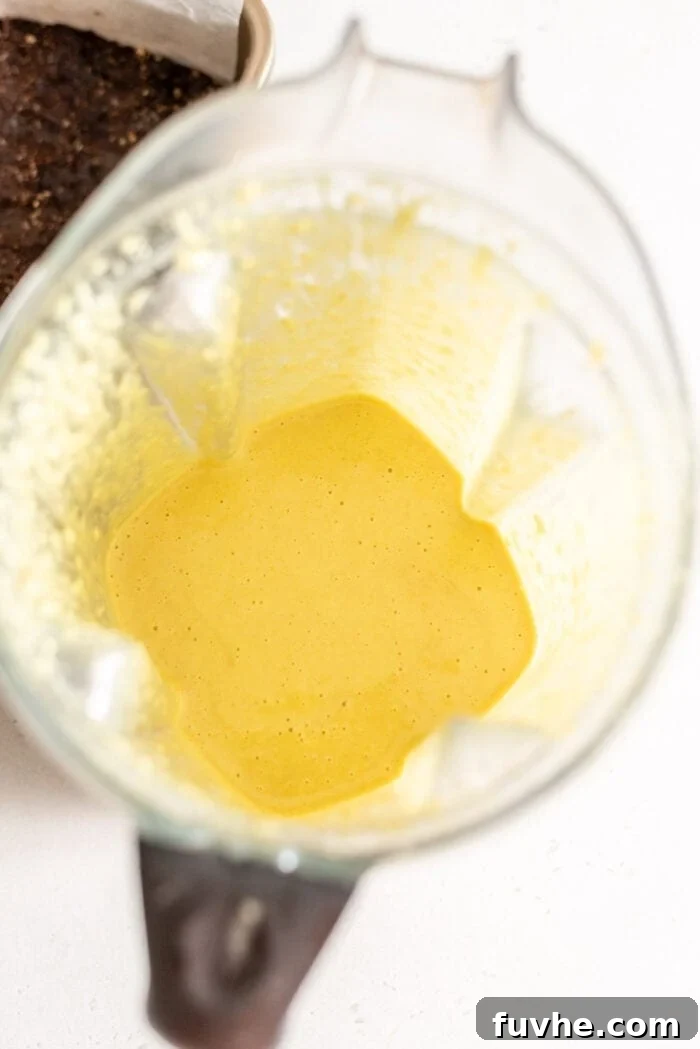
3: Layering the Custard and Chilling
With the crust firmly set in place and the custard filling perfectly creamy, it’s time to bring these two layers together.
- Pour Over Crust: Carefully pour the freshly blended custard filling over the pressed chocolate coconut crust in the loaf pan.
- Smooth Evenly: Gently spread the custard evenly across the entire surface of the crust using a small spatula or the back of a spoon. Aim for a smooth, uniform layer.
- Freeze to Set: Transfer the entire loaf pan to the freezer. Allow it to chill for at least 1-2 hours, or until the custard layer is completely firm to the touch. This crucial step ensures the layers are distinct and stable before the final chocolate topping is added.
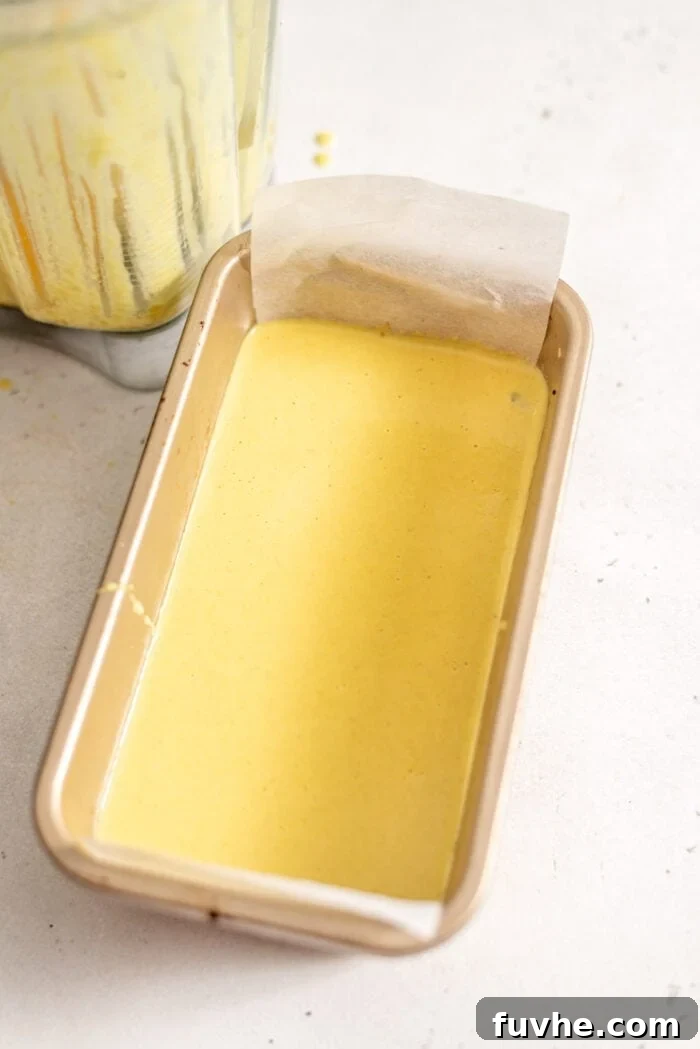
4: Preparing the Silky Chocolate Ganache
The final layer is a luscious chocolate ganache, providing that irresistible finish. This step is surprisingly simple!
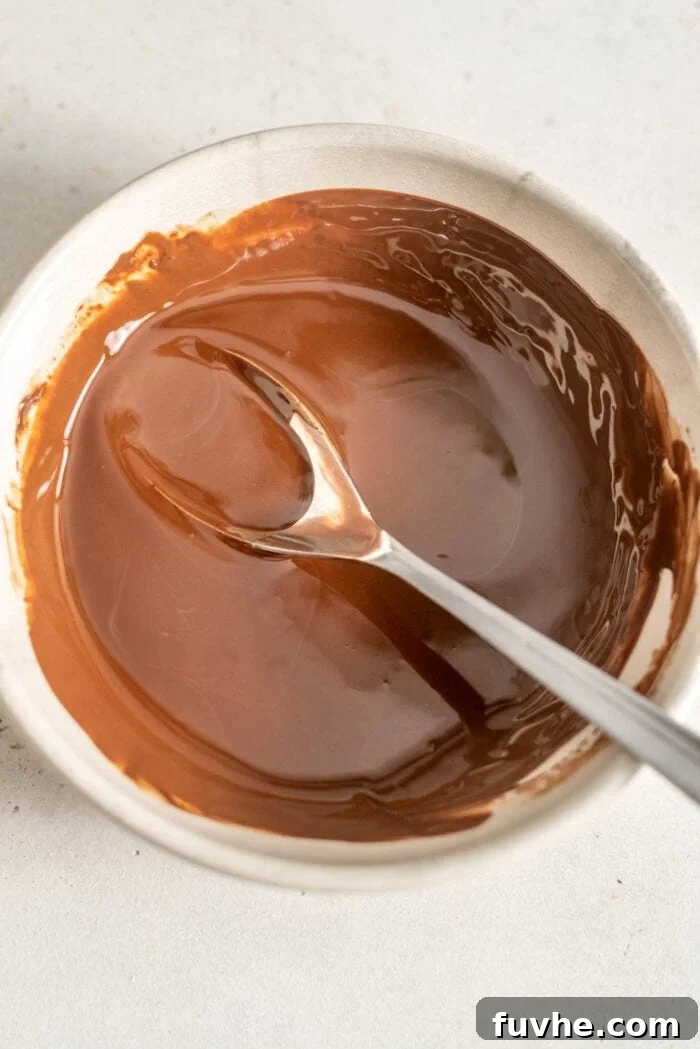
- Melt Chocolate and Vegan Butter: In a small, microwave-safe bowl, combine the dairy-free chocolate chips (or finely chopped dark chocolate) and the optional vegan butter. The vegan butter helps achieve a softer ganache that is less prone to cracking when sliced.
How to Melt Chocolate:
- Microwave Method: Heat the chocolate and vegan butter in the microwave in 20-second intervals, stirring thoroughly after each interval. Continue heating and stirring until the chocolate is mostly melted with just a few small chunks remaining. Then, remove from the microwave and continue stirring gently until completely smooth and creamy. Overheating can cause chocolate to seize, so low and slow is key!
- Double Boiler Method (Stovetop): Place a heatproof bowl containing the chocolate and vegan butter over a saucepan of simmering water (ensuring the bottom of the bowl does not touch the water). Stir continuously until the chocolate is melted and smooth. This method provides more controlled, even melting.
5: Applying the Ganache and Final Freeze
The final layering step before your Nanaimo bars are ready to chill into perfection.
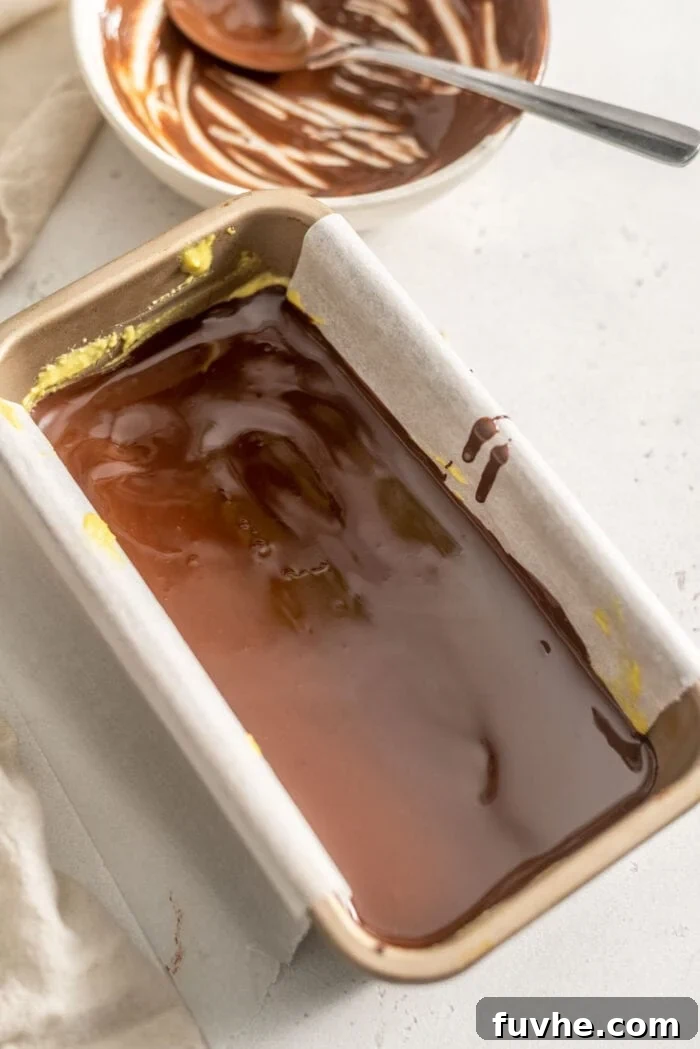
- Pour Ganache: Once the custard layer is firm, pour the melted chocolate mixture evenly over it.
- Smooth Surface: Using a small offset spatula or the back of a spoon, gently spread the chocolate ganache across the entire surface, ensuring an even and appealing finish.
- Chill to Set: Return the pan to the fridge for about 20-25 minutes, or place it in the freezer for a quicker set (approximately 10-15 minutes). The chocolate doesn’t take long to harden, so keep an eye on it. The bars are ready for slicing once the chocolate layer is firm to the touch.
6: Precision Slicing and Enjoyment!
The moment of truth! Slicing your Nanaimo bars perfectly without cracking the chocolate topping is an art form. Here’s how to do it:
- Remove from Pan: Once the chocolate has fully hardened, use the parchment paper flaps to carefully lift the entire slab of Nanaimo bars out of the loaf pan and place it onto a clean cutting board. If any edges weren’t covered by parchment, you can gently run a thin knife, warmed under hot water, along those edges to loosen the bar.
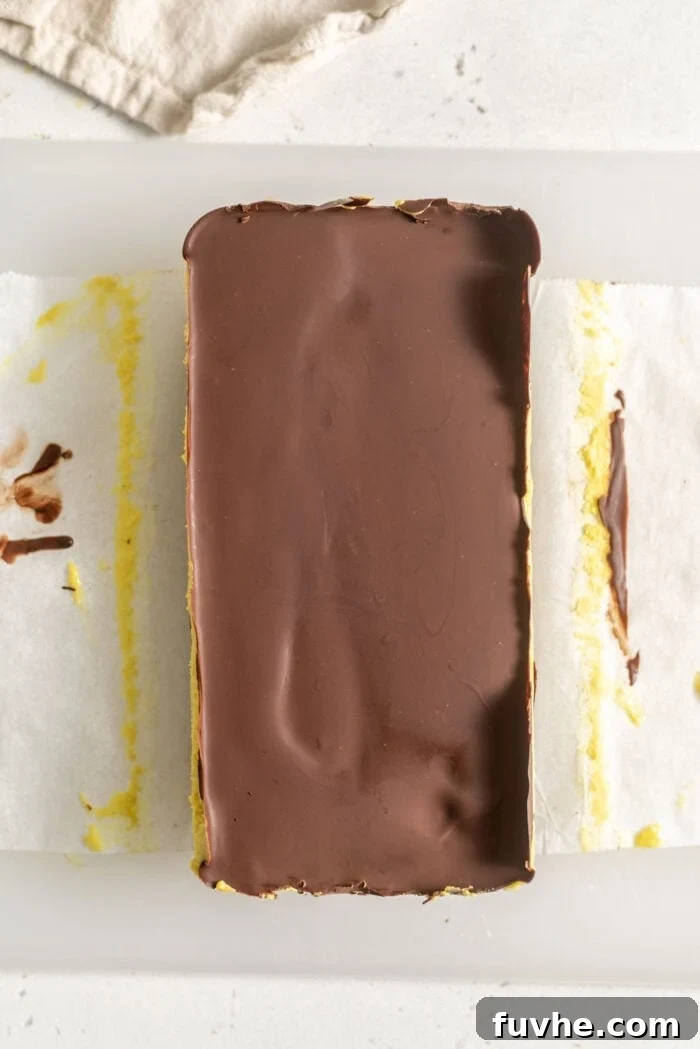
To prevent the chocolate from cracking, allow the bars to sit at room temperature for 5-10 minutes before you begin slicing. This slight softening of the chocolate layer makes it more pliable.
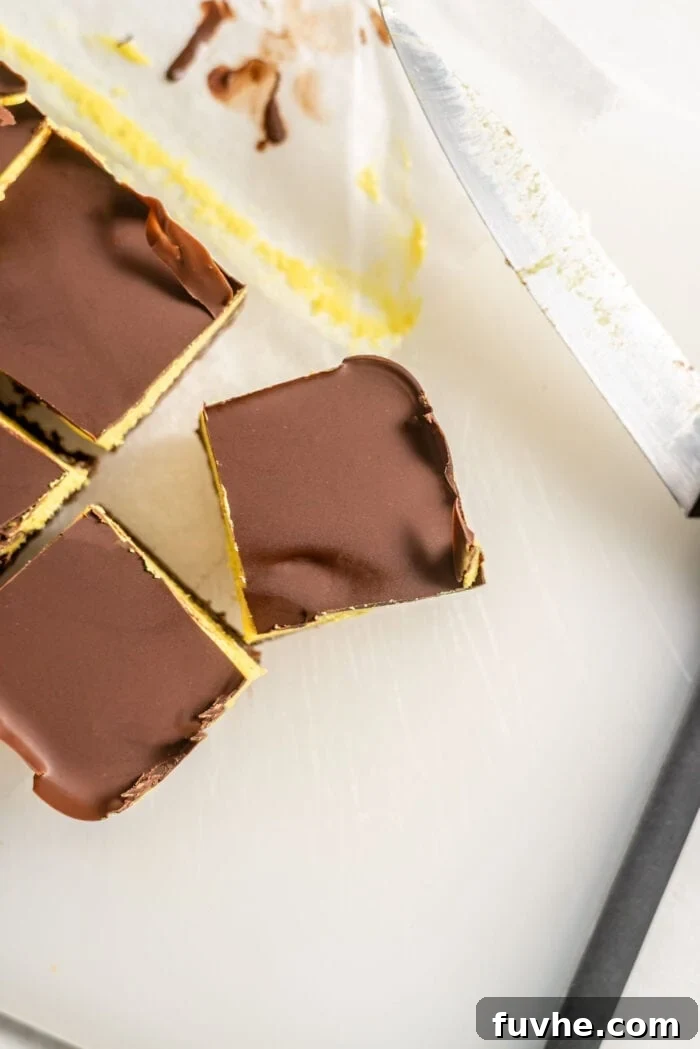
- Score the Bars: For clean cuts, run a sharp, thin knife under hot water, wipe it dry, then lightly score lines across the top of the bars where you intend to cut. This creates a guide and helps prevent the chocolate from shattering.
- Slice Through: After scoring, gently but firmly press the hot knife all the way through the bar, making clean cuts. Re-warm and wipe your knife as needed between cuts for the cleanest results.
We recommend slicing into 8 generous squares, but for a truly rich and decadent experience, consider cutting them into 16 smaller mini-bars, as a little goes a long way with these treats!
Expert Tips for Perfect No-Bake Vegan Nanaimo Bars
Achieve Nanaimo bar perfection every time with these valuable tips and insights:
- Prioritize Quality Coconut Milk: The consistency of your custard heavily relies on good quality, thick full-fat coconut milk. When shopping, give the can a good shake. If it feels sloshy and watery, opt for another brand. You want one that feels dense and almost solid. Alternatively, canned coconut cream, which is naturally thicker, works wonderfully for an extra-rich filling.
- Adjust for Thickness Preference: This recipe typically yields thicker crust and custard layers compared to some traditional Nanaimo bars. If you prefer a thinner bar with more delicate layers, simply use a larger baking pan (such as an 8×8 inch square pan) and adjust the chilling times accordingly. The overall flavor will remain the same, just with a different presentation.
- Consider Smaller Portions: These Nanaimo bars are incredibly rich and decadent. While cutting into 8 large squares is standard, we highly recommend slicing them into 16 smaller mini-bars. This makes them perfect for sharing, reduces indulgence, and allows you to savor each bite without feeling overwhelmed. A little truly goes a long way!
- Always Check Your Dates: Soft and moist dates are crucial for a well-bound crust. If your dates feel firm or dry, make sure to pit them and soak them in hot water for about 15 minutes before using. Drain them thoroughly afterwards. Fresh Medjool or Sayer dates are often moist enough to skip this step, but it’s a good precaution. If your crust mixture still seems too dry after processing, add a tiny bit of warm water (1 teaspoon at a time) until it comes together.
- Don’t Rush the Chilling: Proper chilling time for each layer is essential. Rushing this step can lead to messy, melty layers. Ensure the custard is completely firm before adding the ganache, and the ganache is fully set before slicing. Patience is a virtue when making no-bake desserts!
Frequently Asked Questions About Vegan Nanaimo Bars
Can I make Nanaimo bars without a high-speed blender?
Yes, you absolutely can! However, to achieve the smoothest possible custard filling without a high-speed blender, it is crucial to soak your raw cashews for an extended period, at least 8 hours, or ideally overnight, in room temperature water. A food processor can also be used to blend the custard ingredients, but a blender generally yields a creamier, more refined texture, which is key to a traditional-tasting Nanaimo bar custard.
Do I have to use vegan butter in the ganache?
The vegan butter in the chocolate ganache serves a couple of important purposes: it helps the ganache set with a slightly softer, more “ganache-like” consistency, and more importantly, it helps prevent the chocolate from cracking when you slice the bars. While you can technically omit it, be aware that your chocolate topping might be firmer and more prone to cracking. If you prefer not to use vegan butter, a small amount of almond butter or cashew butter can be used as a substitute to provide a similar softening effect.
Can I double the recipe?
Yes, this recipe can easily be doubled! If you’re doubling the recipe, we recommend using an 8-inch square baking pan instead of a loaf pan. Make sure your parchment paper overhangs on all sides for easy removal, and be prepared for slightly longer chilling times for each layer to set completely.
How do you cut Nanaimo bars without cracking them?
Achieving clean, crack-free slices is a common challenge, but easily overcome with a few tricks:
- Use Fat in Ganache: Including vegan butter (or a nut butter substitute) in your chocolate ganache helps it set softer and more flexibly.
- Thaw Slightly: Do not cut the bars directly from the freezer. Let them sit at room temperature for 5-10 minutes to allow the chocolate to soften slightly.
- Hot, Sharp Knife: Use a very sharp, thin knife. Run the blade under hot water for a few seconds, then wipe it completely dry.
- Score First: Before making the full cuts, lightly score the top chocolate layer where you intend to slice. This creates a guide and reduces the chance of the chocolate shattering.
- Gentle, Clean Cuts: With your warmed knife, gently but firmly press through the scored lines. Re-warm and wipe your knife between each cut for the cleanest results.
Do I have to add turmeric?
No, adding turmeric to the custard filling is completely optional. It is purely for aesthetic purposes, providing a natural yellow tint that mimics the color of traditional Nanaimo bar custard. It is used in such a small amount that it does not affect the flavor of the bars. If you prefer, you can simply omit it.
Storing Your No-Bake Vegan Nanaimo Bars
Proper storage is essential to keep your vegan Nanaimo bars fresh, firm, and delicious. Since they are a no-bake dessert that relies on chilling, they must always be kept cold.
- Refrigeration: Store the bars in a sealed, airtight container in the fridge for up to 1-2 weeks. This is a great option for ready-to-eat treats.
- Freezing for Long-Term Storage: For longer storage, we highly recommend keeping them in the freezer. Place them in a sealed, freezer-safe container or a heavy-duty freezer bag, separated by parchment paper if stacking, for up to 3 months.
- Serving from Frozen: When serving from the freezer, allow the bars to sit at room temperature for 5-10 minutes, or in the fridge for 20-30 minutes, to soften slightly before eating. Many people, myself included, enjoy them straight from the freezer for a wonderfully firm and cool treat!
- Temperature Sensitivity: Be aware that these bars will get very soft and potentially melty if left at room temperature for too long, especially in a warm environment. Always return them to the fridge or freezer promptly after serving.
More Delightful Vegan Christmas Recipes
Looking to expand your holiday treat repertoire? Here are some more fun and festive vegan recipes to add to your Christmas baking (or no-baking!) list:
- Easy Vegan Turtles: A simple 3-ingredient recipe that’s incredibly fun to make and even better to eat.
- Vegan Rum Balls: These no-bake rum balls are packed with holiday cheer and are a perfect boozy bite for Christmas.
- Gluten-Free Vegan Thumbprints: A super yummy Christmas cookie classic with a delightful twist, perfect for any cookie platter.
- Vegan Eggnog: This creamy, spiced vegan eggnog pairs incredibly well with Nanaimo bars for a festive beverage.
- Chocolate Dipped Coconut Macaroons: Easy, no-bake, and deliciously chewy coconut treats, often dipped in chocolate.
- Vegan Chocolate Pie: An incredibly easy no-bake pie made with a surprising ingredient – tofu for ultimate creaminess!
- Vegan 7 Layer Cookie Bars: Be warned, these highly addictive bars are a dangerous delight – you won’t be able to stop at just one!
No-Bake Vegan Nanaimo Bars
By: Deryn Macey
These homemade no-bake vegan Nanaimo bars are surprisingly easy to make with just a handful of wholesome ingredients. These amazing sweet treats are rich, decadent, and taste just like the classic Canadian Christmas dessert!
Rating: 4.91 from 11 votes
Prep Time: 15 mins
Chill Time: 1 hr 30 mins
Total Time: 1 hr 45 mins
Servings: 8 large bars (or 16 mini bars)
Ingredients
For the Chocolate Coconut Crust
- 1 cup (220 g) packed, soft pitted dates
- 1/4 cup (25 g) cocoa powder
- 1/2 cup (50 g) unsweetened fine shredded coconut
- 1/2 cup (60 g) chopped walnuts or walnut pieces
For the Custard Filling
- 1 cup (140 g) raw cashews, soaked
- 1/4 cup + 3 tbsp (105 g) thick and creamy full-fat coconut milk
- 3 tbsp (45 g) coconut oil, measured solid
- 1/4 cup (85 g) maple syrup
- 1/4 tsp turmeric (optional, for color)
- 1 tsp pure vanilla extract
For the Chocolate Ganache
- 3/4 cup (120 g) dairy-free chocolate chips or finely chopped dark chocolate
- 2 tbsp (30 g) vegan butter, optional (helps prevent cracking)
Instructions
- If using a high-speed blender, soak raw cashews in boiled water for 15 minutes (or longer is fine). If using a regular blender or food processor, soak cashews in room temperature water for at least 8 hours, preferably overnight. Drain and rinse thoroughly before use.
- Line a standard-sized loaf pan with parchment paper, ensuring there are two flaps hanging over the sides to easily lift the bars out later.
- To make the chocolate coconut crust: Add pitted dates, cocoa powder, unsweetened fine shredded coconut, and chopped walnuts to a food processor. Process until a thick, crumbly dough forms. The dough should stick together when pressed between your fingers. If too dry, add 1 tsp warm water at a time and re-blend until it reaches the right consistency.
- Firmly press the crust dough into the prepared loaf pan in an even layer to create the base.
- To make the custard filling: Add the drained cashews, full-fat coconut milk, solid coconut oil, maple syrup, vanilla extract, and optional turmeric to a high-speed blender. Blend on low speed, gradually increasing to high, until the mixture is completely smooth and creamy. Scrape down the sides as needed.
- Pour the creamy custard filling over the chocolate crust in the loaf pan and spread evenly. Place the pan in the freezer for 1-2 hours, or until the custard layer is firm.
- To make the chocolate ganache: In a small, microwave-safe bowl, combine the dairy-free chocolate chips and optional vegan butter. Melt in the microwave in 15-20 second intervals, stirring well after each, until mostly melted. Remove and stir until completely smooth and creamy. Alternatively, melt using a double boiler on the stovetop.
- Gently pour and spread the melted chocolate ganache over the set custard filling, smoothing the top with a spatula.
- Return the pan to the fridge for 20-25 minutes (or freezer for 10-15 minutes) until the chocolate has hardened.
- Once fully set, gently run a knife along any un-parchment-lined edges of the pan. Use the parchment paper flaps to lift the entire bar out of the pan onto a cutting board.
- Allow the bar to sit at room temperature for 5-10 minutes to prevent the chocolate from cracking. Run a sharp, thin knife under hot water and wipe dry. Score the top of the bar where you plan to cut, then gently slice all the way through into 8 large squares or 16 smaller, more manageable mini-bars.
Notes
For more detailed tips and troubleshooting, please refer to the “Expert Tips” and “Frequently Asked Questions” sections above in the main article.
The vegan butter in the ganache is optional but highly recommended. It helps the ganache set with a slightly softer texture, making it less prone to cracking when sliced. Almond butter or cashew butter can also be used as a substitute for the vegan butter.
Store these no-bake vegan Nanaimo bars in an airtight container in the fridge for up to 2 weeks, or in the freezer for up to 3 months. If frozen, let them sit at room temperature for 10 minutes before serving. They are best stored and served chilled.
Nutrition
Serving: 1 bar (if cut into 8 portions)
- Calories: 405 kcal
- Carbohydrates: 43g
- Protein: 8g
- Fat: 25g
- Sodium: 104mg
- Fiber: 5g
- Sugar: 31g
- Vitamin A: 27IU
- Calcium: 185mg
- Iron: 2mg
Originally published December 10, 2019.