
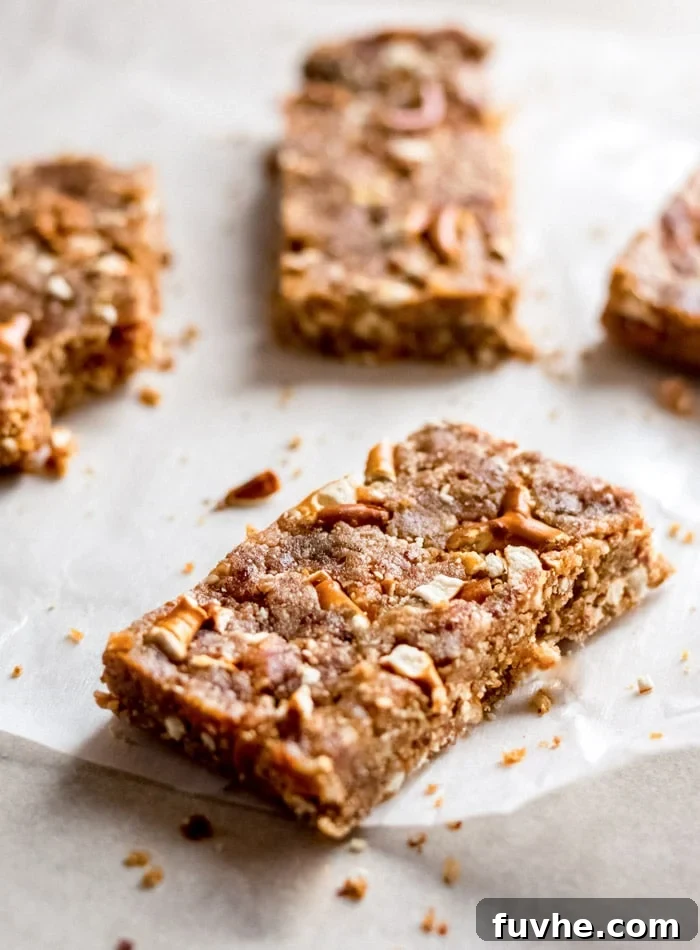
Craving a delightful snack that hits all the right notes? These no-bake sweet and salty granola bars are an absolute game-changer. Featuring a harmonious blend of natural sweetness from dates, rich creaminess from peanut butter, and a satisfying crunch from pretzels, they offer an unparalleled flavor experience. Forget complicated baking – this recipe is incredibly simple, requiring minimal effort for maximum deliciousness.
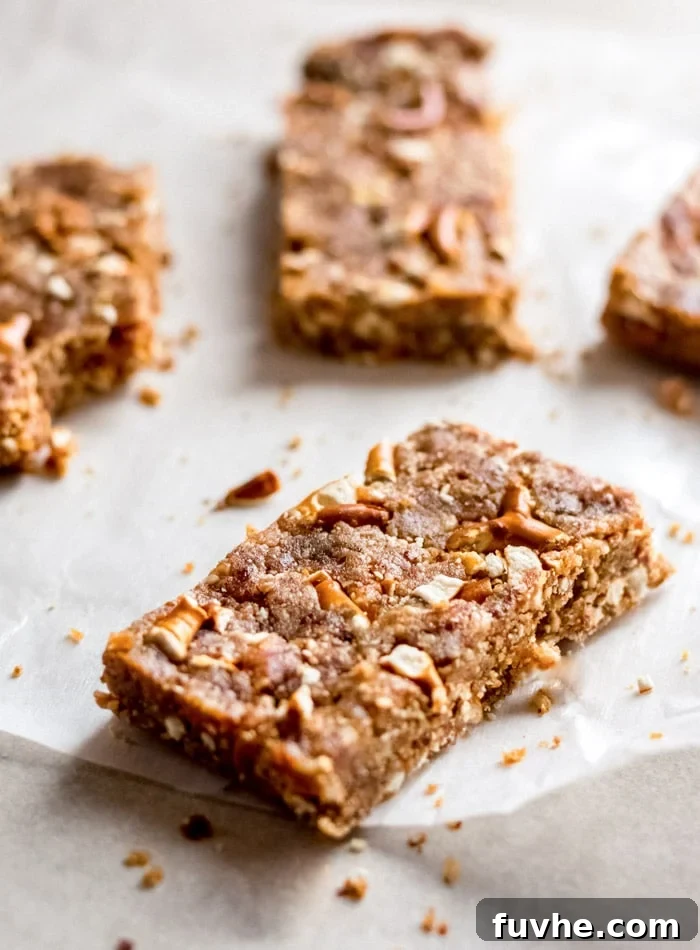
Crafting Your Perfect No-Bake Sweet & Salty Granola Bars
Step away from those expensive, additive-filled store-bought energy bars! This recipe for homemade no-bake granola bars provides a fantastic, healthier alternative that’s surprisingly easy to whip up. With just a handful of wholesome ingredients – dates, almonds, natural peanut butter, and pretzels – you can create a batch of incredibly satisfying treats without ever needing to turn on your oven. They are not only simple to make but also packed with flavor and customizable to your preference.
Why You’ll Love These Irresistible Granola Bars:
- Minimal Ingredients: You’ll only need 4 core ingredients, making this recipe accessible and budget-friendly.
- Effortless Preparation: No baking is required! Simply blend, press, chill, and slice – perfect for busy schedules.
- Versatile Snacking: Ideal as a wholesome morning snack, a post-workout energy boost, a delightful homemade dessert, or a convenient grab-and-go option for school or work.
- Dietary Friendly: Naturally vegan and free from added sugars, these bars can easily be made gluten-free by choosing certified gluten-free pretzels.
- Unforgettable Flavor Profile: Experience the perfect symphony of sweet and salty notes, complemented by an amazing textural crunch from the pretzels.
Beyond traditional bars, this versatile mixture can be rolled into delicious energy balls, perfect for bite-sized portions, or even left crumbled. As a raw granola, it makes a fantastic topping for smoothie bowls, creamy yogurts, or decadent ice cream, adding a unique texture and flavor dimension. These bars are not just fun to prepare but even more enjoyable to eat, appealing to both kids and adults alike. They’re excellent for meal prepping your week’s snacks or simply enjoying a quick treat. Feel free to follow the recipe as is or get creative with delicious additions like chocolate chips for an extra touch of indulgence!
Key Ingredients for the Perfect Granola Bars
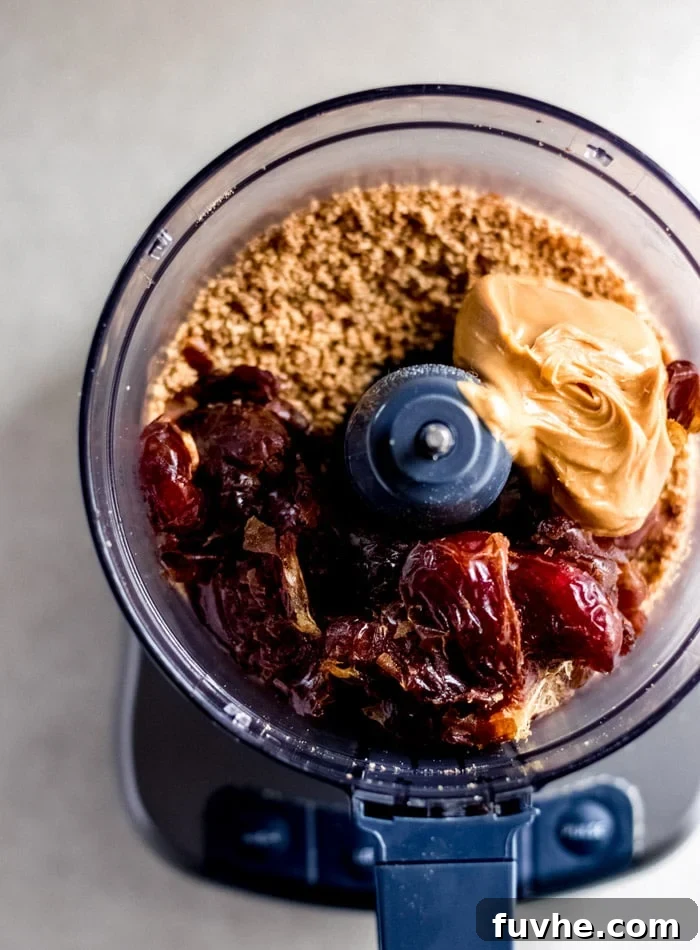
Crafting these delicious bars starts with selecting the right ingredients. While this section highlights the main components, a complete list with precise measurements and detailed instructions can be found in the recipe card at the end of this post.
- Almonds: For the best results, use raw, unsalted almonds without any added oils. These will break down beautifully in the food processor to form the base of your bars. If almonds aren’t your preference, feel free to substitute with raw peanuts or cashews for a different flavor profile. Make sure they are unroasted and unsalted to control the overall taste and sodium content.
- Dates: The natural sweetness and binding power of dates are crucial here. Any variety of soft, moist dates will work wonderfully. Medjool dates are often recommended for their naturally soft texture and rich caramel-like flavor. If your dates feel a bit dry or firm to the touch, don’t worry! Simply pit them and soak them in hot water for about 15 minutes. This will soften them up, making them easier to process and ensuring a sticky, cohesive dough. Always drain them thoroughly before adding them to your food processor.
- Peanut Butter: Opt for natural peanut butter that contains only peanuts and possibly a touch of salt, without any added sugars or hydrogenated oils. The creamy texture of natural peanut butter is essential for binding the ingredients together. For those with peanut allergies or simply looking to experiment, almond butter, cashew butter, or even tahini (for a unique, slightly bitter note) can be excellent substitutes, offering different flavors and nutrient profiles.
- Pretzels: The pretzels are key to the “salty” and “crunchy” aspect of these bars. Any variety of small, crunchy pretzels will do. For those needing a gluten-free option, simply choose certified gluten-free pretzels, which are widely available in most grocery stores. Crushing them beforehand allows for an even distribution of their delightful saltiness and satisfying texture throughout the bars.
Easy Step-by-Step Preparation Guide
Making these no-bake granola bars is incredibly straightforward. Follow these simple steps for a perfect batch every time. Remember, the key is a good food processor!
Step 1: Prepare the Almond Base
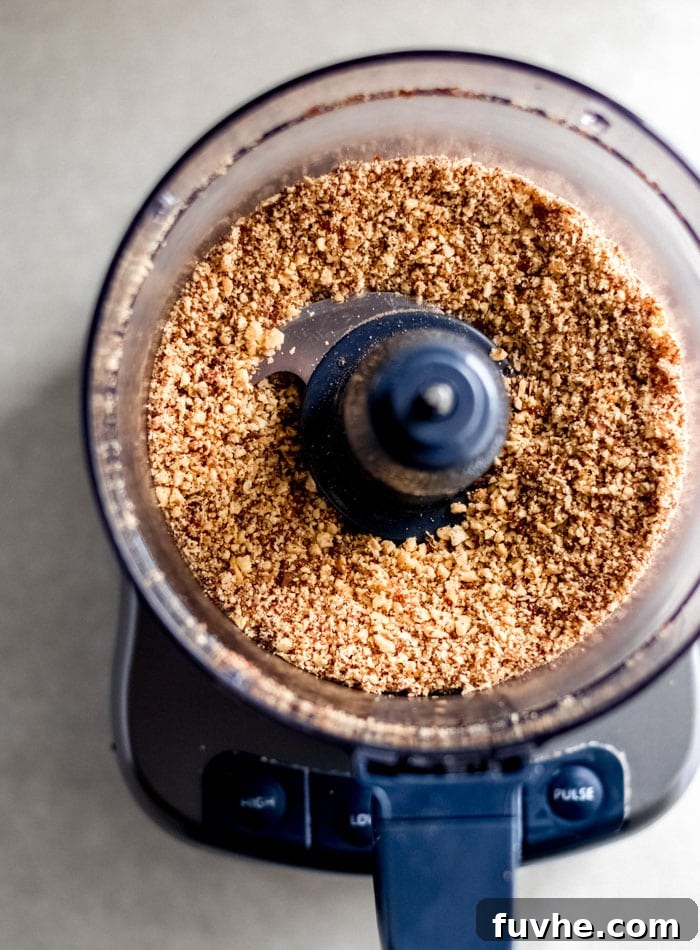
Begin by adding your raw almonds to a powerful food processor. Pulse and blend until the almonds are finely broken down into a coarse, grainy flour-like consistency. This creates the foundational texture and adds a subtle nutty flavor to your bars. Ensure there are no large chunks remaining for a smooth dough.
Step 2: Create the Sticky Dough
Next, add the pitted, soft dates and the natural peanut butter to the food processor with the almond flour. Process again, scraping down the sides as needed, until the mixture transforms into a thick, cohesive, and sticky dough. You should be able to easily press a small amount of the dough between your fingers and have it hold its shape, or it might even clump together into a single large ball as it blends. This indicates the perfect consistency for binding your bars.
Quick Tip: If your dough appears too crumbly and isn’t sticking together, gradually add 1-2 tablespoons of warm water and process again. This extra moisture will help achieve the desired sticky consistency.
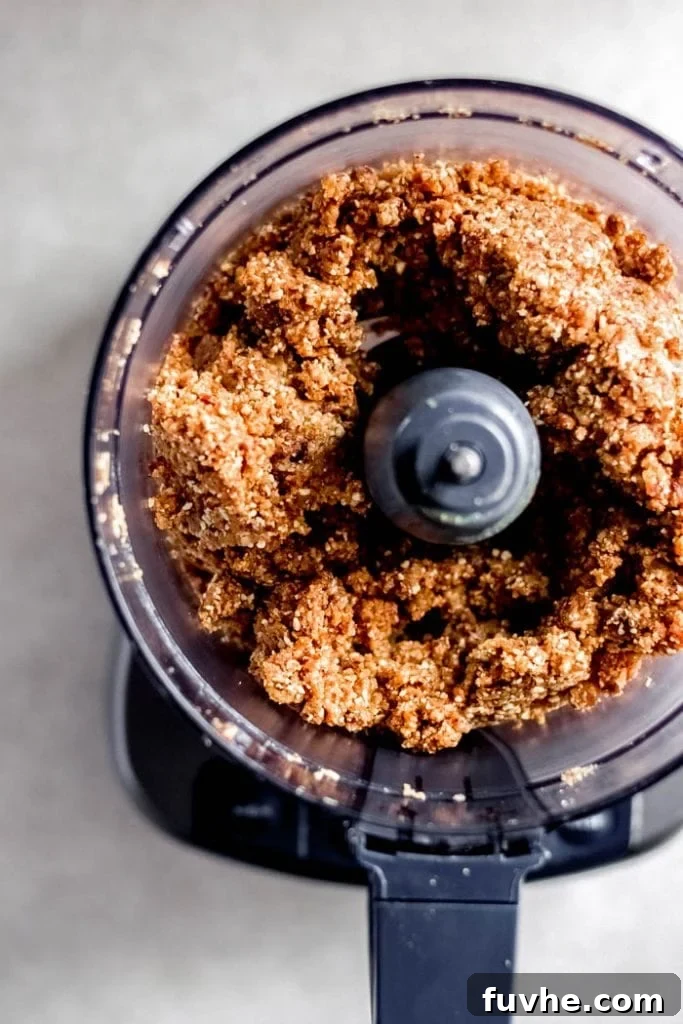
Step 3: Incorporate the Pretzels and Add-ins
Once your sticky dough is formed, it’s time to add the crushed pretzels. Gently pulse the mixture a few times in the food processor, just enough to evenly distribute the pretzels without over-processing them into fine crumbs. You want to maintain some distinct pretzel pieces for that signature crunch. If you’re adding any optional ingredients like chocolate chips, cacao nibs, dried cranberries, or raisins, now is the perfect time to incorporate them as well. A quick pulse or a gentle stir by hand will ensure they are well mixed into the dough.
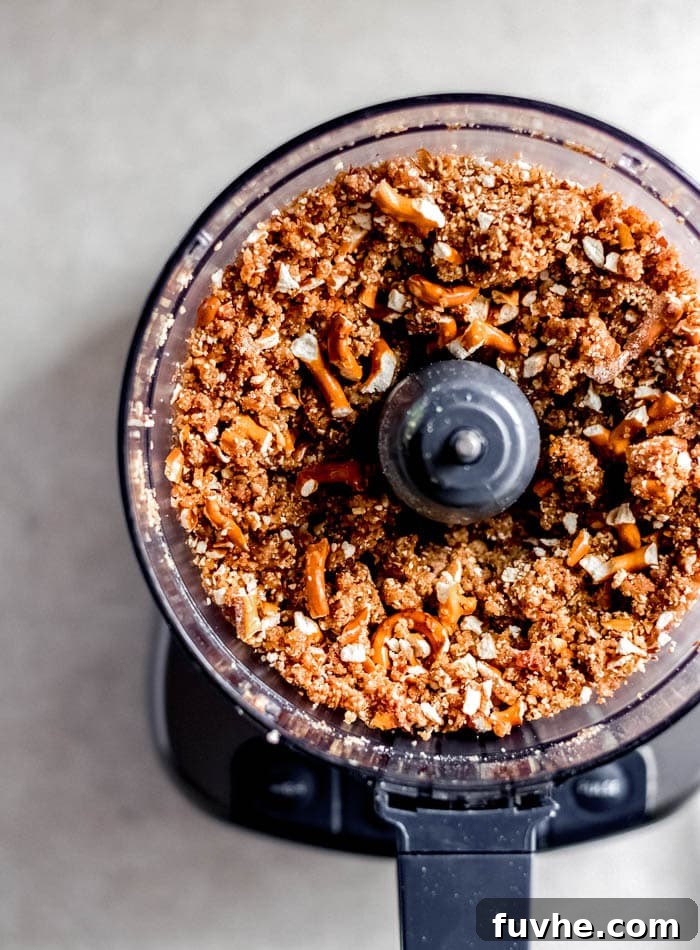
Step 4: Press and Chill for Firmness
Line a loaf pan (or an 8×8 inch square pan for thinner bars) with parchment paper, leaving an overhang on the sides to easily lift the bars out later. Transfer the entire dough mixture into the prepared pan. Using your hands, firmly and evenly press the dough into the pan. Take a few minutes to really compact it down, ensuring it’s flat and extends into all corners. The firmer you press, the better your bars will hold together. Once pressed, transfer the pan to the freezer for at least one hour. This crucial chilling period allows the bars to firm up completely, making them easy to slice without crumbling.
Quick Tip: Lightly wet your hands before pressing the dough into the pan. This prevents sticking and helps you achieve an incredibly smooth and even surface on your bars.
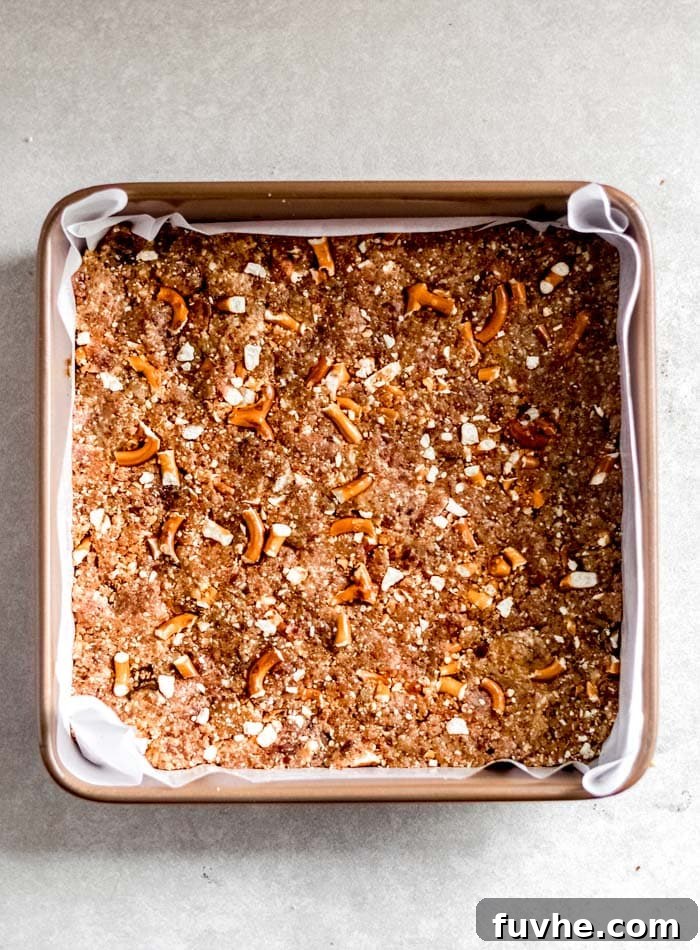
Step 5: Slice and Enjoy Your Homemade Goodness
After the bars have thoroughly firmed up in the freezer, carefully lift the entire slab of granola from the pan using the parchment paper overhang. Place it on a cutting board. Using a sharp knife, slice the chilled slab into your desired portions. You can opt for 8 larger granola bars, perfect for a substantial snack, or cut them into 16 smaller squares for bite-sized treats or dessert portions. These perfectly sweet and salty, crunchy bars are now ready to be savored!
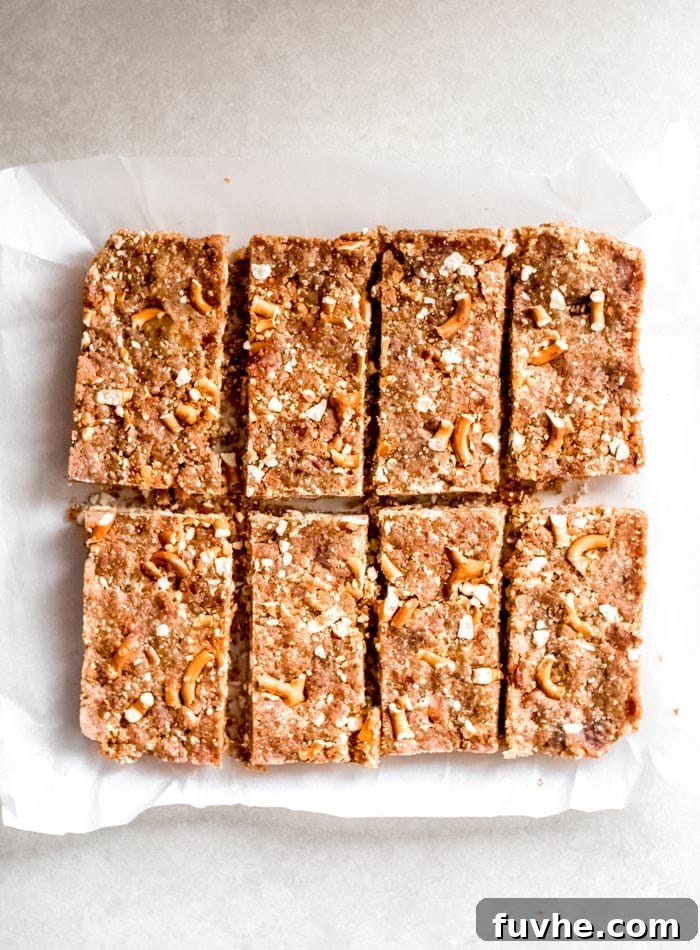
Expert Tips for No-Bake Bar Perfection
- The Importance of Soft Dates: The success of these no-bake bars largely depends on the softness and moisture content of your dates. Dry dates will result in a crumbly mixture that won’t hold its shape. If your dates are firm, always remember to pit them and soak them in a bowl of hot water for about 15 minutes before using. This rehydrates them and makes them wonderfully pliable for blending. Drain them thoroughly after soaking to avoid excess moisture.
- Elevate with Chocolate: For an extra layer of decadence, consider adding up to 1/2 cup of your favorite chocolate chips (dark, milk, or white vegan). You can mix them directly into the dough during Step 3. Alternatively, for a truly gourmet touch, melt some chocolate and drizzle it over the chilled bars, or spread a layer of chocolate ganache – a recipe for which can be found in my No-Bake Cashew Cookie Dough Bars.
- Creative Add-ins and Variations: These bars are incredibly forgiving and perfect for customization. Beyond chocolate, other fantastic additions include dried cranberries, chopped dried apricots, a pinch of sea salt (if your pretzels aren’t salty enough), a dash of cinnamon for warmth, or even some mini marshmallows for a fun twist. Feel free to mix and match up to 1/2 cup of various add-ins to create your signature flavor combination.
- Equipment Matters: A powerful food processor is essential for this recipe to achieve the right dough consistency. A blender might work for the almonds and dates but might struggle with the thick dough.
- Even Pressing: Don’t underestimate the importance of pressing the dough firmly and evenly into the pan. This is what gives the bars their structural integrity. Use the back of a spoon or your hands to ensure every part is compacted.
Proper Storage for Lasting Freshness
Ensuring your delicious no-bake granola bars stay fresh and tasty is simple with these storage tips:
- Refrigerator Storage: For everyday enjoyment, store your granola bars in an airtight container in the refrigerator. They will remain fresh and firm for up to 2 weeks, making them an excellent option for weekly meal prep.
- Freezer Storage: For longer preservation, these bars freeze beautifully! Place them in a sealed freezer-safe container or a freezer bag, separated by parchment paper to prevent sticking. They can be stored in the freezer for up to 4 months. Thaw them at room temperature for a few minutes or enjoy them straight from the freezer for a firmer, chewier treat.
- Room Temperature: While convenient for on-the-go snacking, these bars are best kept cool. If you’re packing them for lunch or a hike, try to keep them in a cool environment, as warm temperatures can cause them to soften considerably.
Discover More No-Bake Energy Bar Recipes
If you’ve fallen in love with the ease and deliciousness of these no-bake bars, you’ll be thrilled to explore more of my simple and healthy energy bar recipes. They’re perfect for satisfying cravings and fueling your day:
- Irresistible Chocolate Chip No-Bake Granola Bars
- Nutrient-Rich No-Bake Vegan Hemp Protein Bars
- Energizing No-Bake Chocolate Chia Energy Bars
- Wholesome Healthy No-Bake Oatmeal Raisin Bars
- Delicious Nut-Free Energy Bars for All
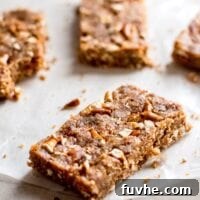
Sweet and Salty Granola Bars
Ingredients
- 1 cup raw almonds (150 g)
- 1 cup packed, soft pitted dates (220 g)
- 1/3 cup natural peanut butter (80 g)
- 1 1/4 cup crushed pretzels
Instructions
-
Place the almonds in a food processor and mix until they’re broken down into very small pieces, almost into a flour.
-
Add the dates and peanut butter and mix until it forms a thick, sticky dough you can press between your fingers. If it seems too crumbly, add 1-2 tbsp warm water and blend again.
-
Crush the pretzels and then add them in, pulsing just enough to mix them through. Or you can just stir them through with a spoon or your hands.
-
Line a 7 or 8-inch square pan with parchment paper, then press the dough firmly into the pan taking a few moments to flatten it and firmly press it into all corners.
-
Place the bars in the freezer for at least 1 hour to firm.
-
Once they’re ready, lift out of the pan, cut into bars and enjoy!
Notes
Nutrition
, Calories: 242 kcal
, Carbohydrates: 38 g
, Protein: 5 g
, Fat: 10 g
, Sodium: 93 mg
, Potassium: 415 mg
, Fiber: 5 g
, Sugar: 28 g
, Vitamin A: 3 IU
, Calcium: 62 mg