
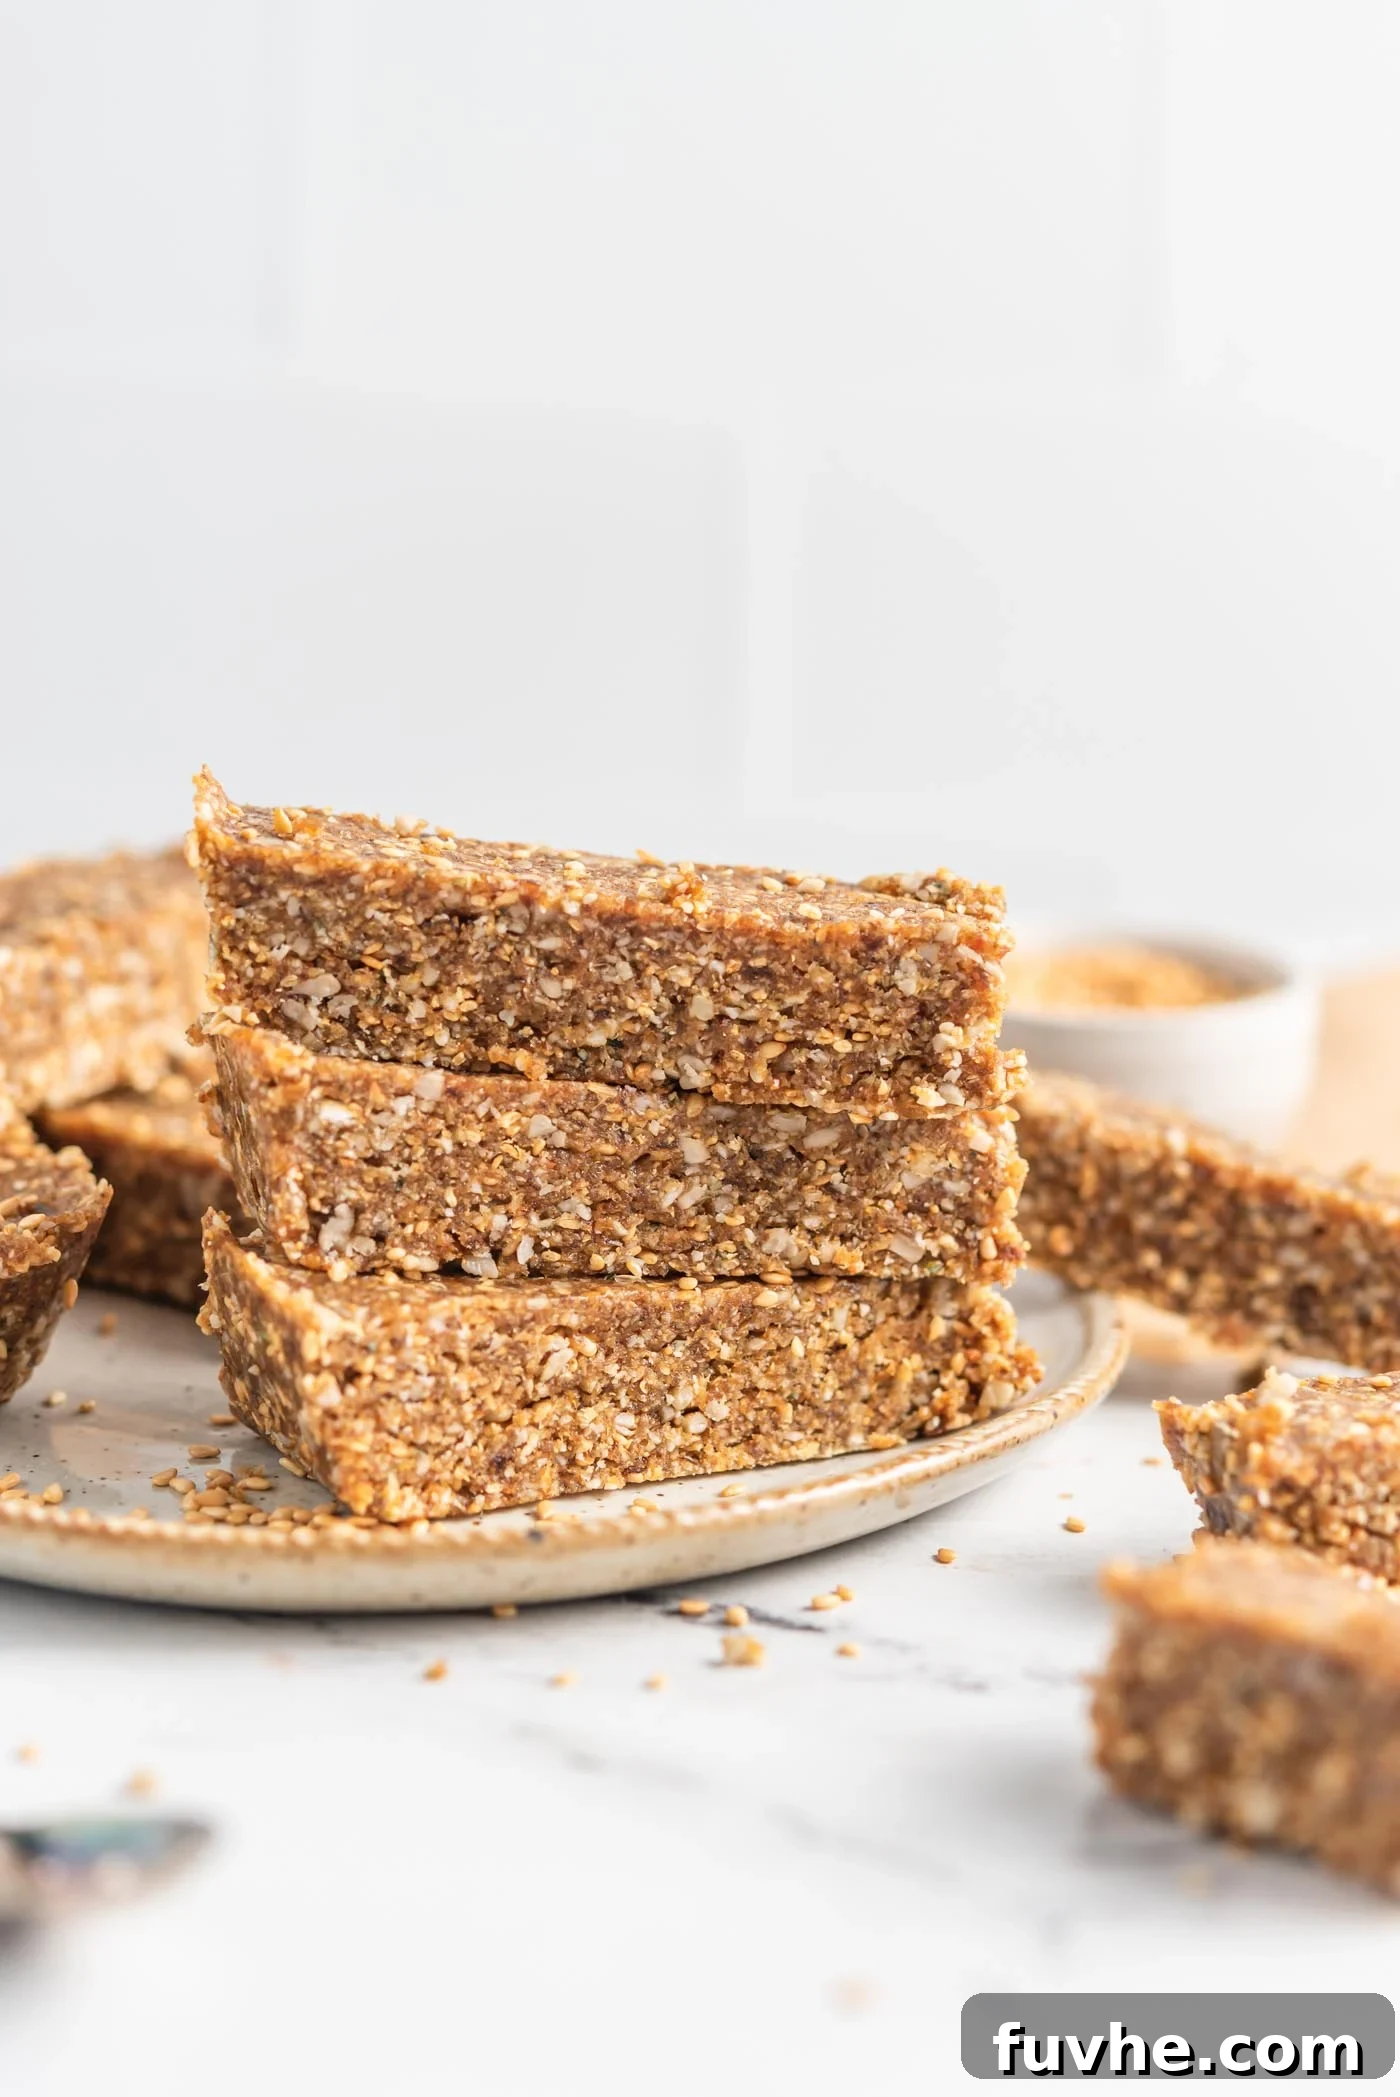
Unlock a world of wholesome energy with these incredible vegan nut-free energy bars. Perfect for anyone seeking a healthy, delicious, and convenient snack, these bars are remarkably easy to prepare with just 6 simple ingredients. Whether you’re navigating a busy workday, embarking on an outdoor adventure, or simply need a guilt-free treat, these homemade bars offer a fantastic solution. Designed to be both deeply satisfying and powerfully energizing, they strike the perfect balance between a scrumptious dessert and a functional snack, catering to diverse tastes and dietary needs.
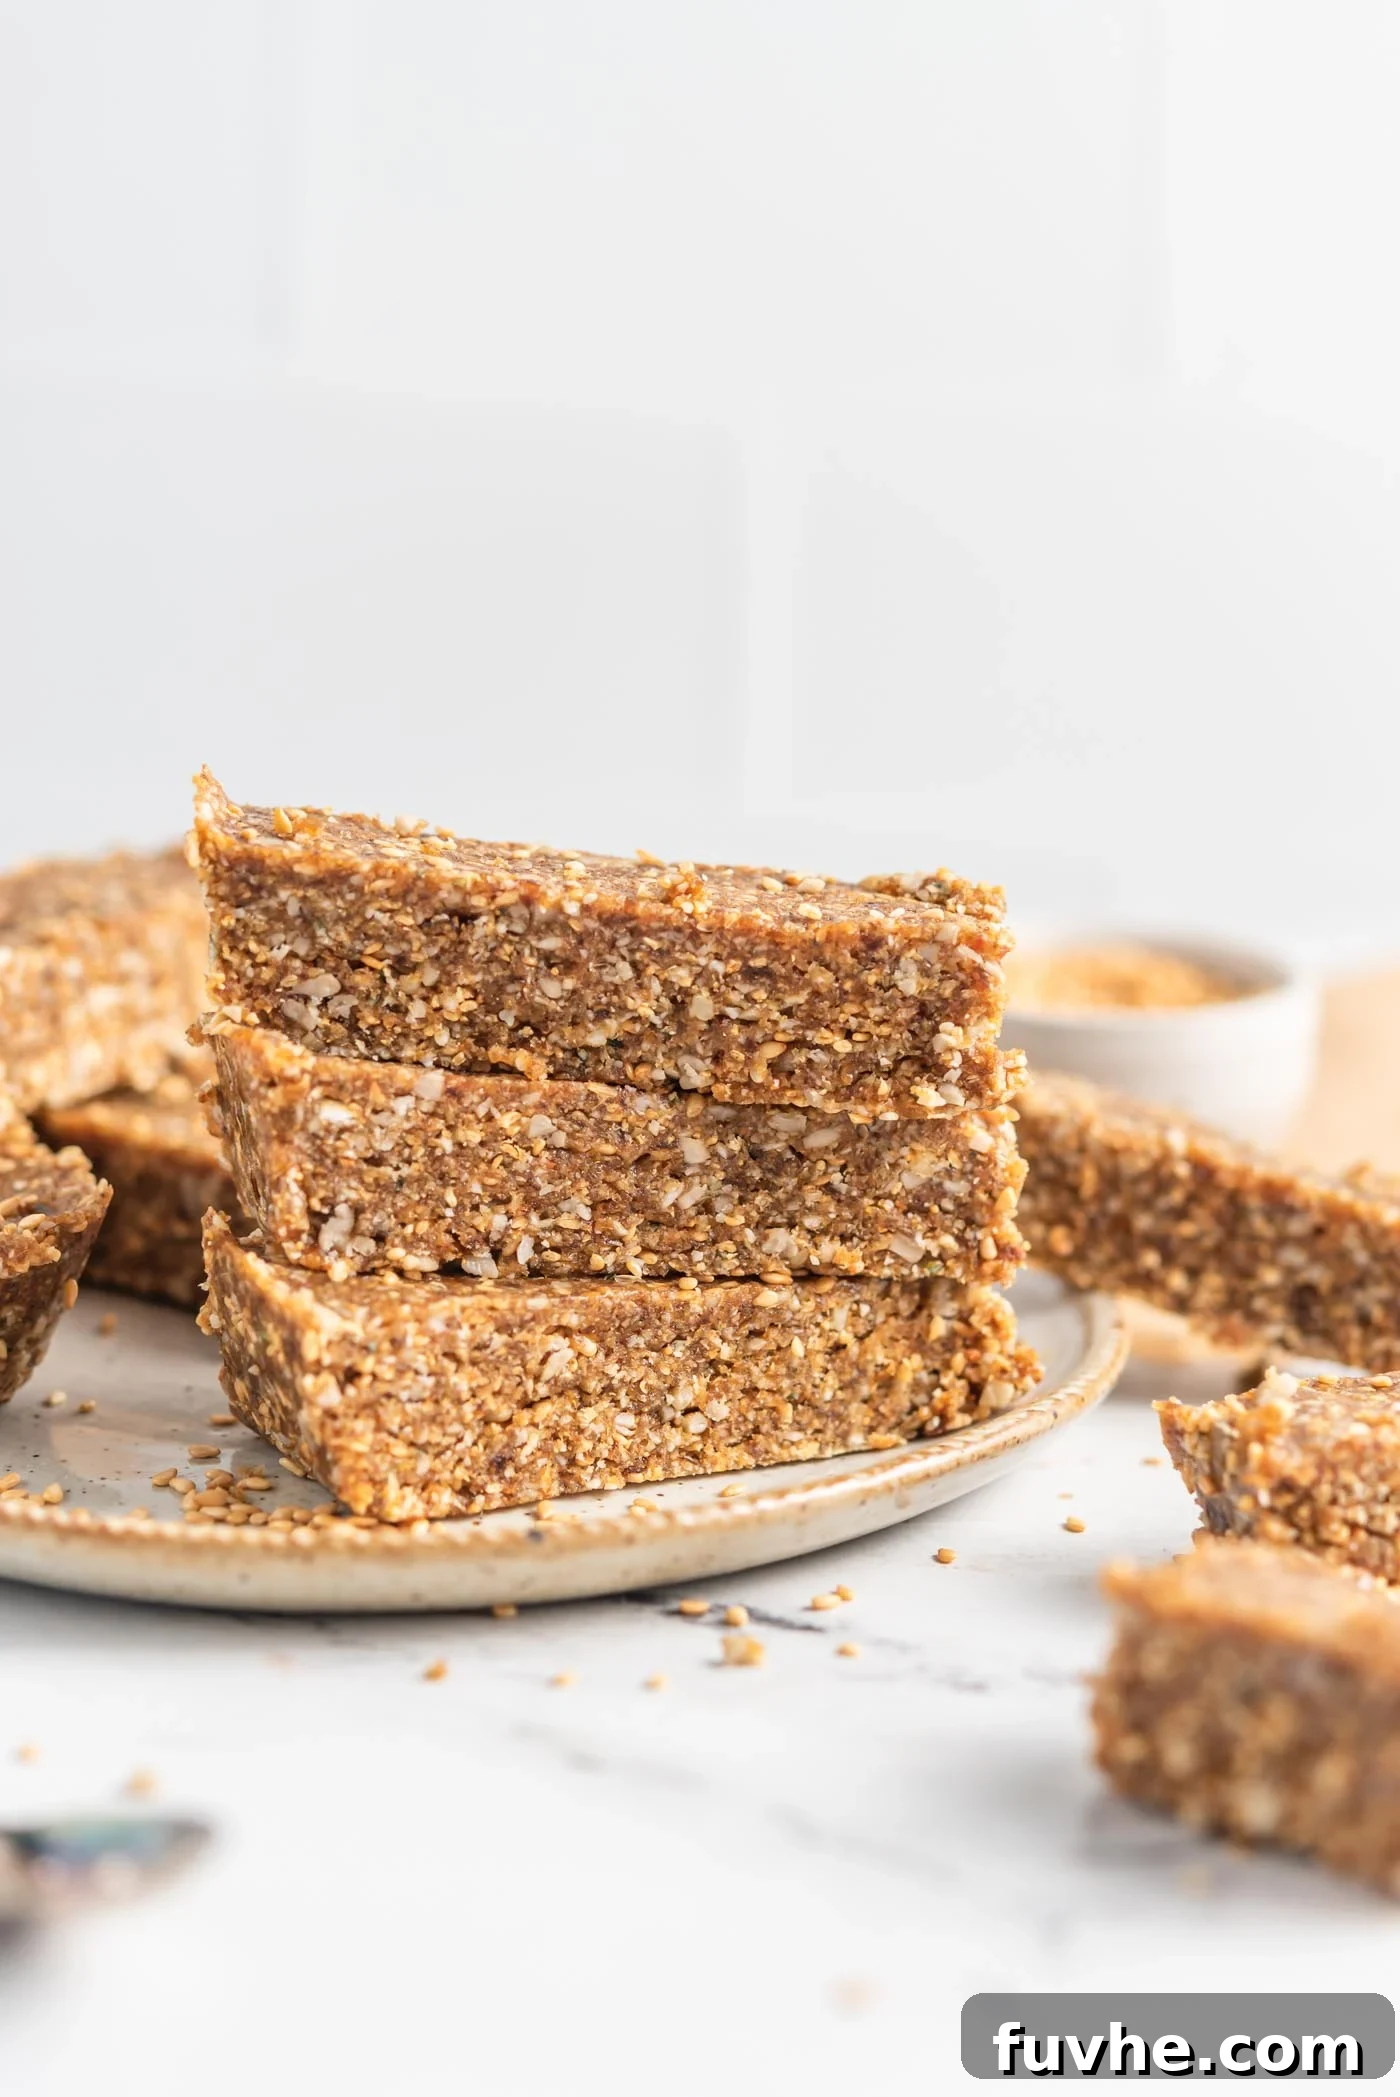
These versatile energy bars are crafted from a foundation of wholesome ingredients, meticulously selected for their nutritional value and ability to deliver sustained energy. The beauty of this recipe lies in its adaptability; you can easily mix and match components to align with your personal preferences or dietary requirements, making it a truly customizable vegan delight. They are undeniably yummy enough for dessert, offering a sweet indulgence without the refined sugars, yet they serve as the perfect energizing snack for any time of day. Their portable nature makes them an ideal companion for a wide range of activities, from a quick energy boost at home to a vital fuel source on a long journey.
For those who love wholesome, easy-to-make snacks, be sure to explore more delicious options like our Baked Cranberry Granola Bars, the effortlessly simple No-Bake Granola Bars, and the delightful Sunflower Seed Energy Balls. Each recipe offers unique flavors and textures, ensuring you always have a healthy option at hand.
Why Make Your Own Energy Bars?
In a world brimming with processed snacks, choosing to make your own energy bars is a smart and rewarding decision. Homemade bars offer unparalleled control over ingredients, allowing you to sidestep artificial additives, excessive sugars, and unhealthy fats often found in store-bought varieties. You dictate what goes in, ensuring every bite is packed with pure, unadulterated goodness. Not only is it more cost-effective in the long run, but it also gives you the satisfaction of creating something nutritious and delicious from scratch. These nut-free energy bars are a testament to how simple and beneficial homemade snacking can be, providing a reliable source of clean energy without any hidden nasties. They are especially beneficial for those with specific dietary concerns, such as nut allergies, as they guarantee a safe and enjoyable treat.
Recipe Features and Benefits
These energy bars are designed with your health and convenience in mind, boasting a range of impressive features:
- Dietary Inclusivity: Completely vegan, gluten-free, nut-free, oil-free, and contains no added refined sugar. This makes them suitable for a wide array of dietary needs and preferences, ensuring almost everyone can enjoy them safely.
- Nutritional Powerhouse: Each bar is a compact source of nutrition, providing approximately 239 calories, 6 grams of protein, and 5 grams of fiber. This balanced profile helps keep you full, supports muscle recovery, and aids in healthy digestion.
- Effortless Preparation: Requiring only 6 simple ingredients, the recipe is straightforward and quick to assemble, making it perfect for even the busiest schedules. No baking required, just a few simple steps in a food processor.
- Highly Customizable: Adapt the ingredients and flavor profile as needed to suit your taste. Whether you prefer a sweeter bar, a richer texture, or specific types of seeds, this recipe serves as an excellent foundation for experimentation.
- Perfect On-the-Go Snack: These bars are robust and travel-friendly, ideal for hiking, road trips, camping, post-workout fuel, or simply stashing in your bag for an afternoon pick-me-up. Their compact size and resilient nature make them a reliable companion for any adventure.
- Kid-Friendly Portions: Easily cut them into 28 mini bars for a kid-friendly snack or dessert. Their appealing taste and bite-sized format make them a healthier alternative to sugary treats for children.
- Versatile Topping: Get creative by crumbling these yummy bars over smoothie bowls, yogurt, or even ice cream for an added layer of flavor and texture, transforming simple dishes into gourmet experiences.
The Power of Seeds: Key Ingredients Explained
The magic of these nut-free energy bars lies in their carefully selected seed-based ingredients, each contributing unique nutritional benefits and flavors. This recipe calls for about 2 cups of mixed seeds and coconut, but the quantities and varieties are easily adjustable to meet your specific dietary needs or personal preferences.
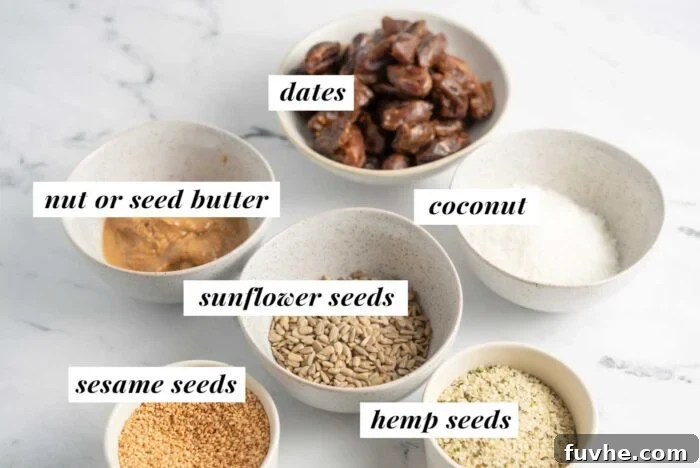
While this overview highlights the main components, a complete ingredient list with precise measurements and detailed instructions can be found in the recipe card at the end of this post.
- Sesame Seeds: These tiny powerhouses are rich in healthy fats, protein, B vitamins, and essential minerals like calcium, magnesium, and zinc. You have the flexibility to use hulled or unhulled, toasted or plain, white or black sesame seeds, each offering a slightly different flavor and nutrient profile. Toasted sesame seeds will impart a deeper, nuttier flavor to your bars.
- Hemp Seeds (Hemp Hearts): Often labeled as hemp hearts, these seeds are celebrated for their exceptional nutritional content, including a complete protein profile, omega-3 and omega-6 fatty acids, and various minerals. While a fantastic addition, they can be a little pricier. If desired, you can easily substitute them with additional sunflower or sesame seeds without compromising the bar’s integrity or deliciousness.
- Sunflower Seeds: An excellent source of Vitamin E, magnesium, and selenium, sunflower seeds add a pleasant crunch and a mild, earthy flavor. It’s crucial to use raw sunflower seeds that are free from added oil, salt, or sugar to maintain the health-focused nature of these bars.
- Coconut (Unsweetened Shredded): Unsweetened medium or fine shredded, or desiccated, coconut contributes a natural sweetness and a lovely chewy texture. Coconut is rich in healthy fats and fiber. If you have a coconut allergy or simply prefer to omit it, you can substitute it with an additional 1/2 cup of any other seeds listed, or even a different type of nut like almonds, walnuts, or pecans, if you’re not strictly nut-free.
- Dates (Soft & Pitted): Dates are the natural sweetener and binder in this no-bake recipe, providing fiber, potassium, and antioxidants. I personally favor sayer dates for their affordability and soft, pliable texture, which is ideal for achieving the perfect consistency in no-bake creations. However, any variety of date can be used as long as they are soft, moist, and not overly dry. If your dates are dry, a quick soak in warm water will soften them right up.
- Nut or Seed Butter: This ingredient acts as an additional binder and adds richness. For a strictly nut-free recipe and a distinct, delicious flavor, opt for tahini (sesame seed butter) or sunflower seed butter. If nuts are not a concern for you, almond butter, peanut butter, or cashew butter are also excellent choices that will yield fantastic results.
Step-by-Step Instructions for Flawless Energy Bars
Crafting these delicious nut-free energy bars is a breeze. Follow these simple steps to ensure perfect texture and taste every time:
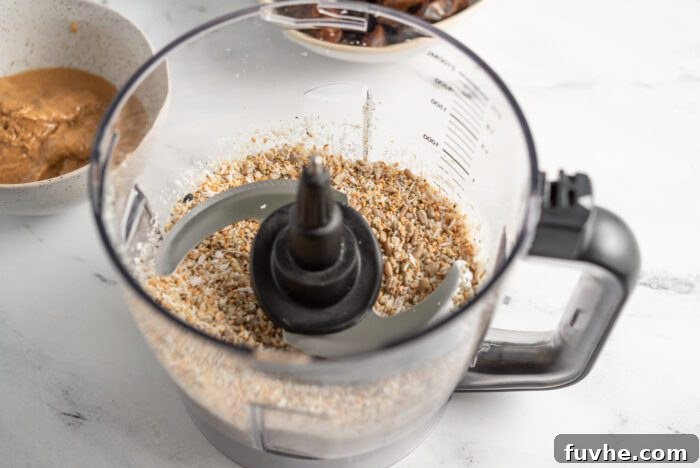
Step 1: Process the Dry Ingredients for a Flaky Base.
Begin by adding your chosen blend of seeds (sesame, hemp, sunflower) and unsweetened shredded coconut to a food processor. Pulse and blend these ingredients until they are finely broken down into a flaky, coarse consistency. This initial processing ensures an even distribution of flavors and helps create a uniform texture for your bars.
Step 2: Create the Sticky Dough.
Next, add the soft, pitted dates and your preferred nut or seed butter (tahini or sunflower seed butter for nut-free) to the food processor with the processed seed mixture. Blend again until the ingredients combine to form a thick, sticky dough. The dough should be cohesive enough that you can easily press a small amount between your fingers and it holds its shape. If, after blending, the dough appears too crumbly or dry, don’t worry! Simply add 1-2 tablespoons of warm water and process again. This small adjustment should provide the necessary moisture to achieve the perfect sticky consistency.
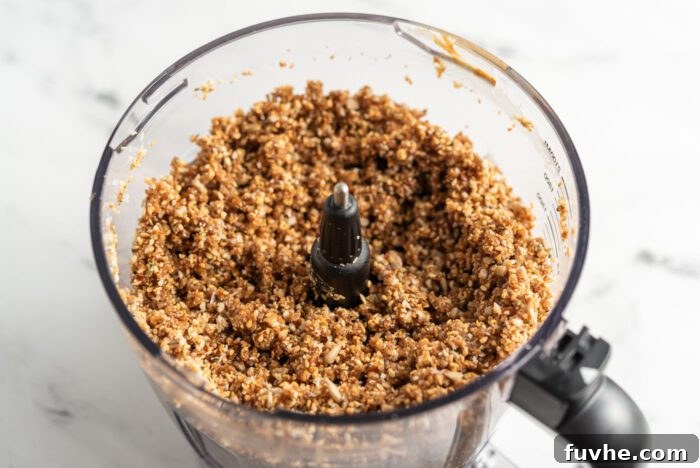
Step 3: Press into a Lined Pan.
Prepare an 8-inch square baking pan by lining it with parchment paper. Make sure the parchment paper extends over at least two sides of the pan; these overhangs will serve as convenient handles later for easy removal of the set bars. Transfer the sticky dough into the prepared pan. Now comes a crucial step for bar integrity: firmly press the dough into the pan. Take a few minutes to really compact it down, paying special attention to the sides and corners, ensuring an even and dense layer. This firm pressing is key to preventing crumbly bars once they’ve set.
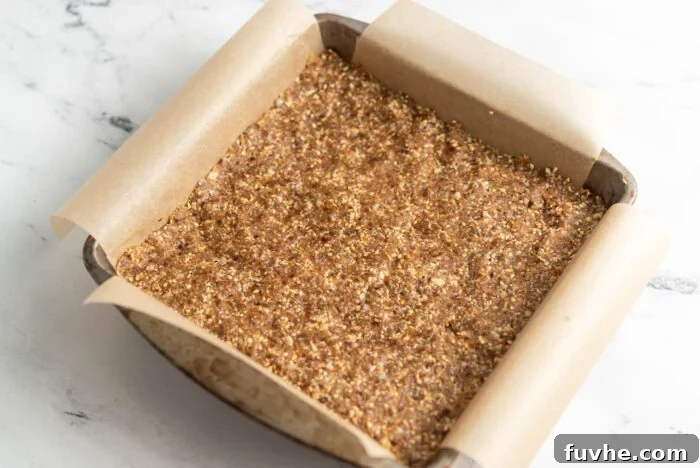
Step 4: Chill and Slice.
Once the dough is firmly pressed, place the pan in the freezer for 30-60 minutes to allow the bars to firm up. While not strictly necessary, this chilling period significantly improves the bar’s structure, making them easier to slice and handle. After chilling, use the parchment paper overhangs to lift the firm slab of dough out of the pan. Place it on a cutting board and slice it into 14 evenly sized bars, or adjust to your preferred portion size (e.g., 28 mini bars for smaller snacks).
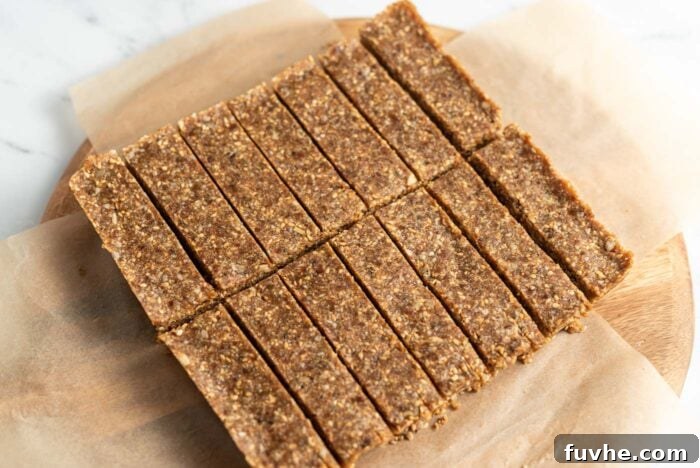
Your homemade nut-free energy bars are now ready to be enjoyed! Savor them immediately for a delightful and energizing snack, or store them as directed below to have a ready supply whenever hunger strikes.
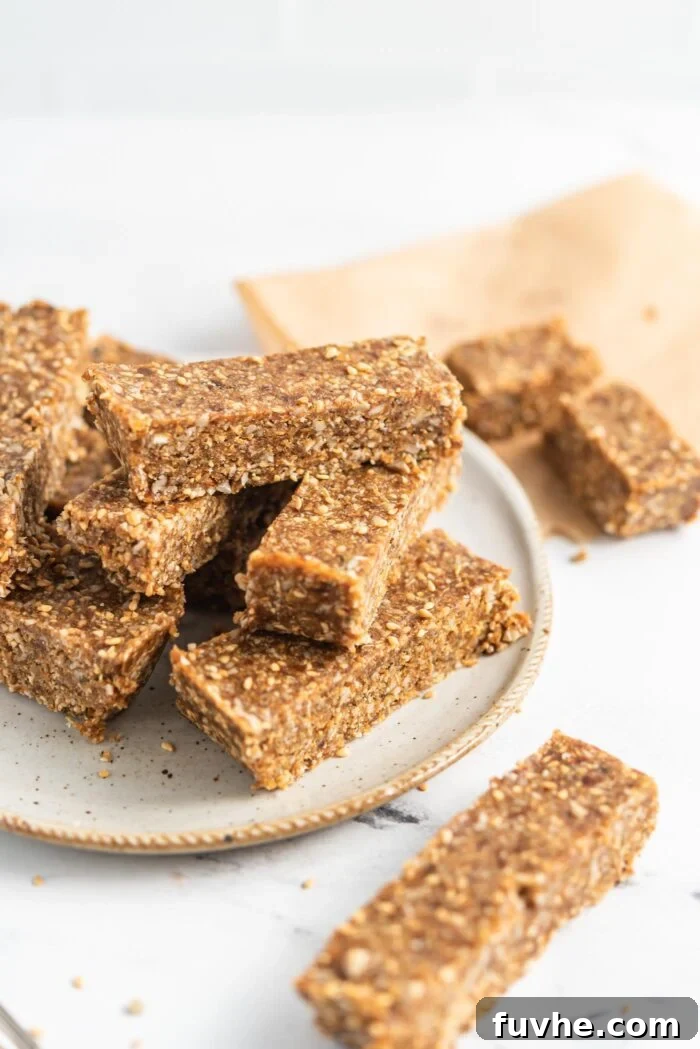
Customization and Variations
One of the joys of making your own energy bars is the endless possibilities for customization. While the base recipe is fantastic as is, feel free to get creative and tailor them to your taste and nutritional goals:
- Seed & Coconut Combinations: The recipe calls for 2 cups of mixed seeds and coconut. You can use any combination of sunflower seeds, pumpkin seeds (pepitas), hemp seeds, coconut, and sesame seeds. If you can’t have coconut, simply replace it with an equal amount of additional seeds or oats. If nuts are acceptable, you can substitute any portion of the seeds with chopped almonds, walnuts, or pecans for a different flavor profile.
- Flavor Boosters: Incorporate up to 1/3 cup of additional ingredients for extra flavor and texture. Consider adding cacao nibs or dairy-free chocolate chips for a rich, chocolatey twist. Finely chopped dark chocolate or dried cranberries also make wonderful additions. Other dried fruits like apricots, cherries, or finely chopped figs can add natural sweetness and chewiness.
- Spices and Extracts: A pinch of cinnamon, nutmeg, or cardamom can elevate the flavor. A splash of vanilla extract or almond extract (if not strictly nut-free) can also enhance the overall taste.
- Protein Power-Up: For an extra protein boost, you could blend in a scoop of your favorite plant-based protein powder, though this might slightly alter the texture and require a bit more liquid (like a tablespoon of water) to maintain stickiness.
FAQs: Common Questions Addressed
This is a common issue often stemming from using overly dry dates or nut/seed butter. Soft, moist dates are absolutely essential for no-bake recipes like this, as they provide the natural stickiness needed to bind the ingredients. If you suspect your dates are too dry, pit them and soak them in hot water for about 15 minutes before draining them thoroughly and using them in the recipe. If you’ve already blended and the dough still seems too crumbly to hold together, add 1-2 tablespoons of warm water to the food processor and process again until the mixture forms a cohesive, squeezable ball. The extra moisture should help bind everything.
While flax and chia seeds are incredibly healthy, they absorb a lot of liquid and can significantly alter the texture of these specific bars, making them too dry or dense. Therefore, I wouldn’t recommend them for this particular recipe as it’s formulated for a different seed profile. However, if you’re keen to incorporate them into similar no-bake recipes, here are some excellent alternatives:
- Hemp Chia Bars – These feature a delightful blend of pepitas, oats, and walnuts alongside hemp and chia.
- Chocolate Chip Chia Seed Bars – A perfect treat made with oats and coconut oil, highlighting chia seeds.
- Chocolate Superfood Bars – Packed with flax, chia seeds, and almonds for a nutrient-dense snack.
Recipe Notes and Serving Suggestions
Serving Size: I typically cut my bars into 14 larger portions, and then often halve each of those, creating 28 delightful mini bars. This way, I have the flexibility to grab a small treat or combine a couple for a more substantial snack. Feel free to slice them into as many portions as you desire; 16 squares also work beautifully for a balanced serving size.
Seeds & Coconut: The base of this recipe is incredibly flexible. You can use any combination of up to 2 cups of sunflower seeds, sesame seeds, raw pumpkin seeds (pepitas), hemp seeds, and unsweetened shredded coconut. If you need to avoid coconut, simply substitute it with an additional 1/2 cup of any other seeds or even rolled oats for a different texture. For those who can consume nuts, feel free to swap out some of the seeds for chopped almonds, walnuts, or pecans.
Additional Ingredients: To enhance the flavor and nutritional profile, try mixing in up to 1/3 cup of extras. Cacao nibs, dairy-free chocolate chips, or finely chopped dark chocolate add a lovely bitterness and sweetness. Dried cranberries or other chopped dried fruits like apricots provide a tangy chewiness that complements the seeds and dates beautifully.
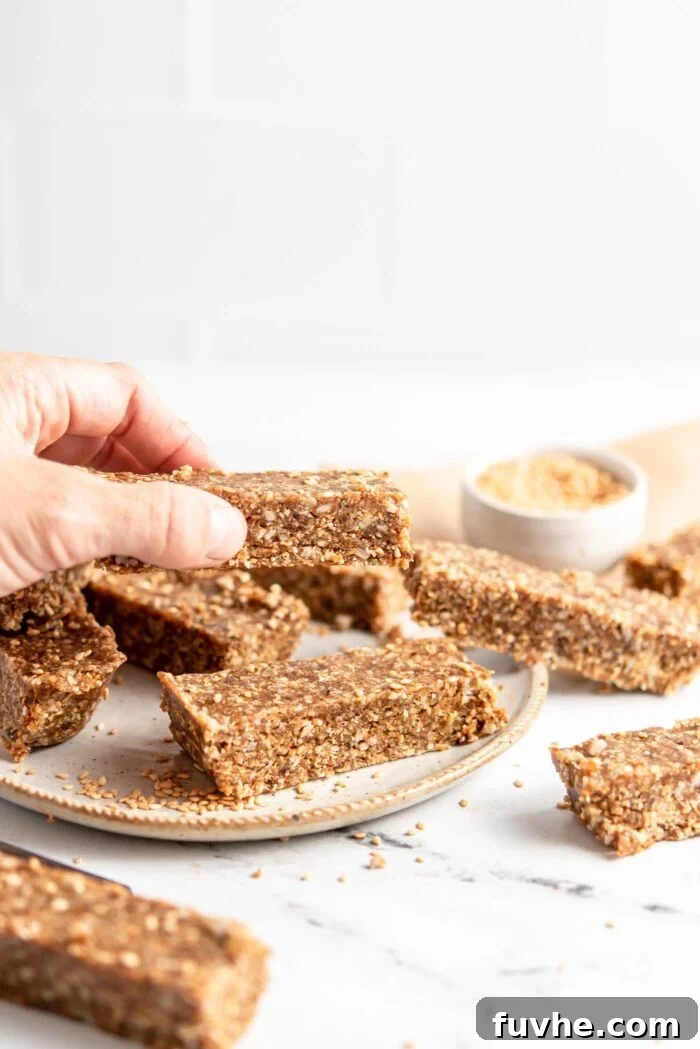
Storing Your Nut-Free Energy Bars
Proper storage is key to maintaining the freshness and optimal texture of your homemade energy bars:
- Temperature Guidance: These bars are best enjoyed chilled. While they can tolerate room temperature for a day or two, especially when packed for on-the-go (like during a hike or road trip), they will start to soften. For longer periods, refrigeration or freezing is highly recommended.
- Fridge Storage: Store your energy bars in an airtight container in the refrigerator for up to 2 weeks. This keeps them firm and fresh, ready for whenever you need a quick boost.
- Freezer Storage (Recommended): For maximum longevity and convenience, store the bars in a sealed, freezer-safe container for up to 3 months. A fantastic advantage of these bars is that they don’t freeze solid, meaning you can enjoy them straight from the freezer. Their slightly firmer, chilled texture when eaten frozen is truly delightful!
More No-Bake Snacks to Try
If you’ve fallen in love with the simplicity and goodness of these no-bake energy bars, you’re in luck! There’s a whole world of delicious and healthy no-bake snacks waiting to be discovered. Here are some more yummy energy bars and balls to expand your repertoire:
- Sunflower Seed Energy Balls: A delightful 4-ingredient recipe featuring the wholesome goodness of sunflower seeds, complemented by sweet cranberries and dairy-free chocolate chips.
- Hemp Seed Maca Balls: Boost your energy with these simple 4-ingredient energy bites, packed with nutrient-rich hemp seeds and the adaptogenic benefits of maca powder.
- No-Bake Vegan Hemp Protein Bars: Satisfying homemade protein bars crafted with almonds and hemp, perfect for a post-workout snack or a filling treat.
- No-Bake Chocolate Chia Energy Bars: A reader favorite, these rich chocolate energy bars are made with chia, coconut, and walnuts for an irresistible combination of flavors and textures.
- Vanilla Espresso Date Energy Bars: Energize your day with these unique nut-free bars, featuring the natural sweetness of dates, a kick from coffee beans, and the hearty texture of oats.
Nut-Free Energy Bars
By: Deryn Macey
These easy and delicious, no-bake energy bars are made with healthy seeds for a perfect nut-free snack option.
Prep Time: 10 mins
Chill Time: 30-60 mins (approx. 28 mins on average for firmness)
Total Time: Approximately 40-70 mins (including chill time)
Servings: 14 bars
Pin Recipe
Print Recipe
Ingredients
- 1/2 cup (70 g) sesame seeds
- 1/2 cup (80 g) hemp seeds
- 1/2 cup (75 g) sunflower seeds
- 1/2 cup (50 g) unsweetened shredded coconut
- 2 cups (400 g) lightly packed, soft and pitted dates
- 1/2 cup (120 g) tahini, or peanut butter/almond butter (for non-nut-free option)
- 1/2 tsp sea salt, optional (omit if nut/seed butter contains added salt)
Instructions
- Add the sesame seeds, hemp seeds, sunflower seeds, and coconut to a food processor and process until broken down into a flaky consistency.
- Add the dates, tahini (or chosen butter), and sea salt (if using) to the food processor. Process until a thick, sticky dough forms that can easily be pressed together between your fingers. If the dough seems too crumbly, add 1-2 tablespoons of warm water and process again until it binds.
- Line an 8-inch square baking pan with parchment paper, ensuring the paper extends over at least two sides of the pan. This will help you lift the bars out easily later. Firmly press the dough into the pan, taking a few minutes to ensure it’s evenly compressed and flat, especially along the edges and corners.
- Place the pan in the fridge for 30-60 minutes to allow the bars to firm up. This step helps them become more solid and easier to slice.
- Lift the firm slab of bars out of the pan using the parchment paper overhangs. Place on a cutting board and cut into 14 bars, 16 squares, or your desired portion size.
Notes
For an extra treat, consider adding 1/4 cup of dairy-free chocolate chips, finely chopped dark chocolate, or cacao nibs into the food processor at the very end of processing the dough. Pulse briefly to incorporate.
Store the bars in an airtight container in the fridge for up to 2 weeks, or in the freezer for up to 3 months. They do not freeze solid and taste fantastic straight from the freezer, so freezer storage is highly recommended for optimal freshness and a delightful chilled texture.
The total of 2 cups of seeds and coconut can be customized. Mix and match from sunflower seeds, pepitas (pumpkin seeds), hemp seeds, coconut, and sesame seeds. If you have a coconut intolerance or allergy, simply substitute the coconut with an additional 1/2 cup of any other seeds. For a truly nut-free recipe, always ensure you use tahini or sunflower seed butter as your binder.
Nutrition (per 1 bar serving)
Serving: 1 bar
Calories: 239 kcal
Carbohydrates: 26 g
Protein: 6 g
Fat: 14 g
Fiber: 5 g
Originally published March 19, 2018.