
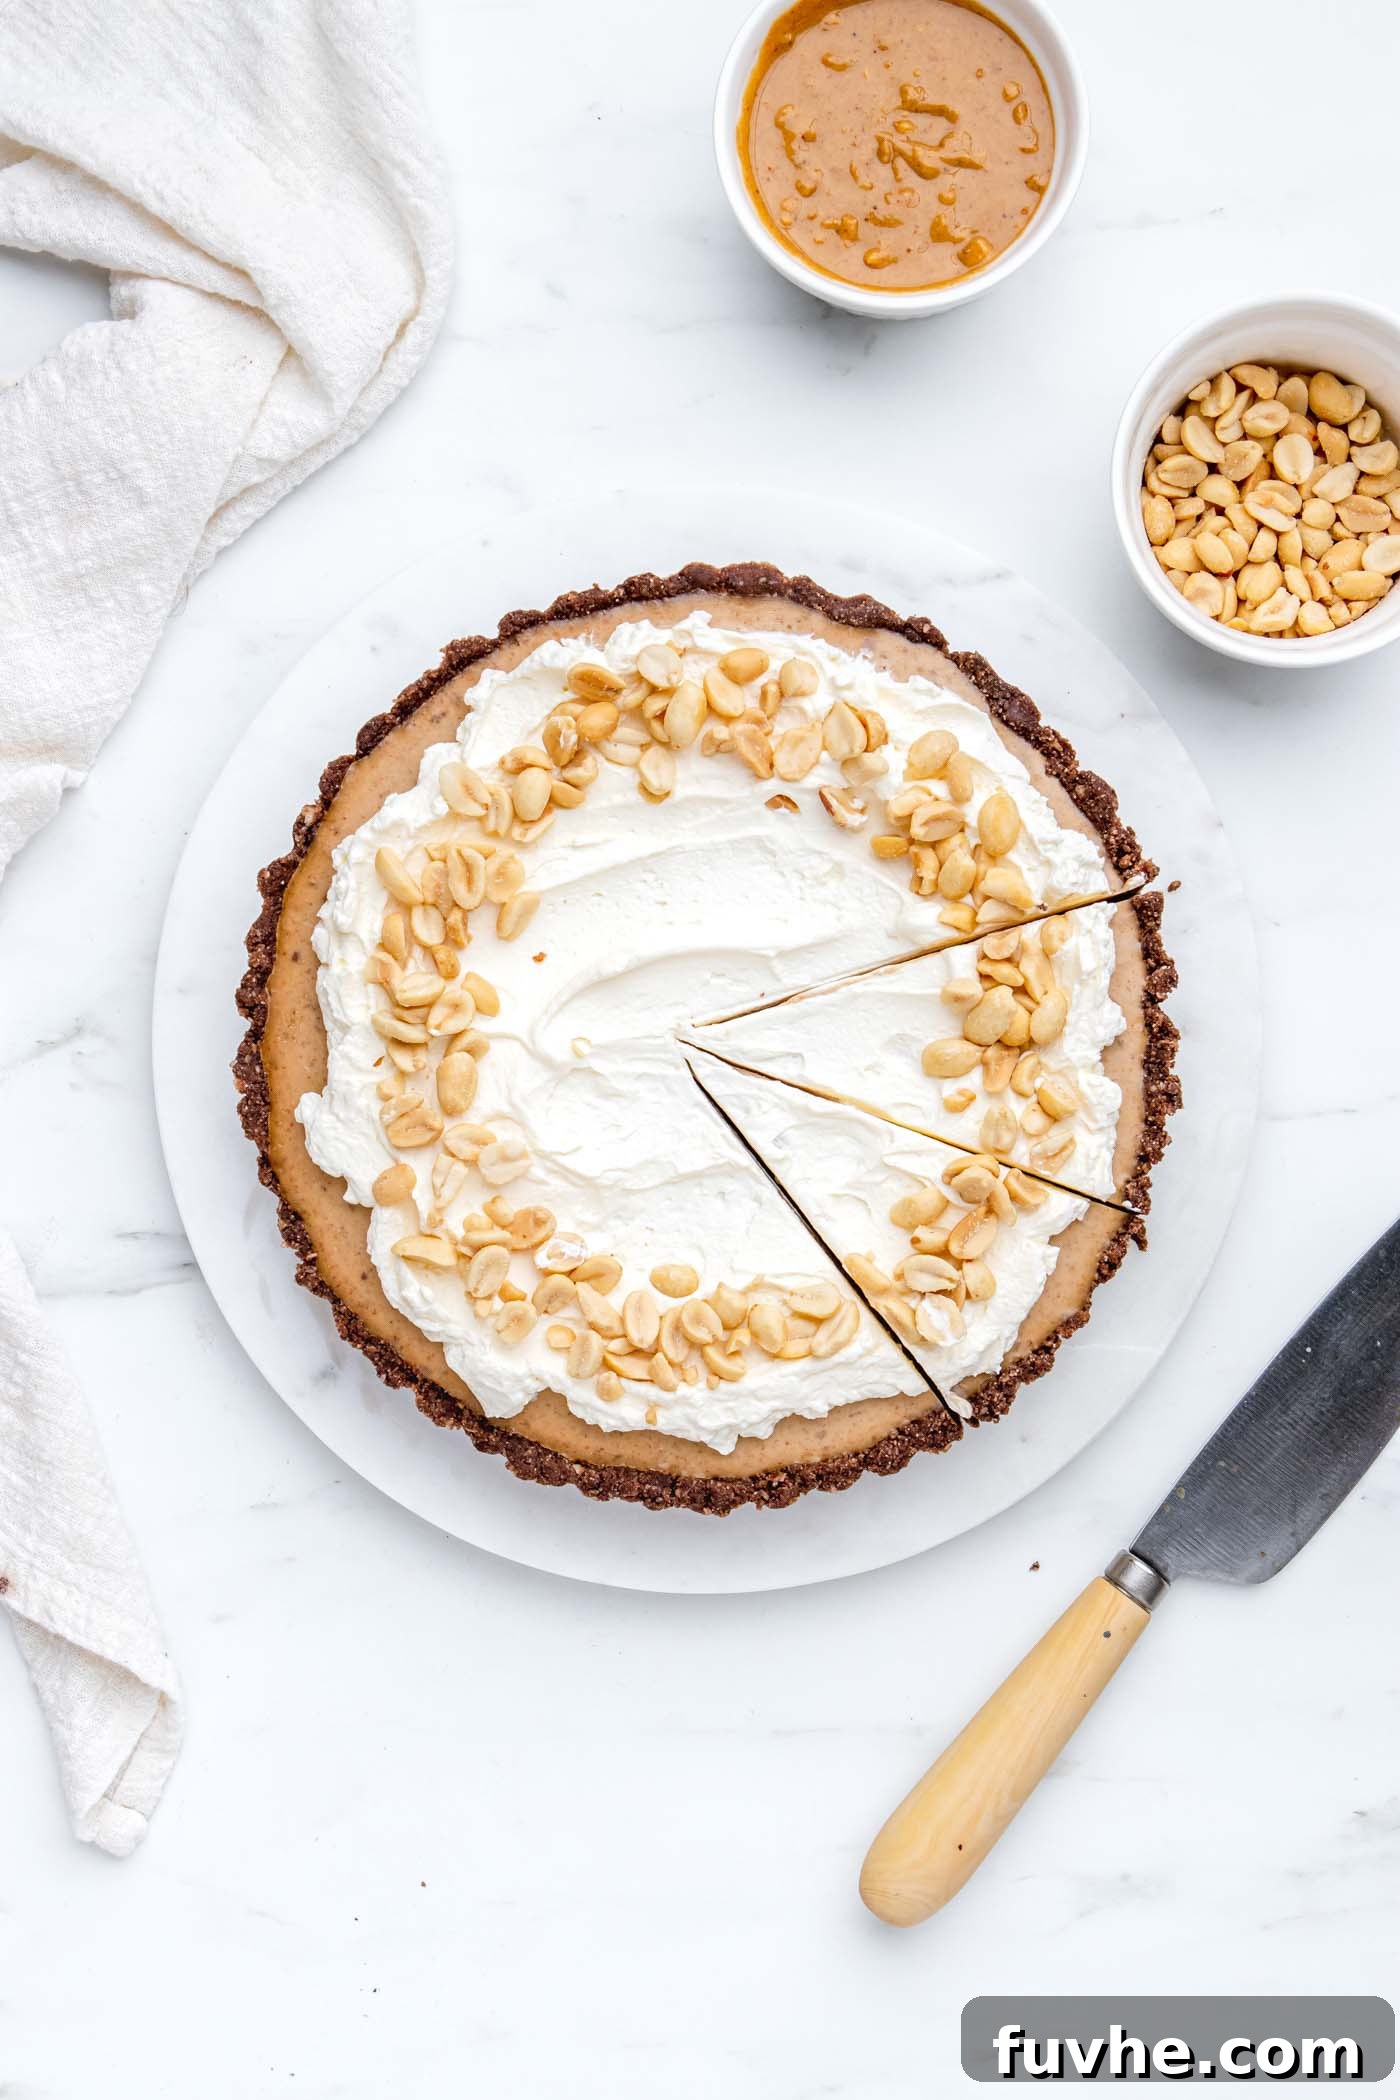
Welcome to the ultimate guide for creating a truly irresistible No-Bake Vegan Peanut Butter Pie. This extraordinary dessert is a dream come true for anyone who adores the classic combination of rich chocolate and creamy peanut butter, all while adhering to vegan and gluten-free dietary preferences. Imagine a decadent, mousse-like filling nestled atop a crisp chocolate crust, requiring absolutely no oven time. It’s a match made in culinary heaven, guaranteed to impress guests and satisfy even the most intense sweet cravings. Perfect for any occasion, from casual family dinners to elegant holiday celebrations, this pie is as effortless to make as it is delightful to devour. Get ready to indulge in a treat that’s both simple and spectacular.
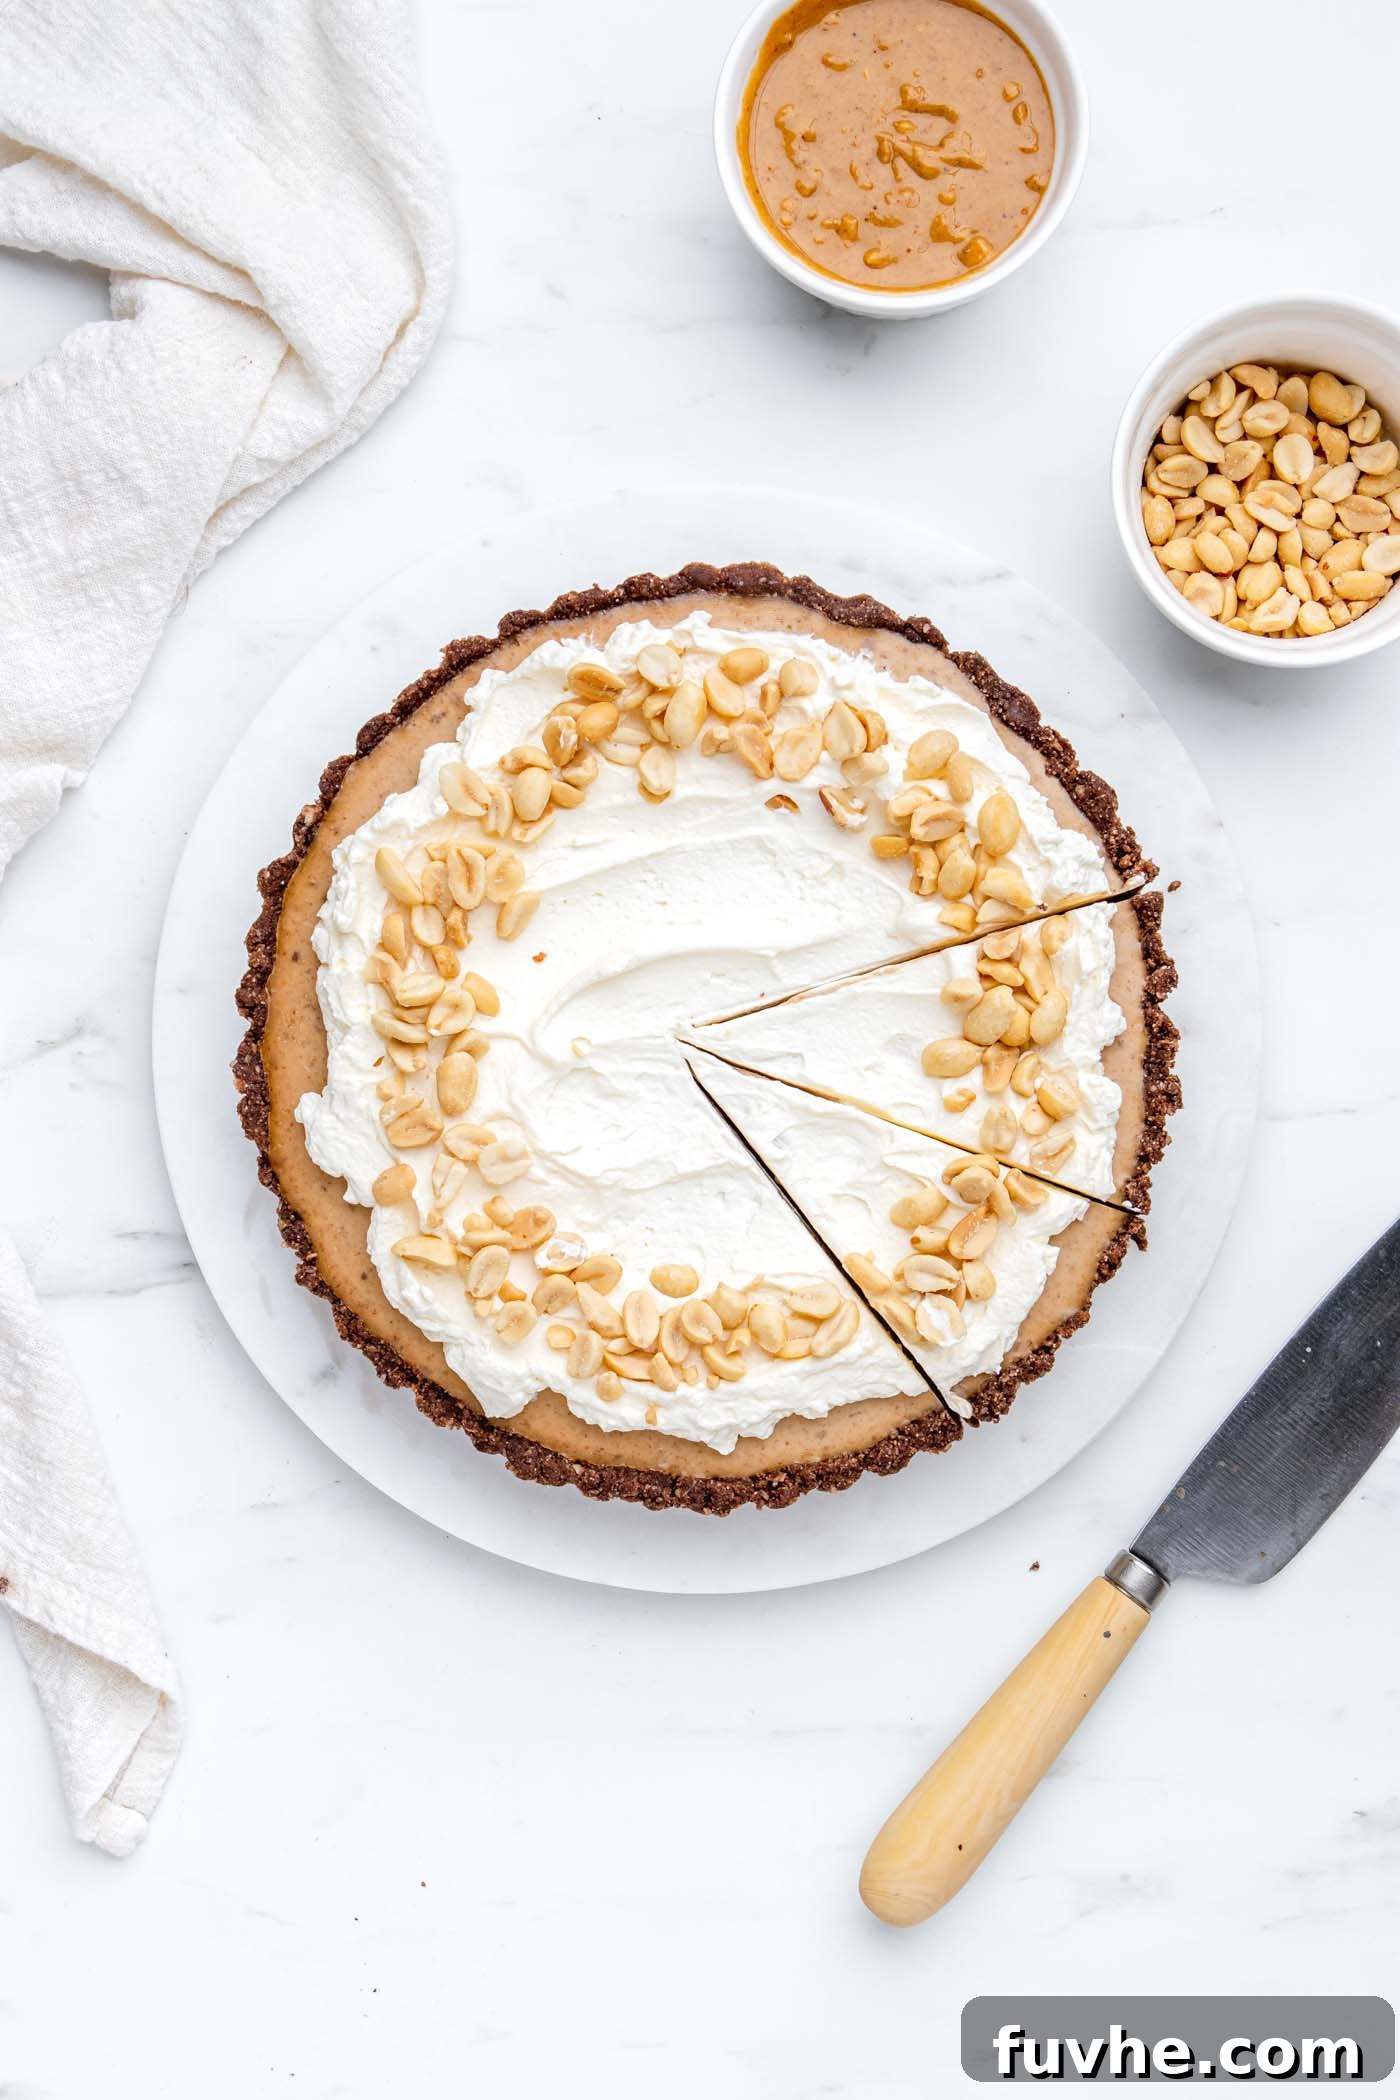
Why You’ll Love This No-Bake Vegan Peanut Butter Pie
This remarkable peanut butter pie isn’t just a dessert; it’s a testament to how simple, wholesome ingredients can come together to create something truly extraordinary. Here’s why this recipe will quickly become a favorite in your kitchen:
- Effortless Preparation – No Baking Required! Say goodbye to hot ovens and complex baking steps. This pie comes together beautifully without any baking, making it an ideal choice for summer gatherings, busy holidays, or whenever you crave a show-stopping dessert without the fuss. Its simplicity means less time in the kitchen and more time enjoying your masterpiece.
- Dietary Inclusive: Vegan, Gluten-Free, and Peanut-Free Option. Designed to cater to a wide range of dietary needs, this pie is completely vegan and gluten-free. This ensures that almost everyone can enjoy a slice without compromise. Plus, with the simple substitution of almond butter for peanut butter, it can easily be made completely peanut-free, perfect for those with nut allergies.
- Luxuriously Rich and Creamy Mousse-Like Filling. Prepare for an unparalleled textural experience! The filling is incredibly smooth, airy, and creamy, akin to a velvety mousse, but entirely dairy-free. Crafted with wholesome plant-based ingredients, it melts in your mouth, offering a decadent contrast to the crisp chocolate crust.
- The Perfect Dessert for Holidays and Special Occasions. Whether you’re celebrating a birthday, hosting a Christmas dinner, or simply looking for a dessert to elevate a weekend meal, this no-bake pie fits the bill. Its elegant presentation and crowd-pleasing flavor make it a fantastic centerpiece for any festive gathering, leaving a lasting impression on your guests.
- Crafted with Wholesome, Natural Ingredients. We believe in delicious food made with good-for-you ingredients. This recipe utilizes natural sweeteners like maple syrup, nutrient-rich almond flour, and healthy fats from coconut oil and peanut butter, offering a dessert that tastes indulgent yet is made with ingredients you can feel good about.
- Cool, Refreshing, and Ideal for Summer. There’s nothing quite like a chilled dessert on a warm day. Served straight from the fridge, this pie offers a wonderfully cool and creamy respite, making it the perfect summer treat. It’s a refreshing alternative to heavier baked goods, especially when you want something light but still satisfying.
Essential Ingredient Insights
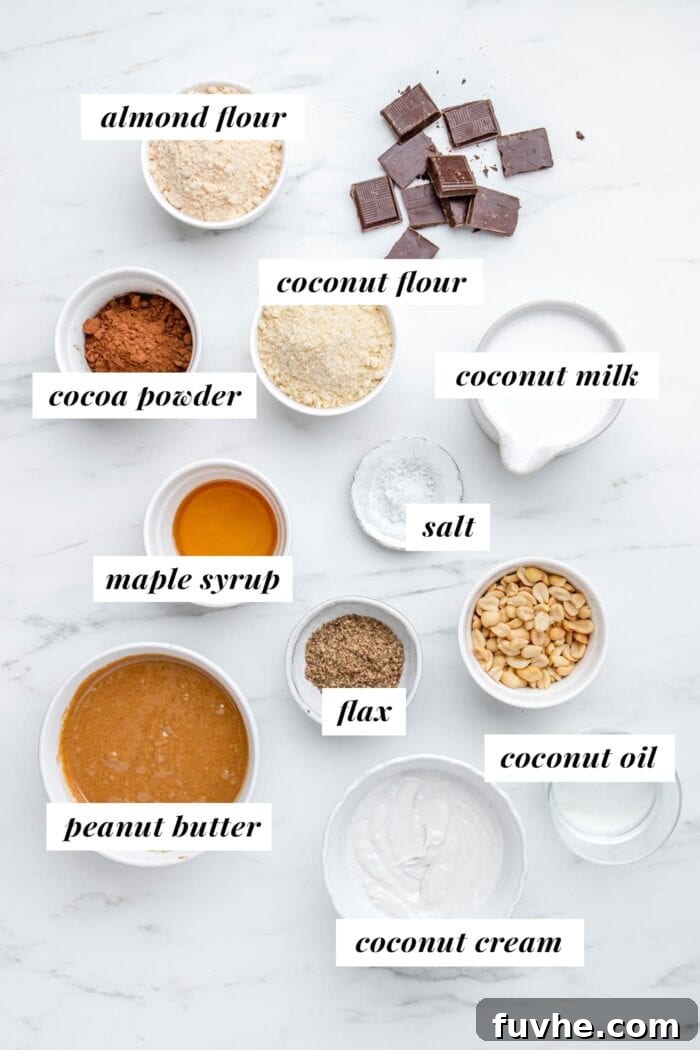
Crafting the perfect no-bake vegan peanut butter pie begins with understanding the role of each ingredient. This section provides detailed notes to help you select the best quality items and make informed substitutions when necessary. Remember to refer to the full recipe card at the end of this article for precise measurements and detailed instructions.
- Almond Flour: You’ll need 1 cup (110g) of fine almond flour for the crust. This provides a delicate, crumbly texture that forms the perfect base for our rich filling. You can easily find high-quality almond flour at most grocery stores, or make your own by blending blanched almonds in a high-speed blender or food processor until a fine, flour-like consistency is achieved. Ensure it’s blanched almond flour for the best results, as it yields a smoother crust. If you happen to have extra, it’s excellent for making other gluten-free treats.
- Coconut Flour: Adding 1 cup (110g) of coconut flour to the crust mixture provides additional structure and a subtle sweetness. Coconut flour is highly absorbent, which helps create a firm crust without the need for baking. Its unique fibrous texture also contributes to the overall delightful crumb of the base.
- Unsweetened Cocoa Powder: A quarter cup (22g) of unsweetened cocoa powder is crucial for creating that rich, deep chocolate flavor in the crust. For an even more intense and luxurious chocolate experience, seek out dark cocoa powder. The quality of your cocoa powder directly impacts the depth of flavor in your crust, so choose a good one!
- Melted Coconut Oil: Essential for both the crust and the filling, 1/4 cup (60g) of melted coconut oil acts as a binding agent that helps the pie set firmly when chilled. In this recipe, coconut oil cannot be substituted, as its unique solidifying properties at cool temperatures are key to achieving the desired no-bake structure.
- Maple Syrup: This natural sweetener plays a vital role in both the crust (1/4 cup, 60mL) and the filling (1/3 cup, 80mL), imparting a wonderful depth of flavor without being overly sweet. It’s a fantastic unrefined sugar alternative. If maple syrup is unavailable, agave syrup makes an excellent suitable substitute, offering a similar sweetness and liquid consistency.
- Full-Fat Coconut Milk: For the creamy filling, you’ll need 1 1/4 cups (300mL) of good quality, full-fat canned coconut milk at room temperature. The key is to select a brand that is thick, creamy, and smooth, with minimal separation. Before opening, give the can a good shake to ensure the cream and liquid are well combined. Avoid “light” coconut milk, as it won’t provide the necessary richness or setting properties for the filling.
- Coconut Cream: This ingredient is vital for achieving the ultra-rich, mousse-like texture of the filling, requiring 1/3 cup (80g). You can often find canned coconut cream in the Asian food aisle of larger supermarkets. If not available, you can easily make your own: simply place a can of full-fat coconut milk in the refrigerator overnight. In the morning, carefully open the can and scoop the thick, solidified cream from the top, leaving the watery liquid behind. One standard can of coconut milk typically yields about 1/2 cup of cream, so you can reserve any extra cream or the coconut water for smoothies, oatmeal, or curries.
- Creamy Peanut Butter: The star of the show, 1 cup (250g) of creamy peanut butter is the heart of this pie’s filling. Choose a natural, creamy peanut butter without added sugars or hydrogenated oils for the best flavor and texture. If you prefer a peanut-free option, creamy almond butter or even cashew butter can be used as a delicious alternative, maintaining the rich, nutty profile.
- Ground Flaxseed: Two tablespoons (14g) of ground flaxseed are added to the filling. This acts as a natural thickener and binder, helping the filling to set beautifully without the need for gelatin or other conventional thickeners. It also adds a subtle nutty flavor and a boost of healthy omega-3 fatty acids.
- Salt: Just a touch (1/8 tsp) of salt in the crust helps to balance the sweetness and enhance the chocolate and peanut butter flavors, bringing out their full potential.
Easy Step-by-Step Instructions
Creating this magnificent no-bake vegan peanut butter pie is incredibly simple. Follow these straightforward steps to assemble your dessert masterpiece:
- Prepare the Almond Flour (if needed): If you’re using whole blanched almonds instead of pre-ground almond flour, start by adding the almonds to a food processor or high-speed blender. Pulse them until they reach a fine, flour-like consistency. Be careful not to over-process, or you’ll end up with almond butter!
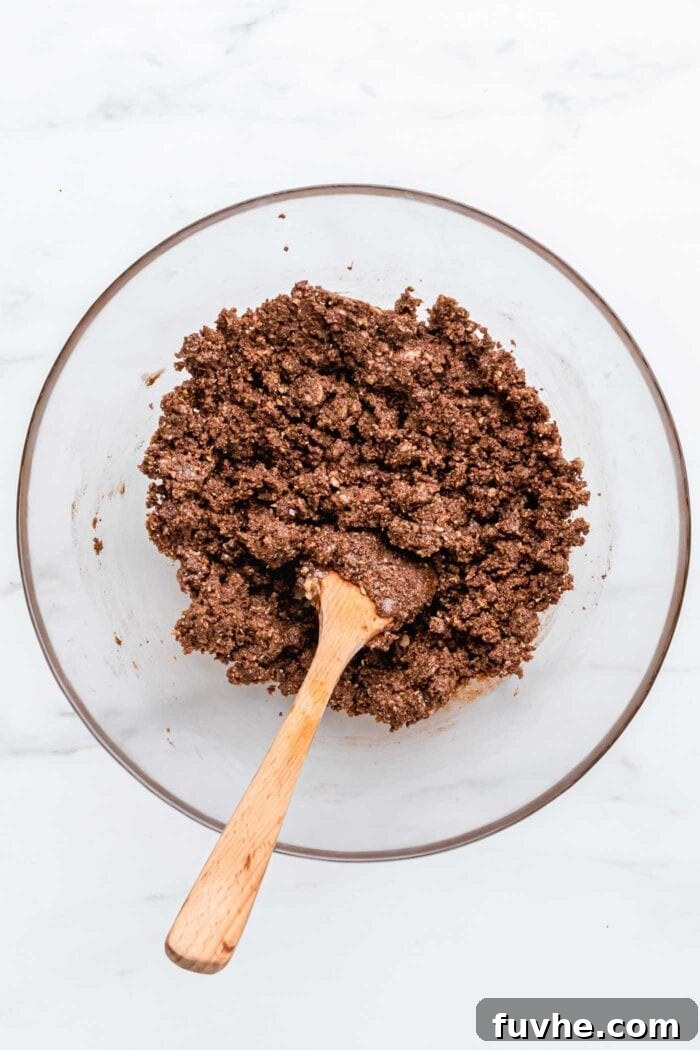
- Combine Crust Ingredients: In a spacious mixing bowl, combine the almond flour, coconut flour, unsweetened cocoa powder, melted coconut oil, maple syrup, and a pinch of salt. Mix all the ingredients thoroughly until they are well combined and resemble coarse, moist crumbs. Alternatively, for even faster preparation, you could pulse all crust ingredients together in a food processor until just combined.
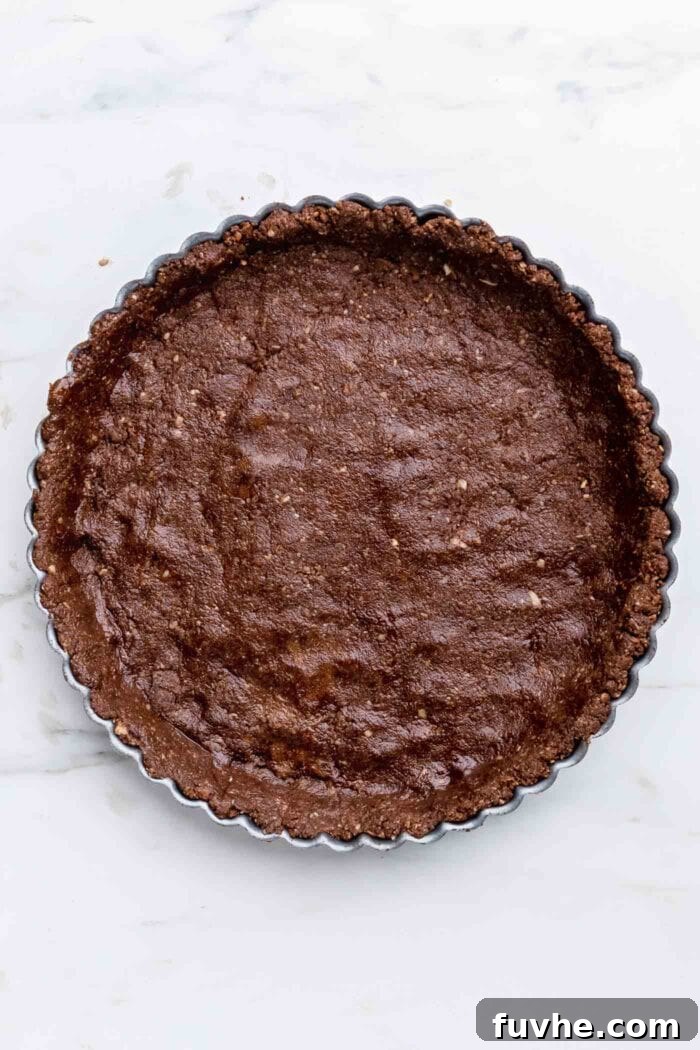
- Form the Pie Crust: Transfer the crumbly crust mixture into a 7 or 8-inch pie tin (approximately 18-20 cm). Using your fingertips or the back of a spoon, firmly press the mixture evenly into the bottom and up the sides of the pie tin. Ensure it’s compact and smooth. Once the crust is formed, place the entire pie tin into the freezer to chill while you prepare the filling. This helps it set and become firm.
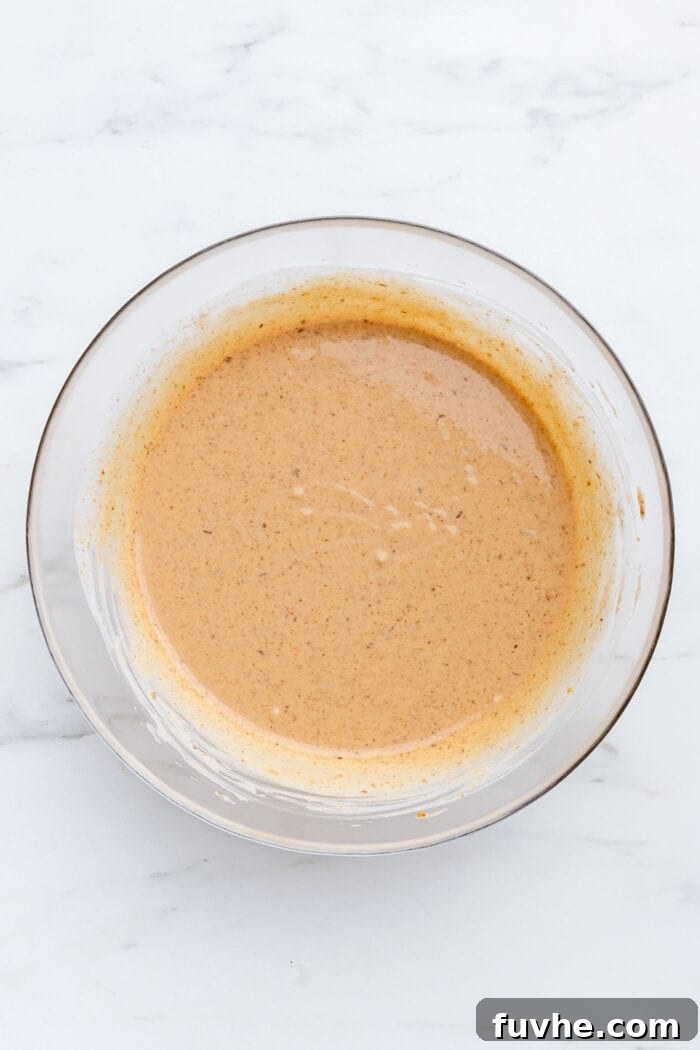
- Prepare the Creamy Filling: In a separate large bowl, whisk together the room-temperature full-fat coconut milk, coconut cream, and maple syrup until the mixture is smooth and well combined. Next, add the creamy peanut butter and ground flaxseed to the bowl. Mix again with a whisk or spatula until the filling is completely smooth, creamy, and free of any lumps. The consistency should be thick and luxurious.
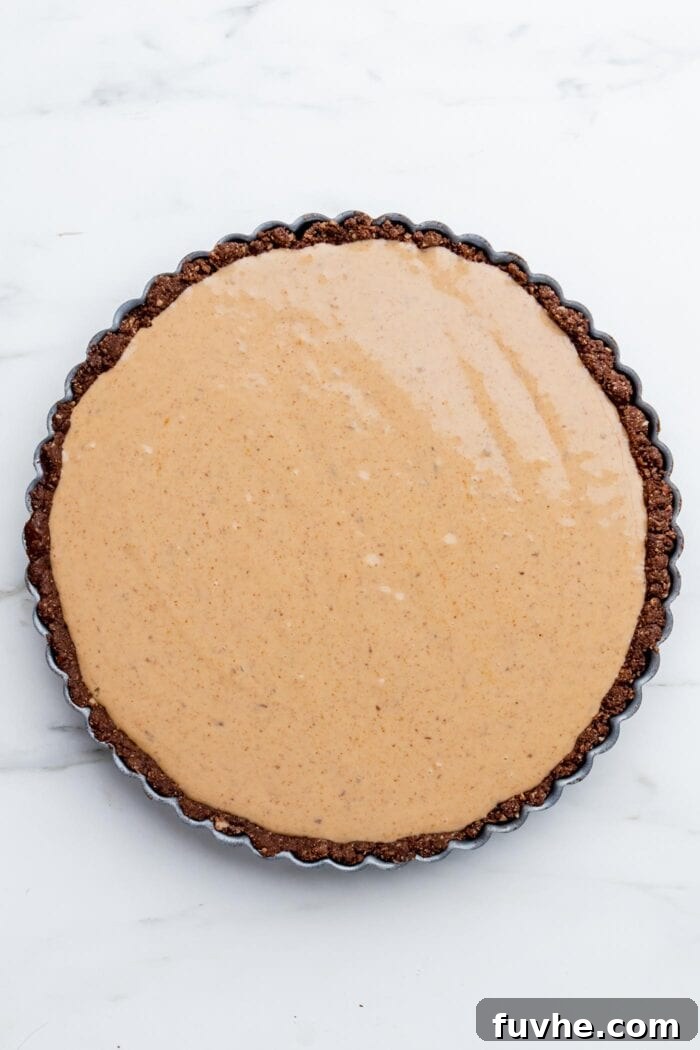
- Assemble and Chill: Carefully pour the prepared peanut butter filling over the chilled chocolate crust in the pie tin. Use a spatula to gently spread the filling evenly across the crust, ensuring a smooth top. Once assembled, place the entire pie tin back into the refrigerator for a minimum of 3-4 hours to allow the pie to fully set. For the firmest slice, chilling overnight is ideal.
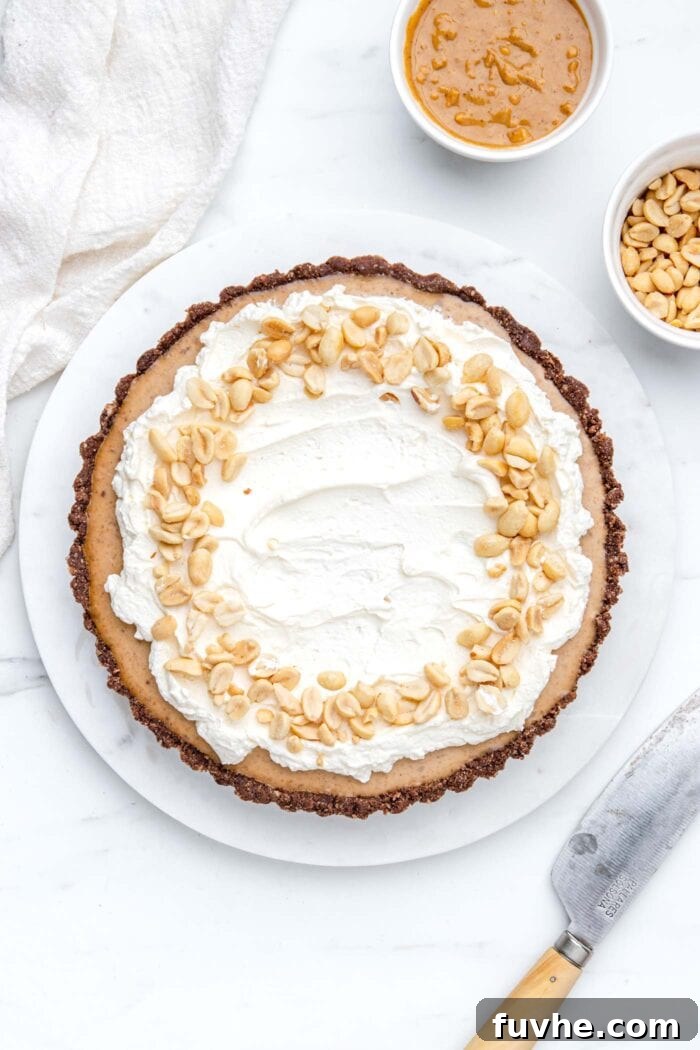
- Decorate and Serve: Once the pie has set, it’s ready for its grand finale! Before serving, generously top with your favorite dairy-free whipped cream (such as coconut whipped cream), a luscious drizzle of melted chocolate, and a sprinkle of chopped peanuts for added crunch and flavor, if desired. Slice and enjoy this spectacular no-bake treat!
Frequently Asked Questions About Vegan Peanut Butter Pie
No need to worry! This versatile pie can easily be made into delicious peanut butter squares using a 7 or 8-inch square baking pan. For easy removal and clean slices, we highly recommend lining the pan with parchment paper, leaving an overhang on the sides. You can also successfully use a springform pan, which makes serving individual slices even easier.
While the pie is absolutely delicious on its own, adding toppings can elevate both its appearance and flavor! Here are some creative ideas to make your pie truly shine:
- Melted Chocolate Drizzle: For an extra layer of chocolatey goodness, drizzle up to 1/3 cup of melted dairy-free chocolate chips or dark chocolate over the top.
- Peanut Butter Drizzle: A light drizzle of extra creamy peanut butter can enhance the core flavor and create an appealing visual swirl.
- Roasted or Salted Peanuts: Add a wonderful crunch and salty contrast by sprinkling roasted or salted peanuts over the top.
- Coconut Whipped Cream: A generous dollop of homemade whipped coconut cream or your favorite store-bought dairy-free whipped topping adds a light, airy texture and a beautiful finish.
- Chocolate Shavings or Chocolate Chips: For a simple yet elegant touch, sprinkle chocolate shavings or mini chocolate chips.
- Chopped Peanut Butter Cups: Take indulgence to the next level with chopped homemade vegan chocolate peanut butter cups or store-bought dairy-free alternatives.
Absolutely! If you prefer a peanut-free option or simply love the taste of almond butter, it’s a fantastic substitute. Creamy almond butter will yield a rich, nutty flavor and a similar creamy texture, ensuring your pie is just as delightful.
Yes, this no-bake pie is an excellent make-ahead dessert! In fact, it requires a minimum of 3-4 hours of chilling to set properly, and it’s even better when chilled overnight. Preparing it a day in advance allows the flavors to meld beautifully and ensures a perfectly firm texture, making it ideal for entertaining.
While it is a dessert, this pie uses wholesome, natural ingredients like almond flour, natural peanut butter, coconut products, and maple syrup, making it a more nutritious option compared to many traditional baked goods loaded with refined sugars and dairy. It’s rich in healthy fats and fiber. As with all treats, enjoy it in moderation as part of a balanced diet.
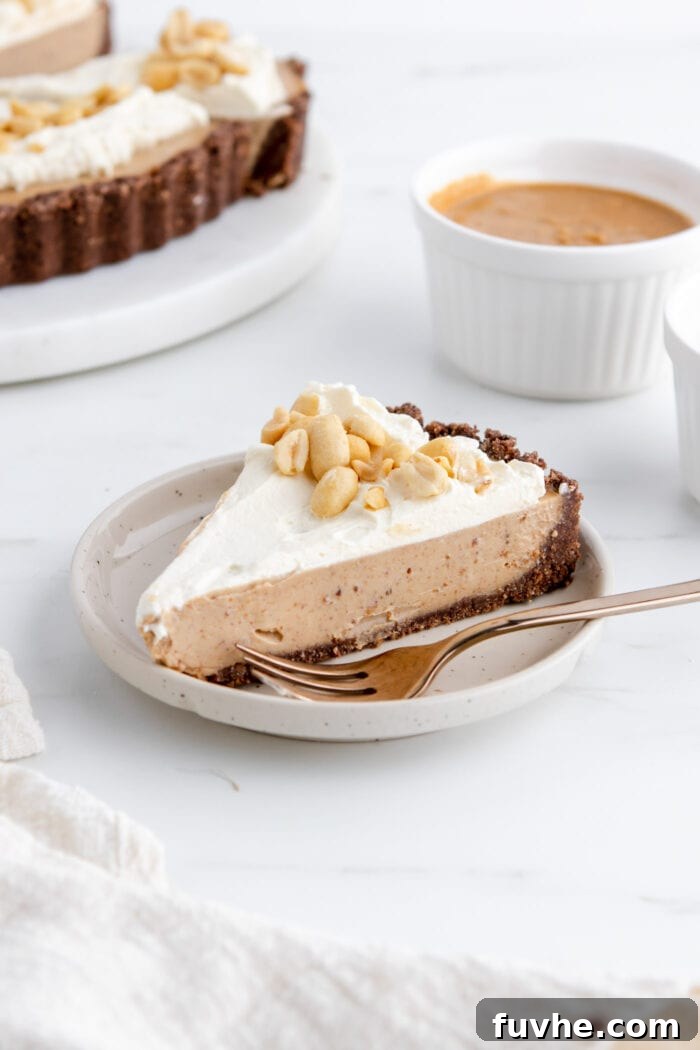
Storing Your No-Bake Vegan Peanut Butter Pie
- Your delicious vegan peanut butter pie must be stored properly in the refrigerator or freezer to maintain its texture and freshness.
- Refrigerator Storage: Store the pie, wrapped securely in its pie tin with plastic wrap or aluminum foil, for up to 1 week. Alternatively, transfer individual slices to an airtight container.
- Freezer Storage: For longer preservation, the pie can be frozen. Wrap the whole pie in the tin very well with plastic wrap and then foil, or place individual slices in an airtight freezer-safe container. It will keep for up to 3 months.
- Thawing Frozen Pie: If you’re serving a frozen pie, allow it to thaw briefly at room temperature for about 20-30 minutes, or transfer it to the refrigerator for a few hours before serving. This will ensure it’s perfectly creamy and ready to enjoy.
Explore More No-Bake Vegan Desserts
If you’ve fallen in love with the ease and deliciousness of this no-bake pie, you’re in for a treat! Discover other fantastic no-bake vegan desserts that are just as simple to make and equally satisfying:
- No-Bake Vegan Key Lime Pie: A zesty and refreshing classic with a delightful vegan twist.
- Raw Vegan Brownies: Rich, fudgy, and packed with chocolatey goodness, entirely raw and no-bake.
- No-Bake Chocolate Almond Bars: A delightful combination of chocolate and almond in an easy-to-make bar form.
- Vegan No-Bake Chocolate Pie: For the ultimate chocolate lover, this pie delivers pure indulgence.
- Vegan Chocolate Ganache Tart: An elegant and decadent tart featuring a smooth, rich chocolate ganache.
No-Bake Vegan Peanut Butter Pie
Deryn
10 minutes
4 hours
4 hours
10 minutes
8
Ingredients
For the Crust:
- 1 cup almond flour or ground blanched almonds, 110 g
- 1 cup coconut flour, 110 g
- 1/4 cup unsweetened cocoa powder, 22 g
- 1/4 cup melted coconut oil, 60 g
- 1/4 cup maple syrup, 60 mL
- 1/8 tsp salt
For the Filling:
- 1 cup creamy peanut butter, 250 g
- 2 tablespoons ground flaxseed, 14 g
- 1/3 cup maple syrup, 80 mL
- 1 1/4 cup full-fat coconut milk at room temperature, 300 mL
- 1/3 cup coconut cream, 80 g
For Topping (Optional):
- whipped coconut cream or dairy-free whipped cream of choice
- peanuts
- melted chocolate
Instructions
-
If using whole blanched almonds, add them to a food processor or high-speed blender and pulse until a fine consistency of almond flour is achieved.
-
In a large bowl, mix all the crust ingredients (almond flour, coconut flour, cocoa powder, melted coconut oil, maple syrup, and salt) together until well combined and crumbly.
-
Transfer the crust mixture into a 7 or 8-inch pie tin and firmly press it down onto the bottom and sides of the tin using your fingers. Place the crust in the freezer to chill while you prepare the peanut butter pie filling.
-
In a separate bowl, whisk together the coconut milk, coconut cream, and maple syrup until combined and smooth. Stir in the creamy peanut butter and ground flax seeds until the mixture is thoroughly combined and creamy.
-
Pour the peanut butter filling into the chilled crust and gently spread it evenly. Let the pie set for 3-4 hours in the fridge, or preferably overnight, until firm.
-
Before serving, top the pie with whipped coconut cream and drizzle with melted chocolate. Garnish with chopped peanuts, if desired, and serve chilled.
Notes
If you do not have a pie or tart pan, you can successfully use a springform pan or an 8-inch square baking pan lined with parchment paper for easy removal.
This pie must be stored in the fridge or freezer. It can be stored in the fridge for up to 1 week or in the freezer for up to 3 months. If frozen, thaw briefly at room temperature or in the fridge before serving for the best texture.
To make your own delicious whipped cream topping, whip together 1/2 cup of chilled coconut cream with 1/4 cup of maple syrup or powdered sugar, adjusted to your taste.
Nutrition
Serving:
1
slice
,
Calories:
473
kcal
,
Carbohydrates:
36
g
,
Protein:
13
g
,
Fat:
28
g
,
Sodium:
187
mg
,
Fiber:
9
g
,
Sugar:
20
g