
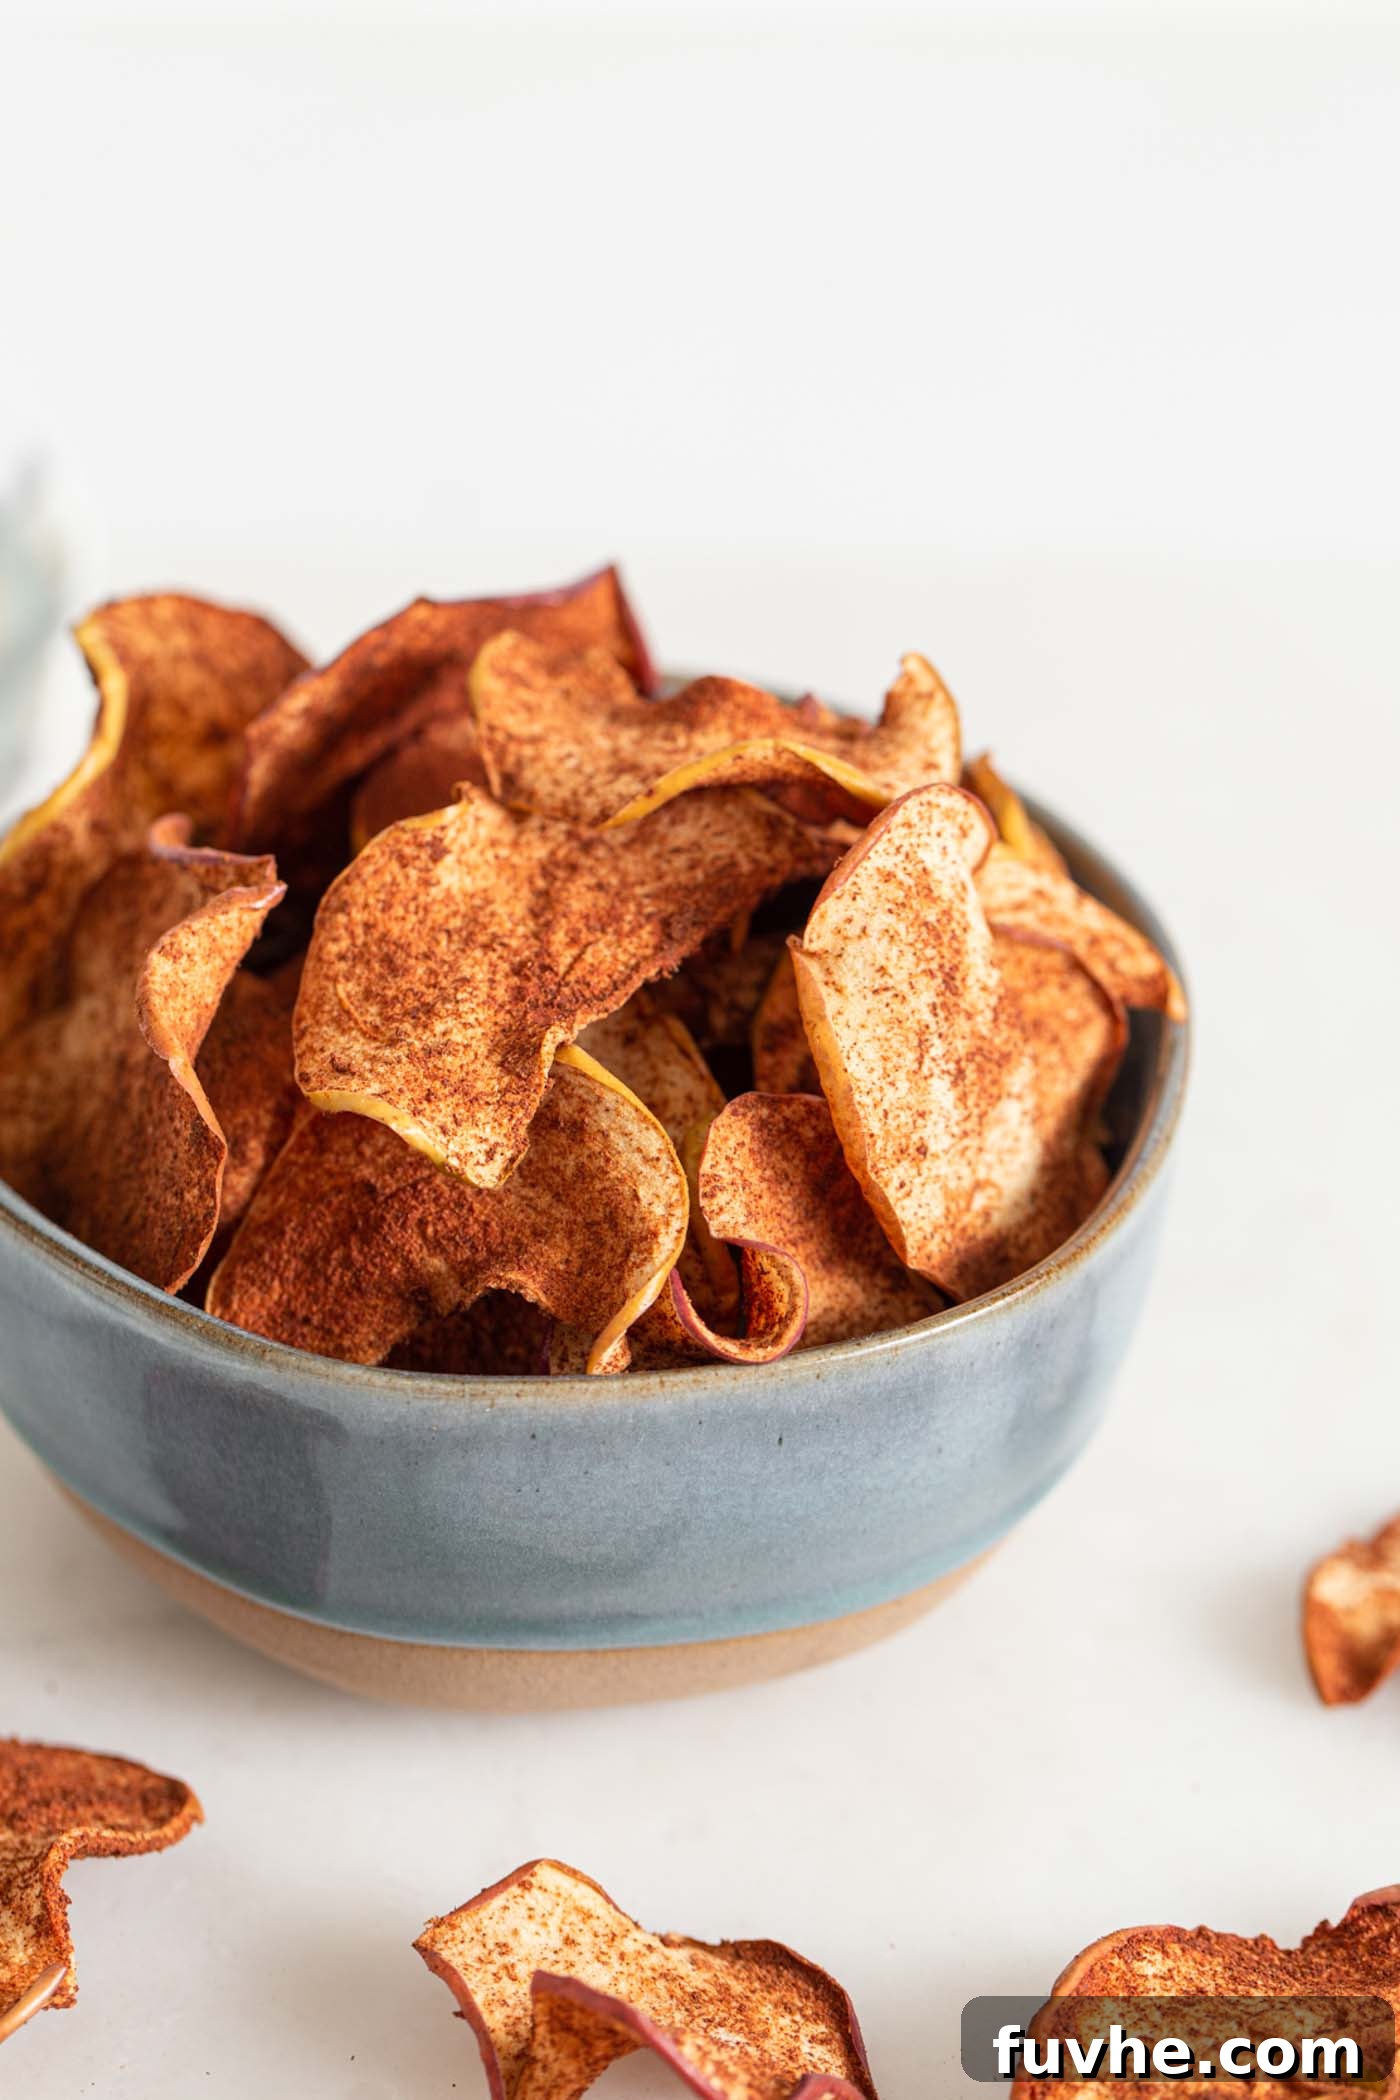
Discover the delightful simplicity of homemade baked cinnamon apple chips – a truly wholesome and irresistible snack requiring just two main ingredients. This recipe transforms crisp apples into crunchy, naturally sweet treats, perfect for satisfying cravings without any guilt. Whether you’re seeking a healthy snack for your kids, a light dessert, or a flavorful autumn delight, these apple chips are incredibly easy to prepare and absolutely delicious. Each bite delivers a burst of apple flavor enhanced by the warm notes of cinnamon, creating an experience that’s both comforting and refreshing.
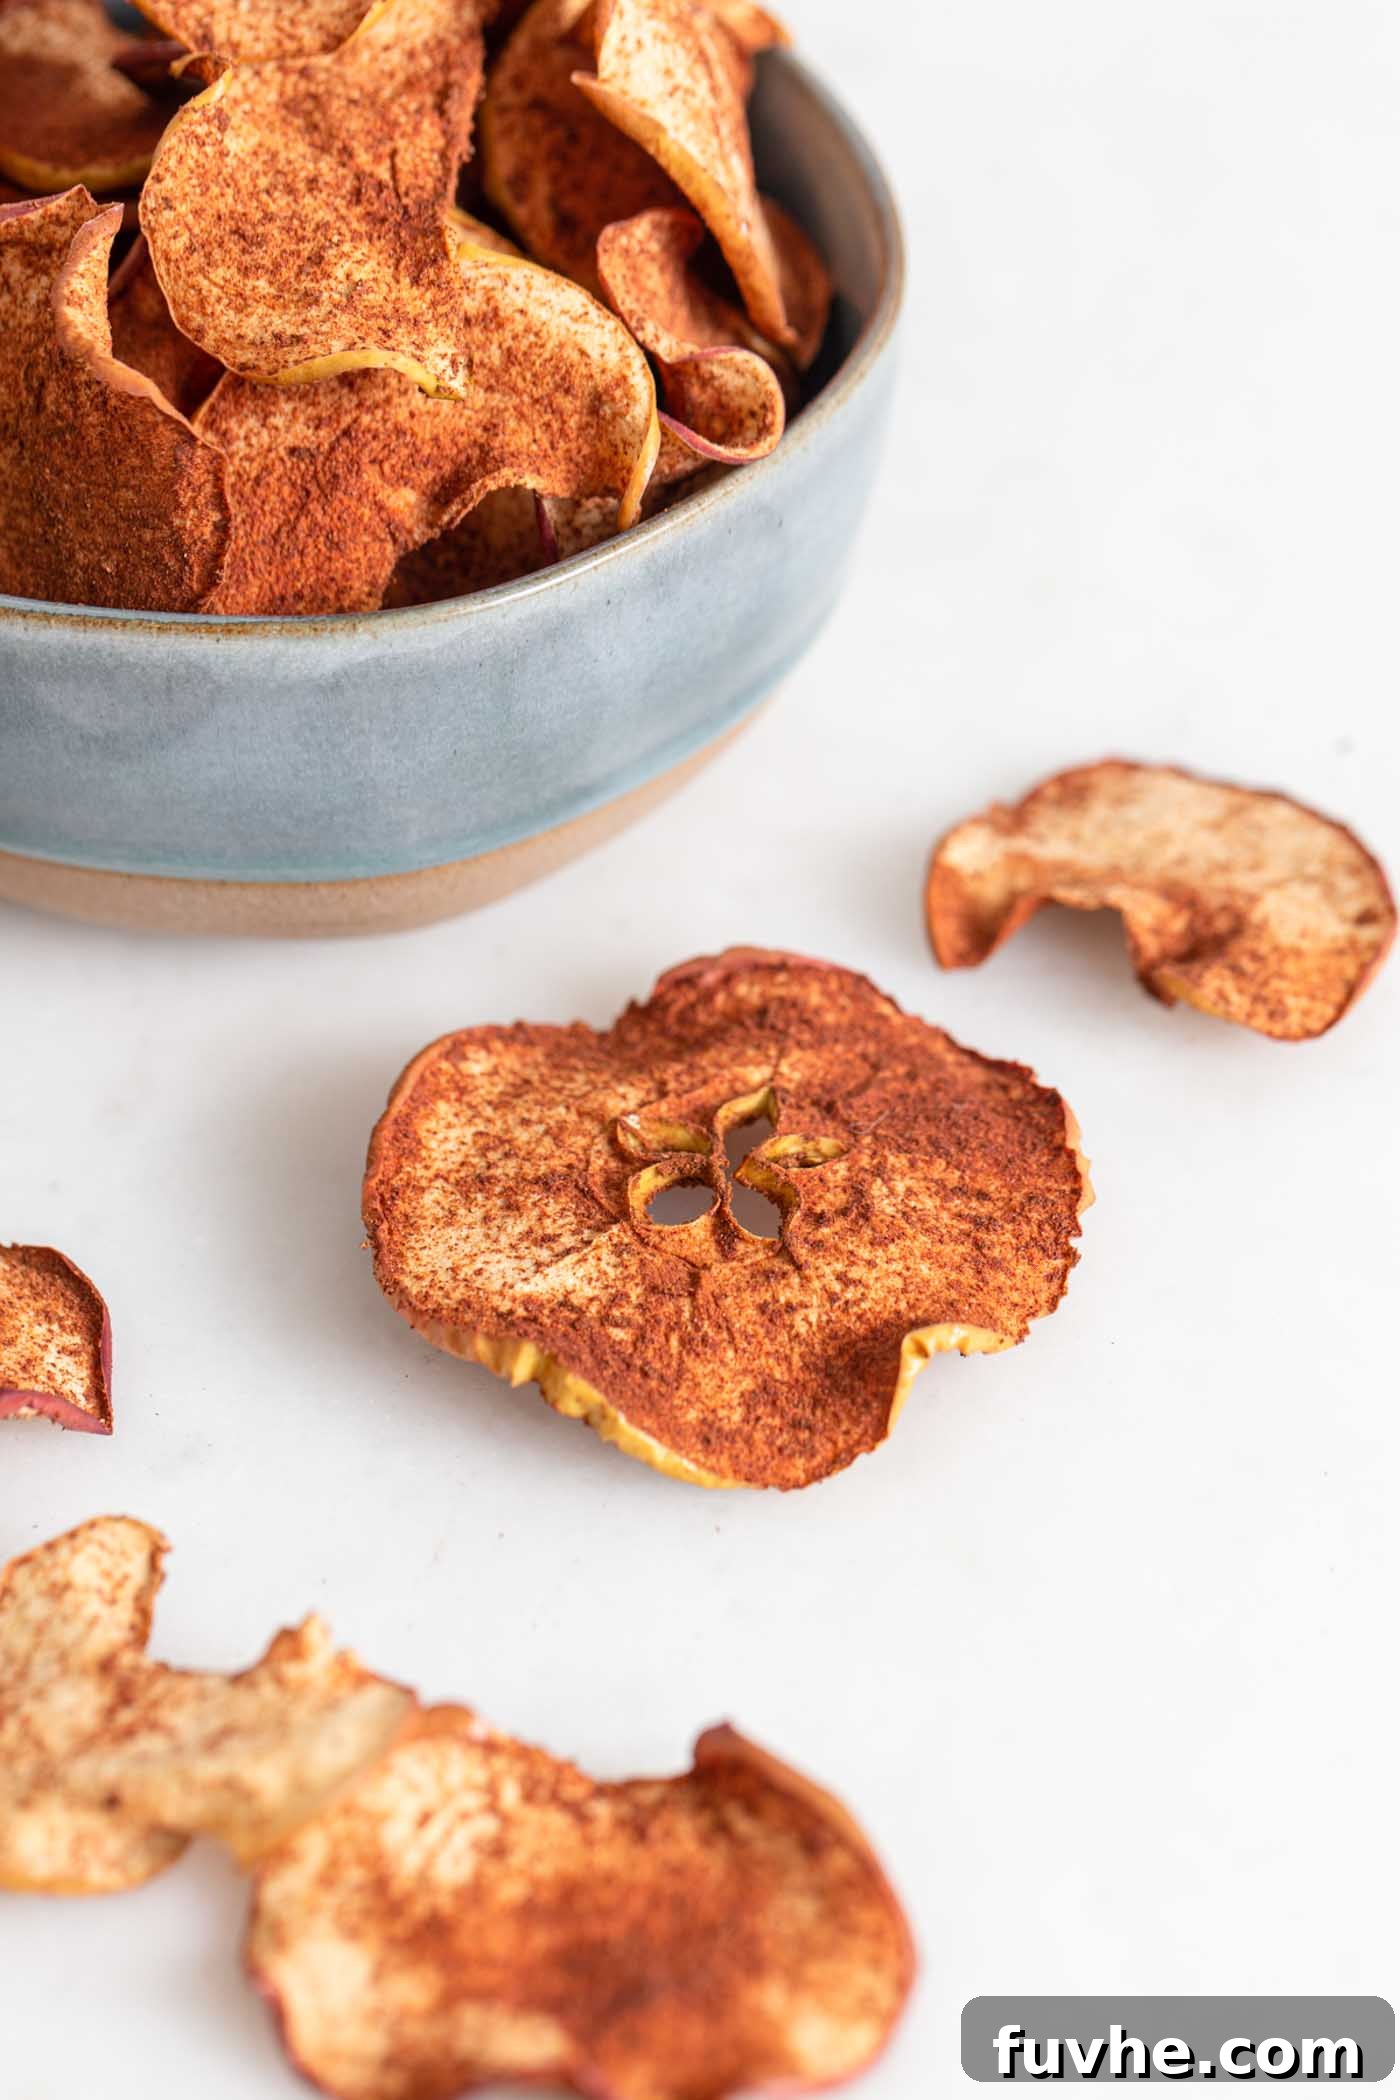
Not only are these cinnamon apple chips incredibly tasty, but they also boast impressive dietary credentials. This recipe is naturally **vegan**, **gluten-free**, and contains **no added sugar or oil**, making them a fantastic choice for those with specific dietary preferences or anyone aiming for a cleaner eating lifestyle. They’re an ideal snack for both kids and adults, providing a boost of natural energy and fiber. Their natural sweetness means you don’t need to add anything extra, keeping them light and healthy. While delicious year-round, they truly shine as a comforting treat during the cozy fall months, filling your home with an inviting aroma of baked apples and cinnamon. This simple process of dehydrating apples at a low temperature not only preserves their nutritional value but also concentrates their flavor, making them a satisfying and nutrient-dense option.
Making your own apple chips is a rewarding experience, offering a healthier and more cost-effective alternative to heavily processed, store-bought versions. You have complete control over the ingredients, ensuring a pure, unadulterated snack free from preservatives, artificial flavors, and unwanted additives. The preparation process is surprisingly straightforward, requiring minimal effort for maximum flavor payoff and the joy of creating something truly wholesome from scratch. Plus, it’s a fantastic way to utilize a surplus of apples from a farmer’s market haul or an autumn apple-picking adventure. If you find yourself with an abundance of fresh apples, don’t stop here! Explore other delightful apple creations like our Cinnamon Baked Apple Slices or indulge in our hearty Vegan Stuffed Baked Apples for more apple-inspired culinary adventures.
Why You’ll Adore These Healthy Baked Apple Chips
There are countless reasons to fall in love with these simple yet satisfying baked apple chips. They perfectly blend convenience, health, and incredible flavor, making them a staple in any healthy kitchen.
- Incredibly Simple to Make: With just two core ingredients – apples and cinnamon – this recipe is foolproof, even for novice bakers. The steps are straightforward, making it an ideal activity for a relaxed afternoon.
- Naturally Healthy & Guilt-Free: These chips are a powerhouse of nutrition without any of the bad stuff. Free from added sugars, unhealthy oils, and artificial preservatives, they are a pure, wholesome snack. Apples provide essential fiber, vitamins, and antioxidants, while cinnamon offers additional health benefits.
- Perfect for Various Diets: Naturally **vegan** and **gluten-free**, these apple chips are suitable for a wide range of dietary needs and preferences. They’re also an excellent choice for those managing sugar intake or looking for low-calorie snack options.
- A Kid-Friendly Favorite: The sweet, crispy texture of these baked apple chips makes them an instant hit with children. They’re a smart and delicious way to encourage kids to eat more fruit, offering a much healthier alternative to processed snacks.
- Fills Your Home with an Amazing Aroma: As the apples slowly bake, they release a beautiful, warm, and inviting scent of baked fruit and cinnamon. This natural aromatherapy is particularly delightful during autumn and creates a cozy atmosphere in your home.
- Highly Versatile: Enjoy these chips straight out of the container as a standalone snack, or get creative with them! They make a fantastic topping for yogurt parfaits, oatmeal, smoothie bowls, or even a healthy crunch element for salads.
- Reduces Food Waste: This recipe is a brilliant way to use up an abundance of apples that might otherwise go to waste. Transform slightly bruised or extra apples into a delicious, long-lasting snack.
- Cost-Effective: Making your own snacks can save money compared to buying expensive store-bought alternatives, especially for healthy, specialized options.
Minimal Ingredients, Maximum Flavor: What You’ll Need
You might be pleasantly surprised to learn that achieving these perfectly crispy, aromatic, and flavorful apple chips requires an incredibly short list of ingredients – just two! All you truly need are fresh, ripe apples and a sprinkle of warm, comforting cinnamon. This simplicity highlights the natural deliciousness of the fruit itself.
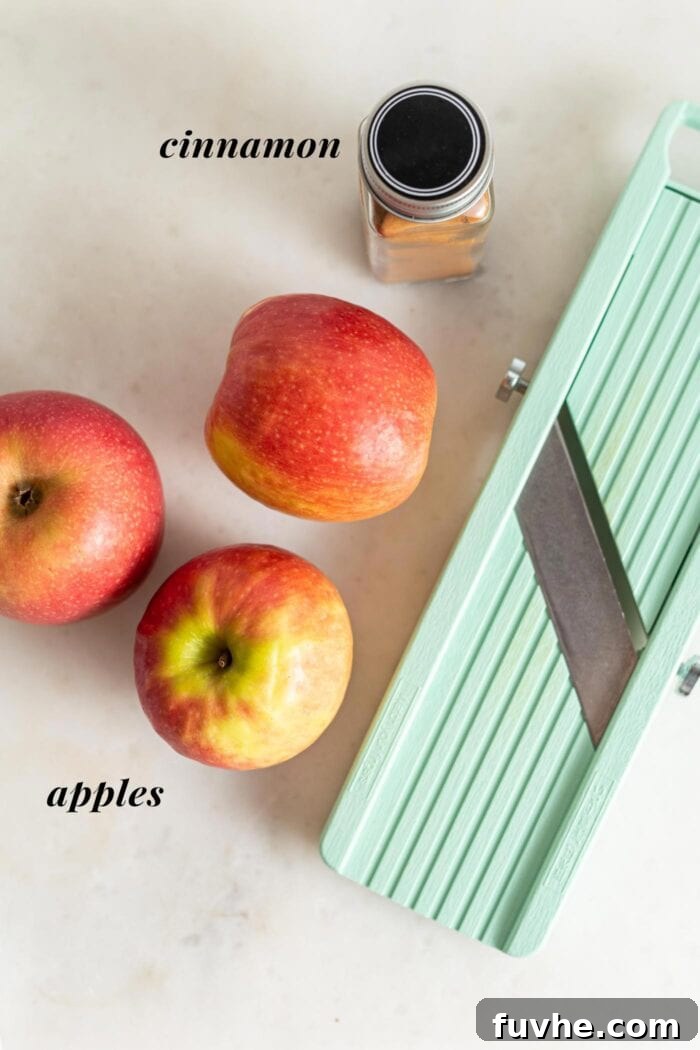
- Apples: The undisputed star of our delicious chips! While nearly any apple variety will work in a pinch, selecting the right type can significantly enhance the texture, sweetness, and overall flavor of your finished product. For the best, crispiest, and most naturally sweet results, I highly recommend using firm, sweet, and crunchy varieties. Excellent choices include **Gala, Honeycrisp, Pink Lady, or Fuji**. These apples hold their structure exceptionally well during the slow baking process, preventing them from becoming mushy, and offer a delightful natural sweetness that requires no additional sugar. If you prefer a slightly tart profile, **Granny Smith** apples are an excellent choice; just be aware that their tartness will be more pronounced in the dehydrated chip form. Avoid overly soft, mealy, or bruised apple varieties, as they tend to yield less-than-ideal, chewy rather than crispy, results. You’ll typically need about 2-4 medium-sized apples, which will yield a good batch of chips depending on their size and how thinly they are sliced.
- Cinnamon: This warm, fragrant spice is a quintessential partner to apples, elevating their natural sweetness and adding a comforting depth of flavor that is synonymous with cozy fall treats. While a sprinkle of **cinnamon** is a truly lovely addition and highly recommended for its warm, aromatic qualities, it is completely optional. The chips are delicious even without it, allowing the pure apple flavor to shine. Feel free to adjust the amount of cinnamon to your personal preference – use as much or as little as you like, or even skip it altogether. For those who enjoy experimenting with flavors and adding a touch more complexity, consider introducing a tiny pinch of ground **nutmeg** or **ginger** alongside the cinnamon for an extra layer of warmth and spice. If you’re craving a slightly sweeter treat, a small pinch of **coconut sugar** or **brown sugar** (ensure it’s finely ground or powdered to adhere well) mixed with the cinnamon can create a wonderfully caramelized edge and a more dessert-like experience without making them overly sweet or unhealthy.
Essential Kitchen Tools for Apple Chip Success
While the ingredient list is refreshingly minimal, having the right tools on hand can significantly streamline the preparation process and ensure you achieve the best possible outcome for your crispy baked apple chips.
- Mandoline Slicer: This tool is highly recommended and truly a game-changer for achieving consistently thin and perfectly even apple slices. Uniform slices are absolutely crucial for uniform baking and ultimately, for achieving that coveted all-over crispiness. A good mandoline will make the prep work quick, effortless, and precise.
- Sharp Chef’s Knife: If you don’t have a mandoline, don’t despair! A very sharp chef’s knife and a steady hand can still produce thin slices. The key is to take your time and aim for as much consistency as possible in thickness.
- Apple Corer (Optional but Handy): A convenient tool for quickly removing the apple core before you begin slicing. While not strictly essential (you can remove seeds after slicing), it can save a bit of time and effort, especially if you’re making a large batch.
- Large Baking Sheets: You will likely need one or two large baking sheets to ensure you can arrange all your apple slices in a single layer without overcrowding. Overcrowding leads to steaming, not crisping.
- Parchment Paper or Silicone Baking Mats: Absolutely essential for lining your baking sheets! These prevent the thinly sliced apples from sticking to the pan and also aid in promoting even airflow and crisping. Silicone mats, in particular, are excellent for this purpose and make cleanup a breeze.
- Large Mixing Bowl: A spacious bowl is perfect for tossing the apple slices evenly with cinnamon or any other chosen spices, ensuring every piece is beautifully coated.
- Tongs or Spatula: Useful for carefully flipping the delicate apple slices halfway through the baking process.
Step-by-Step Instructions for Perfectly Crispy Cinnamon Apple Chips
Creating these healthy and delicious baked apple chips is a simple and rewarding process. Paying close attention to a few key details will ensure you achieve perfectly crispy results every single time. Follow these detailed steps for an effortless and satisfying snack:
- Prepare Your Oven: Begin by preheating your oven to a low temperature of 220°F (105°C). This low and slow baking temperature is absolutely crucial for the success of apple chips, as it gradually dehydrates the apples, allowing them to crisp up beautifully without burning or cooking too quickly.
- Wash and Core the Apples: Start by thoroughly washing your apples under cool running water. Pat them dry. If you have an apple corer, now is the ideal time to use it to remove the core from each apple before you start slicing. This step can save you time and make the slicing process smoother. If you don’t own a corer, no worries – simply proceed to thinly slice the apples first, then carefully remove any visible seeds as you go.
Achieving Consistent Slices: The Golden Rule for Crispiness! For the very best results, the most critical step is to aim for apple slices that are consistently thin, ideally between 1/16 to 1/8 inch thick. Uniform thickness is paramount for even baking; thicker slices will take significantly longer to crisp up and might remain chewy, while much thinner ones could burn if baked alongside thicker pieces. A mandoline slicer is truly your best friend here, as it effortlessly creates perfect, uniform slices, maximizing your chances for an even and super crispy batch.
No Mandoline? No Problem! Try This Knife Technique: If you don’t own a mandoline slicer, a very sharp chef’s knife can still get the job done effectively. To achieve the thinnest possible slices, first cut the apple into quarters or halves to create a flat surface. Then, lay the apple piece cut-side down and carefully slice away from yourself. Take your time, focus on precision, and do your absolute best to create slices that are as thin and even as possible. Patience and a steady hand are key here to achieving consistency.
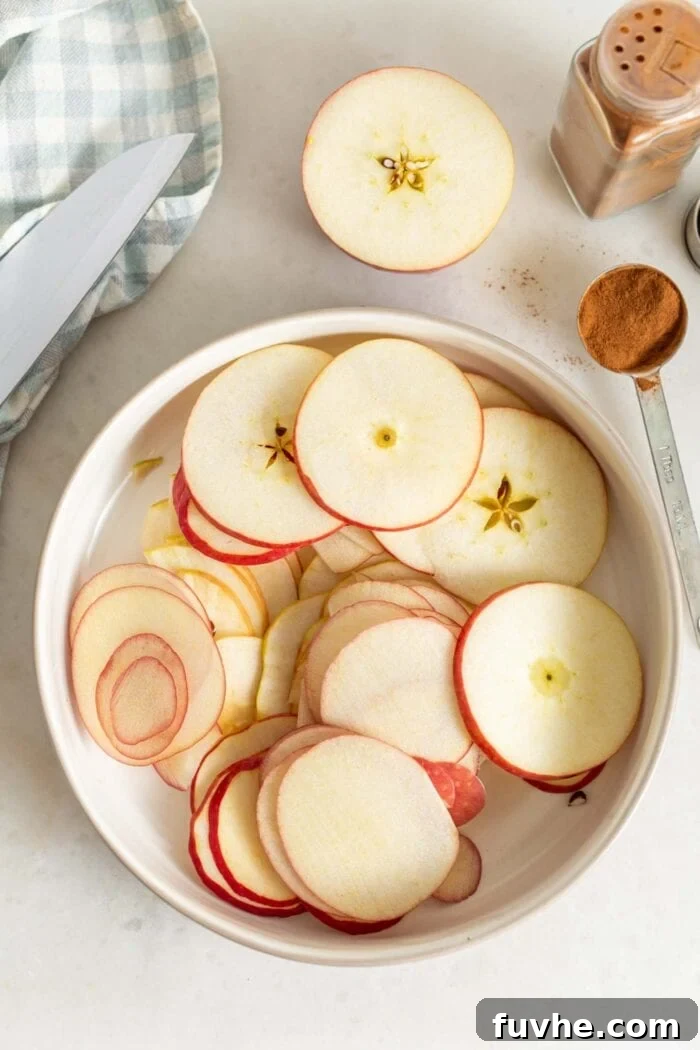
- Season the Apple Slices: Transfer your thinly sliced apples into a large mixing bowl. Generously sprinkle them with your desired amount of cinnamon. I recommend starting with about 1/2 to 1 teaspoon of cinnamon for 2-4 medium apples, then adjusting according to your taste preferences. Using your clean hands (or a spatula for delicate handling), gently toss and mix the apple slices until each and every piece is thoroughly coated on both sides with the cinnamon. This hands-on approach ensures an even distribution of flavor. While you could sprinkle cinnamon directly on the baking sheet, mixing in a bowl beforehand provides a far superior and more consistent coating.
Quick Tip: Customize Your Spice & Sweetness! Cinnamon is a beloved classic, but feel free to let your culinary creativity shine. Remember, the chips are absolutely delicious even without any spices. Other warm spices that pair beautifully with apples include a tiny pinch of ground **nutmeg** or **ginger** for added depth. For those who enjoy a slightly sweeter profile, a light dusting of finely ground **coconut sugar** or a tiny bit of powdered **brown sugar** mixed with the cinnamon can add a lovely caramelized note and enhance the dessert-like quality of the chips, without making them overly sugary.
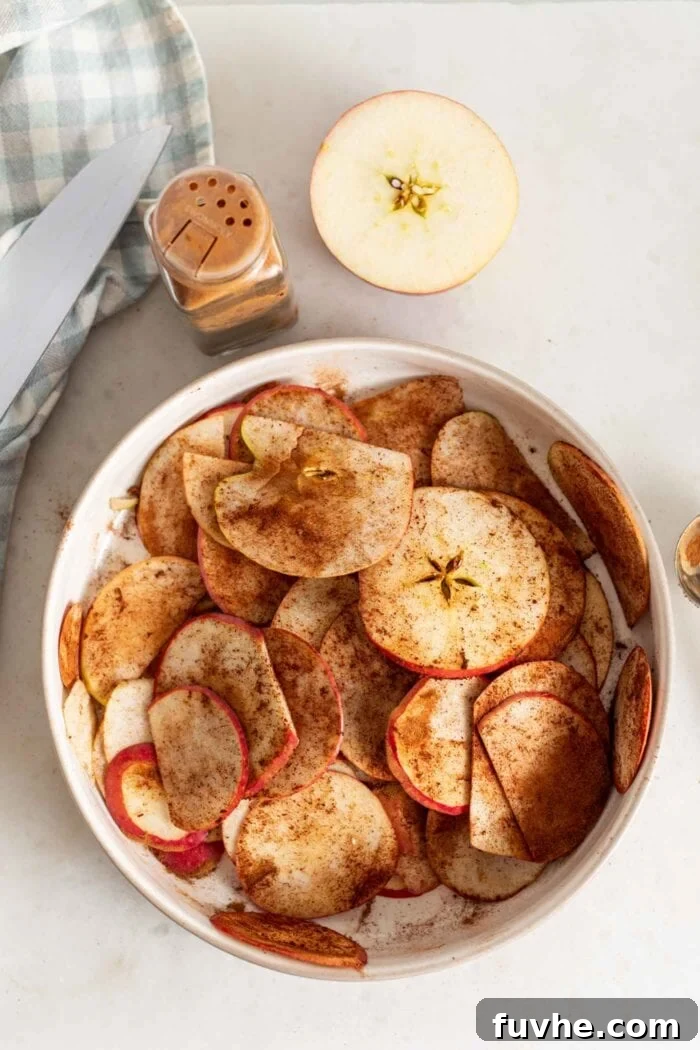
- Arrange on Baking Sheets: Line one or two large baking sheets with parchment paper or a reusable silicone baking mat. This step is absolutely crucial to prevent the delicate apple slices from sticking to the pan during their long bake and to facilitate proper crisping. Carefully arrange the seasoned apple slices in a single layer on the prepared trays. It is extremely important to ensure that none of the slices are overlapping. Overlapping slices will steam rather than bake, resulting in chewy, soggy spots instead of uniformly crisp chips. You will likely need two trays, or even more, depending on the quantity of apples you are baking.
- The Two-Hour Bake Cycle: Place the baking sheets in your preheated 220°F (105°C) oven. Bake for an initial 1 hour. After this first hour, carefully remove the trays from the oven. Using a pair of tongs or a thin spatula, gently flip each individual apple slice. This action ensures both sides are exposed to the heat evenly, promoting uniform dehydration and crispiness. Return the trays to the oven and continue baking for another hour.
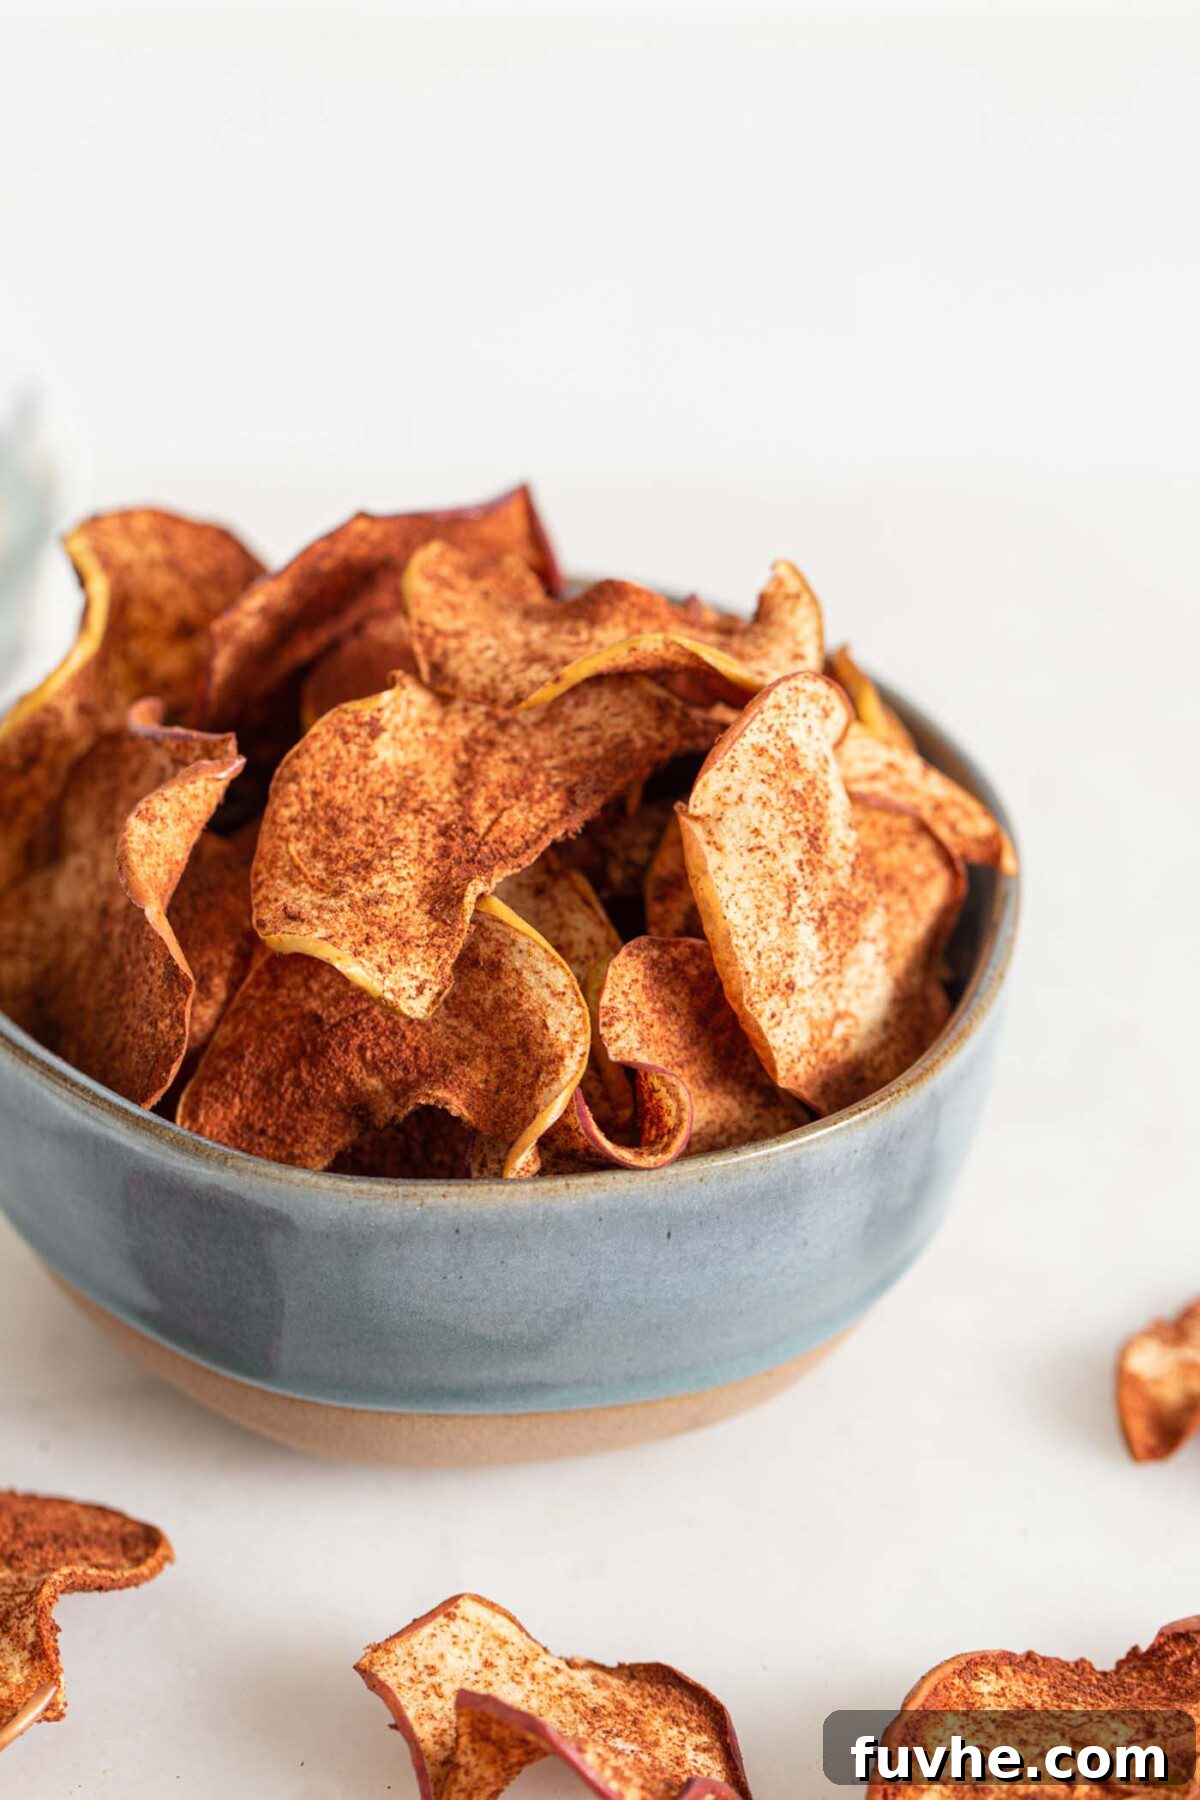
- The Cooling Secret for Ultimate Crispness: Once the second hour of baking is complete, turn off your oven. This next step is a secret weapon for achieving maximum crispiness: **leave the apple chips inside the oven as it cools down completely.** This slow cooling process, utilizing the residual heat, continues to gently dehydrate any remaining moisture in the apples, making them incredibly crisp. Resist the urge to open the oven door during this time, as it will release the heat too quickly. The chips will continue to crisp up significantly as they cool to room temperature, which can take anywhere from 30 minutes to a couple of hours, depending on your oven’s insulation.
Expert Tips for Achieving the Crispiest Baked Apple Chips
While making apple chips is straightforward, a few expert tips can elevate your results from good to perfectly crisp every time. Follow these guidelines for snack perfection:
- Slice Them as Thin and Even as Possible: This cannot be stressed enough – it is the single most critical step! Thinner slices mean quicker and more thorough dehydration, which directly translates to crispier chips. Aim for slices that are almost translucent. Using a mandoline slicer is highly recommended for achieving this consistency effortlessly.
- Avoid Overlapping on the Tray: Always arrange your apple slices in a single layer on the baking sheets. Ensure there is adequate space between each slice. Overlapping slices will trap moisture and steam instead of baking, resulting in chewy, soft spots rather than crispy chips. If you have too many slices, use multiple trays.
- Embrace Low and Slow Baking: The low oven temperature (220°F/105°C) is essential. Resist the urge to crank up the heat to speed up the process. A slow, gentle bake slowly dries out the moisture from the apples, allowing them to crisp up thoroughly without burning.
- Don’t Forget to Flip Mid-Baking: Flipping the chips halfway through the baking process (after the first hour) ensures even exposure to heat and air on both sides. This promotes uniform dehydration and contributes significantly to an all-over crisp texture.
- The “Cool in the Oven” Secret: This step is a game-changer! Once the baking time is complete, turn off your oven and leave the apple chips inside as the oven cools down completely. The residual heat will continue to slowly evaporate any remaining moisture, further crisping them up. They will become even crisper as they reach room temperature.
- Listen for the Crunch: Properly baked apple chips should feel dry to the touch and have a distinct snap when broken. If they still feel bendy or soft after cooling, they might need a little more time in a very low oven or could be gently reheated to crisp them up.
- Trial and Error with Thickness: Every oven is different, and apple varieties vary. If your chips aren’t crispy enough, try slicing them even thinner next time. Conversely, if they seem to brown or burn too quickly, slightly thicker slices might be better for your specific oven’s heat distribution.
Creative Variations and Delightful Serving Suggestions
These baked cinnamon apple chips are wonderfully versatile, offering a simple canvas for culinary creativity. Here are some ideas to customize them and how to best enjoy them:
Flavor Variations:
- Enhanced Spiced Sweetness: Beyond just cinnamon, explore a broader spectrum of warm baking spices. Try a mix of apple pie spices like a pinch of allspice, a hint of ground cardamom, or a touch of cloves for a more complex and festive flavor profile.
- Subtle Vanilla Bean: For an elegant and aromatic touch, scrape a tiny bit of fresh vanilla bean seeds onto your apple slices before baking. The delicate vanilla flavor complements the apples beautifully.
- Bright Citrus Zest: A touch of finely grated lemon or orange zest sprinkled over the apples before baking can add a wonderfully bright, fresh, and slightly tangy note that cuts through the sweetness.
- A Touch More Sweetness: If you desire a slightly sweeter chip, but still want to keep it healthier, sprinkle a tiny amount of maple sugar, date sugar, or a natural sugar-free sweetener (like erythritol or stevia blend) along with the cinnamon. Ensure it’s finely ground to adhere well.
- Savory Twist: For an unexpected savory snack, skip the cinnamon entirely and instead sprinkle the apple slices with a pinch of sea salt and a very light dusting of black pepper or a subtle herb like thyme before baking.
How to Enjoy Your Delicious Apple Chips:
These versatile chips aren’t just for snacking! Here are some creative ways to incorporate them into your meals and treats:
- Standalone Healthy Snack: The most straightforward and satisfying way! Enjoy them straight from the jar or bag as a convenient, wholesome, and incredibly addictive snack anytime hunger strikes.
- Crunchy Topping for Breakfast: Crumble your baked apple chips over Greek yogurt, dairy-free yogurt, oatmeal, or blend them into smoothie bowls for an added layer of delightful crunch and concentrated apple flavor.
- Unique Salad Garnish: Add a surprising and delicious crunch to your green salads. They pair exceptionally well with autumnal salads featuring ingredients like toasted pecans, walnuts, goat cheese (or vegan feta), and a light vinaigrette.
- Healthy Dessert Topping: Elevate your desserts! Use them to top fruit crumbles, baked apples, vegan ice cream, dairy-free puddings, or even a simple baked sweet potato for a healthier and flavorful textural contrast.
- Homemade Trail Mix Addition: Incorporate them into your homemade trail mixes alongside nuts, seeds, dried cranberries, and a few dark chocolate chips for a wholesome energy boost that’s perfect for hiking or a midday pick-me-up.
- Decorative Edible Garnish: Use a few perfectly formed apple chips as an elegant, edible garnish for platters, cheeseboards, or even cocktails.
Storing Your Delicious Baked Apple Chips
Proper storage is paramount to maintaining the delightful crispness and extending the shelf life of your homemade baked cinnamon apple chips. Following these simple guidelines will ensure they remain fresh and crunchy for as long as possible:
- Cool Completely Before Storing: Before attempting to transfer your apple chips to any storage container, it is absolutely essential to let them cool down completely to room temperature. This is best done on the baking pan itself, or even better, transferred to a wire cooling rack after removing from the oven. Any residual warmth, even slight, will create condensation inside an airtight container, which will quickly turn your perfectly crispy chips soft and potentially lead to spoilage or mold. Patience here is key!
- Use an Airtight Container: Once fully cooled and thoroughly dry, transfer the chips to an airtight container. This type of container is crucial as it prevents moisture from the surrounding air from softening the chips and helps to preserve their crispy texture. Glass jars with tight-fitting lids, food-grade plastic containers, or even resealable bags can work well, provided they are truly airtight.
- Room Temperature Storage: Store the airtight container at room temperature, in a cool, dry place away from direct sunlight or sources of excessive heat (like near an oven or sunny window). A pantry or cupboard is ideal. Refrigeration is generally not recommended as the humidity inside a refrigerator can make them soggy.
- Optimal Shelf Life: When stored correctly in an airtight container at room temperature, these baked cinnamon apple chips will retain their optimal crispness and delicious flavor for up to 1 week. Beyond that, they might start to lose some of their crunch, though they will still be safe to eat.
- Re-Crisping (If Needed): If your apple chips happen to lose some of their crispness over time (perhaps due to humidity), you can easily refresh them. Simply spread them out on a baking sheet and reheat them in a low oven (around 200°F/95°C) for 10-15 minutes, or until they feel crisp again. Let them cool completely before re-storing.
Explore More Delicious Apple Recipes
Apples are incredibly versatile and offer endless culinary possibilities, spanning from breakfast delights to comforting desserts. If you love working with apples and enjoyed making these chips, be sure to explore these other fantastic and flavorful recipes:
- Slow Cooker Apple Butter: A rich, concentrated, and naturally sweet apple spread, perfect for slathering on toast, swirling into oatmeal, or incorporating into baked goods.
- Vegan Apple Crumble Bars: A delightful dessert or substantial snack featuring a tender, spiced apple filling nestled between a buttery (vegan) shortbread base and a crispy crumble topping.
- Gluten-Free Apple Cranberry Crisp: A warm, comforting, and irresistibly flavorful dessert that’s perfect for gatherings or a cozy night in, boasting sweet apples and tart cranberries under a crunchy gluten-free oat topping.
- Apple Pie Overnight Oats: A convenient, healthy, and incredibly tasty breakfast option that captures all the comforting flavors of apple pie in an easy-to-prepare jar.

★
★
★
★
Baked Cinnamon Apple Chips
Deryn Macey
10
2
2
10
2
cups
Pin Recipe
Print Recipe
Ingredients
-
2-4
apples -
cinnamon,
as needed
Instructions
-
Pre-heat oven to 220°F (105°C).
-
Core the apples if you have an apple corer. If not, go ahead and slice them into thin, even rounds (about 1/16-1/8 inch thick) using a sharp knife or mandoline slicer, removing any seeds as you go. For best results, aim for consistent slices so they bake evenly.
-
Place the slices in a bowl and sprinkle with cinnamon (1/2-1 tsp to start, depending on the number of apples). Use your hands to mix so that each apple slice is thoroughly coated on both sides. Optionally, you can skip this step and bake them without cinnamon.
-
Arrange the apple slices in a single layer on a silicone mat or parchment paper-lined baking sheet, ensuring no slices overlap. Bake for 1 hour, then remove from the oven and carefully flip each slice. Bake for another hour, then turn the oven off and leave them in the cooling oven until completely cooled to achieve maximum crispness.
Notes
Storage: Store completely cooled apple chips in an airtight container at room temperature for up to 1 week. Ensure they are fully cooled before storing to maintain crispness.
Spices and Additions: Cinnamon is optional but highly recommended for its warm aroma. For variety, try adding a tiny pinch of nutmeg or ginger. For a slightly sweeter treat, lightly dust with finely ground coconut sugar or powdered brown sugar along with the cinnamon.
Nutrition Facts
Serving:
1
apple
,
Calories:
95
kcal
,
Carbohydrates:
25
g
,
Protein:
0.5
g
,
Fiber:
4.5
g
,
Sugar:
18
g
Like this recipe? We’d love to hear from you!
Share your thoughts and ratings in the comments below!
Originally published on November 17, 2017. Updated with new photos and expanded text on September 21, 2020.