
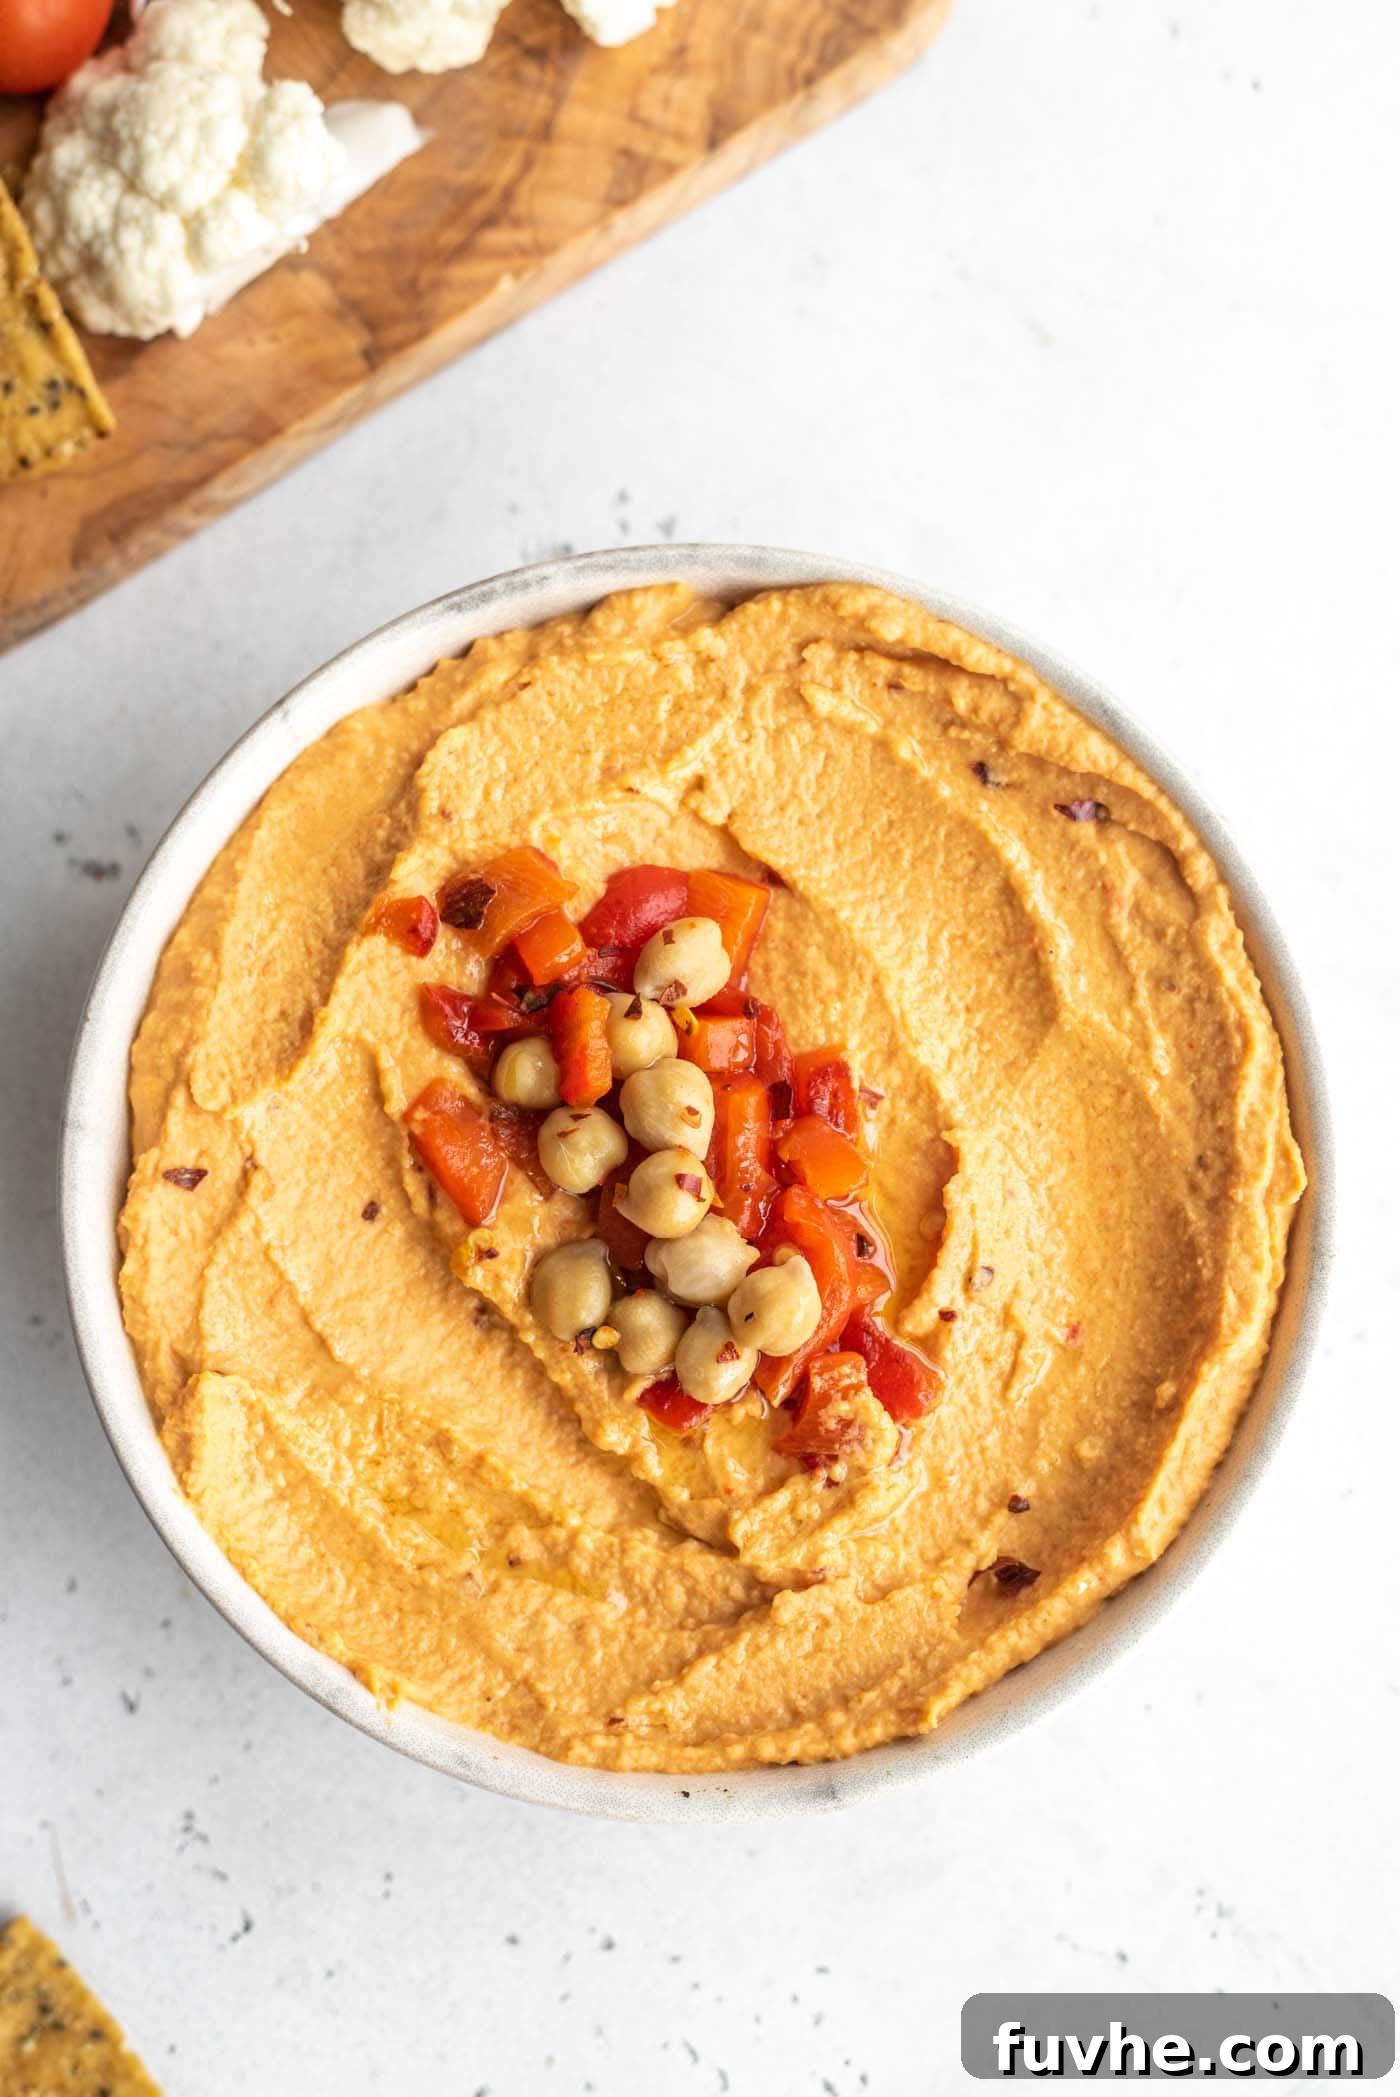
Transform simple ingredients into an extraordinary culinary delight with this incredibly easy and luscious Roasted Red Pepper Hummus recipe. Perfect as a vibrant dip, a wholesome spread, or a flavorful addition to countless meals, this homemade hummus stands out for its deep, smoky-sweet flavor derived from freshly roasted red peppers. Not only is it a treat for your taste buds, but it also caters to a healthy lifestyle, being completely vegan, oil-free, low in fat, and sugar-free. Get ready to impress your friends and family with this vibrant, creamy, and undeniably delicious dip!
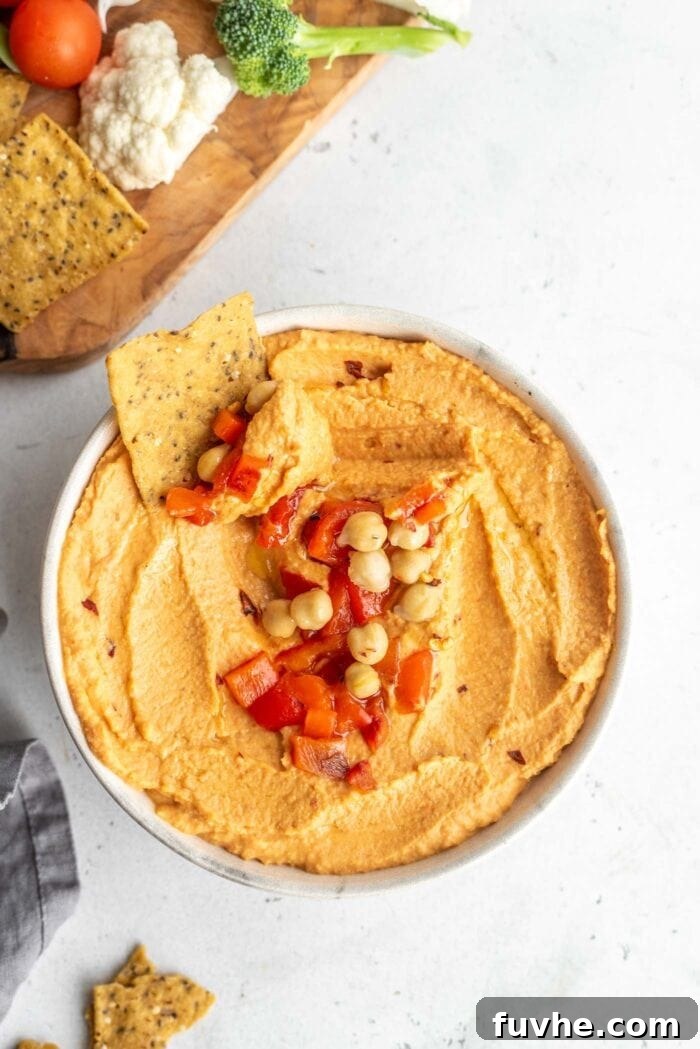
The Undeniable Appeal of Homemade Hummus
While store-bought hummus offers convenience, nothing quite compares to the fresh, vibrant flavors and silky-smooth texture of a batch made right in your own kitchen. This recipe elevates traditional hummus by incorporating roasted red peppers, adding a layer of sophisticated sweetness and smoky depth that’s truly irresistible. Beyond its exceptional taste, making hummus from scratch gives you complete control over the ingredients, allowing you to avoid unnecessary additives, preservatives, and excess oils often found in commercial varieties.
Our roasted red pepper hummus isn’t just delicious; it’s also a powerhouse of nutrition. Crafted with wholesome plant-based ingredients, it’s naturally vegan, completely oil-free, low in saturated fat, and free from added sugars. This makes it an ideal healthy snack or meal component for anyone looking to incorporate more nourishing, plant-forward options into their diet without compromising on flavor.
Essential Ingredients for Your Perfect Red Pepper Hummus
Crafting this phenomenal hummus requires just a handful of quality ingredients. Each component plays a crucial role in building the rich flavor profile and achieving that signature creamy texture. Let’s explore what you’ll need to bring this culinary masterpiece to life:
Roasted Red Peppers: The Heart of the Flavor
The star of this recipe, roasted red peppers, infuse the hummus with a distinctive smoky sweetness and a beautiful reddish-orange hue. While you can use jarred roasted red peppers in a pinch, we highly recommend making your own from scratch. The fresh roasting process at home brings out an unparalleled depth of flavor and aroma that jarred versions simply can’t replicate. It requires a little extra time (about 20-30 minutes for preparation and roasting), but the result is undeniably worth the effort. For a comprehensive guide on achieving perfectly roasted red peppers, you can find all the details on how to roast red bell peppers here.
Chickpeas: The Creamy Foundation
Chickpeas, also known as garbanzo beans, form the essential creamy base of any good hummus. For this recipe, you’ll need approximately two cups of cooked chickpeas, which can be easily obtained from a standard 19-ounce can, drained and thoroughly rinsed. If you prefer to cook your chickpeas from dried, ensure they are cooked until very tender for the smoothest possible hummus. Rinsing canned chickpeas helps remove excess sodium and improves the flavor profile.
Tahini: The Authentic Touch
Tahini, a smooth paste made from ground sesame seeds, is a non-negotiable ingredient for authentic hummus. It provides a rich, nutty flavor and contributes significantly to the characteristic creamy, luxurious texture that defines quality hummus. The consistency of tahini can vary; some brands are quite thick, while others are wonderfully drippy. If your tahini is on the thicker side, you might need to add a touch more water or aquafaba during blending to achieve the desired consistency.
Fresh Lemon Juice: Zesty Brightness
Freshly squeezed lemon juice is another indispensable element. Its bright, zesty acidity cuts through the richness of the tahini and chickpeas, lifting the overall flavor of the hummus and adding a refreshing tang. Always opt for fresh lemon juice over bottled for the best results; the difference in taste is remarkable.
Garlic: Aromatic Depth
Garlic is crucial for adding an aromatic, pungent depth to the hummus. We recommend using two to three cloves of fresh garlic, adjusted to your personal preference for intensity. For an even more complex, mellow flavor, consider using roasted garlic—a delightful variation that adds a sweeter, less sharp garlic note.
Sea Salt & Spices: Balancing and Enhancing Flavor
A good quality sea salt is essential for seasoning, bringing all the flavors together and making them pop. Start with about one teaspoon and adjust to taste, adding more if needed. For that classic Mediterranean warmth, a touch of ground cumin is highly recommended. If you enjoy a little heat, half a teaspoon of cayenne pepper or red pepper flakes will add a lovely kick to your roasted red pepper hummus, and you can always add more for extra spice!
With these simple yet powerful ingredients, you’re well on your way to creating a delectable, healthy, and satisfying homemade dip that will quickly become a staple in your kitchen.
Crafting Your Hummus: A Step-by-Step Guide to Creamy Perfection
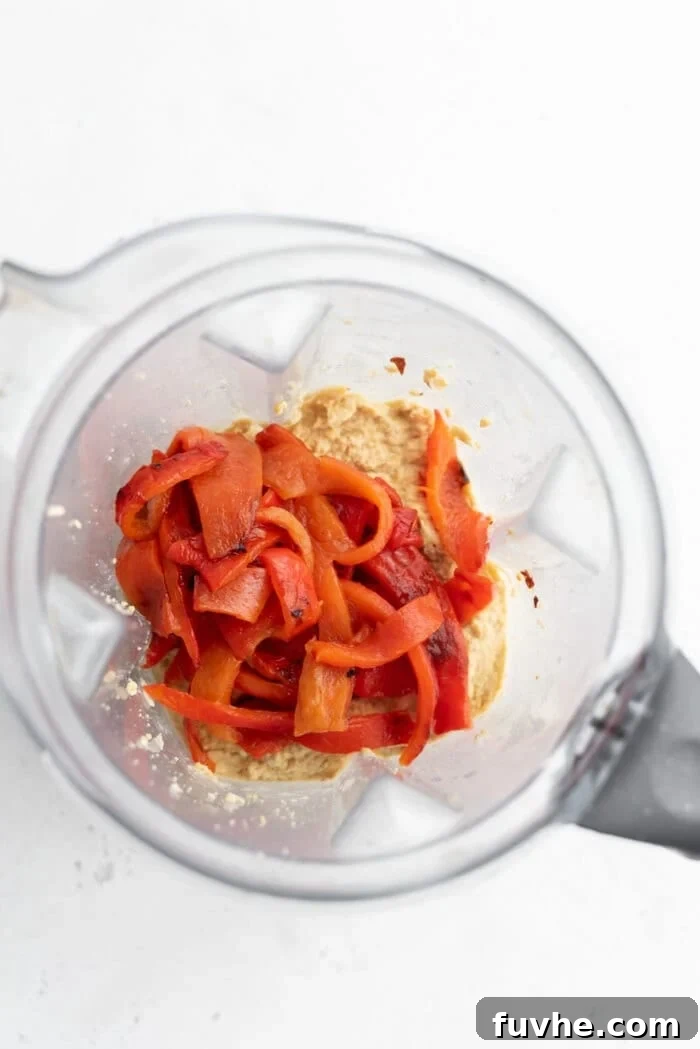
Making this roasted red pepper hummus is a straightforward process, especially if your red peppers are already roasted. The magic happens primarily in your blender or food processor, where the simple ingredients transform into a smooth, luxurious spread.
Roasting Your Red Peppers (If Not Already Prepared)
If you haven’t already roasted your red peppers, this is your first crucial step. The process is simple and yields incredible flavor. Preheat your oven to a high temperature, around 400°F (200°C). Wash and halve your bell peppers, removing the seeds and stems. Place them cut-side down on a baking tray. Roast for about 20-25 minutes, or until the skins are charred and blistered. Immediately transfer the hot peppers to a bowl and cover tightly with plastic wrap or a lid to steam for about 10-15 minutes. This steaming process makes the skins incredibly easy to peel off. Once cooled, peel the skin, remove any remaining seeds, and you’re ready to use them. For a more detailed guide on perfecting this step, refer to our full roasted red peppers recipe linked above.
Blending for Ultimate Smoothness
The key to achieving wonderfully smooth and creamy hummus lies in the blending process. You have two excellent options:
- Food Processor: A food processor is a classic tool for hummus making. It excels at breaking down ingredients evenly and allows for easy scraping down of the sides. If you have a powerful food processor, it will yield a beautifully smooth result.
- High-Speed Blender (e.g., Vitamix): For an exceptionally silky-smooth hummus, a high-speed blender is often the preferred choice, especially if your food processor blades aren’t super sharp. Blenders, like a Vitamix, can create an incredibly fine texture. However, they may require a bit more attention; you’ll need to stop and scrape down the sides more frequently to ensure all ingredients are evenly incorporated.
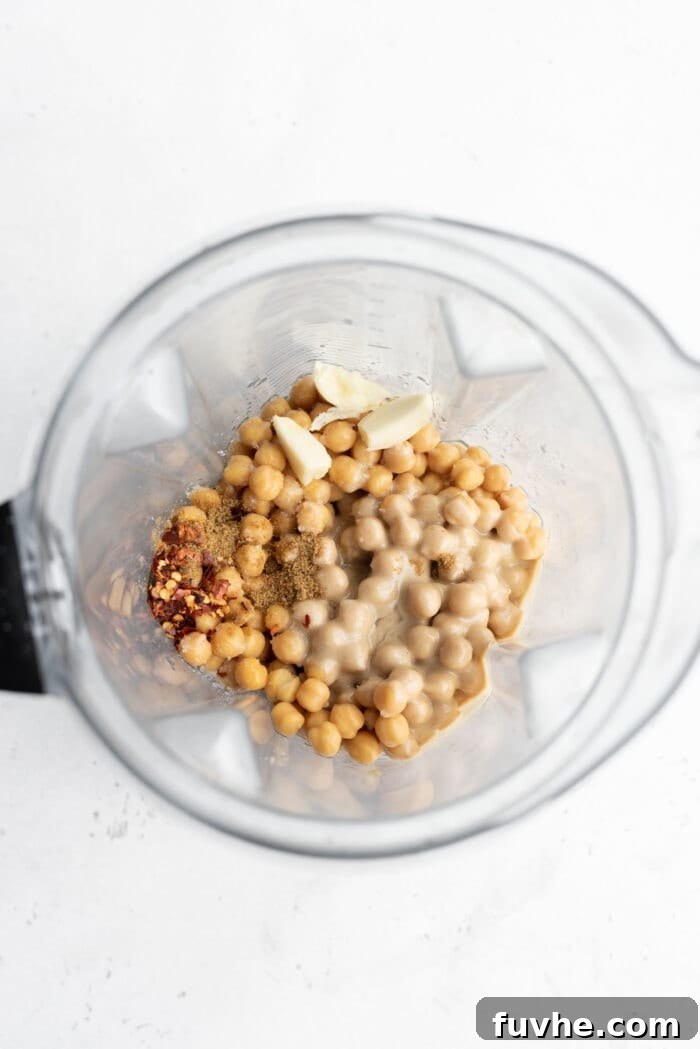
Regardless of the appliance you choose, the blending technique remains similar: Combine all the ingredients—roasted red peppers, chickpeas, tahini, lemon juice, garlic, sea salt, and any optional spices—into the container. Start blending on a low speed, allowing the ingredients to begin breaking down. Gradually increase the speed, stopping as needed to scrape down any mixture clinging to the sides. Continue blending until the hummus is completely smooth, light, and creamy, without any discernible chunks of chickpeas or garlic. Don’t be afraid to let it run for a few minutes to achieve that coveted airy texture. If the mixture is too thick to blend easily, add a tablespoon or two of water or aquafaba (the liquid from a can of chickpeas) until it reaches your desired consistency.
Achieving the Perfect Hummus Consistency
The ideal hummus consistency is a matter of personal preference, but generally, it should be smooth, creamy, and spreadable, not overly thick or runny. Here are a few tips to help you get it just right:
- Too Thick? If your hummus is too dense or struggling to blend, slowly add a tablespoon of cold water or aquafaba (the liquid from the canned chickpeas) at a time, blending after each addition until you reach your desired consistency. Cold water/aquafaba can also contribute to a lighter, fluffier texture.
- Not Smooth Enough? Ensure your chickpeas are very tender. If using canned chickpeas, some people find that peeling the skins off each chickpea (though tedious) results in an incredibly smooth hummus. For most, thorough blending in a powerful machine is sufficient.
- Embrace the Scrape: When using a blender or food processor, especially with smaller batches, the ingredients can stick to the sides. Regularly stop the machine and scrape down the sides with a spatula to ensure everything gets incorporated and blended evenly.
Creative Ways to Enjoy Your Homemade Roasted Red Pepper Hummus
Once you’ve mastered this incredible roasted red pepper hummus, the possibilities for enjoying it are endless. Its rich, savory, and slightly sweet flavor makes it incredibly versatile. Here are some inspiring ideas to make the most of your delicious creation:
As a Classic Dip
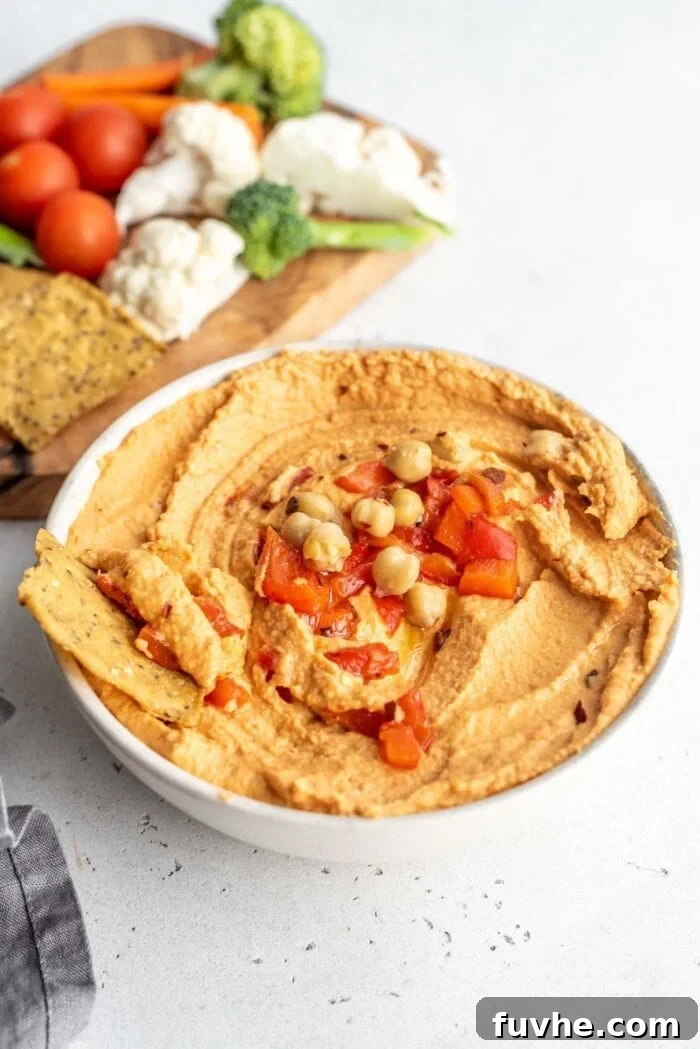
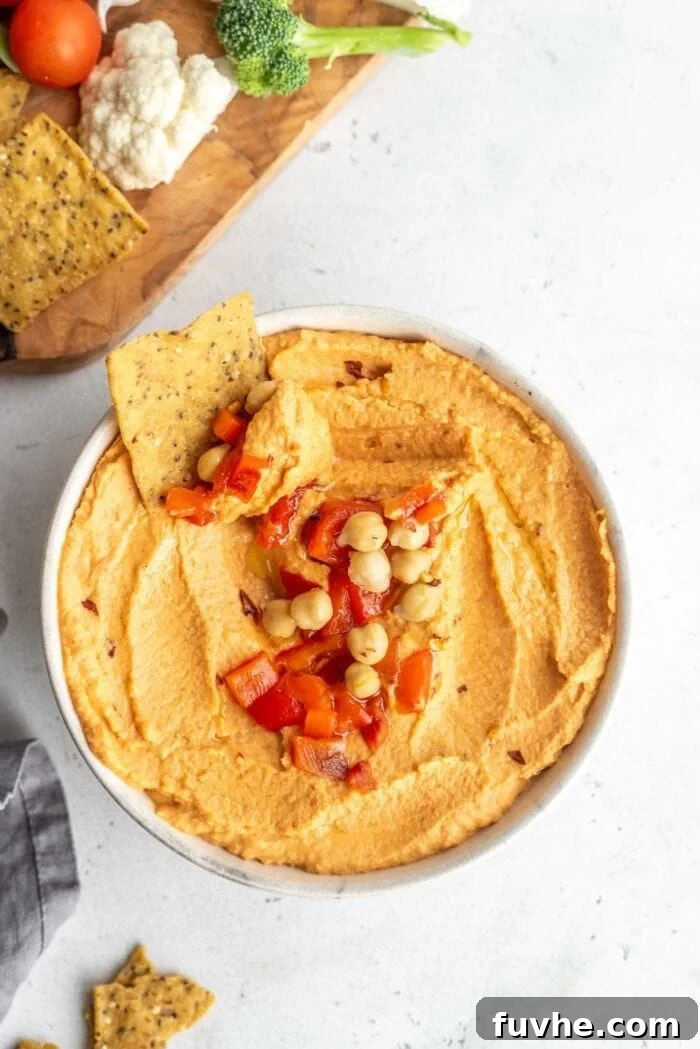
- With Fresh Veggies: Serve alongside a colorful array of crisp raw vegetables like carrot sticks, cucumber slices, bell pepper strips, celery, cherry tomatoes, and broccoli florets for a healthy and satisfying snack.
- Pita & Crackers: It’s a perfect match for warm pita bread, pita chips, artisanal crackers, or gluten-free alternatives.
- Bread & Crostini: Spread generously on toasted bread, baguette slices, or crostini for an elegant appetizer.
Versatile Spread & Filling
- Sandwiches & Wraps: Elevate your lunch! Use it as a flavorful, creamy spread in sandwiches, wraps, and pitas instead of mayonnaise or other condiments. It pairs wonderfully with fresh greens, grilled vegetables, and plant-based protein.
- Burgers: Spread a dollop on your favorite veggie burgers or grilled portobello mushrooms for an extra layer of taste and moisture.
A Flavorful Addition to Meals
- Salad Booster: Thin it out slightly with a little extra lemon juice or water to create a creamy, tangy salad dressing.
- Grain Bowls & Buddha Bowls: Add a generous scoop to your favorite grain bowls or Buddha bowls for a boost of protein, fiber, and flavor.
- Mezze Platter: Incorporate it into a Mediterranean-inspired mezze platter with olives, dolmades, falafel, and other dips.
- Side Dish: Serve alongside grilled plant-based kebabs, roasted vegetables, or lentil dishes for a complete and satisfying meal.
Storage & Meal Prep Tips
Making a batch of roasted red pepper hummus is excellent for meal prepping, ensuring you have a healthy snack or ingredient ready throughout the week. To maintain its freshness and flavor:
- Refrigeration: Store your homemade hummus in an airtight container in the refrigerator for up to 5 days. You might notice it thickens slightly when cold; simply stir it well before serving, and if desired, add a tiny splash of water or lemon juice to loosen it up.
- Serving Garnish: If you plan to garnish your hummus with olive oil, herbs, or spices, it’s best to do so just before serving to keep it looking its best.
Nutritional Highlights: Why This Hummus is Good for You
This roasted red pepper hummus is more than just delicious; it’s packed with nutrients, making it a fantastic addition to any balanced diet. Here’s a look at its key health benefits:
- Excellent Source of Plant-Based Protein: Chickpeas are a wonderful source of plant-based protein, essential for muscle repair, growth, and overall bodily function.
- Rich in Dietary Fiber: Both chickpeas and red peppers contribute significant amounts of dietary fiber, which promotes digestive health, helps regulate blood sugar levels, and contributes to a feeling of fullness, aiding in weight management.
- Healthy Fats: Tahini provides healthy monounsaturated and polyunsaturated fats, which are beneficial for heart health and help with the absorption of fat-soluble vitamins.
- Abundant in Vitamins & Antioxidants: Red peppers are loaded with Vitamin C and A, powerful antioxidants that support immune function, skin health, and protect against cellular damage. Lemon juice further boosts Vitamin C content.
- Oil-Free & Sugar-Free: By making it oil-free, we reduce the caloric density and avoid processed oils, while being sugar-free aligns with a healthier eating pattern.
- Minerals: Chickpeas and tahini are good sources of essential minerals like iron, magnesium, phosphorus, and zinc.
Incorporating this roasted red pepper hummus into your diet is a flavorful way to enjoy a nutrient-dense food that supports overall well-being.
Customize Your Hummus: Delicious Variations
One of the joys of making hummus at home is the ability to customize it to your exact taste. Here are some ideas to add your personal touch:
- Spicier Kick: If you love heat, increase the amount of cayenne pepper or red pepper flakes. A dash of your favorite hot sauce or a pinch of smoked paprika can also add an exciting dimension.
- Herbal Infusion: Blend in fresh cilantro or parsley for a bright, herbaceous flavor. A swirl of basil pesto on top just before serving is also divine.
- Smoky Depth: For an even smokier flavor, consider adding a pinch of smoked paprika or a tiny drop of liquid smoke (use sparingly!).
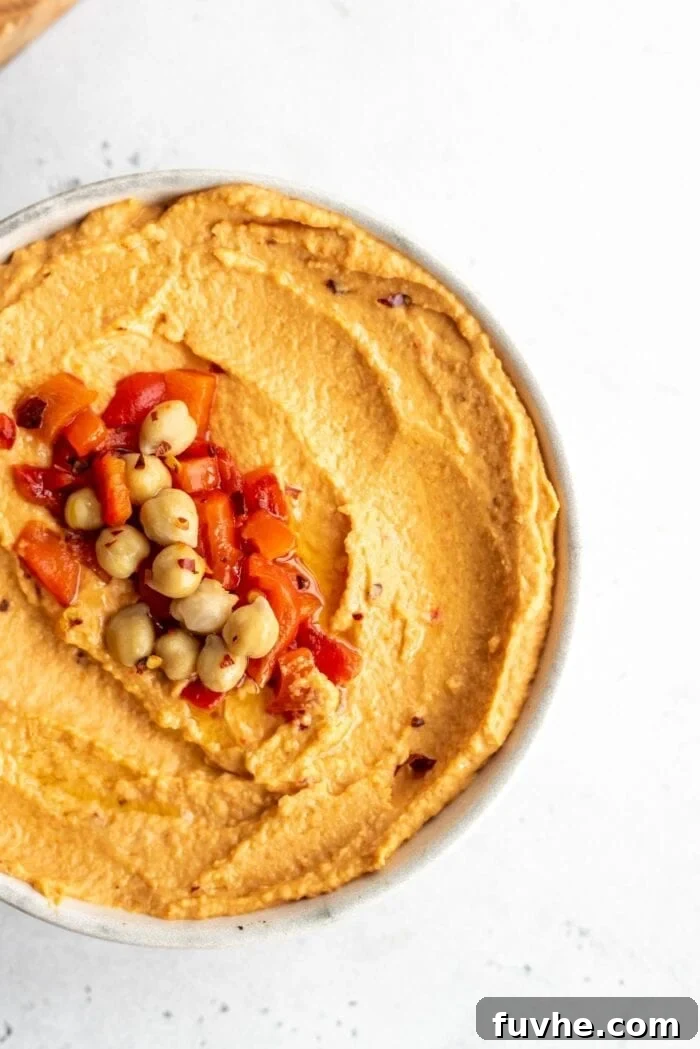
- Topping Perfection: Elevate your hummus with beautiful and flavorful toppings. Drizzle with a good quality olive oil (if not strictly oil-free), sprinkle with extra paprika or sumac, add a scattering of toasted pine nuts, a few whole chickpeas, or finely diced pieces of roasted red pepper. Fresh parsley or cilantro makes for a lovely garnish.
- Garlic Lover’s Dream: For those who can’t get enough garlic, roast your garlic cloves before adding them to the hummus. This mellows the sharpness and adds a sweet, caramelized flavor.
Frequently Asked Questions About Roasted Red Pepper Hummus
New to making hummus or have some common queries? Here are answers to a few frequently asked questions:
- Can I use jarred roasted red peppers? Yes, you can! While homemade roasted peppers offer superior flavor, jarred roasted red peppers (drained well) are a convenient substitute that will still yield delicious hummus.
- How do I make my hummus super smooth? For the smoothest hummus, ensure your chickpeas are very tender. Some chefs also recommend peeling the skins off the chickpeas after cooking/rinsing (a tedious but effective step). Using a high-speed blender and blending for longer, while scraping down the sides, will also help. Adding a little cold water or aquafaba during blending can also enhance creaminess.
- How long does homemade hummus last? When stored in an airtight container in the refrigerator, homemade hummus typically stays fresh for 4-5 days.
- What can I use if I don’t have tahini? While tahini is key for authentic hummus flavor and texture, if you must substitute, you could try a nut butter like cashew butter or sunflower seed butter. However, the flavor will be different, and it won’t be traditional hummus.
- Why is my hummus bitter? Bitterness can sometimes come from too much raw garlic or old tahini. Adjust garlic to taste, and ensure your tahini is fresh and well-stirred.
More Delicious Plant-Based Dips & Recipes
If you’ve enjoyed this roasted red pepper hummus and are eager to explore more flavorful, healthy dips and plant-based dishes, you’ll love these other recipes from our collection:
- Roasted Garlic Hummus: A classic, aromatic favorite.
- Beet Hummus: Vibrant, earthy, and incredibly healthy.
- Roasted Carrot Hummus: Sweet and savory with a beautiful color.
- Edamame Hummus: A fresh, green twist on traditional hummus.
- Roasted Red Pepper Pesto: Another excellent way to utilize those roasted peppers in a different format.
- Roasted Red Pepper Tomato Soup: Comforting and full of flavor.
- Easy Vegan Dips: A collection of versatile and simple plant-based dips for any occasion.
- Healthy Snack Ideas: Discover more wholesome and delicious snacks to fuel your day.
Roasted Red Pepper Hummus Recipe
This simple yet sensational roasted red pepper hummus is perfect as a healthy dip for vegetables, pita, or crackers. It also makes an excellent spread for wraps, burgers, and sandwiches, or can be added to salads for a burst of flavor. This recipe is completely vegan and oil-free, making it a wholesome choice for any meal.
- Prep Time: 10 mins
- Cook Time (for peppers): 20 mins
- Total Time: 30 mins
- Servings: 16 servings (2 tbsp per serving)
- By: Deryn Macey
Ingredients
- 2 large red bell peppers, seeded, roasted, and peeled (yields about 1 cup sliced roasted red peppers)
- 19 oz can chickpeas, drained and rinsed (approximately 2 cups cooked chickpeas)
- 1/4 cup tahini (60 g)
- 3 cloves garlic
- 3 tbsp fresh lemon juice
- 1 tsp sea salt (adjust to taste)
- 1/2 tsp ground cumin (optional, for classic hummus flavor)
- For spicy hummus: 1/2 tsp cayenne pepper or red pepper flakes (or more, if desired)
Instructions
- Add all the ingredients (roasted red peppers, chickpeas, tahini, garlic, lemon juice, sea salt, and optional spices) to a high-speed blender or food processor.
- Begin blending on a slow speed until the mixture starts to combine easily. Stop and scrape down the sides of the container as needed to ensure all ingredients are incorporated.
- Once it’s blending smoothly, gradually increase the power and continue to blend until the hummus is completely smooth, creamy, and free of any chunks. This may take a few minutes. If the mixture is too thick, add a tablespoon of cold water or aquafaba at a time until you reach your desired consistency.
- Transfer the finished hummus to a sealed container and store it in the refrigerator for up to 5 days. Serve chilled or at room temperature, garnished as desired.
Notes
For detailed instructions on how to perfectly roast red bell peppers at home, please refer to our dedicated guide: How to Make Roasted Red Peppers.
Nutrition Information
Per Serving (2 tbsp):
- Calories: 57 kcal
- Carbohydrates: 7 g
- Protein: 3 g
- Fat: 3 g
- Saturated Fat: 0.4 g
- Polyunsaturated Fat: 1 g
- Monounsaturated Fat: 1 g
- Sodium: 241 mg
- Potassium: 103 mg
- Fiber: 2 g
- Sugar: 1 g
- Vitamin A: 474 IU
- Vitamin C: 21 mg
- Calcium: 20 mg
- Iron: 1 mg
(Nutrition information is an estimate and may vary depending on specific ingredients and preparation methods.)
This recipe was originally published April 1, 2013. It was updated in September 2019 with new photos and improved instructions, and further enhanced in [Current Month Year] for SEO optimization and clarity.