
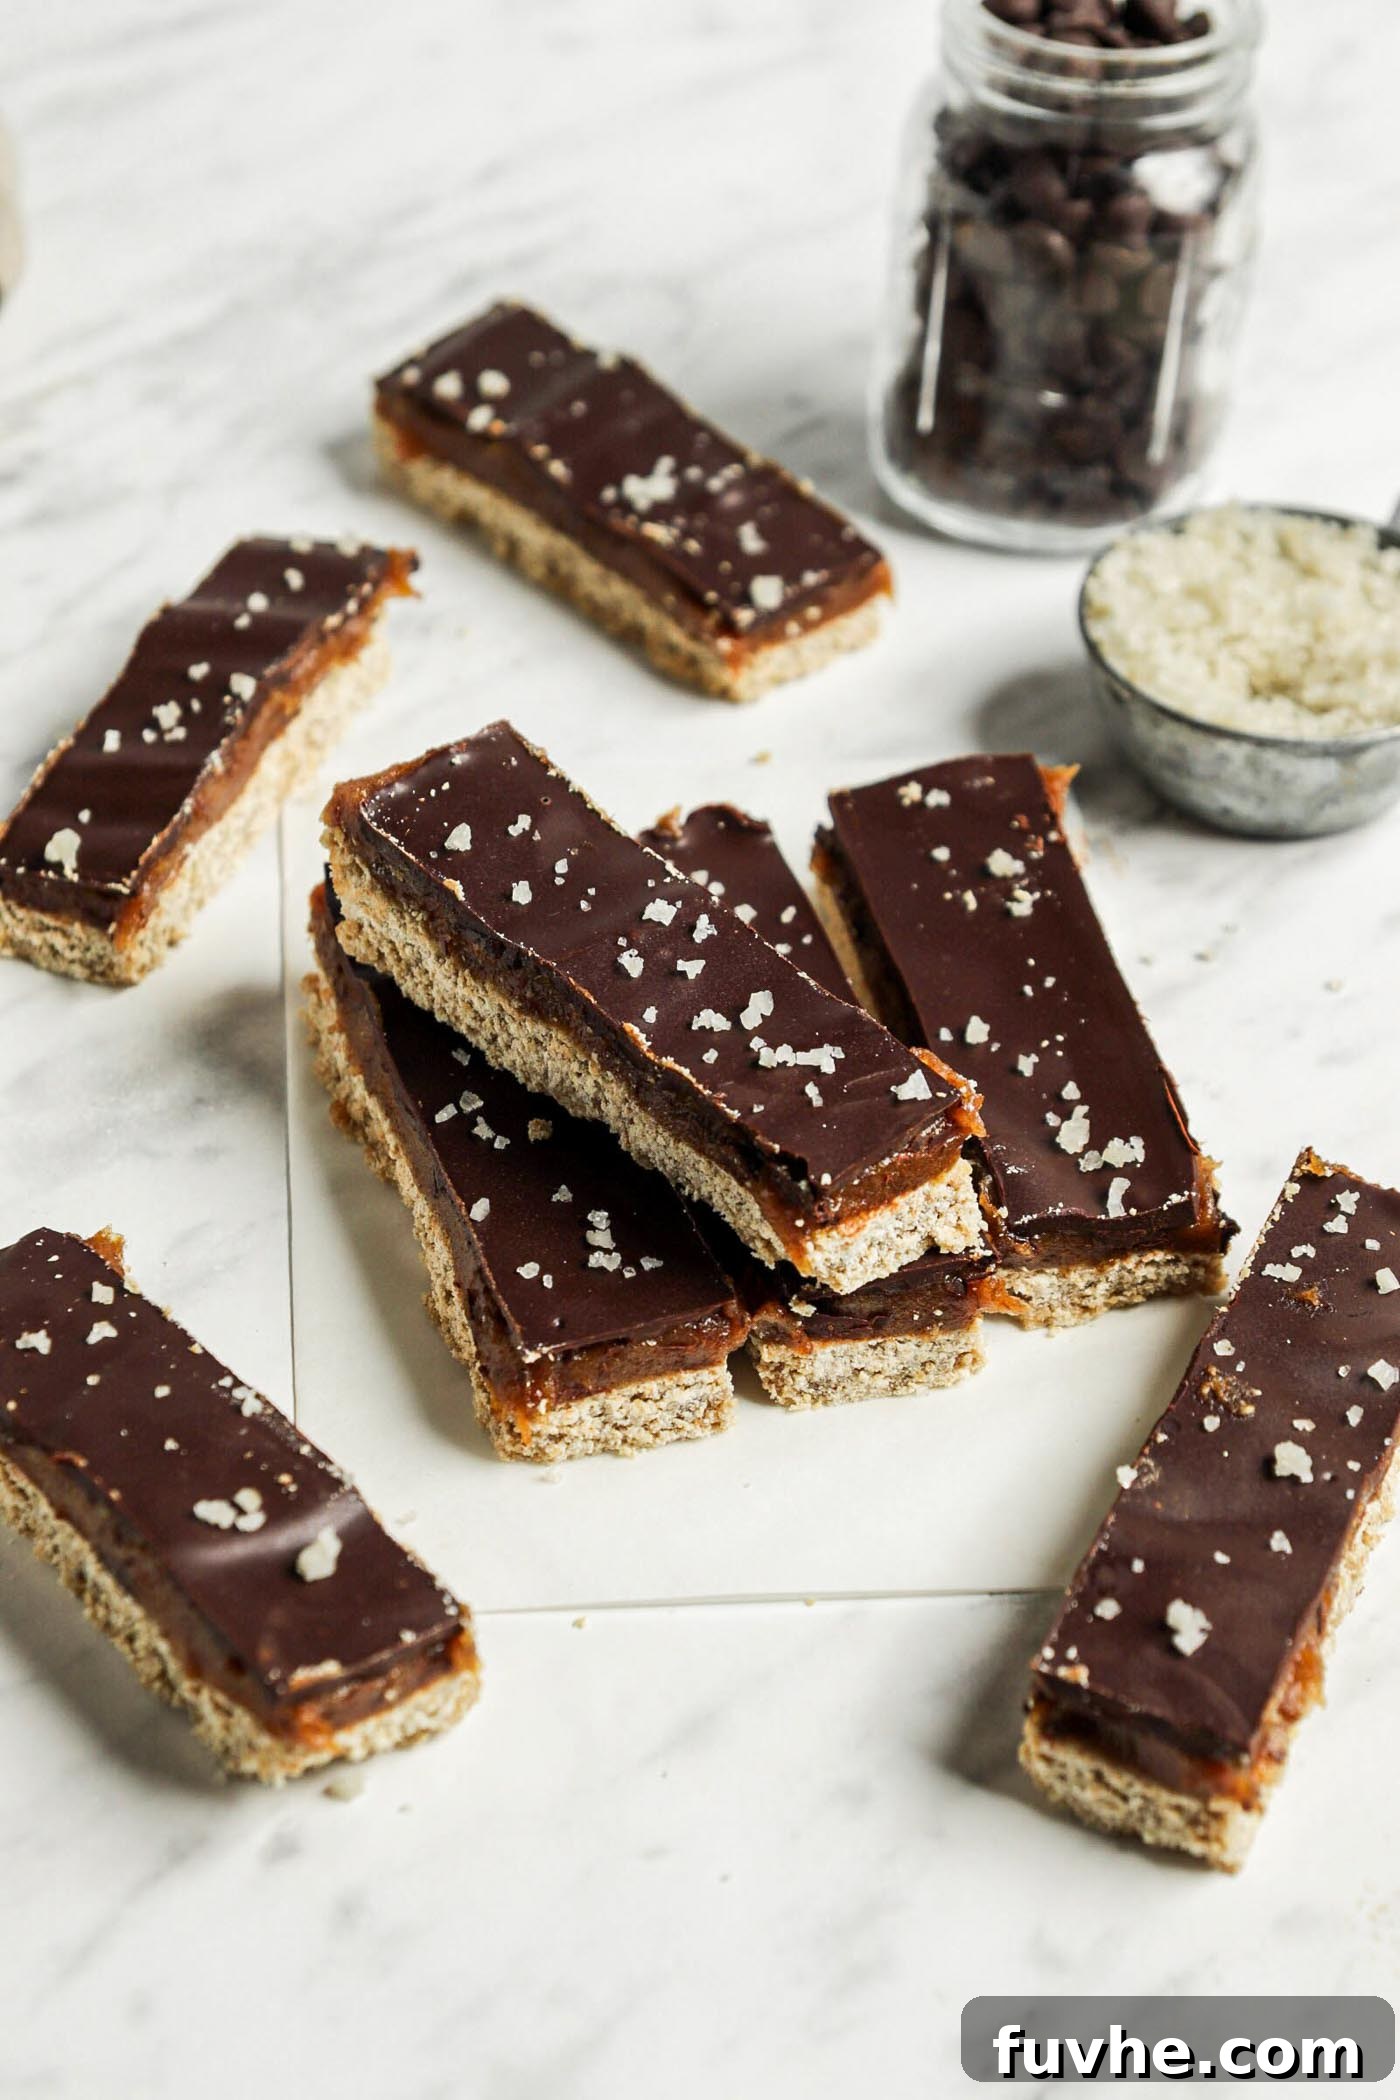
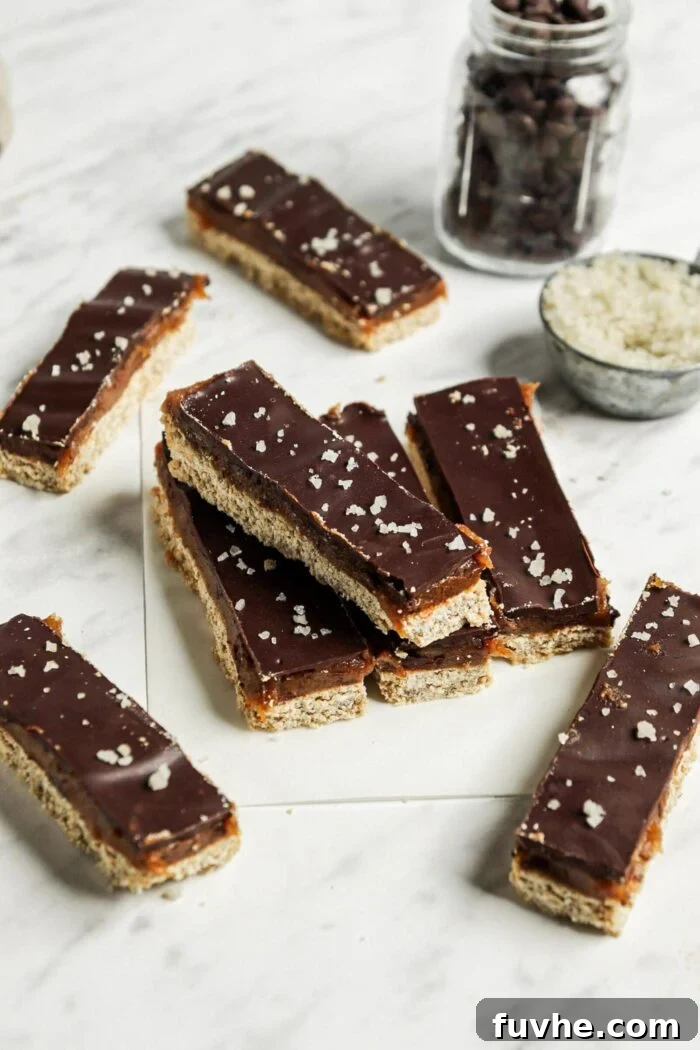
Craving the classic combination of buttery shortbread, rich caramel, and decadent chocolate, but looking for a plant-based alternative? Look no further! These homemade vegan Twix bars perfectly capture the beloved taste and texture of the iconic candy bar, offering a delightful dairy-free and gluten-free treat. Imagine sinking your teeth into a crisp oat flour shortbread base, followed by a luscious layer of creamy, naturally sweetened date caramel, all enrorobed in a smooth, dark chocolate coating. It’s a nostalgic indulgence, reinvented for modern, mindful eaters.
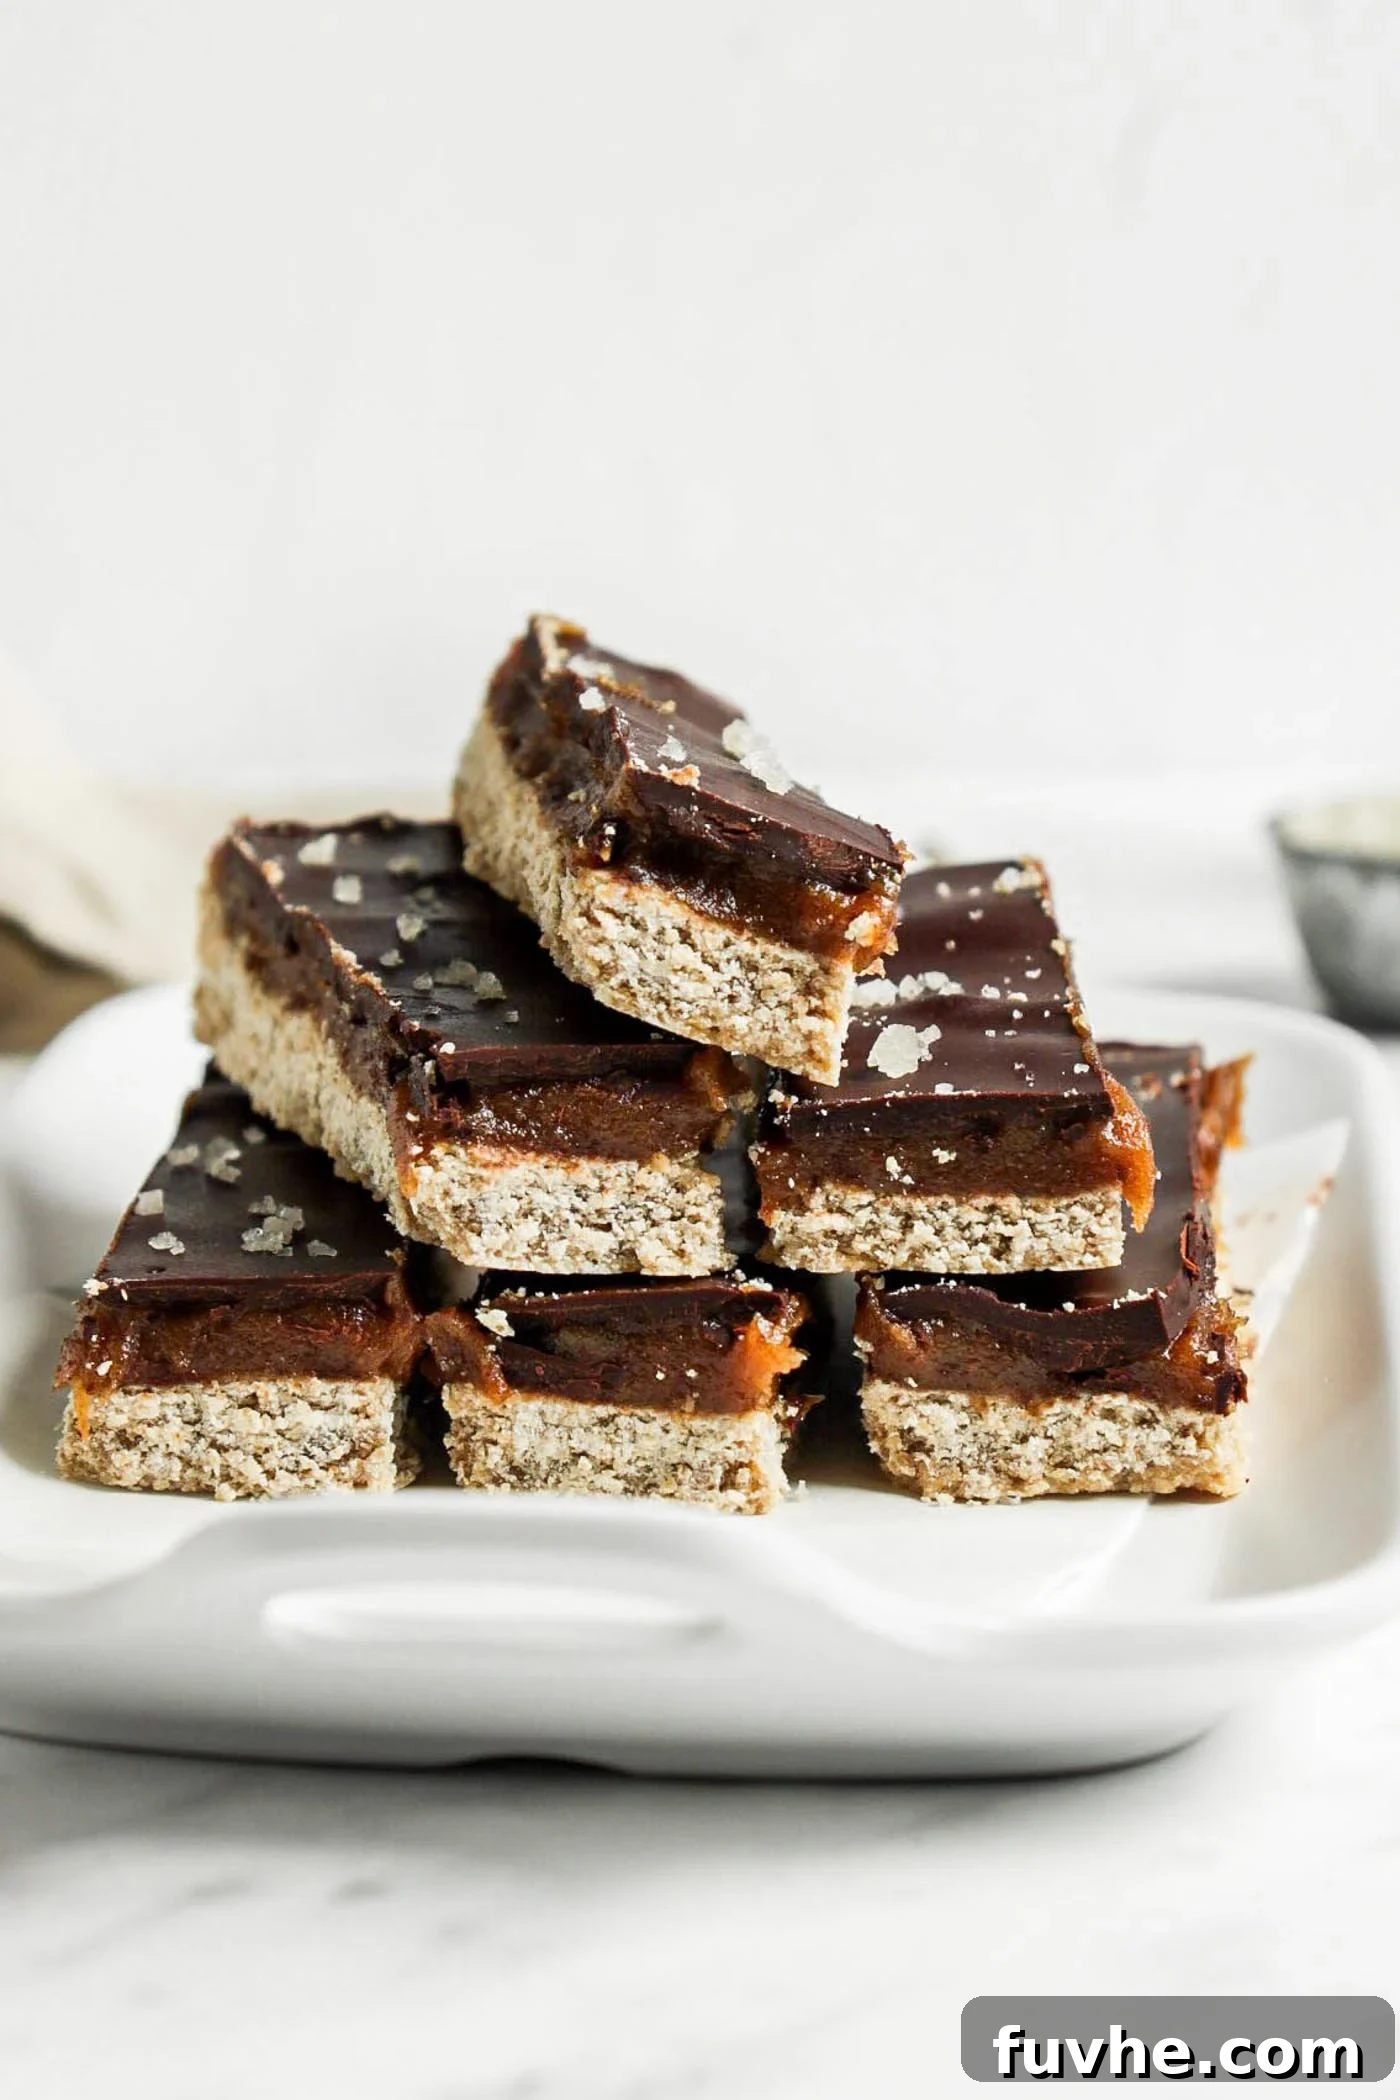
This copycat recipe transforms simple, wholesome ingredients into an extraordinary dessert that’s sure to impress. We’ll guide you through creating a sturdy yet tender oat flour shortbread crust, a sticky-sweet peanut butter date caramel that requires no cooking, and a rich chocolate topping that sets up perfectly. These bars are not just delicious; they’re entirely addictive, remarkably satisfying, and astonishingly similar in taste to the original candy bar, making them an instant favorite for both vegans and non-vegans alike.
If you’re a fan of recreating your favorite confectionery at home with a healthy, plant-based twist, you’re in for a treat! Explore more delightful homemade candy bars with our copycat vegan Butterfinger bars, chewy vegan Snickers bars, and tropical vegan Mounds bars! For festive occasions, try our Vegan Peanut Butter Eggs for Easter or Halloween, and for Christmas, indulge in these luxurious Homemade Vegan Ferrero Rocher and melt-in-your-mouth Easy Homemade Vegan Turtles Candy. Each recipe promises pure, guilt-free pleasure.
Why You’ll Love These Vegan Twix Bars
Creating your own vegan Twix bars offers numerous advantages beyond just satisfying a craving. Here’s why this recipe deserves a spot in your kitchen:
- Dietary-Friendly Indulgence: These bars are proudly vegan and gluten-free, catering to a wider range of dietary needs without compromising on flavor or texture. Plus, with simple substitutions, they can easily be made completely nut-free, ensuring everyone can enjoy a bite.
- Simple & Accessible Ingredients: You’ll only need just 8 basic ingredients, most of which are likely already in your pantry. This eliminates the need for obscure or expensive specialty items, making the recipe both economical and easy to prepare.
- Fun & Rewarding to Make: The process of layering these bars is incredibly satisfying and straightforward, making it a fantastic project for bakers of all skill levels. It’s a hands-on experience that results in a truly impressive homemade treat.
- Perfect for Any Occasion: Whether you’re looking for a unique dessert for a potluck, a special homemade Halloween treat option, or just a delicious snack to have on hand, these bars fit the bill perfectly. Their universally appealing flavor makes them a hit at any gathering.
- Crowd-Pleaser Guaranteed: With their familiar yet elevated taste, these bars are adored by kids and adults alike. Prepare for rave reviews and requests for the recipe every time you serve them!
Key Ingredients and Their Role
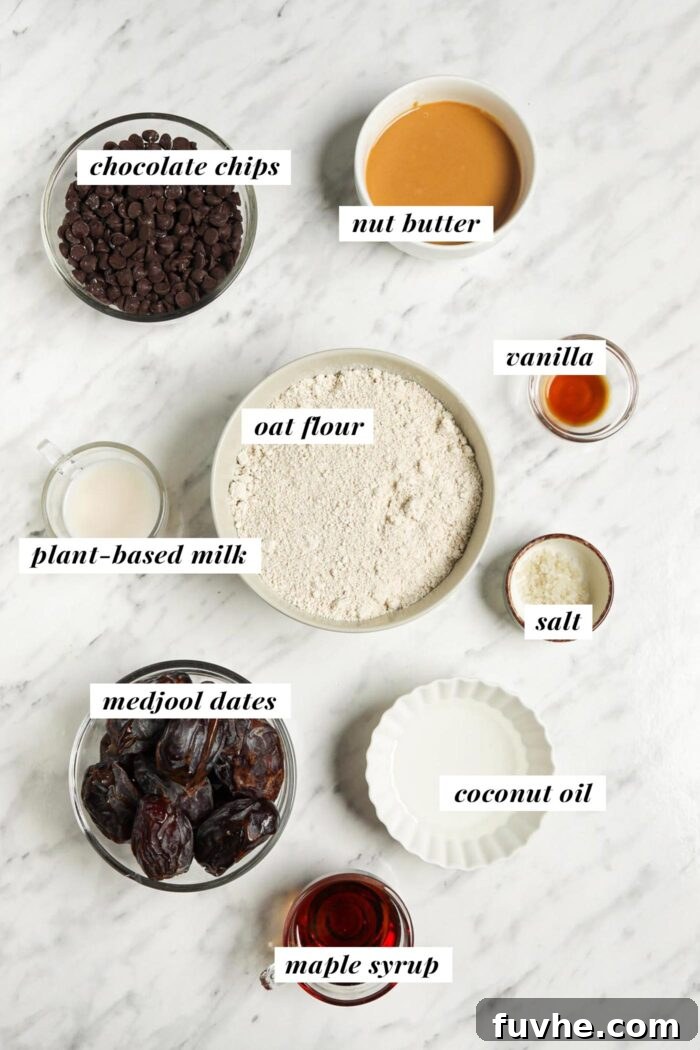
Each ingredient in this recipe plays a crucial role in creating the perfect layered vegan Twix bar. Below, we delve into why these ingredients are chosen and offer convenient substitution options to suit your preferences and pantry availability.
- Oat Flour: This is the star of our “shortbread” base, providing a tender, crumbly texture reminiscent of traditional shortbread, but with added fiber and whole-grain goodness. You can effortlessly make your own by blending rolled or quick oats in a food processor or high-speed blender until a fine flour consistency is achieved. Alternatively, store-bought oat flour works just as well for convenience.
- Coconut Oil: Essential for structure, coconut oil helps to firm up both the shortbread base and gives the chocolate topping its crisp snap. In the crust, it acts as a binder, while in the chocolate layer, it helps achieve a smooth, melt-in-your-mouth texture. For the chocolate layer, it’s optional but highly recommended. If you’re out of coconut oil, vegan butter, cacao butter, or even a solid nut butter (like almond or peanut butter) can be used in the chocolate layer to achieve a similar firming effect.
- Maple Syrup: This natural liquid sweetener not only sweetens our shortbread layer but also adds vital moisture, contributing to its perfect consistency. Maple syrup’s distinct flavor complements the other ingredients beautifully. While it cannot be directly swapped with a dry sweetener without altering the texture, you can use agave syrup for a similar vegan option. Avoid using honey if you wish to keep the recipe strictly vegan.
- Plant-Based Milk: A small amount of plant-based milk is used in both the shortbread and caramel layers to adjust consistency. Any unsweetened variety, such as almond milk, cashew milk, or soy milk, will work wonderfully. The amount needed can vary, especially in the caramel, depending on the softness and moisture content of your dates.
- Dates: The secret to our naturally sweet and gooey caramel layer! Soft, plump Medjool dates are highly recommended for their rich flavor and easy-to-blend texture. If Medjool dates are not available, you can substitute with approximately 3/4 cup packed of other varieties like Sayer or Deglet Noor dates. For harder dates, a quick soak in hot water for about 15 minutes, followed by thorough draining, will soften them perfectly for blending.
- Nut Butter: This ingredient adds richness, flavor, and creamy texture to the date caramel, helping it achieve that irresistible chewiness. Peanut butter, almond butter, or cashew butter are excellent choices, each imparting a slightly different nuance to the caramel. For those with nut allergies or preferences, sunflower seed butter, Wowbutter, or even tahini can be used as fantastic nut-free alternatives.
- Chocolate: The crowning glory of our Twix bars! Dairy-free chocolate chips or a high-quality dark chocolate bar (ensure it’s vegan) are perfect for melting down into a smooth, glossy topping. Always double-check labels to confirm it’s dairy-free to maintain the vegan integrity of the recipe. For a truly homemade touch, consider making your own chocolate ganache using a simple recipe like the one found in our chocolate ganache recipe, which typically involves maple syrup, coconut oil, and cocoa powder.
Step-by-Step Instructions for Perfect Vegan Twix Bars
Creating these delightful vegan Twix bars is a straightforward process, broken down into three key layers. Follow these detailed steps for the best results:
Step 1: Prepare the Shortbread Crust
Begin by preheating your oven to 350°F (175°C). Line an 8-inch square baking pan with parchment paper, allowing the paper to extend over two opposite sides. This creates convenient “handles” to easily lift the finished bars from the pan once they’re set.
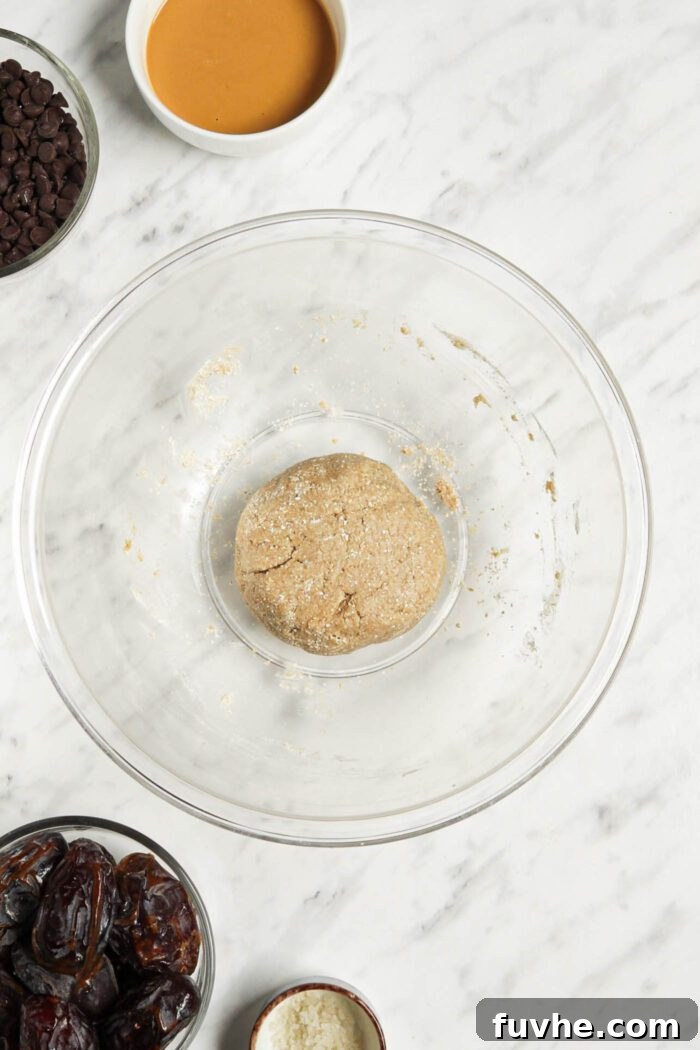
In a large mixing bowl, combine the oat flour, melted coconut oil, and maple syrup. Start mixing these ingredients together, and gradually add the plant-based milk, 1 tablespoon at a time, until a cohesive yet slightly crumbly dough forms. The goal is to achieve a dough that you can easily press into a ball without it falling apart. Avoid adding too much milk, as this can make the crust too soft. If you need to make oat flour, simply blend about 250g of rolled oats in your food processor until it reaches a fine flour consistency.
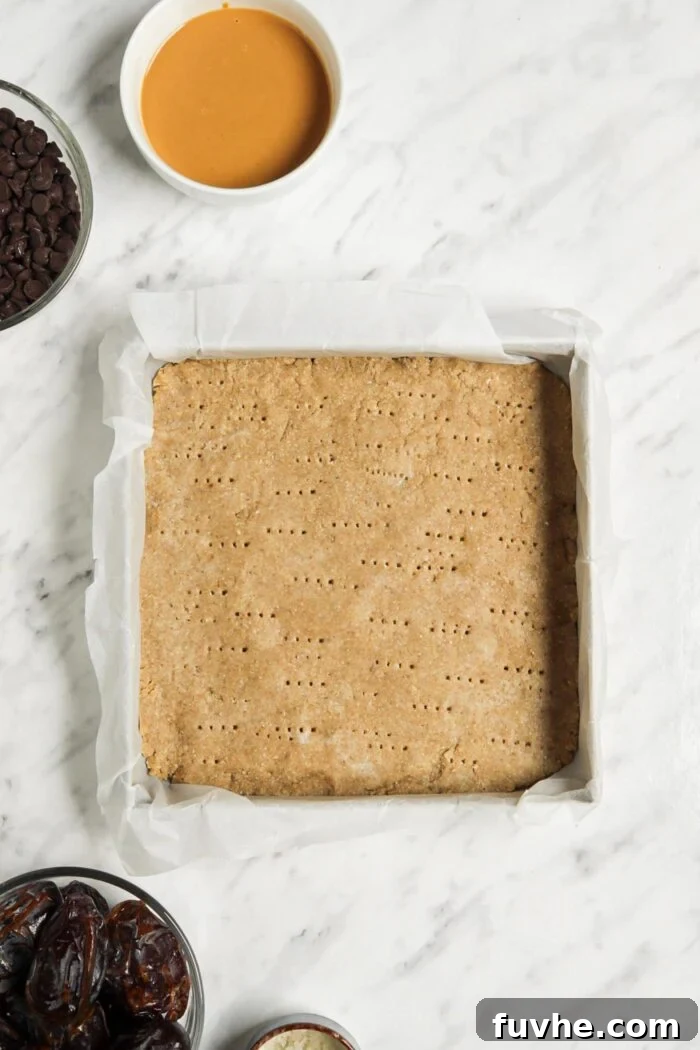
Firmly press the prepared dough into the lined baking pan, spreading it out evenly across the bottom. Use a fork to poke 15-25 small holes across the surface of the dough. This helps prevent the crust from puffing up during baking. Bake for 9-11 minutes, or until the edges are golden brown and the crust smells fragrant. Once baked, remove the pan from the oven and set it aside to cool completely for at least 30 minutes. It’s crucial for the crust to cool and firm up before adding the next layers to prevent them from melting or running.
Step 2: Craft the Creamy Date Caramel Layer
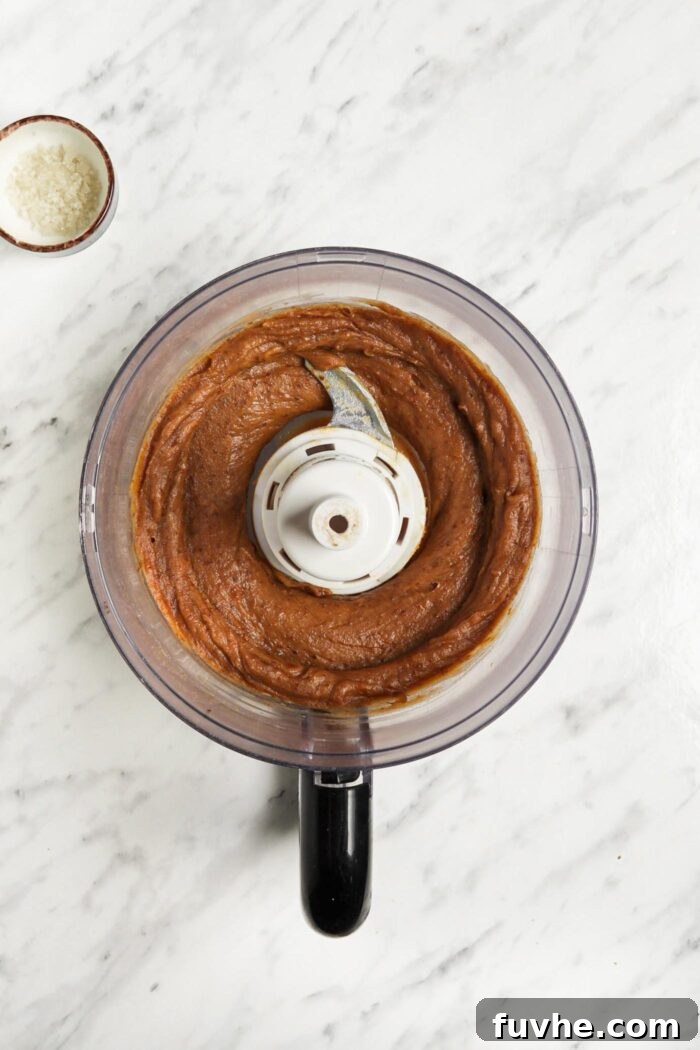
While your crust is cooling, you can begin preparing the luscious caramel. In a food processor, combine the pitted Medjool dates, your chosen nut butter, vanilla extract, and a pinch of salt. Process these ingredients until a smooth, thick, and creamy consistency is achieved. You may need to stop and scrape down the sides of the food processor bowl several times to ensure everything is thoroughly incorporated.
Depending on the natural moisture content of your dates, you might need to add a tablespoon or two of plant-based milk to help the mixture blend smoothly. If your dates are particularly soft, you might not need any extra liquid at all. For drier dates, a helpful tip is to soak them in hot water for about 15 minutes before use, then drain them thoroughly. This ensures they blend into a perfectly smooth caramel.
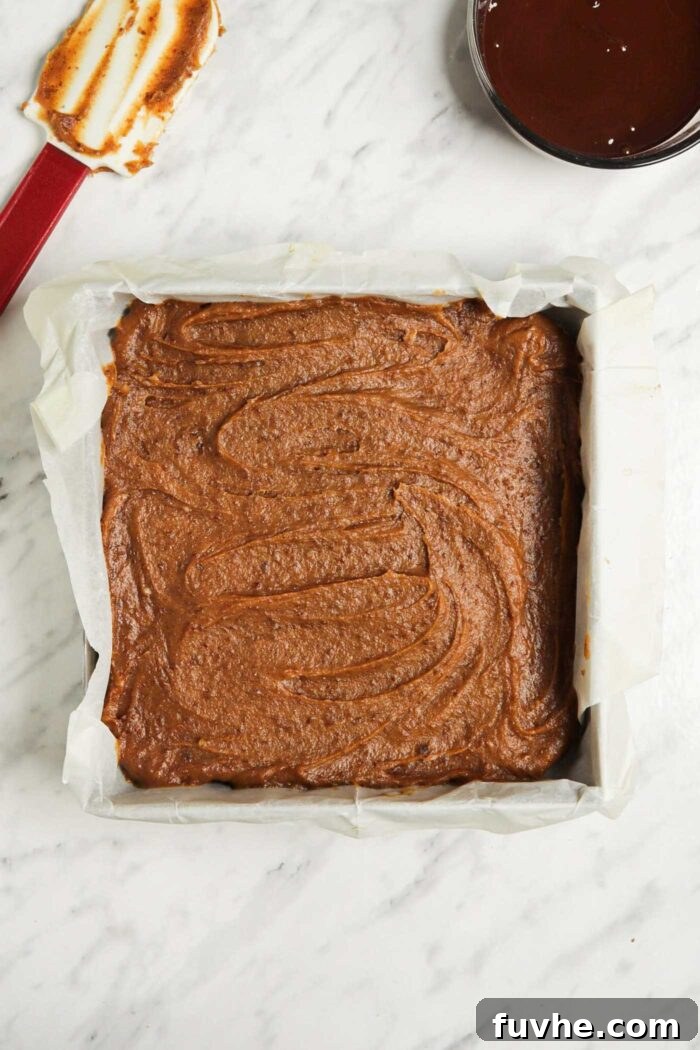
Once the shortbread crust has fully cooled and firmed up, use a spatula or the back of a spoon to spread the date caramel mixture evenly over the baked base. Ensure the caramel forms a consistent layer from edge to edge. This smooth layer is crucial for the classic Twix texture.
Step 3: Add the Chocolate Topping and Chill
For the final layer, gently melt the dairy-free chocolate chips and coconut oil together. You can do this using a double boiler on the stovetop for a gentle, even melt. Alternatively, use a microwave-safe bowl and heat the chocolate in 15-20 second intervals, stirring well after each interval, until the chocolate is mostly melted. Then, stir continuously until any remaining pieces dissolve and the mixture is completely smooth and glossy.
Carefully pour the melted chocolate over the date caramel layer in the pan. Using a spatula, quickly spread the chocolate into an even, smooth layer across the entire surface. For an extra touch of gourmet flair and to enhance the flavors, consider sprinkling a tiny bit of coarse sea salt over the wet chocolate – simply delicious! If you prefer to create your own chocolate from scratch, our Cashew Cookie Dough Bars offer a fantastic chocolate ganache recipe made with maple syrup, coconut oil, and cocoa powder.
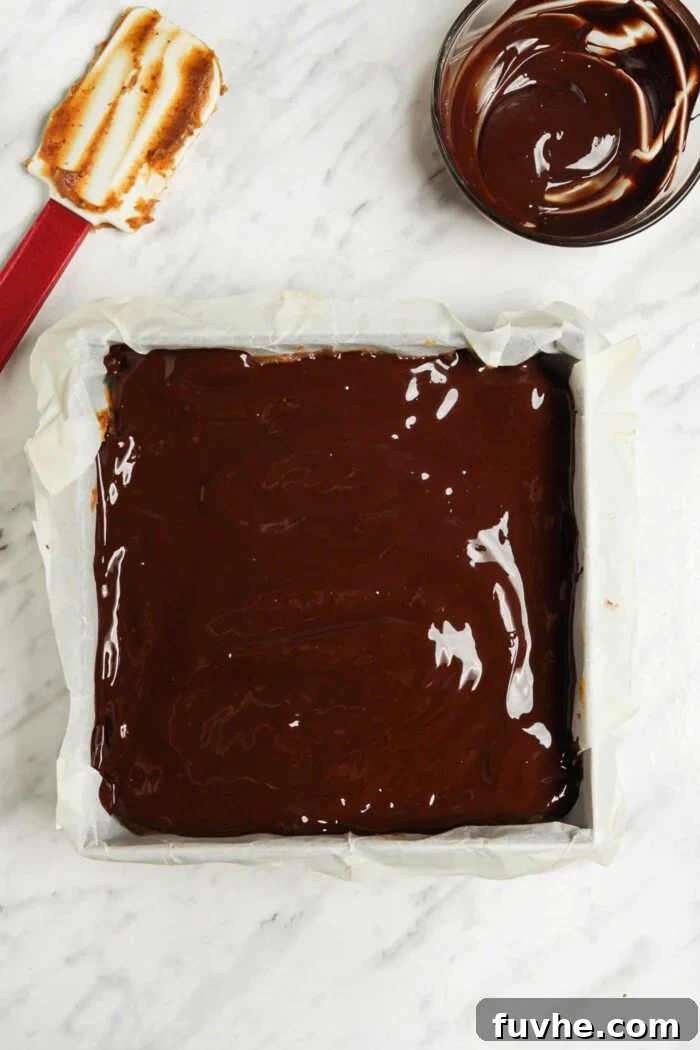
Once the chocolate layer is complete, place the entire pan into the refrigerator or freezer for 1-2 hours. This chilling time is essential to allow all three layers to firm up completely. Once firm, use the parchment paper overhangs to carefully lift the entire slab of bars out of the pan. Place it on a cutting board, slice into desired bar sizes (typically 14 pieces for this recipe), and then these magnificent homemade vegan Twix bars are ready to be savored!
Frequently Asked Questions (FAQs)
Absolutely! To make these delectable Twix bars completely nut-free, simply substitute the peanut or almond butter in the date caramel layer with a suitable allergen-friendly alternative. Great options include tahini (sesame paste, which offers a unique depth of flavor), sunflower seed butter (SunButter), or Wowbutter (a toasted soy butter). Ensure all other ingredients, especially your plant-based milk and chocolate, are also certified nut-free if severe allergies are a concern.
Yes, homemade oat flour is perfectly acceptable and often more economical! To prepare your own, take rolled oats or quick oats and process them in a high-speed blender or food processor until they achieve a very fine, flour-like consistency. For this recipe, you’ll need approximately 250 grams or 2.5 cups of oat flour. Be sure to measure after blending for accuracy.
Yes, this recipe is inherently gluten-free, provided you use the correct ingredients. Oat flour is naturally gluten-free. However, if you have a severe gluten sensitivity or celiac disease, it is crucial to use oats and oat flour that are certified gluten-free. This certification ensures that the oats have not been cross-contaminated with gluten-containing grains during processing.
Soft, fresh Medjool dates are ideal for the creamiest caramel. If your dates feel a bit dry or firm, don’t worry! You can easily soften them by soaking them in hot water for about 15-20 minutes. After soaking, drain them very well and pat them dry before adding them to your food processor. This will ensure they blend into a smooth, pliable caramel.
Chocolate cracking is a common issue! To minimize cracking, ensure the bars are chilled until firm but not frozen solid. If they are too cold, let them sit at room temperature for 5-10 minutes before slicing. Use a large, sharp knife, and warm it under hot water (then dry it completely) before each cut. Press down firmly and steadily rather than sawing, and clean the blade between cuts for the cleanest lines.
While this recipe features a baked shortbread crust for that authentic “Twix” crispness, you can certainly adapt it for a no-bake approach. For a delicious no-bake crust, you might try blending nuts (like almonds or walnuts) with dates and a touch of coconut oil until a sticky dough forms, then pressing it into the pan. This will result in a different texture but still be incredibly delicious. Check out our chocolate caramel bars for a similar no-bake concept.
Storing and Serving Suggestions
Proper storage is key to maintaining the deliciousness and texture of your homemade vegan Twix bars. Here’s how to keep them fresh and ready to enjoy:
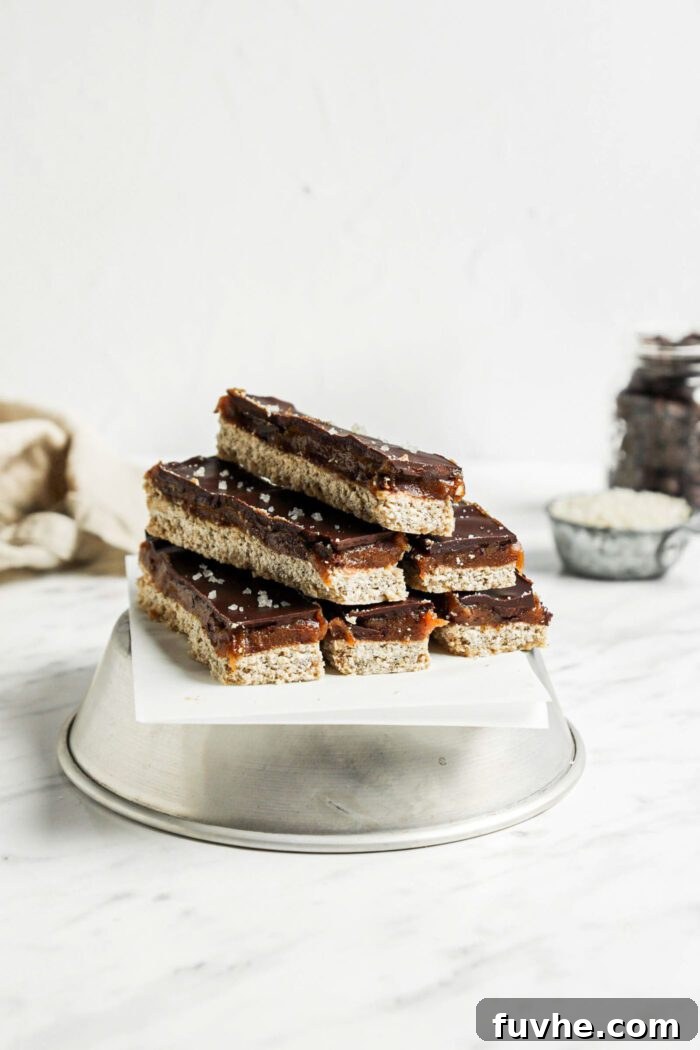
- Long-Term Storage (Freezer): For the best results and longest shelf life, we highly recommend storing these bars in the freezer. Place them in a freezer-safe bag or an airtight container, preferably with parchment paper between layers to prevent sticking. They will keep beautifully in the freezer for up to 3-4 months. You can enjoy them straight from the freezer for a firmer, chewier bite, or allow them to thaw briefly at room temperature (about 10-15 minutes) if you prefer a slightly softer, more yielding texture.
- Short-Term Storage (Refrigerator): If you plan to consume them within a week, the bars can also be stored in an airtight container in the refrigerator. However, please note that they tend to be softer in the fridge compared to the freezer. While still delicious, the freezer helps maintain their structure and crispness best.
Serving Suggestions: These bars are perfect on their own as a satisfying snack or dessert. They also make an excellent addition to a dessert platter for parties or gatherings. For an extra treat, serve them alongside a scoop of vegan vanilla ice cream or with a cup of hot coffee or tea.
More Irresistible Vegan Treats
If you loved creating these vegan Twix bars, you’ll surely enjoy these other plant-based dessert recipes:
- Homemade Snickers – Another fantastic homemade candy bar recipe that captures the essence of a classic.
- Vegan Chocolate Peanut Butter Cups – Just like Reese’s, but completely plant-based and incredibly easy to make.
- No-Bake Chocolate Caramel Tarts – A decadent, elegant dessert that offers a no-bake twist on the chocolate and caramel pairing.
- Vegan Pecan Pie Bars – Experience the richness of pecan pie in convenient, craveable bar form.
- No-Bake Vegan Almond Joy Bars – For all the lovers of almond, chocolate, and coconut in perfect harmony.
Vegan Homemade Twix Bars
Ingredients
For the Crust
- 2.5 cups oat flour, 250 g
- 4 tbsp melted coconut oil, 40 g
- 3 tbsp maple syrup, 50 g
- 3-5 tbsp plant-based milk, as needed
For the Caramel Layer
- 12 soft pitted medjool dates
- 1/3 cup peanut or almond butter, 75 g
- 1 tsp vanilla extract
- 3 tbsp plant-based milk, if needed
- pinch of salt
For the Chocolate Layer
- 1 cup chocolate chips, 170 g
- 2 teaspoons melted coconut oil, 10 g
Instructions
-
Line an 8-inch square baking pan with parchment paper so it sticks out over at least 2 sides of the pan. This will make it easier to remove the bars once set. Preheat the oven to 350 F.
-
If you need to make oat flour, blend approximately 250 g of rolled oats until they reach a fine flour consistency.
-
Add the oat flour, melted coconut oil and maple syrup to a mixing bowl and stir into a moldable dough, slowly adding the plant-based milk as needed to create a somewhat crumbly dough you can still form into a ball.
-
Firmly press the dough into the lined baking pan until you have an even layer then poke holes into the dough using a fork (15-25 pokes evenly spaced around the pan).
-
Bake for 9-11 minutes until golden brown. Set aside to let cool for at least 30 minutes. You can start the caramel right away but don’t add to the base layer until it’s had some time to cool down and firm.
-
To make the caramel, add the dates, nut butter, vanilla and salt to a food processor and blend into a smooth consistency. If needed, add the milk 1 tbsp at a time (water also works). You may not need any milk if your dates were soft or were soaked before use.
-
Once the crust has cooled and firmed, use a spatula to spread the caramel into an even layer over the crust.
-
Melt the chocolate and coconut oil together in a double boiler or the microwave. If you’re using the microwave, make sure you use a microwave-safe bowl and stop to stir the mixture every 15-20 seconds. Continue until the chocolate is mostly melted then stir until any remaining unmelted pieces are mixed in.
-
Spread the chocolate over the caramel layer in the pan.
-
Place the pan in the fridge or freezer for 1-2 hours to firm. If frozen, let thaw briefly before slicing to avoid cracking the chocolate. Otherwise, lift the bars from the pan using the edges of the parchment paper and slice into 14 bars.
Notes
Store the bars in a sealed container in the fridge for up to 1 week or in a freeze-safe bag or container in the freezer for up to 3 months. I’d recommend keeping them in the freezer for best results.