
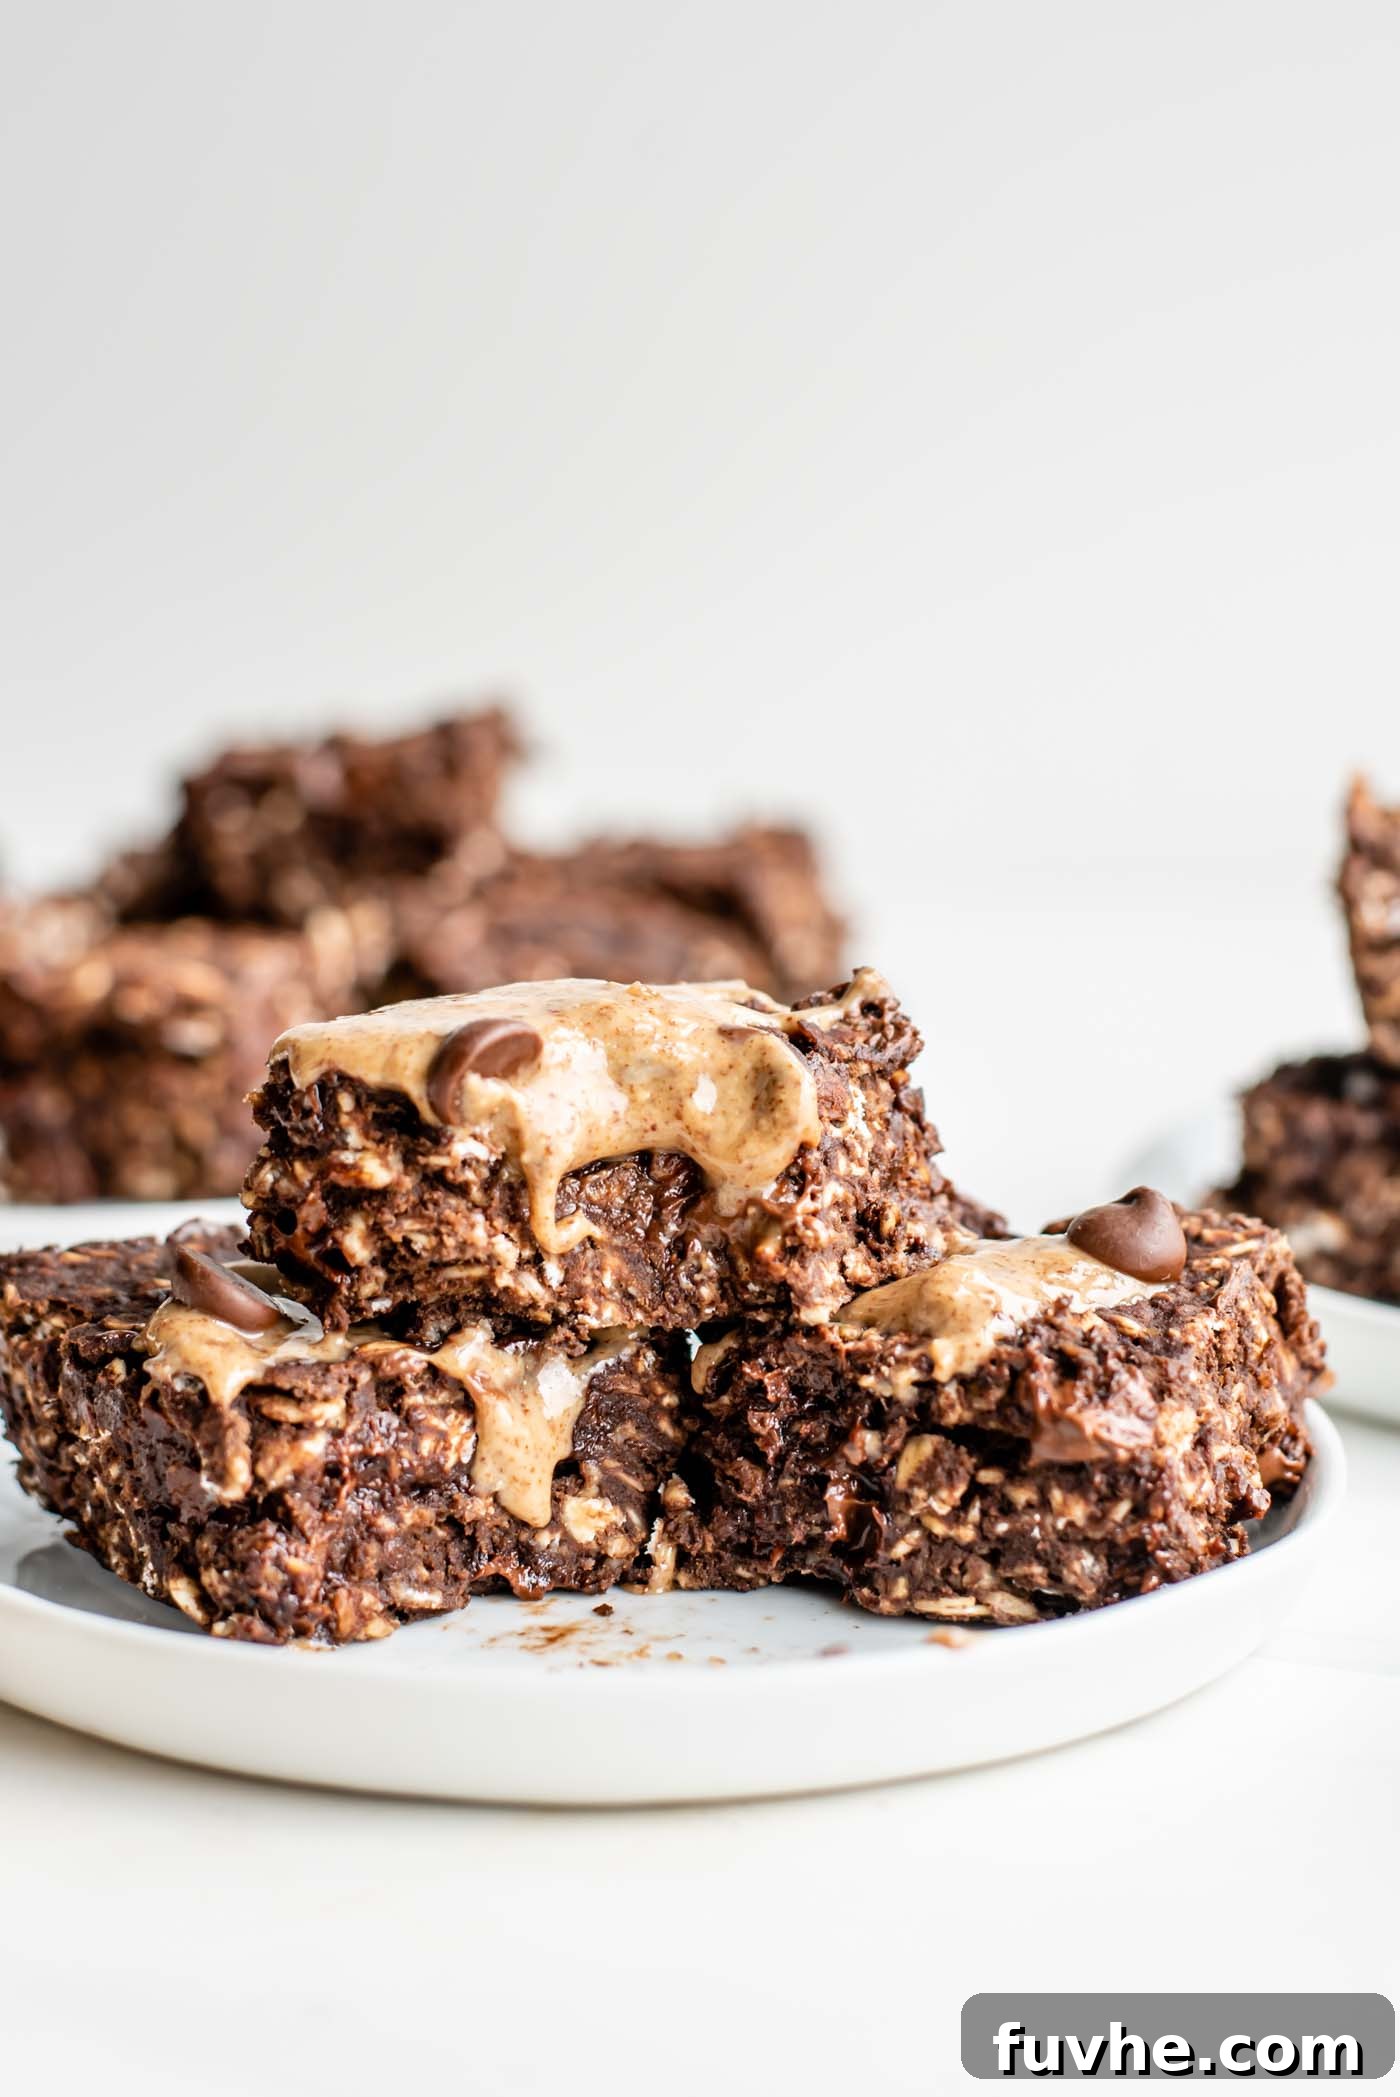
Irresistible Vegan Chocolate Baked Protein Oatmeal Bars: Your New Go-To Healthy Treat
Discover the ultimate guilt-free indulgence with these incredible vegan chocolate baked protein oatmeal bars. Crafted with simplicity in mind, this recipe requires just 5 core ingredients and a mere 20 minutes from start to finish. Imagine sinking your teeth into a rich, chocolatey, and satisfying bar that’s packed with protein and wholesome goodness. All you need are ripe bananas, hearty oats, rich cocoa powder, your favorite vegan protein powder, and dairy-free chocolate chips. Whether you’re fueling up for a busy day, seeking a nutritious snack, or craving a healthier dessert, these bars are the perfect solution.
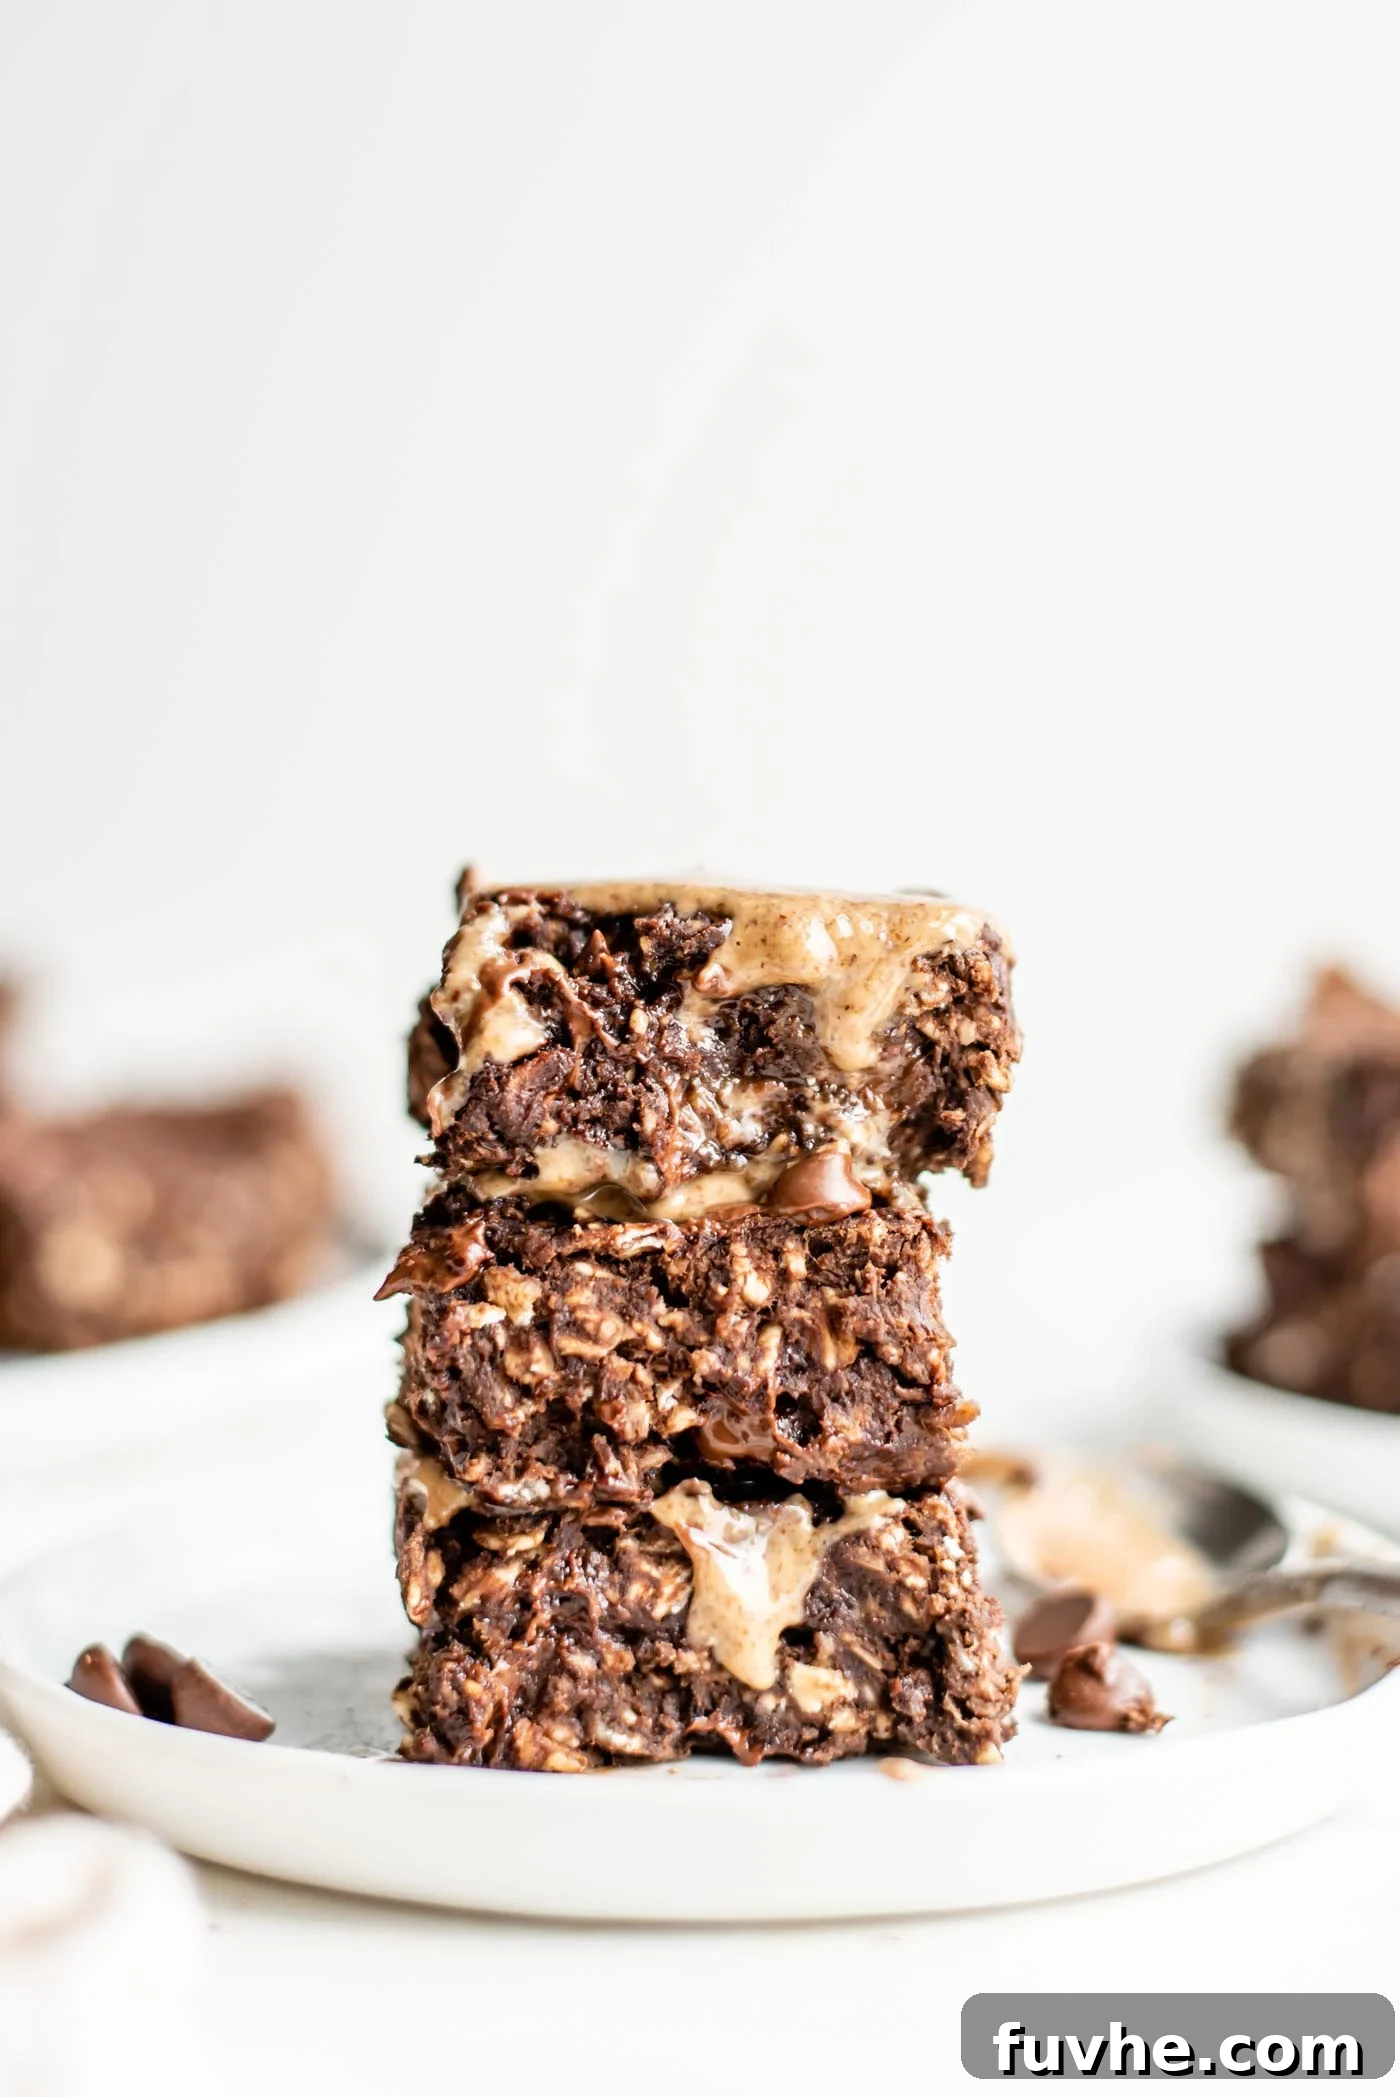
Why You’ll Love These Vegan Baked Protein Oatmeal Bars
These baked oatmeal bars are more than just a recipe; they’re a lifestyle hack for anyone looking to eat healthier without compromising on flavor or convenience. Here’s a closer look at what makes them so special:
- Dietary Features: Perfectly suited for various dietary needs, these bars are inherently vegan, gluten-free (ensure certified oats), nut-free, and oil-free. This makes them an excellent option for those with allergies or specific dietary preferences, allowing almost everyone to enjoy a delicious treat.
- Healthier Snacking, Elevated: Bid farewell to overly sweet, processed snacks. These protein-packed bars offer a well-balanced profile, providing sustained energy, fiber, and essential nutrients. They are consciously designed to be a lower-sugar snack or dessert option, allowing the natural sweetness of the banana and a touch of chocolate to shine through. They satisfy cravings while contributing positively to your daily nutrition.
- Remarkably Quick and Easy: Time is a precious commodity, and this recipe respects that. With a minimal ingredient list of just 5 items and a total preparation and baking time of only 20 minutes, these bars are ideal for busy mornings, quick meal prep sessions, or spontaneous sweet cravings. The simplicity of the process means less stress and more enjoyment, making healthy eating effortlessly achievable.
- Versatile & Portable: Whether you need a grab-and-go breakfast, a post-workout refuel, or a satisfying treat to stash in your lunchbox, these bars are incredibly versatile. Their sturdy texture makes them perfect for portability, ensuring you always have a healthy option at hand.
Understanding Your Ingredients: The Heart of the Bars
The beauty of this recipe lies in its simplicity and the quality of its few ingredients. Each component plays a crucial role in creating the perfect texture, flavor, and nutritional profile. Here’s a detailed guide to what you’ll need and why:
- Vegan Protein Powder: This is where the “protein” in protein bars comes from! For optimal results and a consistent texture, a pea protein-based vegan protein powder is highly recommended. Brands like Vega, NuZest, Orgain, or Bob’s Red Mill typically perform exceptionally well in baking. It’s important to note that this recipe has not been tested with whey protein powder. Whey protein has a different molecular structure and behaves differently under heat, potentially altering the texture and consistency of the final baked product. Sticking to vegan protein ensures your bars come out perfectly moist and chewy.
- Oats: The foundational ingredient, oats provide fiber, complex carbohydrates, and a satisfying chewiness. You have flexibility here: rolled oats, quick oats, and old-fashioned oats all work beautifully. Rolled and old-fashioned oats will give a slightly chewier, more substantial bar, while quick oats will yield a softer, more uniform texture. If you or someone you’re baking for has gluten sensitivity or celiac disease, always opt for oats specifically certified as gluten-free to avoid cross-contamination.
- Cocoa Powder: The source of our decadent chocolate flavor. You can use standard unsweetened baking cocoa powder for a classic chocolate taste or raw cacao powder for a more intense, antioxidant-rich flavor profile. Both options will contribute to the rich color and deep chocolate notes of the bars. Ensure it’s unsweetened to control the overall sugar content.
- Dairy-Free Chocolate Chips: To maintain the vegan integrity of these bars and add delightful pockets of melted chocolate, dairy-free chocolate chips are a must. Brands such as Camino and Enjoy Life are excellent choices and are widely available. You can choose dark chocolate chips for a more intense flavor or semi-sweet for a slightly sweeter touch. These chips melt beautifully, adding an extra layer of indulgence.
- Ripe Bananas: The natural sweetener and binder for these bars. Lightly spotty, slightly overripe bananas are ideal. As bananas ripen, their starches convert to sugars, making them sweeter and easier to mash into a smooth paste. This natural sweetness reduces the need for added sugars, contributing to the healthy profile of the bars. Their pectin content also helps bind the ingredients together, creating a perfectly moist bar without any added oil.
- Sweetening Option (Optional): These bars are intentionally on the healthier side, with the natural sweetness primarily coming from the ripe bananas. They are not designed to be overly sweet or intensely decadent, making them ideal for a wholesome snack. However, if you prefer a sweeter profile, you can easily customize them. Consider adding up to 2-3 tablespoons of a liquid sweetener like maple syrup or agave nectar, or a dry sweetener such as coconut sugar. For a sugar-free alternative, a pinch of stevia powder or a few drops of liquid stevia or monk fruit can be used to sweeten to taste without adding calories.
While this provides a comprehensive overview, please refer to the complete recipe card at the end of this post for precise measurements and detailed step-by-step instructions to ensure your baking success.
Crafting Your Bars: Easy Step-by-Step Guide
Making these protein oatmeal bars is incredibly straightforward, requiring minimal effort and no fancy equipment. Follow these simple steps for perfect results every time:
Before You Start: Begin by preheating your oven to 350°F (175°C). While the oven heats up, prepare a 7-8 inch square baking pan. Lightly grease it with a non-stick cooking spray, or line it with parchment paper, leaving an overhang on the sides to easily lift the bars out after baking. This preparation ensures your bars won’t stick and will be easy to remove and slice.
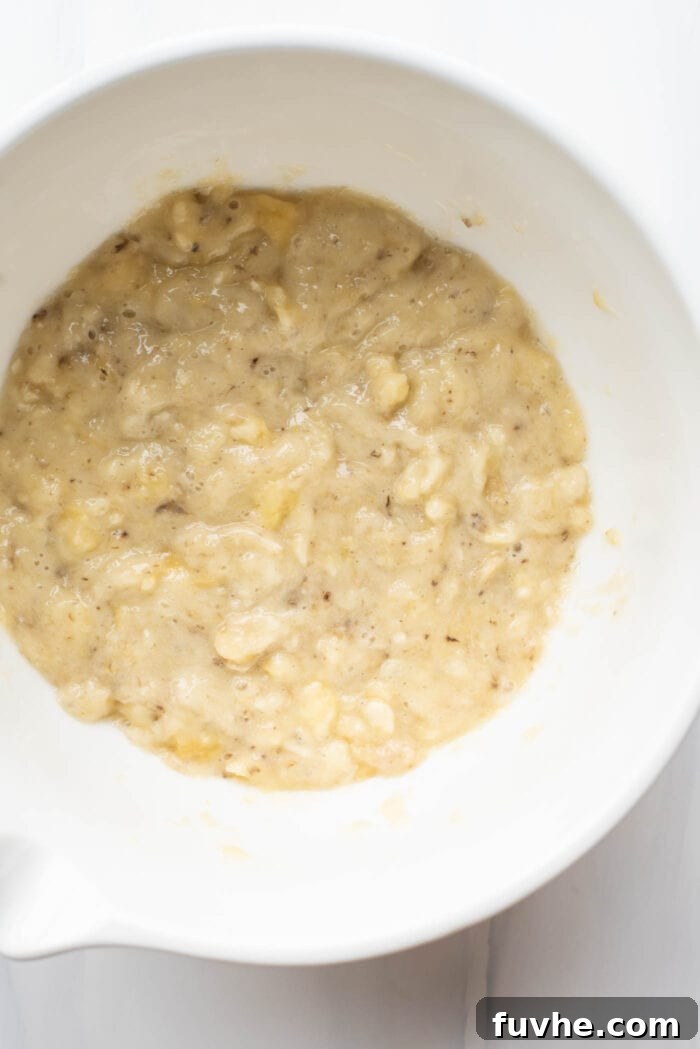
Step 1. Prepare the Banana Base: Place your ripe bananas in a large mixing bowl. Using an immersion blender is fantastic for achieving a super smooth, creamy banana paste, which helps create a uniform texture in your bars. If you don’t have one, a sturdy fork will do the trick just as well; simply mash thoroughly until most lumps are gone. This smooth base is key for an even consistency.
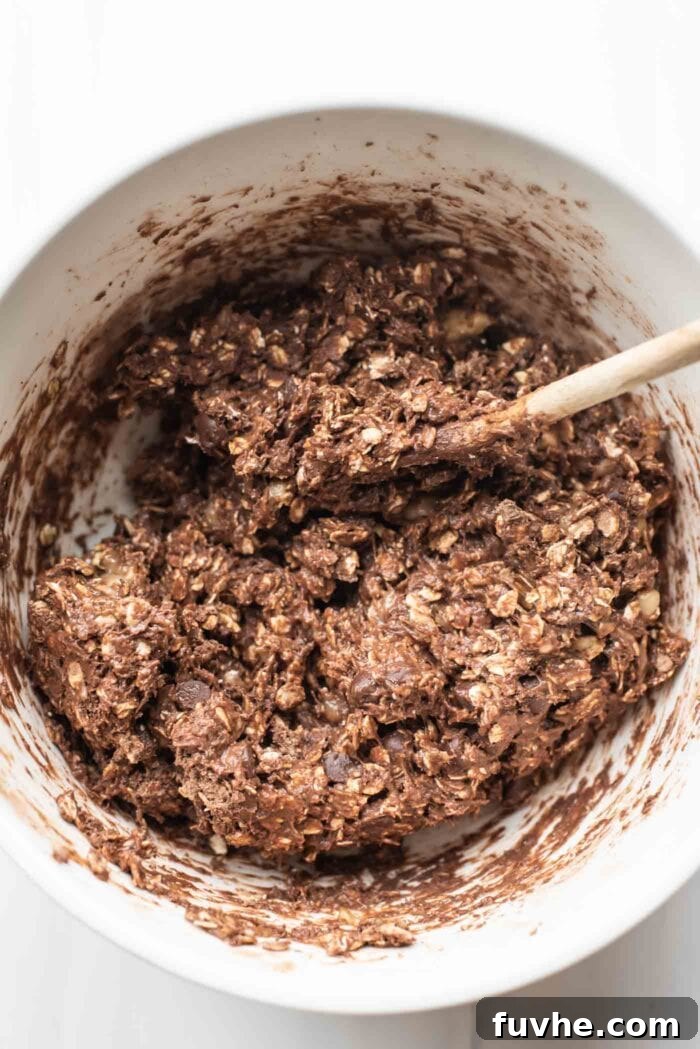
Step 2. Combine All Ingredients: Once the banana is mashed, add the remaining ingredients to the bowl: oats, vegan protein powder, cocoa powder, and dairy-free chocolate chips. Using a spatula or a strong spoon, mix everything together thoroughly. Continue mixing until all the dry ingredients are fully incorporated into the banana, forming a thick, uniform dough. The mixture should be dense enough to hold its shape.
Step 3. Bake to Perfection: Transfer the thick dough into your prepared square baking pan. Use the back of a spoon or your hands to spread the mixture evenly across the pan, pressing it down firmly to ensure a compact and consistent layer. If you’re feeling extra indulgent, now is the time to sprinkle some additional dairy-free chocolate chips on top before baking. Place the pan in the preheated oven and bake for approximately 15 minutes. The bars will look set and firm when ready.
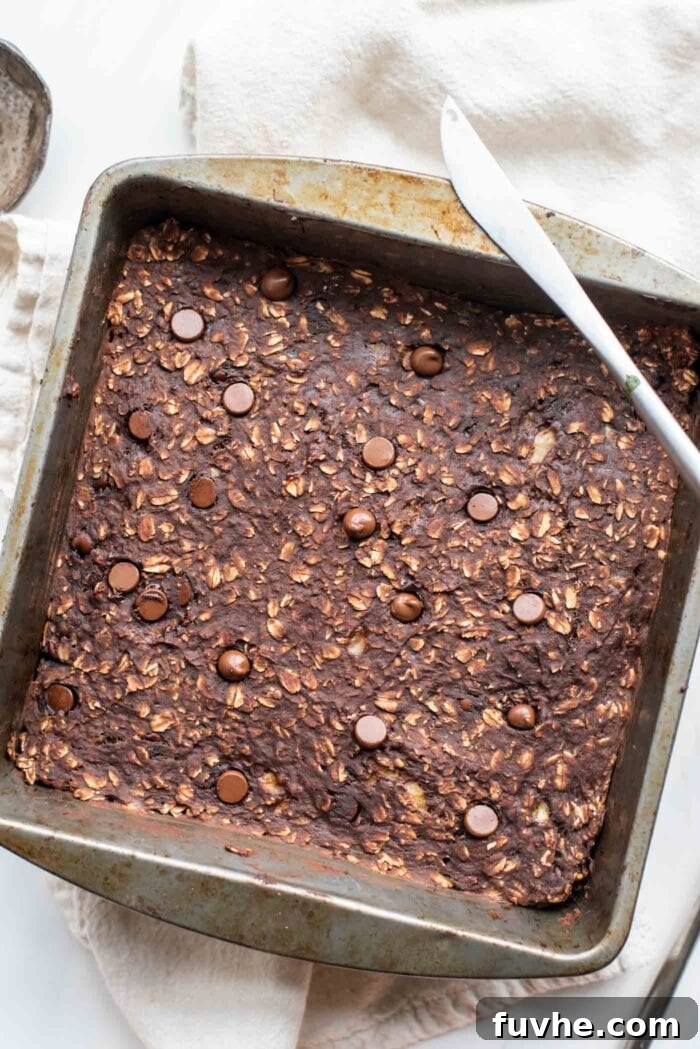
Step 4: Cool, Slice, and Enjoy: Once baked, remove the pan from the oven. This next step is crucial for the bars to maintain their shape: let them cool in the pan for at least 10 minutes. This cooling period allows the bars to firm up and set properly, making them much easier to slice without crumbling. After cooling, carefully lift the parchment paper (if used) or gently loosen the edges. Slice the baked oatmeal into 16 bars and serve! These bars are delightful warm or at room temperature.
Storage and Reheating Tips for Your Baked Oatmeal Bars
One of the many benefits of these vegan chocolate baked protein oatmeal bars is how well they store, making them perfect for meal prepping healthy snacks for the week or even longer. Proper storage ensures they retain their delicious flavor and texture.
- Fridge Storage: After baking, allow the bars to cool completely to room temperature. This is essential to prevent condensation, which can make them soggy. Once fully cooled, transfer them to an airtight container. They will stay fresh and delicious in the refrigerator for up to 5 days. This makes them an excellent grab-and-go snack throughout the week.
- Freezer Storage: For longer-term enjoyment, these bars freeze beautifully. Again, ensure they are completely cooled before freezing. Place them in a single layer on a baking sheet to flash freeze for about an hour – this prevents them from sticking together. Once firm, transfer them to a freezer-safe container or a heavy-duty freezer bag. Label with the date, and they will keep well for up to 3 months. Freezing them individually makes it easy to pull out just one or two bars as needed.
- Reheating & Thawing:
- From Frozen: If frozen, you can thaw the bars at room temperature for about an hour, or transfer them to the fridge overnight.
- Warming Up: While delicious cold, these bars are also incredibly yummy warmed up. You can reheat them in the oven at a low temperature (around 300°F/150°C) for 5-10 minutes, or simply pop one in the microwave for 20-30 seconds until warm and soft. The chocolate chips will get deliciously gooey!
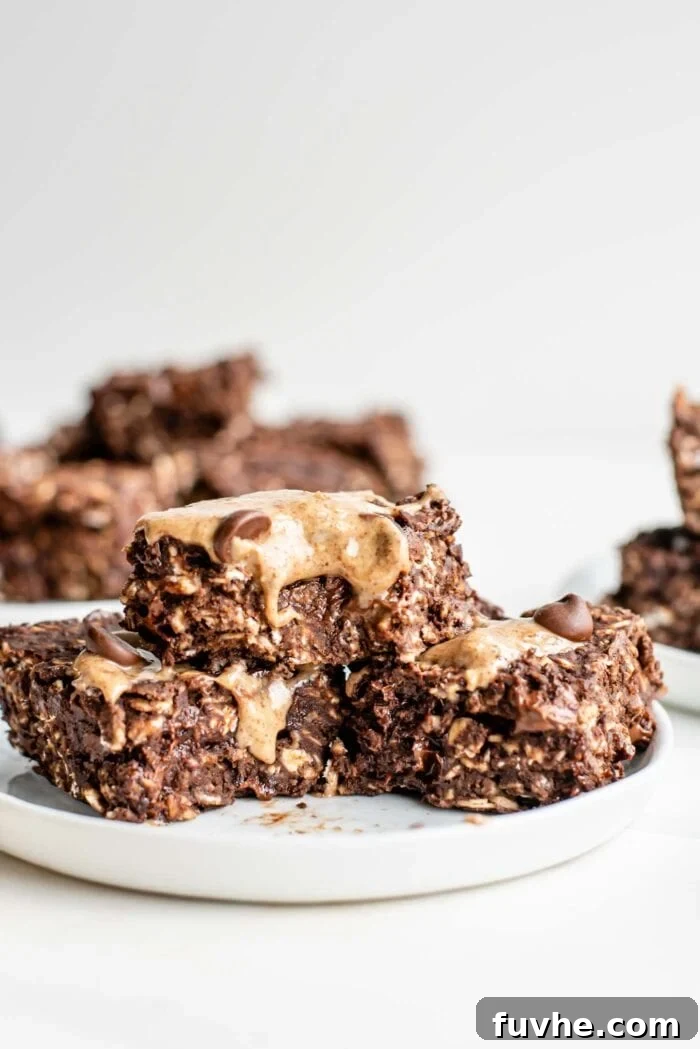
- Serving Suggestion: For an extra treat, try warming a bar and topping it with a dollop of your favorite almond butter or peanut butter. The combination of warm chocolate and creamy nut butter is truly divine!
Tips for Success & Creative Variations
While this recipe is incredibly simple, a few extra tips can elevate your baking experience and allow for delicious customization:
- Perfecting the Mash: The smoother your mashed banana, the more uniform your bar texture will be. Don’t rush this step! If your bananas aren’t super ripe, you might need a bit more effort or even a quick pulse in a food processor.
- Don’t Overmix: Once the dry ingredients are added, mix just until combined. Overmixing can sometimes develop gluten in oats (if not gluten-free certified) or impact the texture.
- Flavor Boosters:
- Vanilla Extract: A teaspoon of vanilla extract can enhance the chocolate and banana flavors beautifully.
- Spices: A pinch of cinnamon or a dash of nutmeg can add warmth and complexity.
- Coffee Enhancement: A half teaspoon of instant espresso powder (mixed into the dry ingredients) can deepen the chocolate flavor without making the bars taste like coffee.
- Additional Mix-ins:
- Nuts & Seeds: For added crunch and nutrients, consider folding in 1/4 cup of chopped walnuts, pecans, sunflower seeds, or chia seeds.
- Dried Fruits: A handful of raisins, dried cranberries, or chopped dates can add extra sweetness and chewiness.
- Coconut: Shredded unsweetened coconut can introduce a tropical hint and textural interest.
- Sweetness Adjustment: Remember, the natural sweetness comes from the bananas. Taste your mashed banana mixture before adding the dry ingredients (and *before* any optional sweeteners) to gauge how sweet your bananas are. Adjust optional sweeteners accordingly.
- Pan Size Matters: Using a pan smaller than 7-8 inches will result in thicker bars that may require a few extra minutes of baking. A larger pan will yield thinner bars that might bake quicker. Always keep an eye on them.
Frequently Asked Questions (FAQ)
Here are answers to some common questions about making these protein oatmeal bars:
- Can I use frozen bananas? Yes! Thaw them completely first, then drain any excess liquid before mashing. Frozen bananas often become very liquidy when thawed, so ensuring they are well-drained will help maintain the right consistency of your dough.
- What if I don’t have vegan protein powder? While the recipe is designed around protein powder for its specific binding and nutritional properties, you *can* omit it. If you do, you might need to adjust the texture. Consider adding an extra tablespoon or two of oats or a tablespoon of flaxseed meal to help absorb moisture and bind the bars. The nutritional profile will, of course, change.
- Can I use a different fruit instead of banana? Bananas are key for the texture and sweetness in this specific recipe. While you could experiment with mashed apple sauce or pumpkin puree, you would likely need to add more sweetener and potentially more binder (like flaxseed meal) as these fruits have different moisture and binding properties than bananas.
- How do I know when they’re fully baked? The bars should appear firm and set when gently pressed. The edges might be lightly golden. A toothpick inserted into the center should come out mostly clean with a few moist crumbs. Be careful not to overbake, as they can become dry.
- Are these good for breakfast? Absolutely! With oats for complex carbs, bananas for natural energy, and protein powder for satiety, these bars make an excellent, well-rounded breakfast or breakfast component, especially when paired with a fruit or a cup of coffee.
Explore More Baked Oatmeal Creations
If you love the convenience and deliciousness of these baked oatmeal bars, you’ll be thrilled to discover other variations to keep your healthy snacking interesting. Here are a few more baked oatmeal recipes you might enjoy:
- Baked Pumpkin Oatmeal Bars: Perfect for fall or any time you crave warm, spiced flavors.
- Vegan Baked Oatmeal Cups: Individually portioned and great for grab-and-go breakfasts.
- Easy Banana Baked Oatmeal: A comforting, shareable baked oatmeal dish.
- Vegan Banana Oatmeal Bars: Another simple, banana-sweetened bar option.
- Carrot Cake Baked Oatmeal: Enjoy the flavors of carrot cake in a healthy breakfast form.
Chocolate Baked Protein Oatmeal Bars
By: Deryn Macey
These yummy vegan chocolate baked oat bars make the perfect sweet but healthier snack or dessert. Easy to make with just 5 simple ingredients, these will become snacking staple!
Prep Time: 5 mins
Cook Time: 15 mins
Total Time: 20 mins
Servings: 16 bars
Ingredients
- 1 3/4 cups ripe mashed banana (about 410 g, approximately 4 small bananas)
- 2 cups quick or rolled oats (200 g)
- 2 scoops chocolate or vanilla vegan protein powder (60 g)
- 2 tbsp cocoa powder (15 g)
- 1/2 cup dairy-free chocolate chips (85 g)
Instructions
- Preheat oven to 350°F (175°C). Prepare a 7-8 inch square baking pan with a light coating of non-stick cooking spray or line with parchment paper.
- Place the banana in a mixing bowl and use an immersion blender or fork to mash into a smooth paste.
- Add the rest of the ingredients (oats, protein powder, cocoa powder, chocolate chips) and mix everything up into a thick, doughy batter.
- Evenly spread the mixture into the prepared pan and bake for 15 minutes.
- Remove from oven and let cool in the pan for 10 minutes before slicing into 16 bars.
Notes
- Taste: These are not super sweet or decadent and are definitely more of a healthy snack bar. For a sweeter bar, you can add up to 3 tbsp maple syrup, coconut sugar, or agave. For sugar-free sweetening, use a pinch of stevia or a few drops of liquid stevia or monk fruit.
- Storage: Let cool completely then store in an airtight container in the fridge for up to 5 days or in the freezer for up to 3 months. If frozen, thaw at room temperature or in the fridge, or microwave for a quick thaw. Enjoy cold or warm in the microwave or oven.
- Serving: Try them warm with a spread of almond or peanut butter for an extra delicious treat.
Nutrition (per bar)
- Serving: 1 bar
- Calories: 114 kcal
- Carbohydrates: 18 g
- Protein: 6 g
- Fat: 3 g
- Sodium: 46 mg
- Fiber: 3 g
- Sugar: 4.8 g
Originally published on February 11, 2017.