
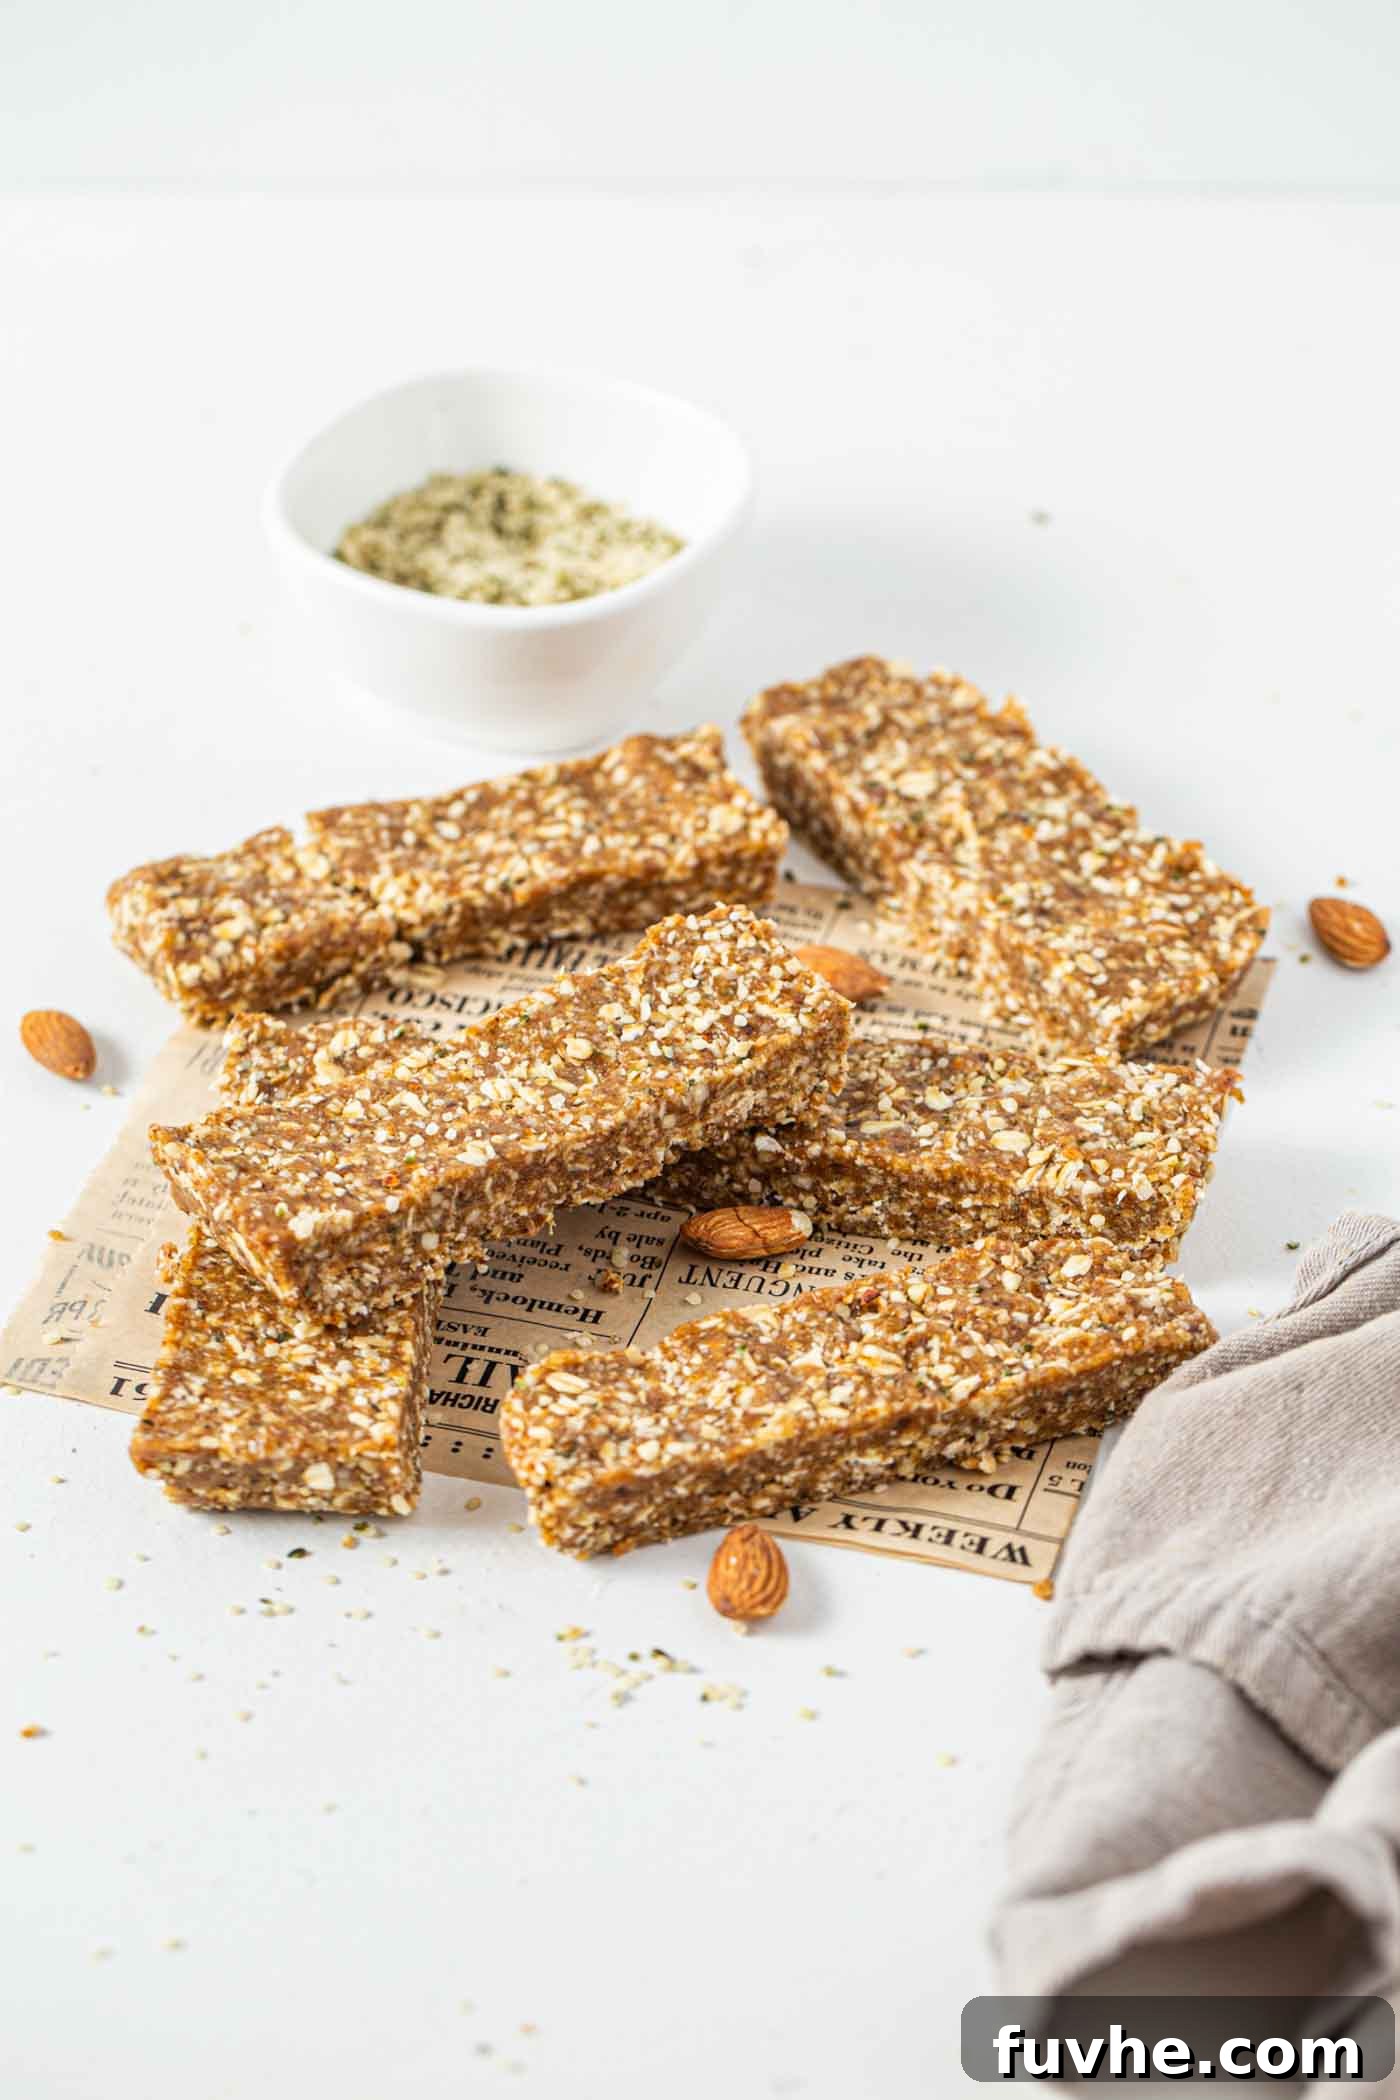
Irresistible No-Bake Oatmeal Energy Bars: Your Ultimate Guide to Healthy, Quick Snacks
Are you constantly on the lookout for a healthy, delicious, and incredibly convenient snack that can power you through your day without the hassle of baking? Look no further! These delightful no-bake oatmeal energy bars, packed with wholesome almonds and nutrient-rich hemp seeds, are precisely what you need. Crafted in mere minutes using just six core ingredients, they deliver a perfect blend of sustained energy, plant-based protein, and satisfying flavor. Say goodbye to expensive, additive-filled store-bought options – with this recipe, you can whip up a batch of these homemade marvels faster and healthier than ever before.
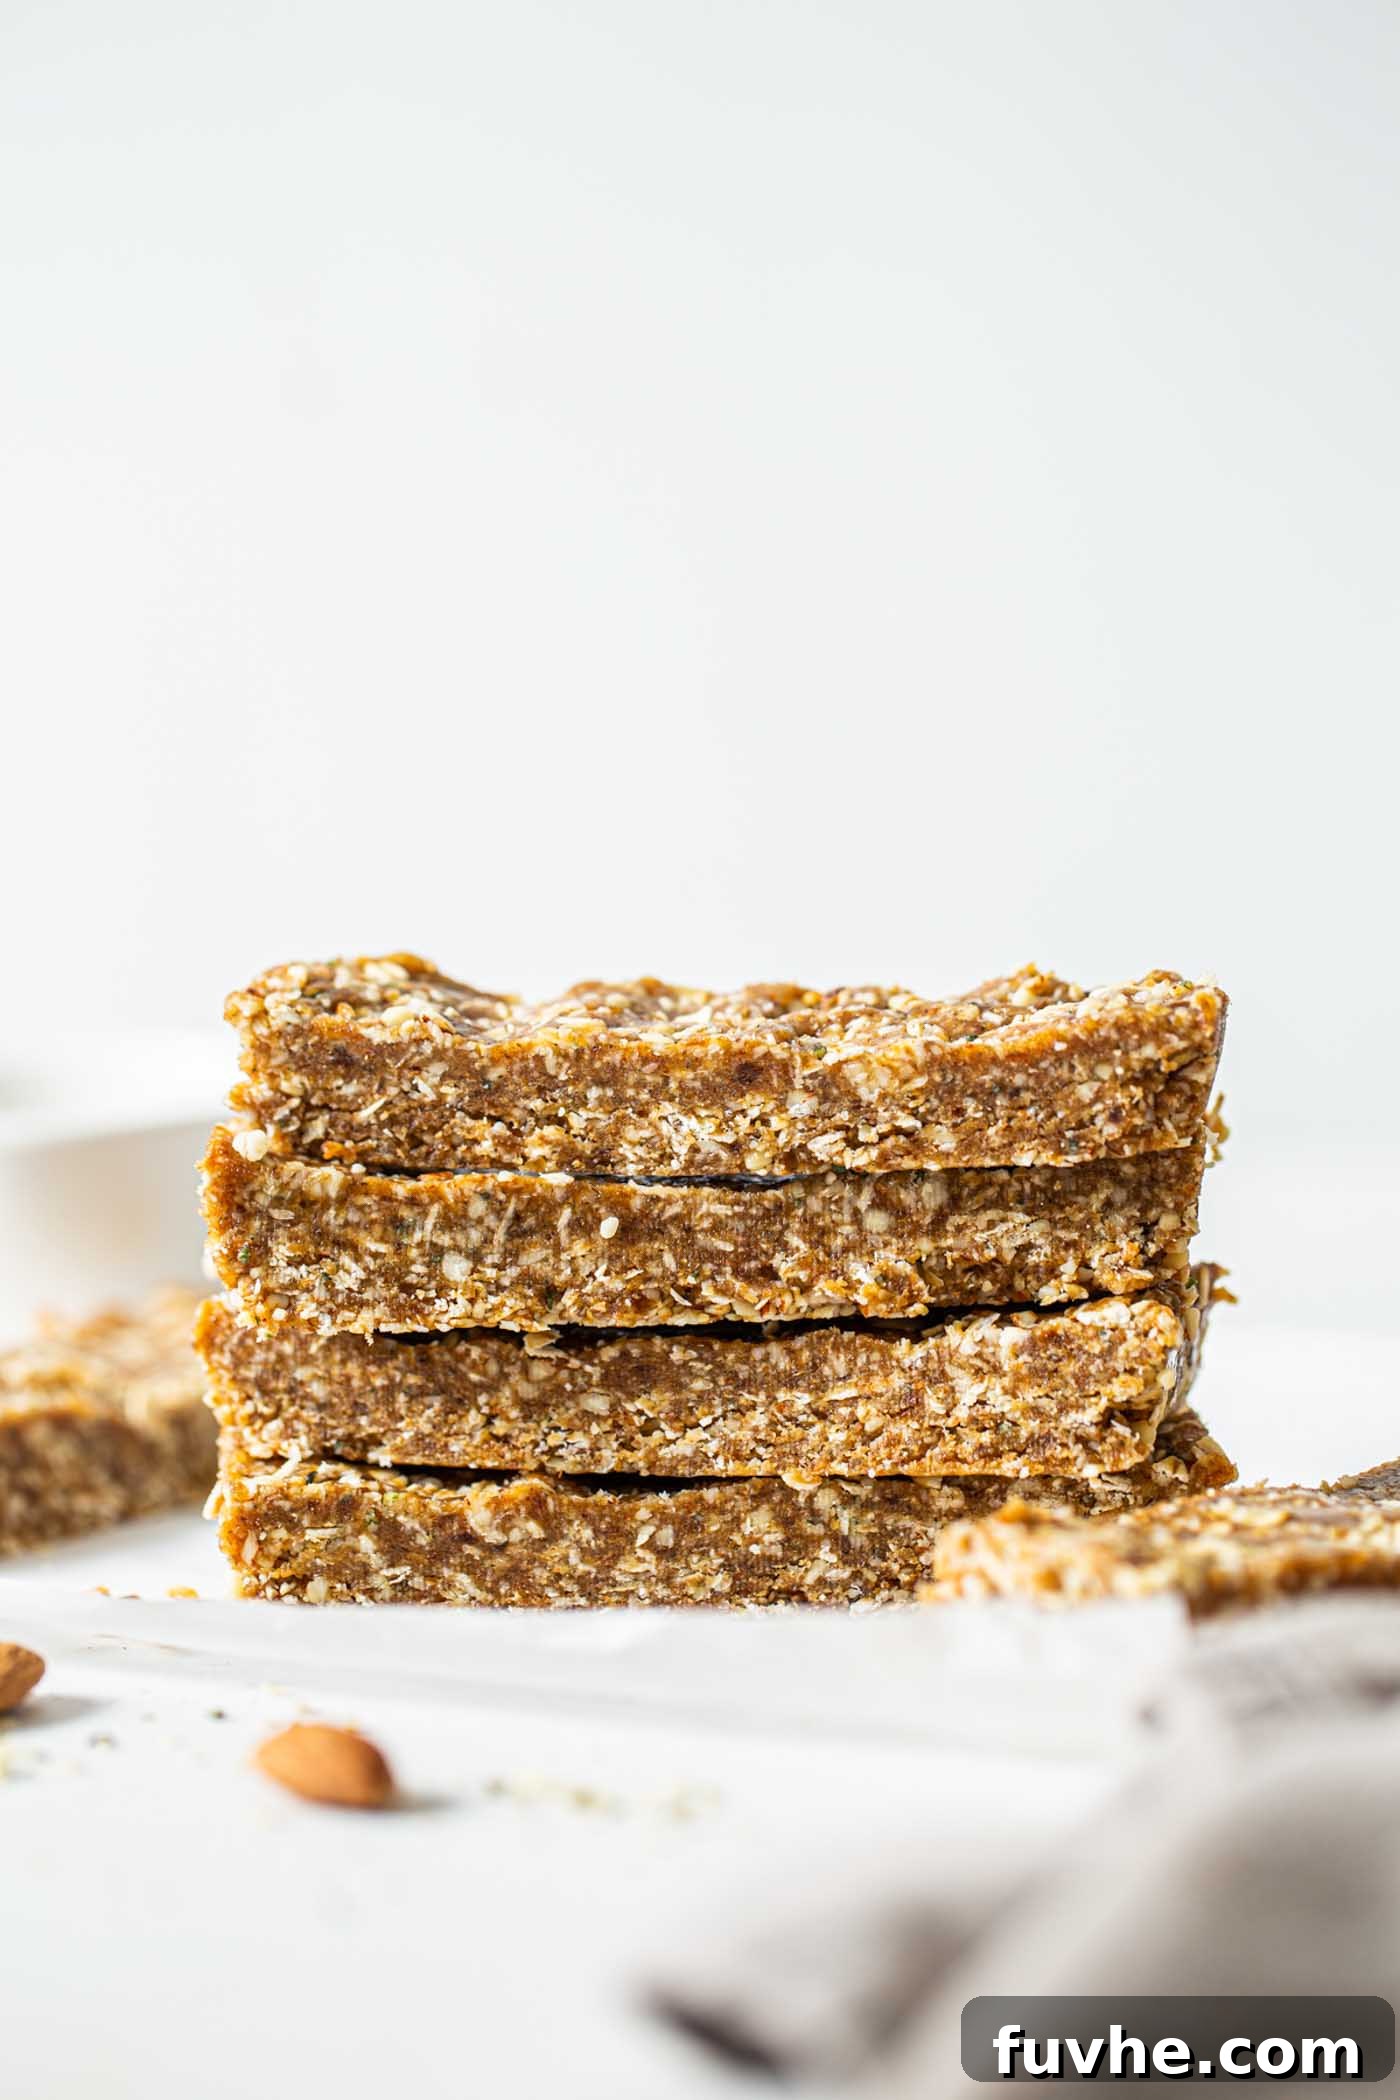
Why These No-Bake Oatmeal Energy Bars Will Become Your Go-To Snack
These homemade no-bake energy bars are more than just a quick bite; they represent a significant upgrade to your snacking routine. They offer a simple, delicious, and highly nutritious alternative to the often-processed and sugar-laden choices dominating grocery store shelves. Here’s a closer look at why they’re an absolute game-changer for anyone seeking convenient, wholesome fuel:
- Remarkably Healthy & Diet-Friendly: Designed with optimal health in mind, these bars are completely vegan, making them suitable for plant-based diets. They are also certified gluten-free (ensure your oats are certified GF), entirely oil-free, and contain absolutely no added refined sugar. Their natural sweetness and binding power come from nutrient-dense dates and a touch of pure maple syrup. Each bar is also a powerhouse of nutrition, packing an impressive 8 grams of high-quality plant-based protein, making them an excellent choice for muscle recovery, sustained energy, and keeping hunger at bay.
- Effortlessly Easy & Exceptionally Quick: Bid farewell to complicated baking processes and long hours in the kitchen! These energy bars require absolutely no oven time and come together in just minutes of active preparation. The process is straightforward: simply combine your ingredients in a food processor, press the mixture into a pan, chill, and then slice. Their incredible simplicity makes them an ideal solution for even the most demanding and busy schedules, allowing you to prioritize healthy eating without sacrificing time.
- Perfect for Smart Meal Prepping: Imagine having a stash of healthy, homemade snacks ready to grab and go throughout your busy week. These bars are perfectly suited for meal preparation. Prepare a larger batch at the start of your week, and you’ll have delicious, nutritious options readily available. They store exceptionally well in both the fridge and the freezer, ensuring you always have a wholesome snack at hand when cravings strike or energy levels dip.
- Versatile & Highly Travel-Friendly: Whether your day involves an intense workout, a long day at the office, an adventurous hike, a relaxing camping trip, a lengthy road journey, or simply packing nutritious lunches for school or work, these bars are the ultimate companion. Their sturdy yet chewy texture and inherent ability to travel well make them an ideal and reliable fuel source for any activity or adventure you embark on.
- Deliciously Satisfying & Crave-Worthy: Beyond their undeniable health benefits and unparalleled convenience, these bars are genuinely bursting with flavor and supremely satisfying. The harmonious combination of chewy oats, crunchy almonds, subtly sweet dates, all beautifully bound by creamy peanut butter and the distinct nutty undertones of hemp seeds, creates a flavor profile that appeals to nearly everyone. Be warned: they are so irresistibly good that they tend to disappear quickly from any kitchen!
If you’re embarking on your journey into making homemade energy bars, this particular recipe serves as an excellent and highly accessible starting point. Once you experience just how easy and incredibly rewarding it is to create your own nourishing snacks, you might find yourself inspired to explore a wider variety of options. Don’t miss out on these other fantastic and equally simple no-bake recipes: try our classic No-Bake Granola Bars, discover our allergy-friendly Nut-Free Energy Bars, or indulge in our delightful No-Bake Lemon Pie Bars.
Power-Packed Ingredients for Your Wholesome No-Bake Energy Bars
The foundation of these incredibly wholesome energy bars lies in a carefully selected blend of simple, high-quality ingredients. Below, we delve into each component, explaining its role and how it contributes to the bars’ exceptional flavor, satisfying texture, and remarkable nutritional value. For precise measurements and a comprehensive list, please consult the full recipe card located at the conclusion of this article.
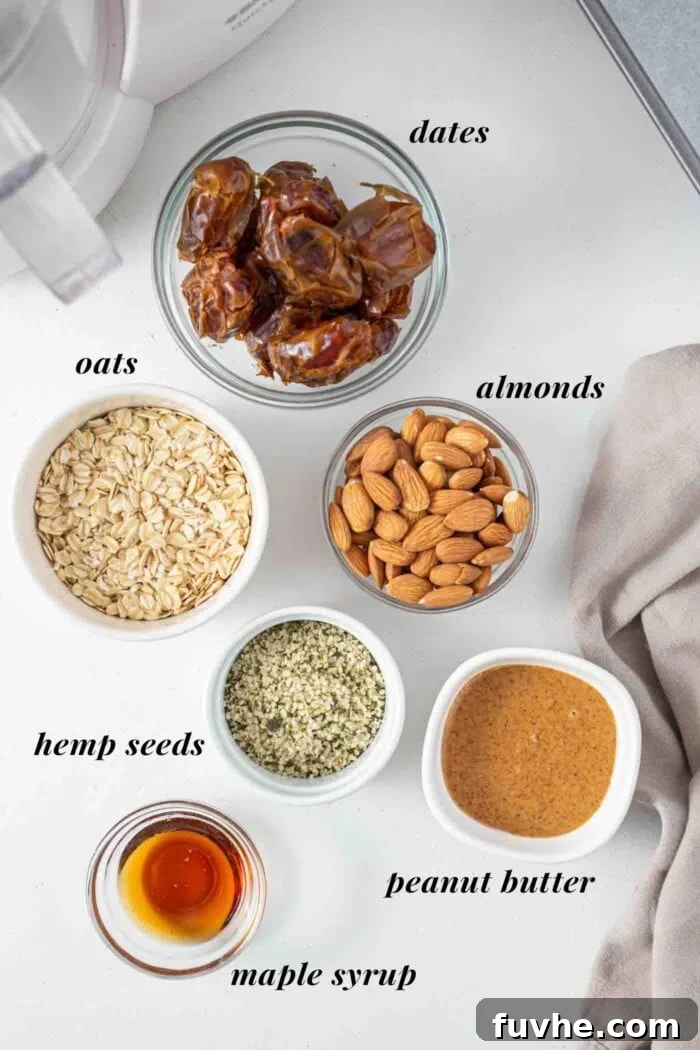
- Dates: The Natural Sweetener and Essential Binder
Dates are absolutely critical to the success of this recipe. They serve a dual purpose, acting as both the primary source of natural sweetness and the crucial binder that holds all the ingredients together. Any variety of soft, moist dates will work beautifully here; Medjool or Sayer dates are particularly favored due to their naturally soft and caramel-like texture. A vital tip: if your dates feel at all dry or firm, it’s imperative to soak them in hot water for about 15 minutes. After soaking, drain them thoroughly before use. This rehydration step is fundamental for achieving the perfect sticky dough consistency, ensuring your bars are cohesive and chewy.
- Almonds: For Satisfying Crunch, Protein, and Healthy Fats
Raw, plain almonds are incorporated to add a delightful textural crunch and provide a significant boost of healthy monounsaturated fats, dietary fiber, and valuable plant-based protein. When selecting almonds, opt for those without any added oils or salt to maintain the bars’ natural integrity. While almonds offer a fantastic base, this recipe is incredibly flexible. You can easily substitute them with other nuts such as pecans, walnuts, or cashews to introduce different flavor nuances. For individuals with nut allergies, sunflower seeds make an excellent and equally nutritious nut-free alternative.
- Oats: The Fiber-Rich, Energy-Sustaining Foundation
Both rolled oats (also known as old-fashioned oats) and quick oats are suitable for this recipe, offering slight variations in texture. Oats are an exceptional source of complex carbohydrates and soluble fiber, which are vital for providing sustained energy release and promoting a feeling of fullness. Rolled oats will lend a slightly chewier bite and more distinct texture to the bars, while quick oats will result in a slightly smoother, more uniform bar. If adhering to a strict gluten-free diet, always ensure you use oats specifically labeled as certified gluten-free to avoid cross-contamination.
- Hemp Seeds (Hemp Hearts): A Nutritional Powerhouse of Omegas and Protein
These small but mighty seeds, often found under the name “hemp hearts” in stores, are true nutritional powerhouses. They are richly endowed with a balanced profile of omega-3 and omega-6 fatty acids, boast a high content of complete plant protein, and are packed with essential minerals like magnesium and zinc. Hemp seeds contribute a subtle, pleasant nutty flavor and significantly enhance the bars’ overall nutritional density, making them even more energizing and satiating. You can typically locate them in the health food aisle of most well-stocked grocery stores or conveniently purchase them online.
- Peanut Butter: The Creamy Binder and Flavor Enhancer
Natural peanut butter, ideally one made with just peanuts and perhaps a touch of salt (or no salt at all), serves as another crucial binder in this recipe. Beyond its binding properties, it imparts a rich, comforting, and familiar flavor that complements the other ingredients beautifully. For those managing peanut allergies or simply desiring a different taste, a wide array of alternatives can be used with great success. Almond butter, cashew butter, tahini (for a distinctive sesame-based flavor), or sunflower seed butter (often called sunbutter) are all excellent substitutes, each offering its own unique flavor profile and nutritional benefits.
- Sweetener: A Touch of Pure Maple Syrup
While the dates provide a substantial amount of natural sweetness, a single tablespoon of pure maple syrup adds an extra layer of nuanced flavor and plays an important role in ensuring the bars are perfectly bound and achieve optimal moisture. Pure maple syrup is preferred for its natural origins, distinct taste, and robust nutritional profile. Agave syrup makes a suitable vegan alternative with a similar consistency. If veganism isn’t a concern, honey can also be effectively used as a substitute.
- Pinch of Salt (Optional): Enhances All Flavors
Although a small pinch of salt is optional, its inclusion can make a remarkable difference in the overall flavor of your energy bars. Salt acts as a flavor enhancer, balancing the sweetness of the dates and maple syrup and bringing out the more complex notes of the nuts, seeds, and oats, resulting in a more robust and satisfying taste experience.
Effortless Preparation: How to Make Your Delicious No-Bake Oatmeal Energy Bars
Creating these delightful and nourishing energy bars is remarkably simple, requiring minimal effort and absolutely no baking whatsoever. Follow these straightforward steps to achieve a perfect batch every single time. For precise ingredient measurements and a comprehensive breakdown, please refer to the complete recipe card found at the bottom of this article.
-
Step 1: Create the Sticky Foundation
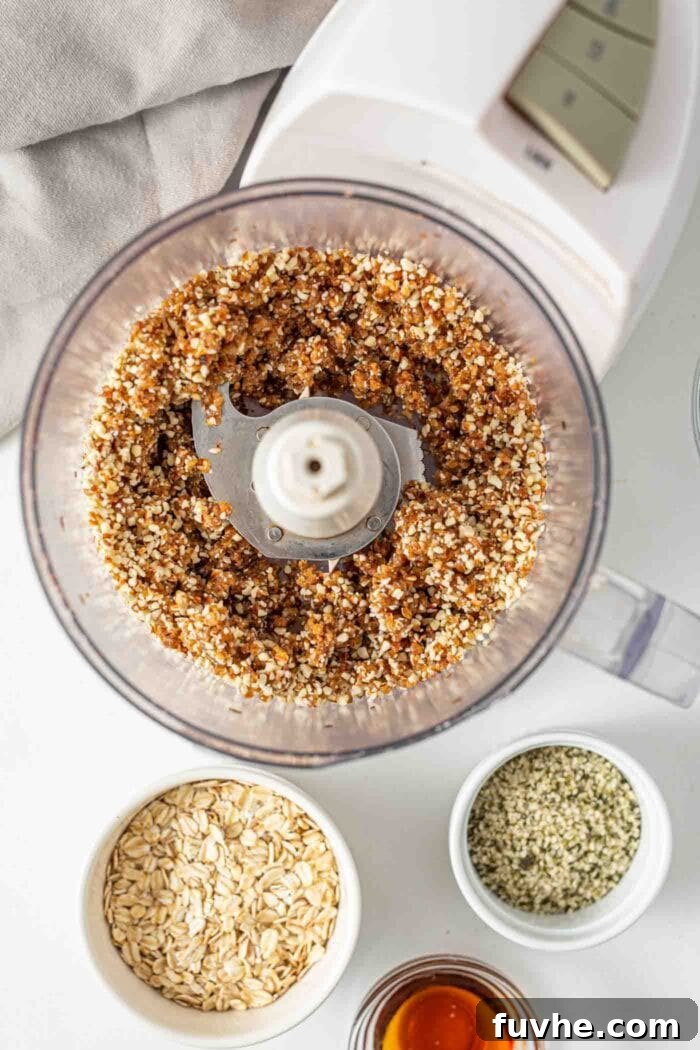
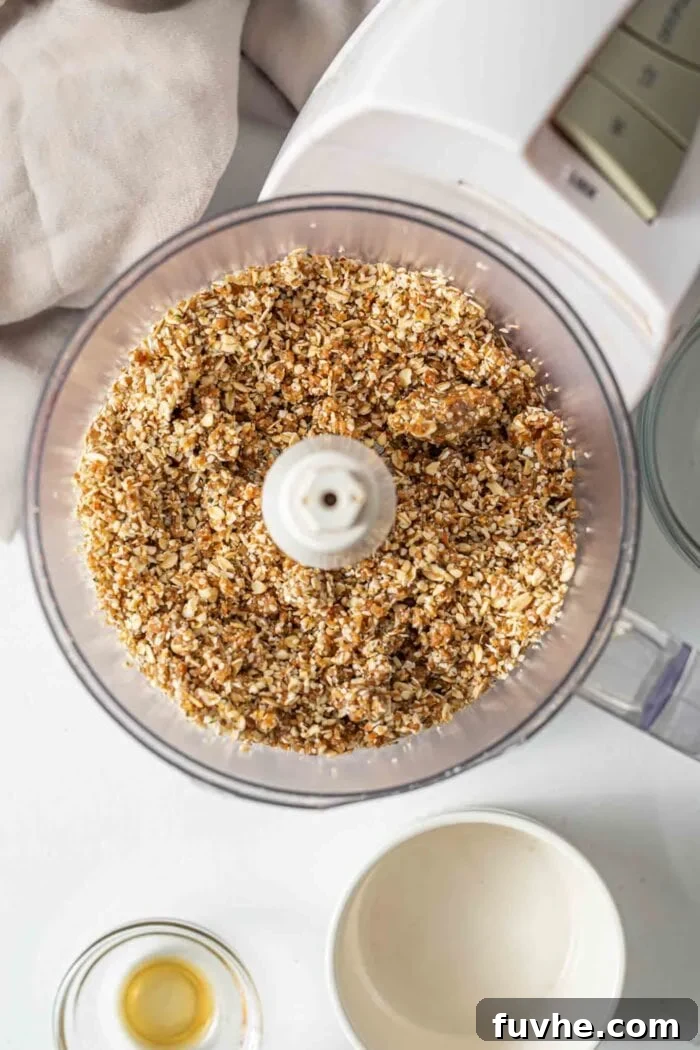
Begin by adding your raw almonds and carefully pitted dates to the bowl of a high-powered food processor. Process these ingredients thoroughly until they are finely broken down and gradually coalesce into a sticky, cohesive, yet crumbly dough. The mixture should be uniformly combined, with no discernible large pieces of dates or almonds remaining. When you press a small amount between your fingers, it should hold together firmly. This crucial initial step establishes the essential sticky base that will bind all the subsequent ingredients into a delicious and sturdy bar.

The almond and date mixture after initial processing, forming a perfect sticky base. -
Step 2: Incorporate Remaining Ingredients to Form the Complete Dough
Next, introduce the rolled oats, hemp seeds, natural peanut butter, and pure maple syrup into the food processor alongside your almond-date mixture. Continue to process these ingredients until they fully combine and form a thick, uniformly sticky dough. This stage may require a bit of patience; you might find it necessary to pause the processor several times to scrape down any ingredients that cling to the sides of the bowl, ensuring an even mix. The final dough should possess a pliable consistency, allowing you to easily press a small portion between your fingers to confirm it holds its shape. Should the dough appear excessively dry or crumbly (a common occurrence if your dates lacked sufficient moisture), gradually incorporate 1-2 tablespoons of warm water, adding one teaspoon at a time, and continue processing until the desired cohesive texture is achieved.
The completed energy bar dough, perfectly sticky and ready to be pressed. -
Step 3: Press Firmly, Chill, and Allow to Set
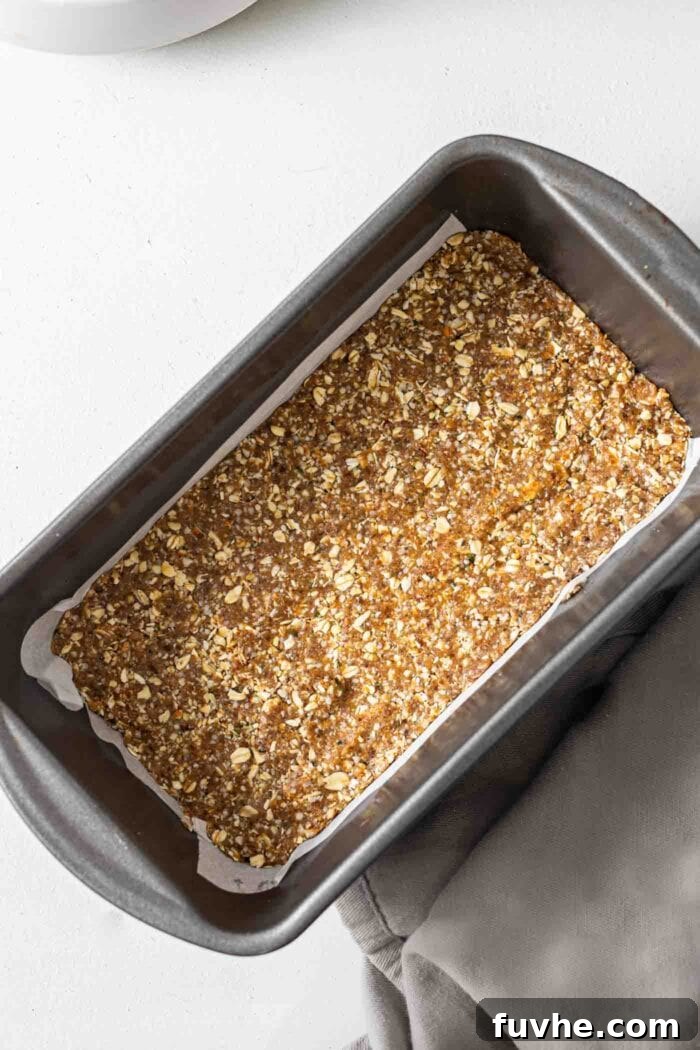
Prepare a standard-sized loaf pan by lining it completely with parchment paper. Ensure there’s enough overhang on both the long and short sides, which will greatly assist in easily lifting the solidified bars out later. Transfer the prepared dough mixture into the lined pan. Utilizing your hands or the back of a sturdy spoon, firmly and evenly press the dough across the entire base of the pan. It’s crucial to take your time during this step, working the mixture diligently into all the corners and edges to create a dense, uniform, and compact layer. The more firmly you press, the better your finished bars will hold their shape and resist crumbling. Once thoroughly compacted, place the entire pan into the freezer for at least one hour to allow the bars to firm up completely. While technically edible immediately, chilling is highly recommended as it makes the bars significantly easier to cut and provides a much more satisfying, solid texture.
The energy bar mixture pressed into a loaf pan, chilling for optimal firmness. -
Step 4: Slice and Indulge in Your Homemade Bars
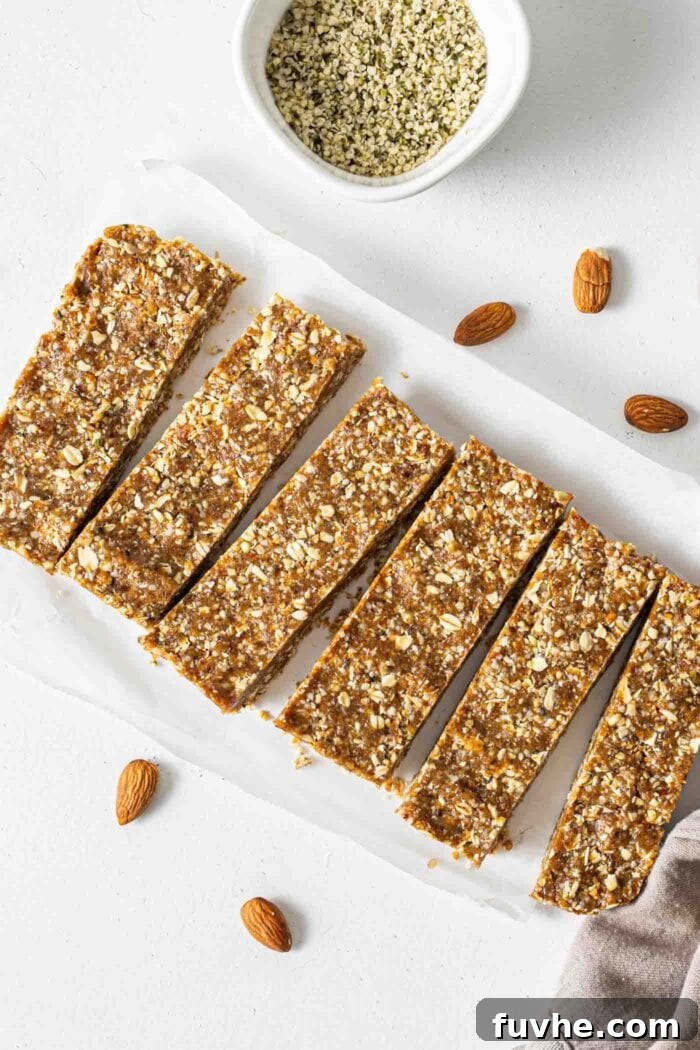
After the bars have achieved sufficient firmness in the freezer, gently use the parchment paper overhang to lift the entire solidified block of energy bars out of the loaf pan. Carefully transfer it onto a clean cutting board. Employing a sharp chef’s knife, meticulously cut the block into 6 or 8 evenly sized bars, depending on your preferred portion size. For achieving the cleanest possible cuts, a professional trick is to warm your knife blade slightly under hot running water and then wipe it dry between each cut; this helps prevent the sticky dough from adhering to the blade. Once sliced, your delectable no-bake oatmeal energy bars are ready to be savored! Any leftover bars should be stored according to the recommendations provided in the dedicated storage section below to maintain their freshness.
Perfectly cut no-bake oatmeal energy bars, ready for guilt-free snacking.
Expert Tips for Perfect No-Bake Oatmeal Energy Bars Every Time
Achieving perfectly textured and incredibly flavorful no-bake energy bars is surprisingly simple, especially when you follow these tried-and-true expert tips:
- The Importance of Soft, Moist Dates: This is arguably the most critical factor for success. Soft, pliable, and fresh dates are absolutely essential for creating a cohesive, sticky dough that holds together well. If your dates feel even slightly dry or firm, do not skip the rehydrating step: soaking them in hot water ensures the bars bind properly and achieve that desirable chewy texture.
- Utilize a Powerful Food Processor: A robust food processor is your best tool for this recipe. It efficiently breaks down the tough nuts and dates into a fine, uniform consistency, and then thoroughly combines all the ingredients into a smooth, even dough. While some high-speed blenders might work, a food processor typically offers superior control for achieving the ideal dough texture without over-processing.
- Adjust Dough Consistency as Needed: The perfect dough should be thick, sticky, and easily pressed together without crumbling. If, after processing, the mixture feels too dry or crumbly, gradually add a very small amount of warm water (start with 1 teaspoon at a time) and re-process until it reaches the desired stickiness. Conversely, if your dough appears too wet or loose, you can add a tablespoon or two of extra oats or finely ground almonds to absorb the excess moisture.
- Press Firmly into the Pan: When transferring the dough to the loaf pan, do not be gentle! Compacting the dough firmly and evenly into the pan is paramount for creating dense, sturdy bars that won’t fall apart. Use the palm of your hand, a flat spatula, or even the bottom of a glass to press down thoroughly and distribute the mixture into all corners.
- Do Not Skip the Chill Time: While the temptation to taste them immediately is strong, patiently chilling the bars in the freezer for at least one hour dramatically improves their texture and makes them significantly easier to cut into neat, uniform portions. This chilling process helps the fats solidify and the ingredients meld, resulting in a less messy, firmer, and more satisfying bar.
- For Immaculate Cuts: To achieve beautifully clean edges on your bars, always use a large, sharp chef’s knife. For an extra touch of perfection, try running your knife under hot water and wiping it dry between each slice. This simple trick prevents the sticky dough from adhering to the blade, ensuring crisp, professional-looking cuts.
- Consider Doubling the Batch: This recipe typically yields a small batch of 6-8 bars, which tend to disappear rapidly! If you’re preparing for a family, meal prepping for the week, or simply want more on hand, consider doubling the recipe. You can then press the larger quantity into an 8×8-inch square pan for an increased yield.
Delicious Variations and Customizations for Your No-Bake Bars
One of the most appealing aspects of these no-bake oatmeal energy bars is their incredible versatility. Feel completely free to experiment with different ingredients and flavors to perfectly match your personal preferences, dietary needs, or simply to utilize what you already have in your pantry:
- Nut-Free Alternative: To make these bars safe for individuals with nut allergies, a simple substitution can be made. Replace the almonds with an equal quantity of raw sunflower seeds or pumpkin seeds. For the peanut butter, opt for a reliable nut-free alternative such as sunflower seed butter (often marketed as SunButter) or tahini.
- Explore Different Nuts & Seeds: Beyond almonds, a world of flavor awaits! Try incorporating walnuts, pecans, or cashews to introduce distinct flavor profiles and textures. You can also boost the overall seed content by adding healthy additions like chia seeds, ground flax seeds, or sesame seeds alongside the hemp seeds, further enhancing their nutritional value.
- Indulge with Chocolate: For those who love a touch of decadence, fold in a generous handful of mini chocolate chips (choose dark chocolate or dairy-free varieties to keep the bars vegan) into the dough after the main processing step. This adds a delightful burst of sweetness.
- Dried Fruit Enhancements: Elevate the sweetness and chewiness by incorporating other chopped dried fruits. Options like cranberries, raisins, dried cherries, or apricots can add new dimensions of flavor and texture to your bars.
- Spice Things Up: A dash of aromatic spices can transform the flavor profile. A pinch of cinnamon, nutmeg, or a splash of vanilla extract can add warmth and depth. For a brighter, zesty twist, consider adding a little orange or lemon zest to the mixture.
- Coconut Lover’s Dream: If you’re a fan of tropical flavors, mix in some shredded unsweetened coconut into the dough for added texture and a distinctive taste. You can also sprinkle a bit on top of the pressed mixture before chilling for an appealing finish.
- Protein Powder Boost: For an extra surge of protein, a scoop of your favorite plant-based protein powder (vanilla or unflavored varieties typically work best) can be added simultaneously with the oats and hemp seeds. Be mindful that protein powder can absorb moisture, so you might need to add an extra tablespoon of water or maple syrup to maintain the correct dough consistency.
- Alternative Sweeteners: While pure maple syrup is ideal, agave nectar can be used as a direct 1:1 substitute due to its similar consistency and sweetness. For those not adhering to a vegan diet, honey also serves as an effective natural sweetener.
Storing Your Homemade Energy Bars for Lasting Freshness
Proper storage is essential to preserving the delightful freshness and ideal texture of your homemade no-bake oatmeal energy bars. Follow these guidelines to ensure you can enjoy them for days, or even months, without compromising quality:
- Refrigerator Storage: For immediate and regular consumption, store the bars in a sealed airtight container in the refrigerator. When stored correctly, they will remain fresh and firm for up to 2 weeks. Keeping them chilled is particularly important as it helps maintain their structure and prevents them from softening too much, especially in warmer ambient temperatures.
- Freezer Storage (Highly Recommended for Longevity): For extending their shelf life significantly and for convenient meal preparation, the freezer is your best ally. Arrange the cut bars in a single layer within a freezer-safe airtight container or bag. If layering is necessary, place a sheet of parchment paper between each layer to prevent sticking. When stored this way, your bars will keep beautifully for up to 3 months, offering a quick and healthy option whenever needed. A fantastic benefit is that these bars typically do not freeze solid, allowing you to enjoy them straight from the freezer as a refreshing, chewy, and instantly satisfying treat!
- Room Temperature: If you plan to take these bars on the go for a short duration, such as a few hours for a picnic or a quick commute, they will generally hold up fine at room temperature. However, it’s important to note that they will naturally soften, especially in warmer climates or during hot weather. For optimal results and to maintain their firmness and freshness during travel, it’s advisable to start with bars that have been previously frozen or to store them in a cool place or an insulated bag whenever possible.
Frequently Asked Questions About No-Bake Oatmeal Energy Bars
- Are these no-bake energy bars truly healthy?
- Absolutely! Crafted exclusively from whole food ingredients like fiber-rich oats, naturally sweet dates, healthy nuts, and nutrient-dense seeds, these bars are a beacon of good health. They are generously packed with dietary fiber, beneficial healthy fats, and high-quality plant-based protein. Crucially, they are entirely free from refined sugars, unhealthy oils, and artificial additives that are commonly found in many commercial energy bars, making them a genuinely wholesome and intelligent choice for sustained energy and overall well-being.
- Can I make these without a food processor?
- A food processor is strongly recommended for this recipe, as it is highly efficient at achieving the precise consistency required, particularly for finely breaking down the dates and almonds. While it might be possible to finely chop the nuts and dates by hand and then mix everything together, this method will be considerably more labor-intensive and may not yield a dough that is as smooth or cohesive, potentially affecting the final texture of the bars.
- How long do these no-bake bars last?
- When stored correctly in an airtight container, these versatile no-bake bars can last for up to 2 weeks in the refrigerator. For extended freshness and convenience, they can be safely stored in the freezer for up to 3 months. This makes them an excellent option for proactive meal preparation and having healthy snacks readily available.
- Can I use honey instead of maple syrup?
- Yes, you certainly can! If your dietary preferences do not require the bars to be strictly vegan, honey can be used as a direct 1:1 substitute for maple syrup. Both honey and maple syrup provide natural sweetness and effectively contribute to binding the ingredients together, yielding a delicious result.
- What’s the best way to cut the bars cleanly?
- To achieve beautifully neat and clean cuts, it is essential to ensure the bars are thoroughly chilled and firm from the freezer before attempting to slice them. Utilize a large, sharp chef’s knife. For an added trick that ensures exceptionally clean edges, try running your knife under hot water and then wiping it completely dry between each slice. This technique helps prevent the sticky dough from adhering to the blade, resulting in perfectly defined bars.
- Can I add protein powder to these bars for an extra boost?
- Absolutely, you can! To fortify these bars with an additional protein kick, feel free to add one scoop of your preferred plant-based protein powder (vanilla or unflavored varieties typically integrate best) into the food processor at the same time you add the oats and hemp seeds. It’s worth noting that protein powder can absorb moisture, so you might need to compensate by adding an extra tablespoon of water or maple syrup to maintain the desired pliable dough consistency.
Conclusion: Your New Favorite Healthy Snack Awaits!
These no-bake oatmeal energy bars are a shining example of how simple, healthy eating can be incredibly delicious, satisfying, and refreshingly convenient. With their foundation of wholesome ingredients, effortless preparation, and adaptable nature, they truly stand as the perfect snack solution for anyone aiming to boost their energy, conquer cravings healthily, and embrace a vibrant, active lifestyle. Whether you’re a busy parent juggling multiple tasks, an avid outdoor enthusiast, or simply someone seeking a better-for-you treat, these bars flawlessly tick all the right boxes. We wholeheartedly encourage you to give them a try, and prepare to wholeheartedly fall in love with what will undoubtedly become your new go-to homemade snack!
If you embark on the delightful journey of making these amazing oatmeal energy bars or any other recipe featured on Running on Real Food, please don’t hesitate to leave a comment and a ⭐⭐⭐⭐⭐ rating in the comment section below. Your invaluable feedback not only helps other enthusiasts discover and enjoy these recipes, but I also genuinely cherish hearing from you! And as always, remember to tag me on Instagram @runningonrealfood so I can admire your wonderful culinary creations! Thank you for choosing and trying my recipes! – Deryn
No-Bake Oatmeal Energy Bars Recipe
By: Deryn Macey
These no-bake oatmeal bars make an excellent healthy snack anytime of day. They’re chewy and just sweet enough with a hint of peanut butter and almonds. Store them in the fridge or freezer for a quick snack for busy days on the go, or anytime you need a little wholesome treat.
Prep Time: 10 mins
Chill Time: 1 hr
Total Time: 1 hr 10 mins
Servings: 8 bars
Ingredients
- 1 cup packed, pitted soft dates (225 g)
- 1/2 cup almonds (75 g)
- 3/4 cup rolled oats (75 g)
- 1/4 cup hemp seeds (40 g)
- 1/4 cup natural peanut butter (or other nut or seed butter) (70 g)
- 1 tbsp maple syrup (15 ml)
- Pinch of salt (optional)
Instructions
- Place the almonds and pitted dates in a food processor or high-powered blender and mix until it forms a cohesive, crumbly dough.
- Add the oats, hemp seeds, peanut butter, and maple syrup to the food processor. Process until a thick, sticky dough forms that you can easily squeeze into a small ball. If the dough seems too dry, add 1-2 tablespoons of warm water, a teaspoon at a time, and process again.
- Line a standard-sized loaf pan with parchment paper, leaving an overhang on the sides. Firmly press the dough evenly into the pan, working it into all corners and flattening the surface. Place the pan in the freezer for about 1 hour to allow the bars to firm up completely.
- Use the parchment paper to lift the firmed-up block of bars out of the pan. Place on a cutting board and cut into 8 squares or 6 bars. Store in an airtight container in the fridge or freezer.
Notes
- Dates: Always use soft, fresh dates for best results as they provide essential moisture and binding. If using dry dates, soak them in hot water for 15 minutes, then drain thoroughly before blending.
- Nut-Free Option: To make these bars nut-free, substitute almonds with sunflower seeds and peanut butter with sunflower seed butter or tahini.
- Storage: Store in a sealed container in the fridge for up to 2 weeks. For optimal freshness and texture, freeze for up to 3 months. They are fine at room temperature for a day or two, but will soften. Keep them cool if possible.
Nutrition Facts
Serving: 1 bar
- Calories: 259 kcal
- Carbohydrates: 32 g
- Protein: 8 g
- Fat: 12 g
Originally published February 20, 2013, this recipe continues to be a beloved staple for healthy snacking.