
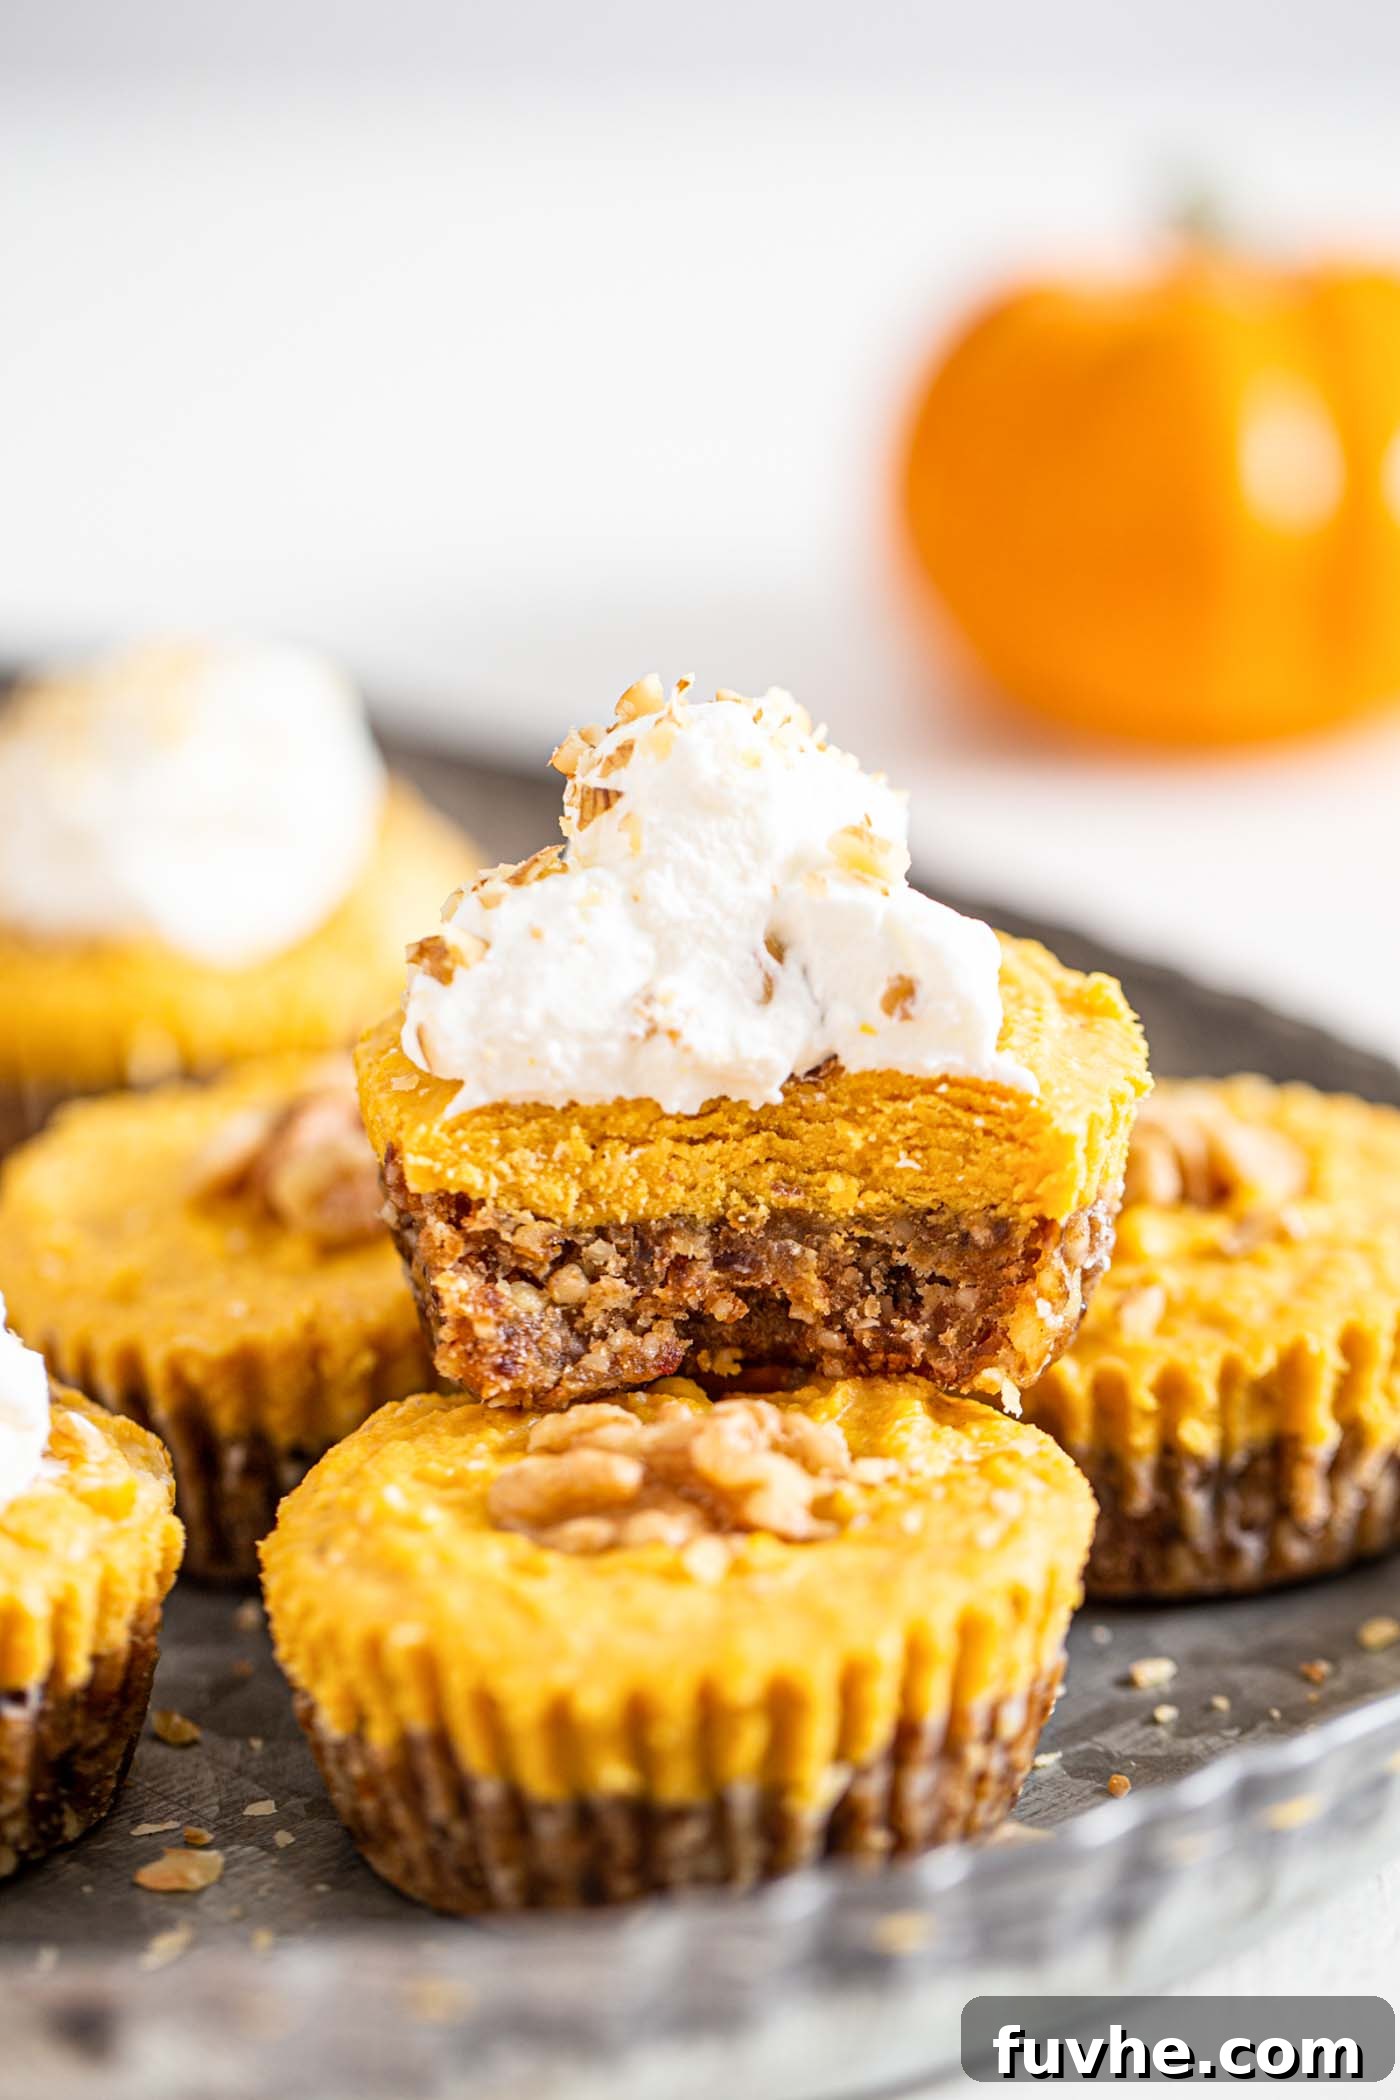
Irresistible Vegan No-Bake Pumpkin Pie Tarts: Your Perfect Fall Dessert
Craving the warm, comforting flavors of pumpkin pie without the fuss of baking? Look no further! These vegan no-bake pumpkin pie tarts are a dream come true. Exceptionally easy to prepare with a handful of wholesome ingredients, they stand out as the ultimate fall dessert, a delightful Thanksgiving treat, or a fantastic, convenient alternative to traditional pumpkin pie. Imagine a rich, spiced pumpkin filling nestled in a perfectly crunchy, naturally sweetened crust, all without ever turning on your oven.
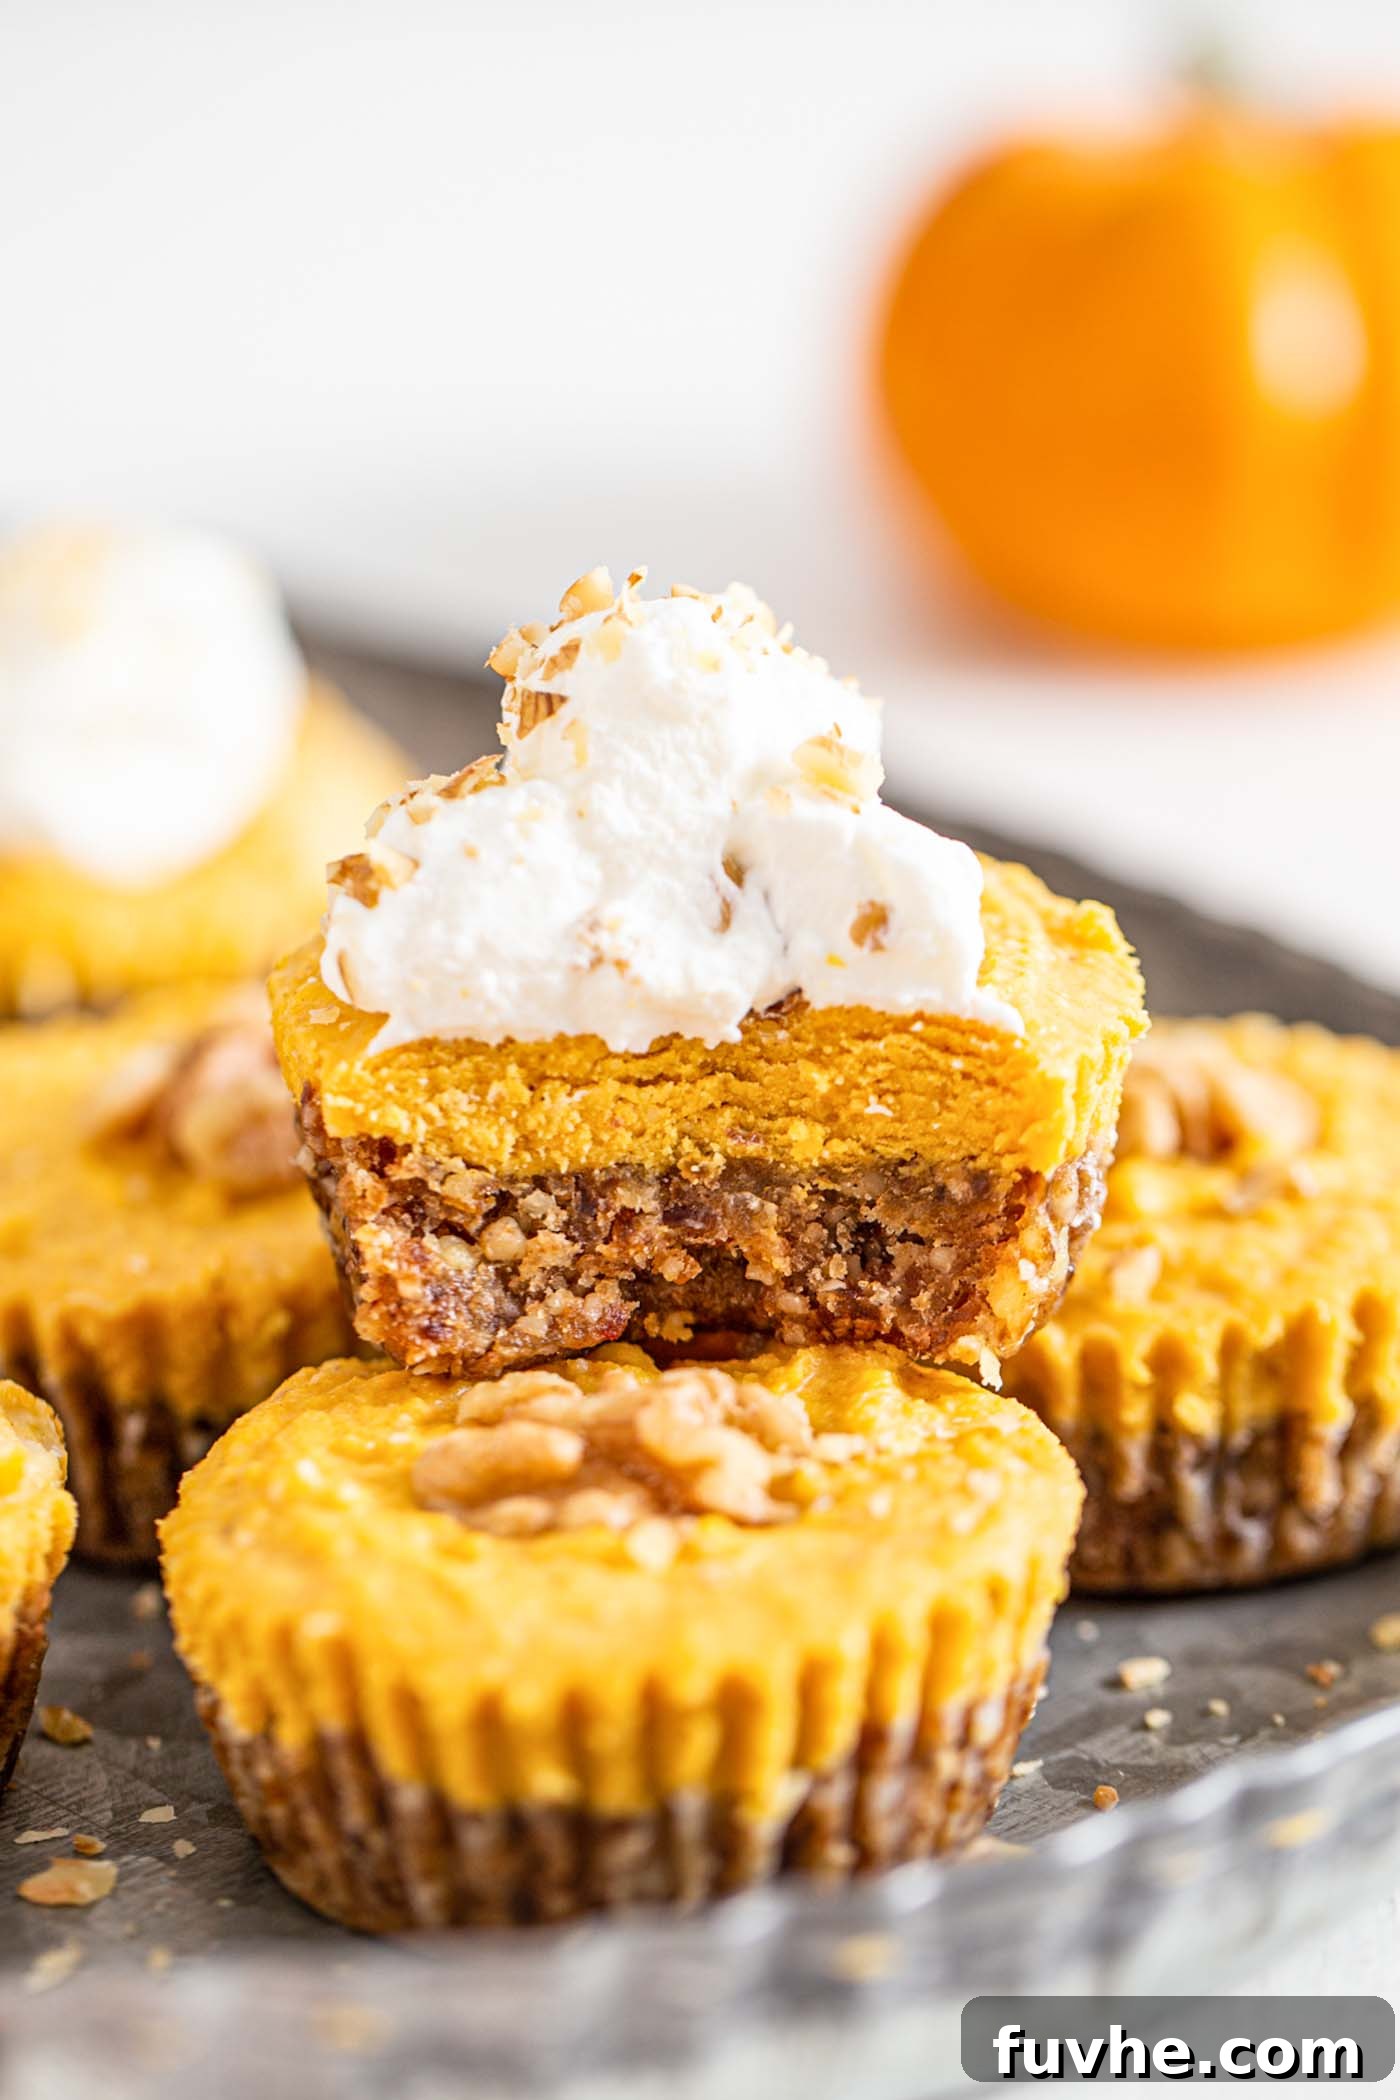
Discover the Magic of No-Bake Pumpkin Tarts
Prepare to impress everyone at your next holiday gathering with these incredibly delicious and surprisingly simple pumpkin tarts. Their lusciously creamy texture and authentic pumpkin pie flavor will have your guests guessing the secret ingredient – that they’re entirely vegan and crafted from just a few minimal ingredients! These tarts are not only a culinary delight but also a practical choice for busy hosts, requiring only about 15 minutes of active prep time before chilling to perfection.
They are ideal for Thanksgiving dinner, Christmas celebrations, festive holiday parties, or simply for stocking your freezer with a sweet, guilt-free fall treat whenever a craving strikes. Serve them chilled, perhaps with a generous swirl of your favorite dairy-free whipped cream, and watch them vanish in moments! Here’s why these delightful mini pies will become your new go-to dessert:
- Diet-Friendly Indulgence: Completely vegan, gluten-free, and free from refined sugars, making them suitable for a wide range of dietary needs and preferences without compromising on taste.
- No-Bake Convenience: Skip the oven and the stress of traditional baking. These tarts firm up beautifully in the freezer, making them perfect for hot kitchens or when oven space is limited.
- A Fresh Take on Pumpkin Pie: Offer a delicious and elegant alternative to traditional baked pumpkin pie. Their individual serving size makes them visually appealing and easy to manage.
- Minimal Ingredients, Maximum Flavor: Crafted with just 6 core ingredients, plus a blend of warming spices, proving that extraordinary desserts don’t need extensive shopping lists.
- Lightning-Fast Preparation: Requires only about 15 minutes of hands-on prep, allowing you more time to enjoy the festivities or simply relax.
- Perfectly Portioned: Their convenient single-serving size eliminates the need for slicing, making them ideal for parties and easy portion control.
If you’re looking for more stress-free, no-bake holiday desserts to round out your seasonal menu, you might also enjoy our No-Bake Vegan Pumpkin Fudge, a rich and creamy treat; our decadent Vegan No-Bake Pumpkin Cheesecake; the equally delightful No-Bake Pecan Pie Tarts for another nutty twist; or a light and airy Pumpkin Mousse.
Essential Ingredients for Your Pumpkin Tarts
Creating these delightful no-bake pumpkin tarts starts with selecting quality ingredients. Each component plays a vital role in achieving the perfect balance of flavor and texture. Here’s a closer look at what you’ll need and why:
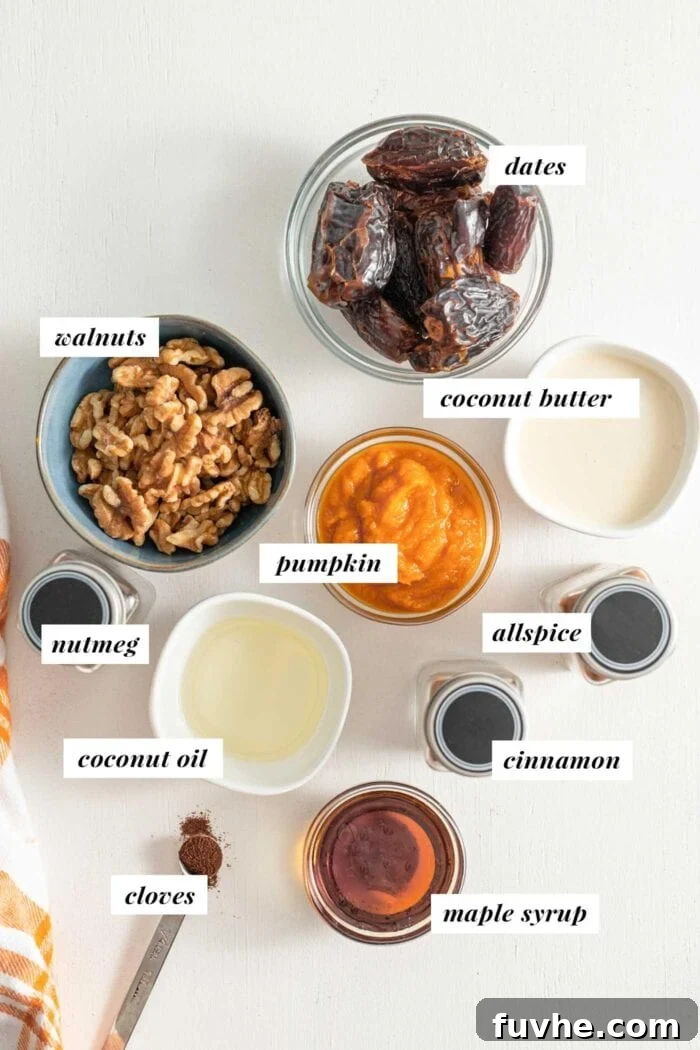
- Walnuts: These form the foundation of our crust, providing a satisfying crunch and rich, earthy flavor. Opt for plain, raw walnuts without any added oil or salt. If walnuts aren’t your preference, you can easily substitute them with pecans, or even a delightful combination of both pecans and walnuts for a more complex flavor profile.
- Dates: Essential for both sweetening and binding the crust ingredients, dates lend a natural caramel-like sweetness. It’s crucial to use soft, moist dates for this recipe – Medjool dates are often ideal due to their plump and sticky nature. If your dates feel a bit dry or firm, don’t worry! Simply soak them in hot water for about 15 minutes, then drain them thoroughly before processing. This will rehydrate them and ensure your crust achieves the perfect sticky consistency.
- Coconut Oil: A small amount of melted coconut oil contributes to a wonderfully buttery and rich texture in the crust. It also helps the crust set firmly when chilled. While it enhances the overall structure, you can omit it if preferred or if you’re avoiding oils. Should you find the mixture too dry without it, add 1-2 tablespoons of warm water incrementally while blending until the desired sticky dough forms.
- Coconut Butter: Also known as coconut manna, coconut butter is the secret to the incredibly creamy and firm filling. It’s essentially pureed coconut meat, which solidifies when chilled, giving the tarts their structure. You can either purchase store-bought coconut butter or make your own if you have the time and equipment. Ensure it’s gently softened or melted before incorporating for a smooth filling.
- Pumpkin Puree: This is the star of our tarts! Make sure to use plain, canned pumpkin puree, not pumpkin pie filling. Pumpkin pie filling often contains added sugars and spices that might alter the flavor balance of this recipe. Look for cans labeled “100% pumpkin” or “pure pumpkin.”
- Maple Syrup: Our chosen natural sweetener for the filling, maple syrup adds a depth of flavor that complements the pumpkin beautifully. Pure maple syrup is recommended. For alternatives, you can use agave nectar or even date syrup if you prefer. Adjust the amount to your taste preference, starting with the recommended quantity and adding more if you desire a sweeter tart.
Beyond these core ingredients, a blend of warm spices like cinnamon, nutmeg, allspice, and cloves will infuse your tarts with that unmistakable, nostalgic pumpkin pie aroma and taste. These spices are key to transforming simple pumpkin puree into a truly festive dessert. For a complete list of ingredients with precise measurements and detailed instructions, please refer to the recipe card found at the end of this post.
Easy Step-by-Step Guide to Crafting Your Tarts
Making these no-bake pumpkin pie tarts is a straightforward process, even for beginner bakers. Follow these simple steps to create a delightful dessert that looks as impressive as it tastes.
Step 1: Prepare the Crust Base – Walnuts First
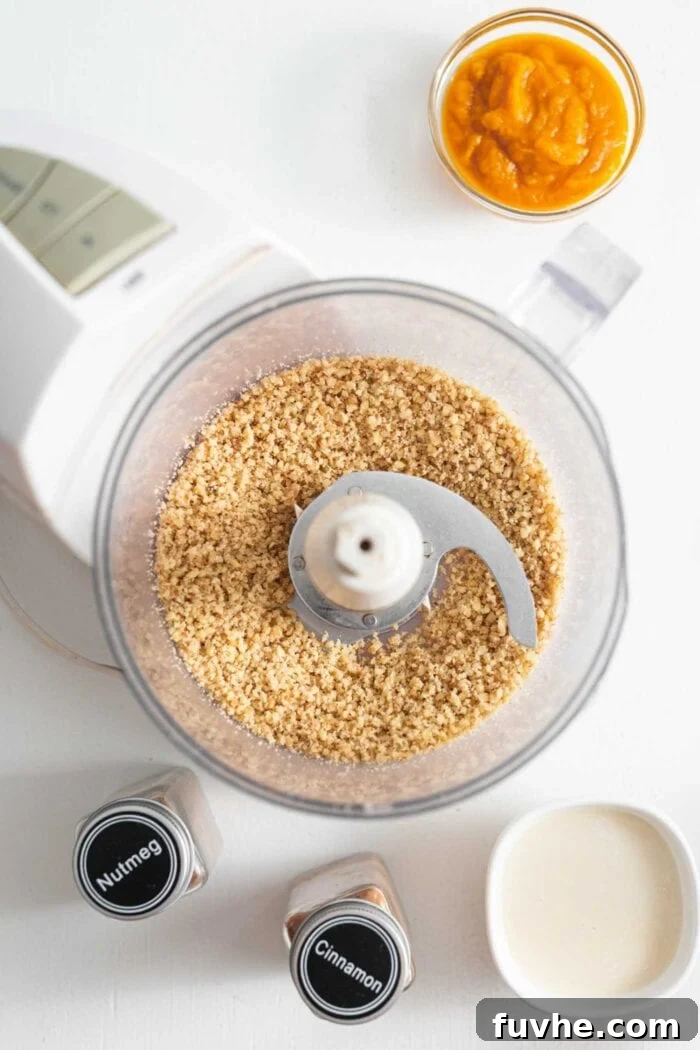
Begin by adding the raw walnuts to your food processor. Pulse them until they break down into fine crumbs. A few slightly larger pieces are acceptable for texture, but the goal is primarily a grainy, flour-like consistency. This creates the perfect base for your sturdy yet tender tart crust.
Step 2: Incorporate the Dates
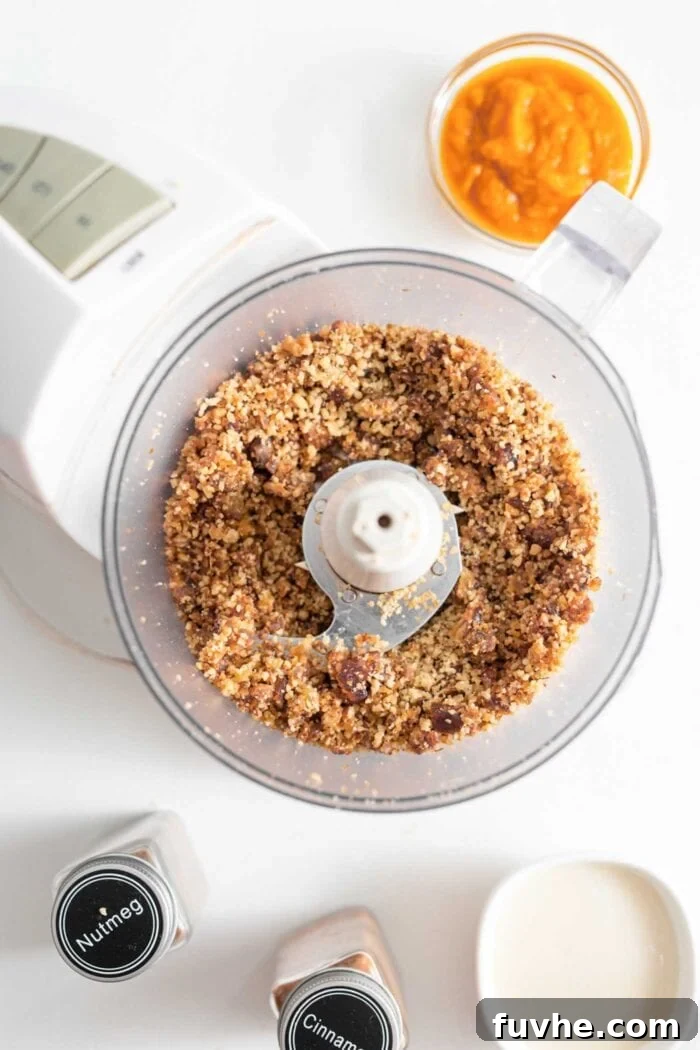
Next, add the pitted soft dates to the food processor with the walnut crumbs. Continue to process the mixture. The dates will begin to break down and combine with the walnuts, eventually forming a sticky, cohesive mixture. This stickiness is essential for binding your crust together without any baking.
Step 3: Add Flavor and Firmness to the Crust
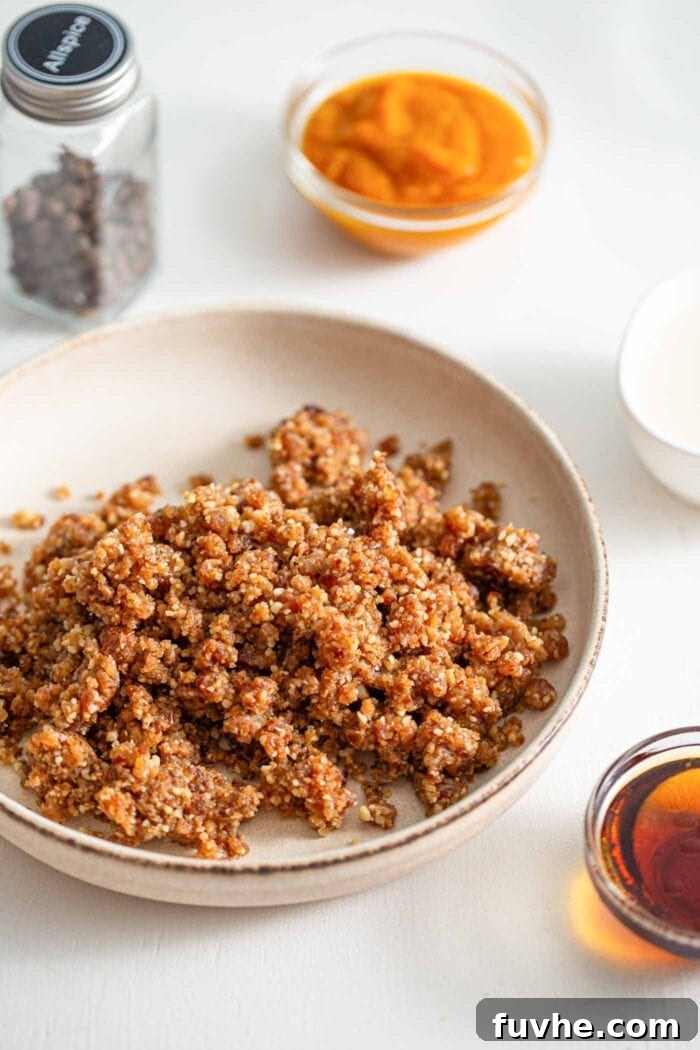
To the walnut and date mixture, add the sea salt, melted coconut oil, and a dash of cinnamon and nutmeg. Process everything again until these new ingredients are thoroughly combined. What you’ll end up with is a thick, wonderfully sticky dough that holds together when pressed. This is your perfectly flavored, no-bake tart crust!
Step 4: Form the Tart Crusts
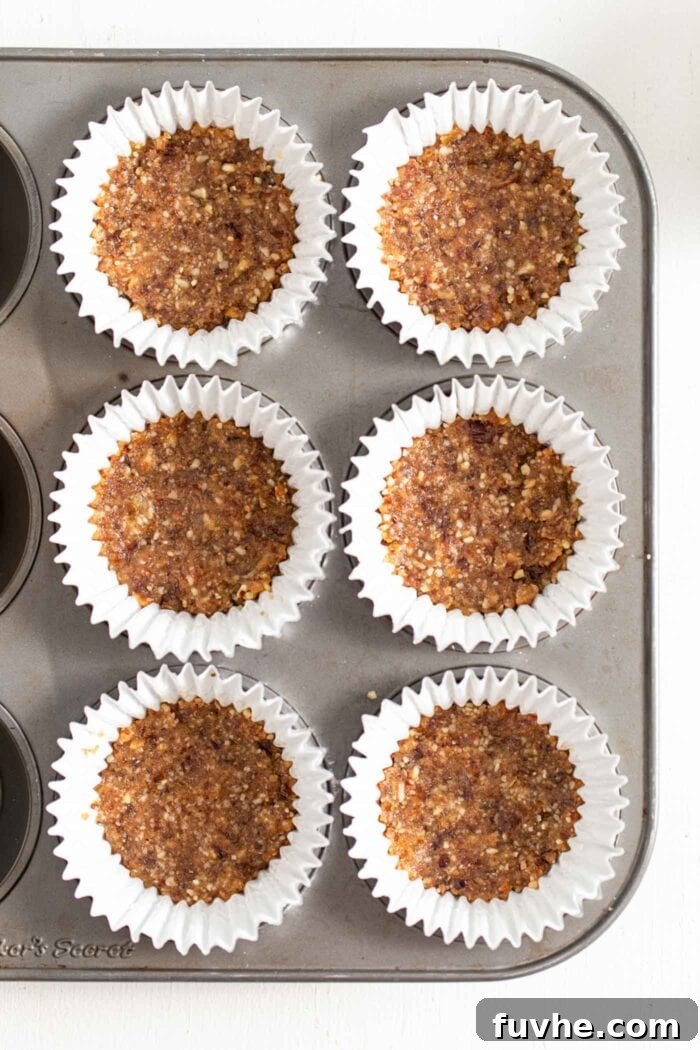
Line 6 standard muffin tins with paper cupcake liners. Alternatively, you can use 6 mini tart pans if you prefer a more traditional tart shape. Divide the prepared dough evenly among the 6 cups. Using your fingertips or the back of a spoon, firmly press the dough into an even layer at the bottom of each liner or tart pan. This creates a compact and sturdy crust. Once formed, place the muffin tin in the refrigerator to chill while you prepare the creamy pumpkin filling. Chilling helps the crust set and become easier to handle.
Step 5: Prepare the Creamy Pumpkin Filling
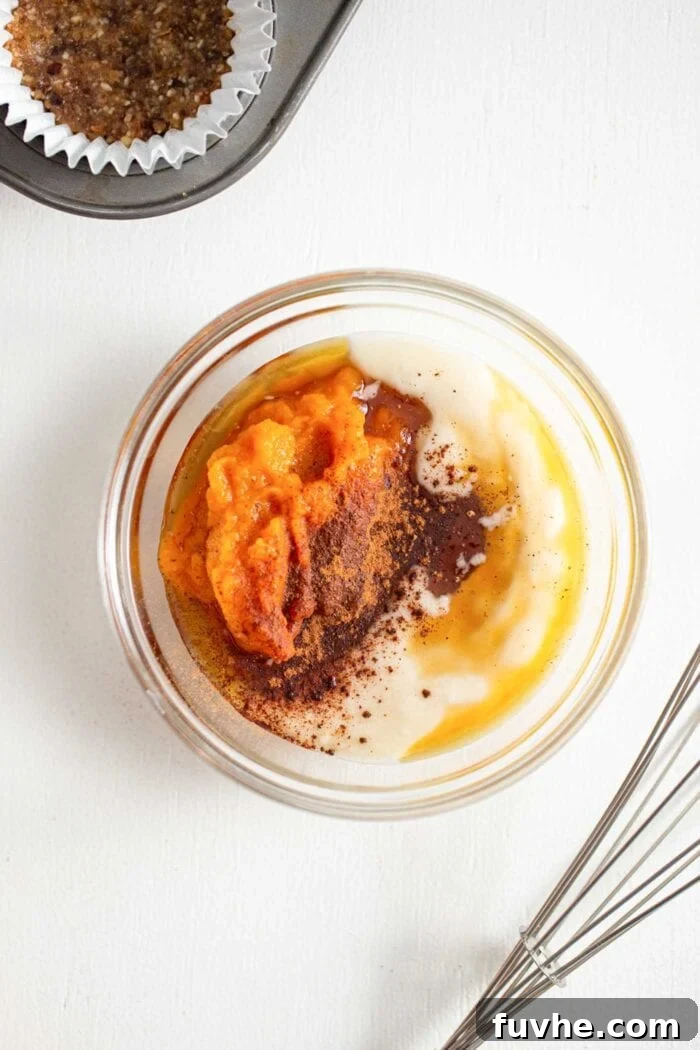
In a small mixing bowl, gently stir together the softened or melted coconut butter, pumpkin puree, pure maple syrup, allspice, and additional nutmeg, clove, and cinnamon. Whisk or stir until the mixture is completely smooth and all ingredients are fully incorporated. Ensure there are no lumps from the coconut butter for a silky-smooth filling.
Step 6: Fill and Chill the Tarts
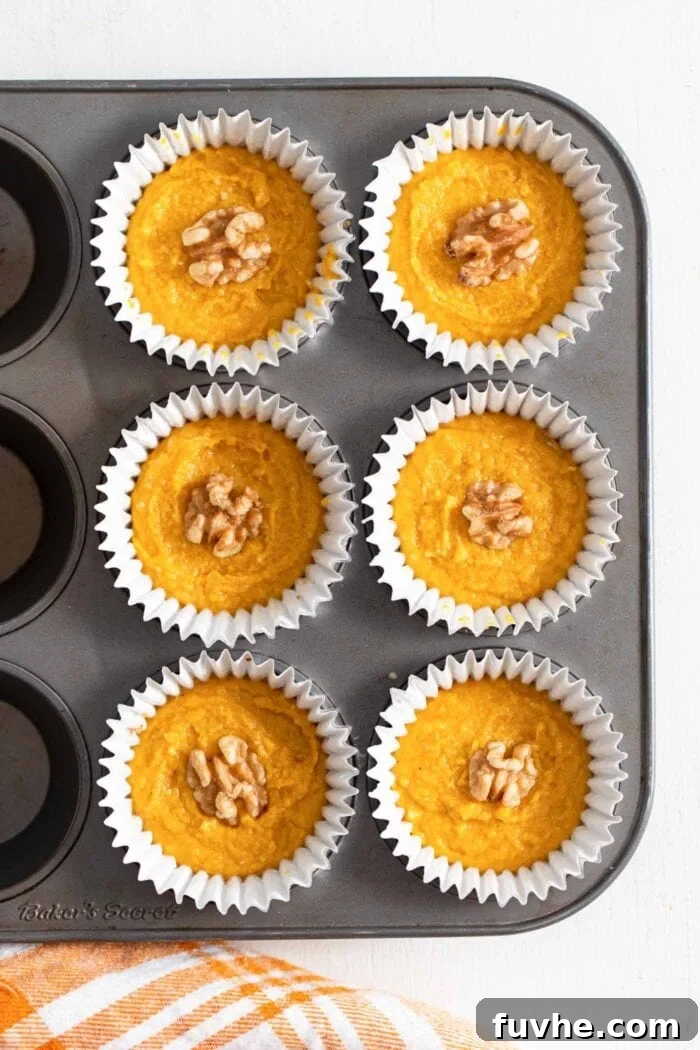
Retrieve your chilled tart crusts from the refrigerator. Carefully spoon the pumpkin filling mixture evenly over each of the 6 prepared crusts. Use the back of a spoon or a small offset spatula to smooth out the tops, creating a neat and appealing finish. For an extra touch, you can garnish each tart with a single walnut or a few pecans before chilling. Place the filled tarts in the freezer for a minimum of 30 minutes, or until the filling is completely firm to the touch. This crucial step allows the coconut butter to solidify, giving the tarts their structure and ensuring they hold their shape beautifully.
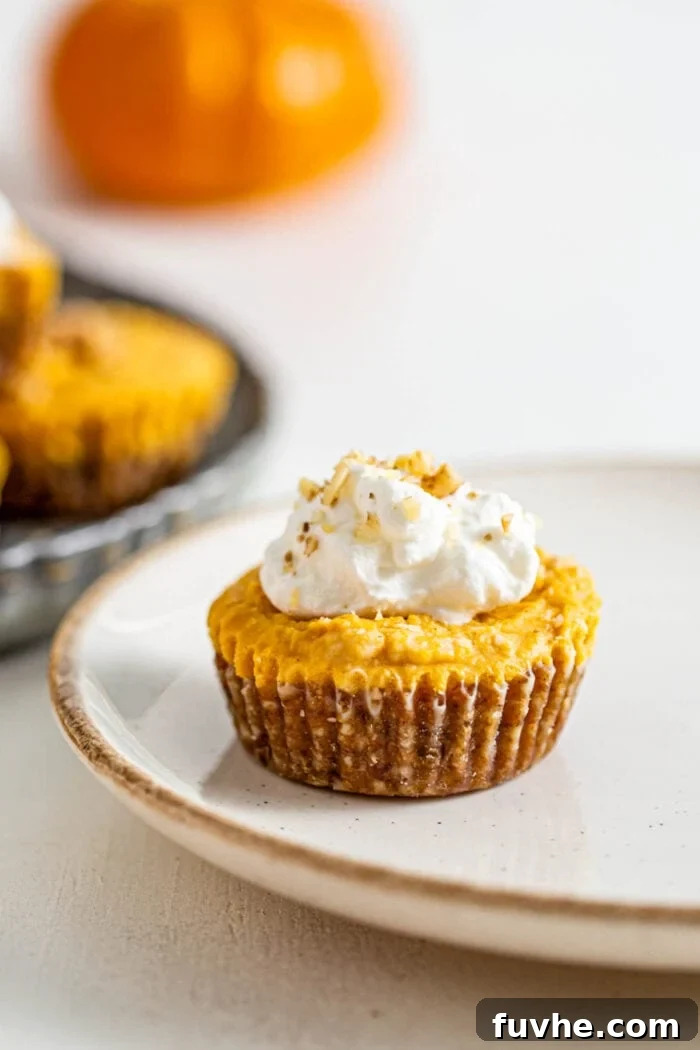
Once your tarts are firm, carefully remove them from their liners or pans. They are now ready to be served! For the ultimate treat, top each tart with a dollop of your favorite dairy-free whipped cream, a sprinkle of extra cinnamon, or a candied pecan. Remember that these tarts need to remain chilled to maintain their firm consistency. Keep them in the freezer until about 10-15 minutes before you plan to serve, allowing them just enough time to soften slightly to a perfect, creamy texture.
Storing Your Vegan Pumpkin Pie Tarts
Proper storage ensures your delicious no-bake pumpkin tarts remain fresh and retain their perfect texture. Since these tarts rely on chilling for their structure, the freezer is their best friend for long-term enjoyment.
- Freezer Storage: For optimal freshness and to maintain their firm consistency, these tarts are best stored in the freezer. Once fully set, transfer them to an airtight container. They can be kept in the freezer for up to 3 months, making them an excellent make-ahead dessert for entertaining or simply to have on hand for a quick treat.
- Thawing for Serving: When you’re ready to enjoy a tart, remove it from the freezer approximately 10-15 minutes before serving. Allow it to soften slightly at room temperature; this brings out the creamy texture of the filling and the delightful flavors of the spices.
- Refrigeration: If you prefer a slightly softer tart, or if you’re serving them within a day or two, you can let them thaw in the refrigerator for 30-40 minutes instead of at room temperature. However, for prolonged storage and best consistency, the freezer is highly recommended.
Explore More Vegan Holiday Dessert Delights
The holiday season is a perfect time to indulge in delicious, plant-based treats. If you loved these no-bake pumpkin pie tarts, you’re sure to enjoy these other festive vegan dessert recipes:
- Vegan Pecan Pie Bars: All the classic flavor of pecan pie in an easy-to-eat bar form.
- Vegan Sweet Potato Pie: A soulful and comforting dessert, perfect for any holiday table.
- Vegan Tiramisu: Indulge in this elegant, coffee-infused Italian classic, reimagined without dairy or eggs.
- Raw Vegan Maple Pecan Pie: Another fantastic no-bake option that celebrates the flavors of maple and pecan.
- Vegan Pumpkin Chocolate Chip Bars: A delightful combination of pumpkin spice and chocolate in a soft, chewy bar.
Vegan No-Bake Pumpkin Pie Tarts
Rate Recipe
Print Recipe
Ingredients
For the Base
- 1 cup walnuts, 150 g
- 1 cup packed pitted soft dates, 250 g
- 1/8 teaspoons sea salt
- 2 tablespoons coconut oil, melted, 30 mL
- 1 teaspoon cinnamon
- ¼ teaspoons nutmeg
For the Filling
- 1/3 cup coconut butter, softened, 85 g
- 1/3 cup pumpkin puree, 85 g
- 3-4 tablespoons pure maple syrup, 45 mL
- ¼ teaspoon allspice
- ¼ teaspoon nutmeg
- ½ tsp ground cloves
- ¼ tsp cinnamon
Instructions
-
In a food processor, process the walnuts into small crumbs. Add the pitted dates and process until finely chopped. The mix will be sticky.
-
Add the sea salt, coconut oil, cinnamon and nutmeg, and process until thoroughly combined into a crumbly but sticky dough you can press together with your fingers.
-
Prepare 6 muffin tins with paper liners or use 6 mini-tart pans. Divide the dough between the 6 servings then use your fingers to firmly press the dough down into the cups for a tight fit. Place in the fridge to chill while you make the top layer filling.
-
In a small mixing bowl, combine melted coconut butter, pumpkin puree, maple syrup, allspice, nutmeg, clove, and cinnamon. Stir until everything is incorporated and smooth.
-
Remove the chilled tarts from the fridge. Spoon the pumpkin filling over the bottom base layer and smooth to even out. Garnish the tops with a single walnut. Place in the freezer until set, about 30 minutes.
-
Once the tarts are firm to the touch, pop out of the tray and serve topped with whipped cream.
Notes
Storing: Store these delicious tarts in an airtight container in the freezer for up to 3 months to maintain their freshness and texture. When you’re ready to enjoy them, simply remove from the freezer and let them thaw at room temperature for 10-15 minutes, or in the refrigerator for 30-40 minutes, until they reach your desired consistency.
Nutrition
Like this recipe? Rate and comment below!
Originally published on November 19, 2014.