
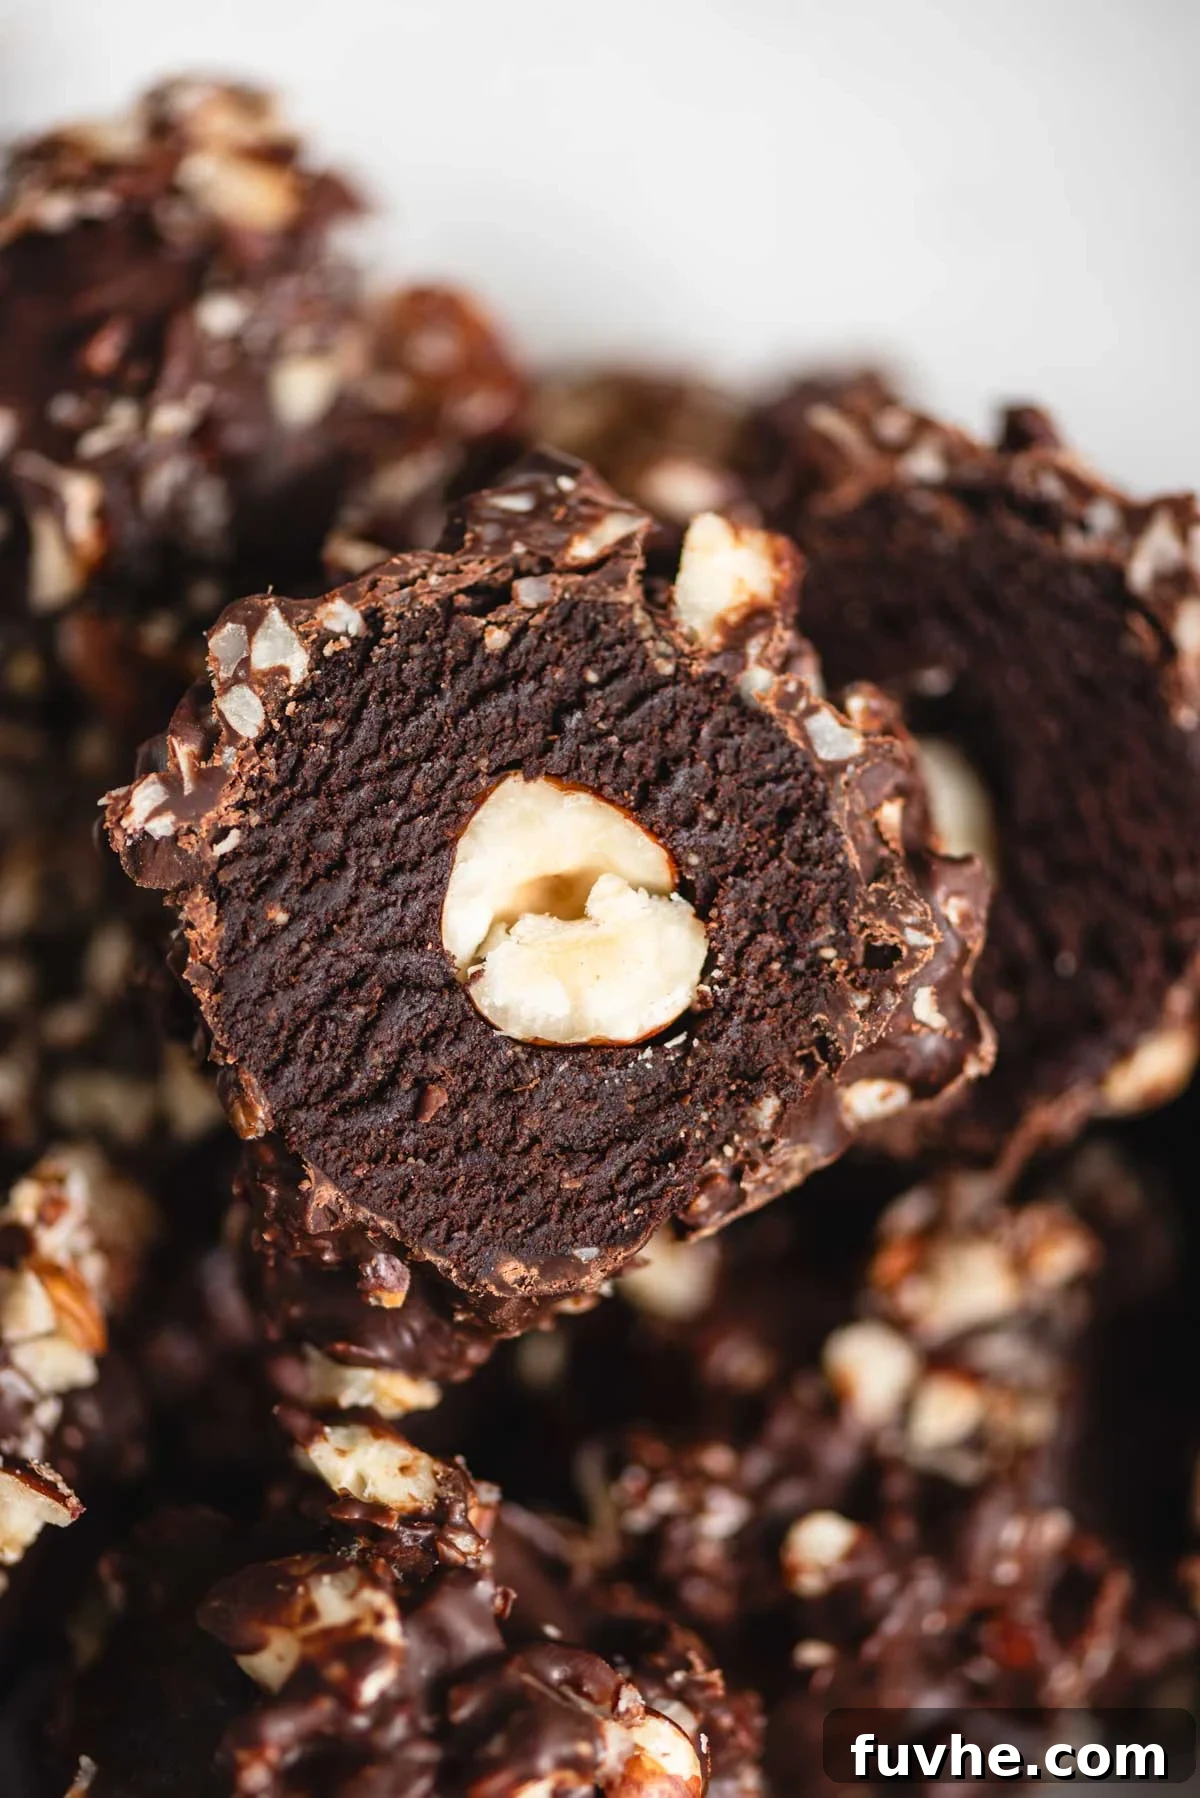
Indulge in the exquisite taste of gourmet confections right from your own kitchen with this incredible homemade vegan Ferrero Rocher recipe. This delightful guide makes it incredibly simple to recreate the classic hazelnut truffle, famously encased in its signature golden wrapper. Forget store-bought complexities; our recipe delivers all the rich, luxurious flavor you crave, but with a wholesome, plant-based twist. Perfect for satisfying sweet cravings, impressing guests, or crafting thoughtful edible gifts, these truffles are a testament to how easy and rewarding homemade treats can be. Prepare to embark on a culinary journey that combines decadent chocolate, crunchy hazelnuts, and a smooth, creamy filling, all without any dairy or gluten.
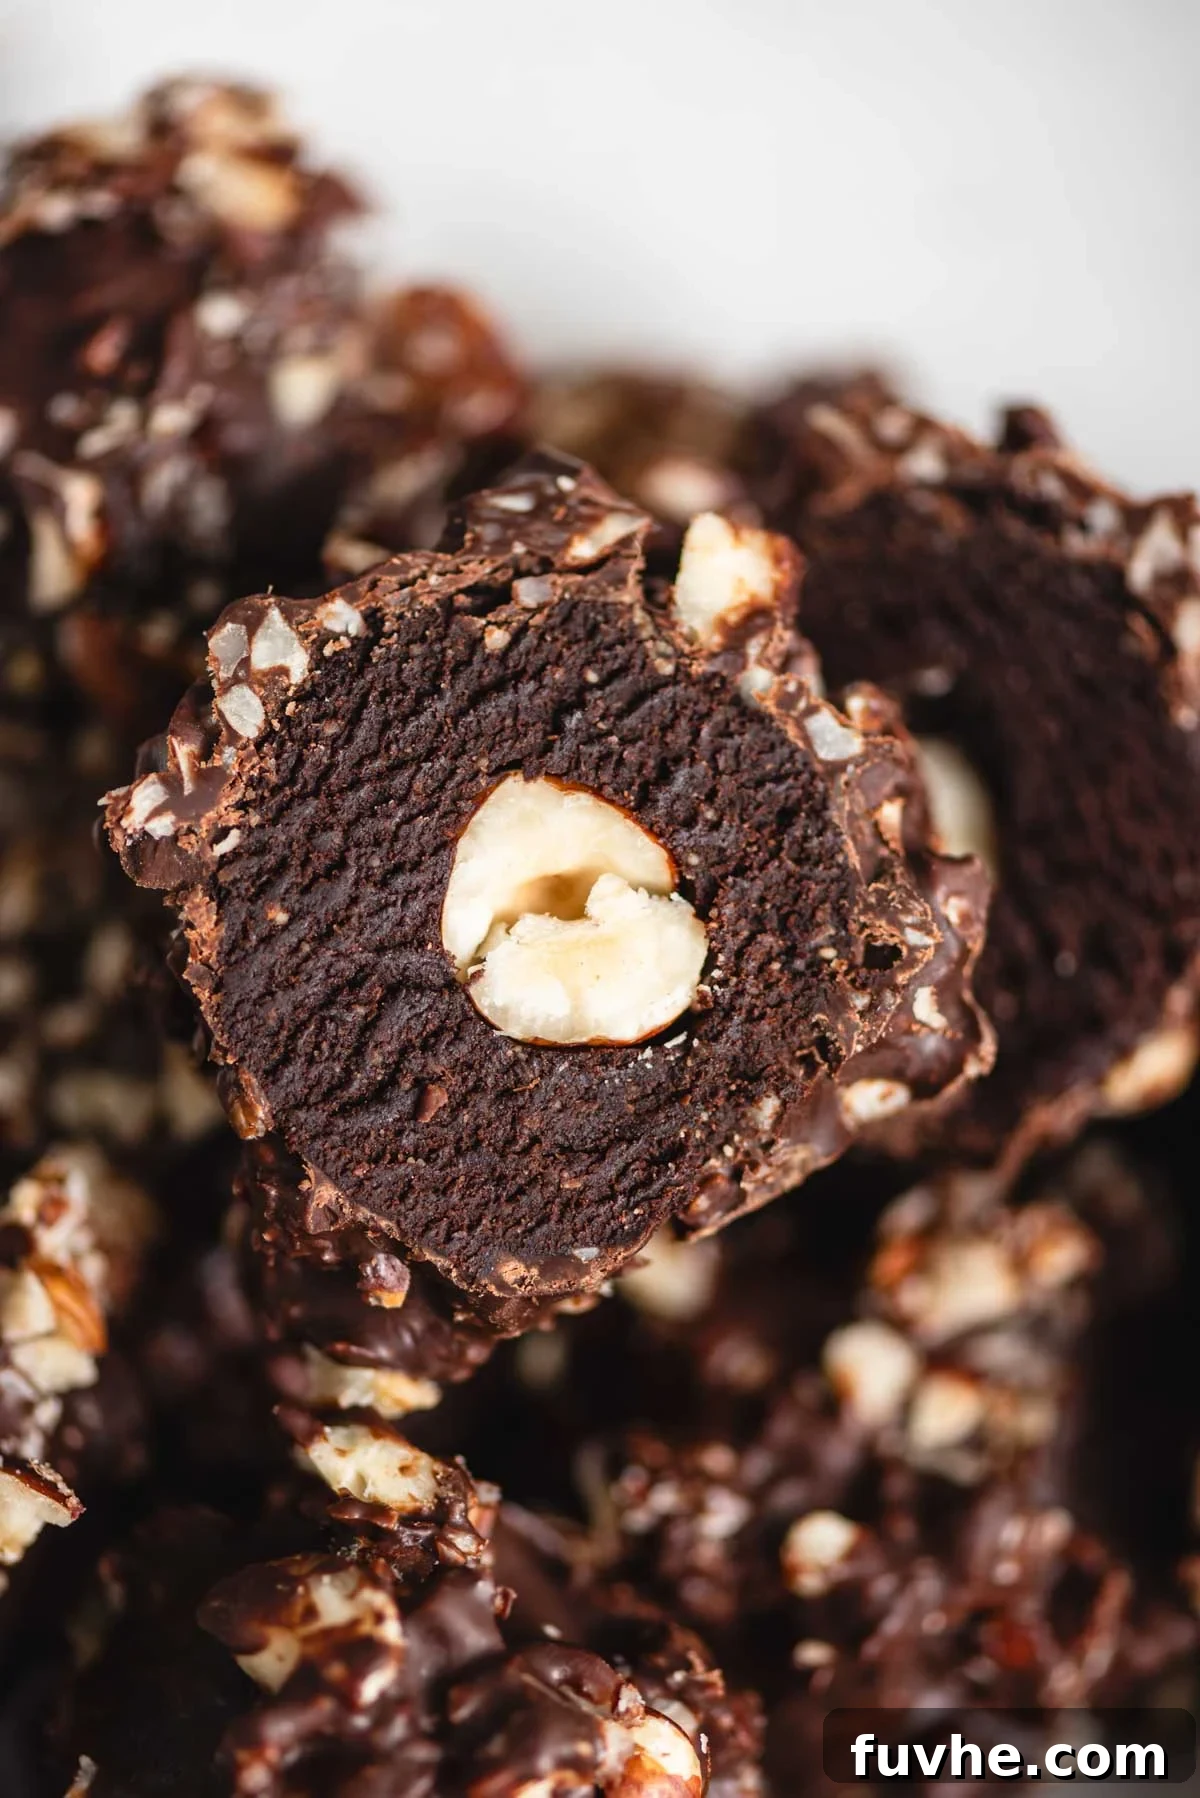
This artisanal version elevates the beloved Ferrero Rocher experience. Our recipe is proudly vegan, entirely gluten-free, requires no baking, and is remarkably easy to assemble using just 7 simple, wholesome ingredients. The straightforward process is ideal for even the most novice of home cooks, demanding no complicated techniques or specialized equipment. You don’t need to be a pastry chef to achieve stunning results!
These luscious truffles are more than just a delicious everyday treat; they are a fantastic option for crafting memorable edible gifts, and they stand out beautifully for any special occasion or holiday gathering. For that authentic, luxurious touch when gifting, consider packaging them in elegant gold foil candy wrappers, mirroring the iconic presentation of their store-bought counterparts. Imagine the delight on someone’s face receiving these handcrafted gems!
If you’re looking for other impressive homemade treats, consider exploring these delicious options: Homemade Nut Clusters, Easy Vegan Turtles, Homemade Butterfinger Bars, Homemade Reese’s Peanut Butter Eggs, and Homemade Mounds Bars. All these recipes are perfect for sharing joy with friends and family.
Why You’ll Love This Recipe: Irresistible Highlights
This homemade vegan Ferrero Rocher recipe stands out for several key reasons, making it a must-try for anyone seeking a guilt-free yet utterly indulgent treat:
- Completely Vegan (Dairy-Free): Enjoy these rich truffles without any animal products, making them suitable for vegan diets and those with dairy sensitivities.
- Gluten-Free: Crafted without any gluten-containing ingredients, ensuring a safe and delicious option for individuals with celiac disease or gluten intolerance.
- No-Bake Perfection: Skip the oven! This recipe comes together quickly and easily without any baking required, perfect for hot days or when you want a fuss-free dessert.
- Minimal Ingredients: With just 7 core ingredients, you likely have most of what you need in your pantry already. Simple ingredients yield spectacular flavor.
- Effortlessly Easy: Designed for simplicity, the process is straightforward and doesn’t demand advanced culinary skills, making it accessible to all.
- No Special Equipment Needed: You won’t need a blender or a food processor for the main fudge mixture, though they can be helpful for chopping hazelnuts.
- Customizable: Easily adapt the flavors and textures to your personal preferences with various additions and substitutions.
- Perfect for Gifting: These truffles make an elegant and heartfelt gift for holidays, birthdays, or any special occasion.
These highlights ensure that you’re not just making a dessert, but creating a truly special, accessible, and enjoyable culinary experience.
Essential Ingredients for Your Vegan Ferrero Rocher
Crafting these delectable vegan Ferrero Rocher truffles requires a carefully selected list of ingredients that balance flavor, texture, and plant-based integrity. Below is a detailed overview of what you’ll need, along with helpful notes on potential substitutions to ensure your success. For precise measurements and the full recipe instructions, please refer to the comprehensive recipe card located at the bottom of this article.
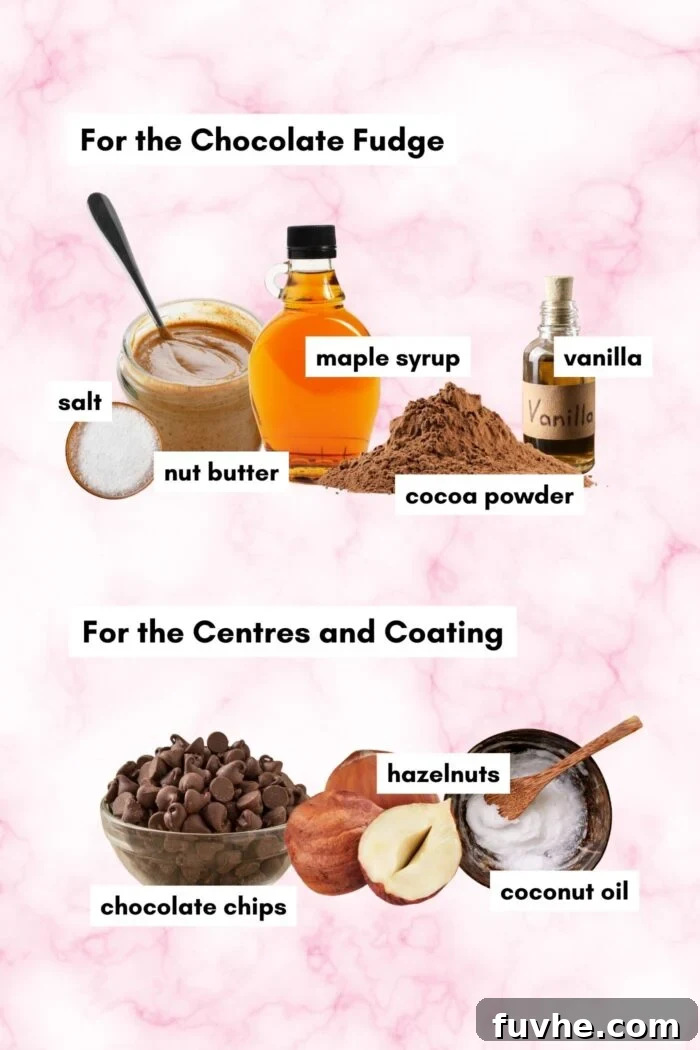
- Almond Butter: This provides the creamy base for our fudge filling, adding richness and helping bind the ingredients. For an even more pronounced hazelnut flavor, you can swap almond butter for hazelnut butter, whether homemade or store-bought. See our dedicated section below on how to easily make your own hazelnut butter at home. Alternatively, feel free to use any other nut or seed butter you prefer, such as cashew butter, peanut butter, or sunflower seed butter, though the flavor profile will change slightly.
- Cocoa Powder: The star of the chocolate fudge, cocoa powder brings deep, rich chocolate notes. You can use natural unsweetened cocoa powder or Dutch-processed cocoa powder; both will yield fantastic results. Cacao powder is also an excellent option if you prefer a less processed alternative.
- Maple Syrup: This serves as our natural liquid sweetener, contributing a delicate sweetness without refined sugars. Other liquid sweeteners like brown rice syrup or agave syrup can be used interchangeably. It’s crucial to use a liquid sweetener as it helps achieve the correct fudge consistency; granulated sweeteners will not work in this particular mixture. If you’re looking for a maple syrup-free option, consider one of the alternative date-based fudge recipes mentioned in our “Variations & Additions” section.
- Hazelnuts (Filberts): These are indispensable for authentic Ferrero Rocher flavor and texture. You’ll need whole hazelnuts for the delightful crunchy centers and finely chopped hazelnuts for coating the truffles. Blanched, unsalted, and either roasted or raw hazelnuts are all suitable. Roasting your own hazelnuts before use can significantly enhance their flavor, bringing out their natural warmth and nuttiness.
- Chocolate: For the outer shell, I opted for dairy-free semi-sweet chocolate chips, which provide a balanced sweetness and melt beautifully. However, you have the flexibility to choose any type of chocolate you love—dairy-free milk chocolate for a sweeter profile or dark chocolate for a more intense, less sweet truffle. Ensure your chosen chocolate is certified dairy-free if maintaining strict vegan standards.
- Coconut Oil: A small amount of coconut oil is added to the melted chocolate. This is key for achieving a smooth, thin coating that hardens nicely and adheres well to the truffles. It helps create that satisfying snap when you bite into the chocolate shell. If you don’t have coconut oil, a plant-based butter (like vegan margarine) can be used as a substitute, though coconut oil generally yields a slightly firmer set.
- Vanilla Extract and Salt: These essential pantry staples act as flavor enhancers. Vanilla extract adds a warm, aromatic depth that complements the chocolate and hazelnut, while a pinch of salt balances the sweetness and intensifies all the other flavors. Don’t skip these!
With these high-quality, simple ingredients, you’re well on your way to creating an unforgettable batch of homemade vegan Ferrero Rocher truffles.
Creative Variations & Additions for Your Ferrero Rocher
While the classic vegan Ferrero Rocher recipe is undeniably delicious, there’s always room to get creative and customize your truffles to perfectly suit your taste preferences. Here are some fantastic variations and additions you can explore:
- Boost Hazelnut Flavor: If you’re a true hazelnut aficionado and want to amplify that signature nutty taste, consider adding a few drops of high-quality hazelnut extract to your fudge mixture. This small addition can make a big difference in intensifying the overall hazelnut essence.
- Enhance Chocolate Depth with Coffee: To elevate the richness of the chocolate and add a subtle layer of complexity, stir 1-2 teaspoons of instant coffee or espresso powder into the fudge mixture. Coffee is a well-known secret ingredient that deepens chocolate flavor without making the truffles taste distinctly like coffee.
- Optimize Hazelnut Flavor through Roasting: The flavor of hazelnuts truly shines when they are properly roasted. To enhance their natural aroma and taste, spread your raw or blanched hazelnuts on a baking pan and roast them in the oven at 350°F (175°C) for 5-10 minutes, or until they are lightly browned and incredibly fragrant. Allow them to cool before incorporating them into your recipe.
- Introduce a Wafer Layer: The original Ferrero Rocher often features a delicate wafer layer, which adds a delightful textural contrast. While not included in the base recipe, you can easily replicate this! Simply crush any vanilla wafer, graham cracker, Biscoff cookie, or other plain, biscuit-like cookie into a fine powder. Before coating your truffles in chocolate, gently roll the fudge balls in this crushed mixture, pressing it firmly into the surface. This creates an extra layer of crispness and flavor.
- Alternative Fudge Ball Bases (Date-Based): If you prefer to make your fudge balls with a different base, particularly if you want to avoid maple syrup or try a whole-food option, here are some excellent alternative recipes made with nutrient-rich Medjool dates. These will give your truffles a different, yet equally delicious, texture and sweetness:
- No-Bake Brownie Bites
- Cacao Hazelnut Energy Balls
- No-Bake Hazelnut Truffles
- 3-Ingredient Chocolate Date Balls
- Chocolate Energy Balls
Don’t hesitate to experiment with these ideas to create your signature vegan Ferrero Rocher truffles!
Step-by-Step Guide: How to Make Homemade Vegan Ferrero Rocher
Creating these decadent vegan Ferrero Rocher truffles is a rewarding process, made simple with our detailed step-by-step instructions. Follow along to craft your own batch of these irresistible chocolate hazelnut delights.
Step 1: Prepare the Chocolate Fudge Filling
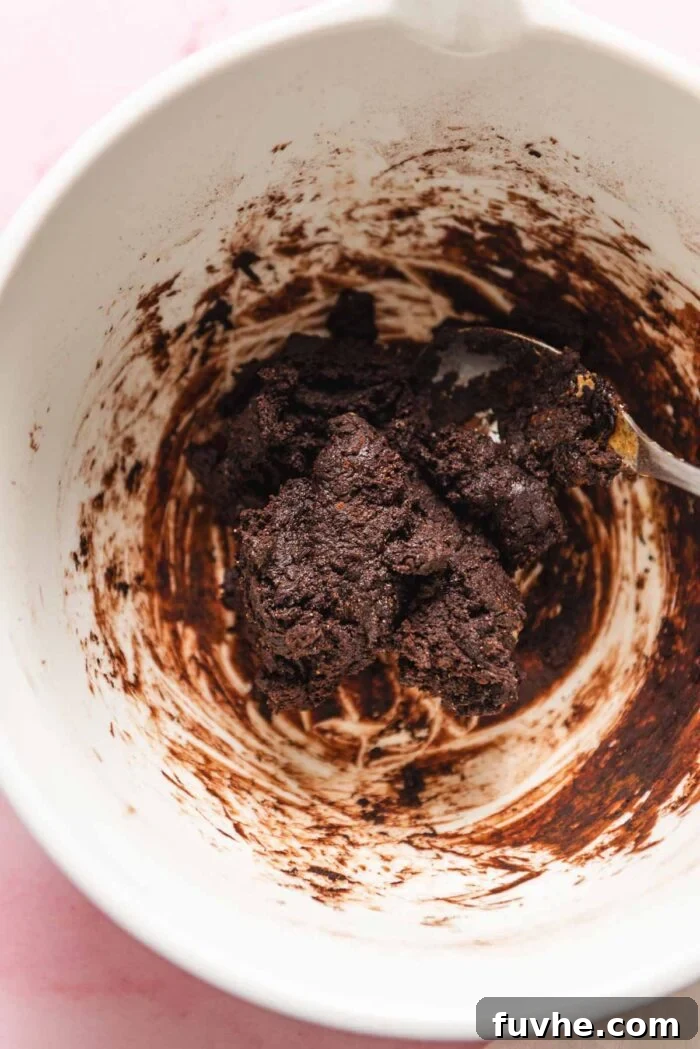
Begin by combining all the ingredients for the fudge filling in a medium-sized mixing bowl. This includes vanilla extract, maple syrup, almond butter (or hazelnut butter), cocoa powder, and a pinch of salt. Stir these ingredients thoroughly with a spoon or spatula until they are well combined and form a thick, uniform, and pliable dough. This mixture will be the luxurious core of your truffles.
Once the fudge dough is ready, place the mixing bowl into the refrigerator. Allow it to chill for approximately 10 minutes. This crucial step helps the mixture firm up slightly, making it much easier to handle and roll into perfectly shaped balls in the next step.
Step 2: Form the Truffles and Insert Hazelnuts
After the 10-minute chilling period, retrieve the fudge filling mixture from the refrigerator. Line a baking sheet with parchment paper to prevent sticking. Using a small cookie scoop or your hands, scoop out portions of the fudge mixture, approximately 1 tablespoon per ball. Roll each portion into a smooth, round truffle. With this recipe, you should yield between 14 to 16 small, perfectly bite-sized truffles.
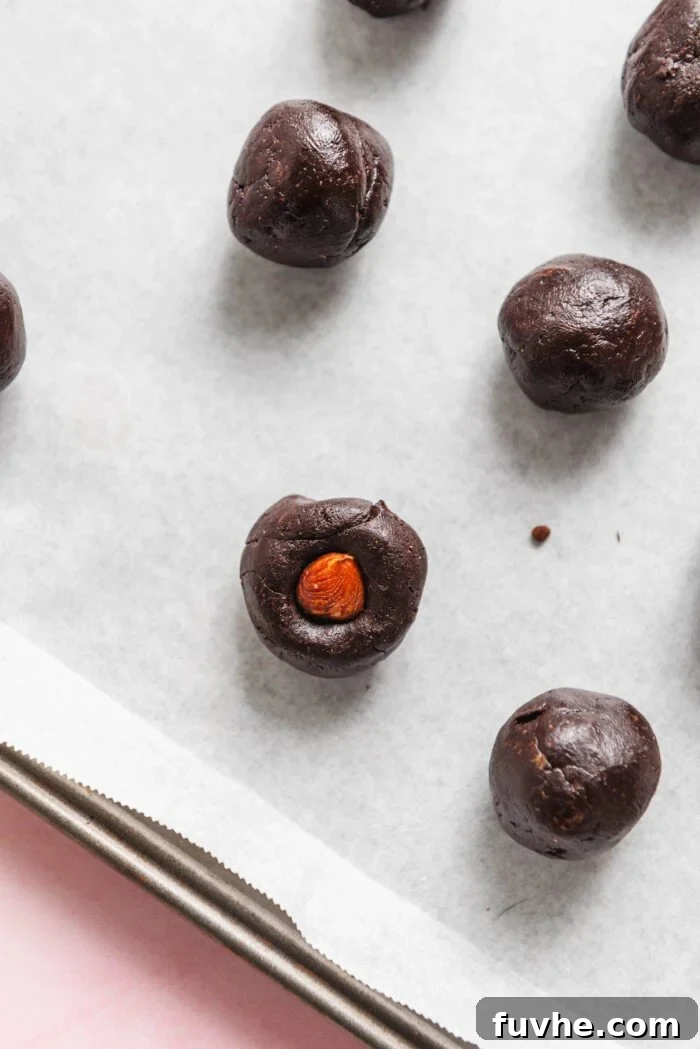
Next, take a whole hazelnut and gently but firmly push it into the exact center of each fudge ball. Carefully mold the fudge around the hazelnut with your fingers, ensuring that the hazelnut is completely covered and sealed within the fudge mixture. This creates the signature crunchy core of a Ferrero Rocher.
Once all your truffles are formed with their hazelnut centers, place them back onto the prepared baking sheet and return them to the refrigerator. Allow them to chill while you proceed to prepare the melted chocolate coating and finely chop the hazelnuts for the outer layer. This will ensure they are firm enough to be coated without losing their shape.
Note: If you plan to add an optional wafer layer (as described in the “Variations & Additions” section), this is the ideal time. After forming the truffles, roll each ball in your chosen crushed wafers, cookies, or cornflakes, gently pressing the crumbs onto the fudge before chilling.
Step 3: Coat Truffles in Chocolate and Hazelnuts
Now it’s time for the decadent chocolate coating! In a microwave-safe bowl, combine your chocolate chips and coconut oil. Melt them together using short 30-second increments in the microwave, stirring well after each interval to prevent burning, until the chocolate is smooth and fully melted. Alternatively, you can use a double boiler method for a more controlled melt.
Once your chocolate is perfectly melted and smooth, remove your chilled truffles from the refrigerator. Using a fork or a sturdy toothpick, carefully dip one fudge ball into the melted chocolate. Gently toss or swirl the truffle to ensure it is completely coated on all sides with an even layer of chocolate.
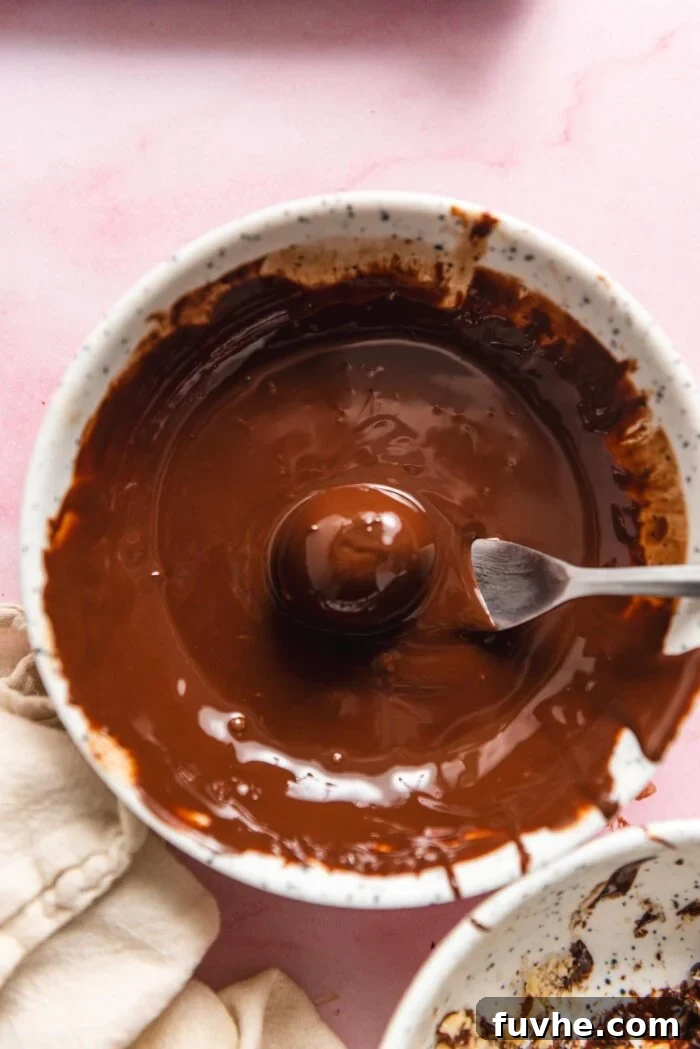
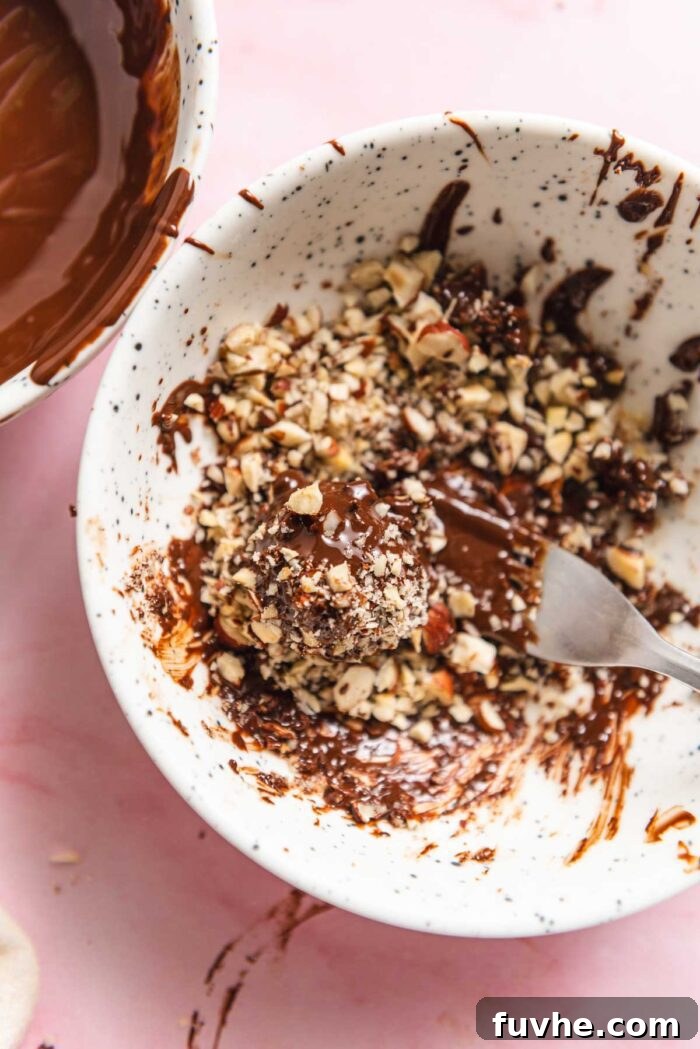
Lift the chocolate-coated truffle from the bowl, tapping the fork handle gently against the side of the bowl to allow any excess chocolate to drip off. This helps create a thinner, more refined coating. Immediately transfer the wet truffle to a bowl containing your finely chopped hazelnuts. Sprinkle the chopped nuts generously over the top and sides, gently pressing them onto the chocolate layer until the truffle is fully and evenly coated. Repeat this process with the remaining fudge balls until every truffle is beautifully coated in chocolate and crunchy hazelnuts.
Step 4: Chill Until Set
As each truffle is coated, place it back onto the parchment-lined baking tray. Once all the truffles have received their luscious chocolate and hazelnut coating, return the entire tray to the refrigerator.
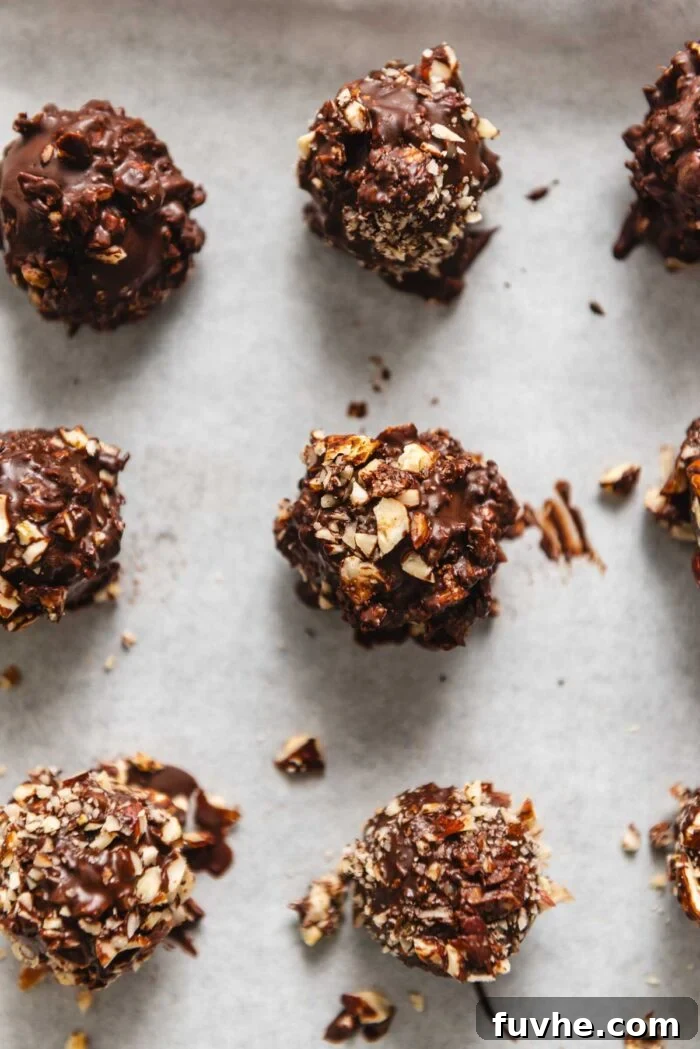
Allow the truffles to chill for approximately 20-30 minutes, or until the chocolate coating is completely set and firm to the touch. This chilling time ensures the chocolate hardens, giving the truffles that satisfying crunch and making them easy to handle.
Once fully set, your homemade vegan Ferrero Rocher truffles are ready to be enjoyed! Prepare to be amazed by their rich flavor and delightful texture.
Frequently Asked Questions (FAQs)
While hazelnuts are traditional for Ferrero Rocher and highly recommended for authentic flavor, you are absolutely not limited to them! This recipe is versatile. You can use almost any other nut to create delicious variations. Almonds, pecans, or pistachios would all work wonderfully both in the center and as part of the coating, offering a slightly different but equally delightful taste and texture. Just ensure they are raw or roasted and unsalted.
These delightful truffles are best stored in the refrigerator in an airtight container. When properly chilled, they will maintain their freshness and texture for up to 2 weeks. For longer storage, you can freeze them for up to 3 months.
While they can be stored at room temperature in a sealed container if you live in a cool climate, be mindful that chocolate melts easily. It’s generally recommended to keep them chilled until just before you plan to serve them, especially if your kitchen or environment is warm.
Yes, absolutely! Freezing is a great way to extend their shelf life and enjoy them over a longer period. Place the finished truffles in a single layer in an airtight freezer-safe container, or layer them with parchment paper in between. They can be stored in the freezer for up to 3 months. When you’re ready to indulge, simply remove them from the freezer and allow them to soften at room temperature for about 5-10 minutes before serving. This brief thawing period will bring them to the perfect texture for enjoyment.
Expert Tips for Perfect Vegan Ferrero Rocher Every Time
- Finely Chop Hazelnuts for Optimal Coating: The key to a beautiful and even coating is to ensure your hazelnuts are very finely chopped. If the pieces are too large, they won’t adhere well to the truffles, and the coating can appear patchy. For the best results, pulse them briefly in a food processor until they resemble a coarse, grainy flour. If you don’t have a food processor, take your time and finely chop them with a sharp knife.
- Elevate Presentation with Gold Foil Wrappers: For an authentic and truly special presentation, especially if you’re gifting these, consider purchasing festive gold foil candy wrappers. Individually wrapping each truffle will give them the iconic, luxurious look of store-bought Ferrero Rocher. It’s a small detail that makes a huge impact!
- Choose the Right Chocolate for Your Sweetness Preference: The fudge filling in this recipe is intentionally not overly sweet, which allows the rich chocolate and hazelnut flavors to shine. For a balanced sweetness that closely mimics the original candy, I recommend using dairy-free semi-sweet chocolate for the coating. If you prefer a less sweet, more intense chocolate experience, dark chocolate (70% cocoa or higher) is a fantastic option. However, if you opt for very dark chocolate, be aware the overall truffle will be less sweet.
- Chill Your Fudge Thoroughly: Don’t rush the chilling steps. A well-chilled fudge mixture is much easier to roll and shape, and chilled truffles will hold their form better when dipped in warm chocolate, preventing them from melting or becoming messy.
- Work Efficiently with Chocolate Coating: Once your chocolate is melted and your truffles are chilled, work quickly when dipping and coating. The melted chocolate can start to set, especially if your kitchen is cool. If the chocolate thickens too much, gently reheat it for a few seconds in the microwave or over the double boiler until it’s fluid again.
Optional: How to Skin Hazelnuts for a Smoother Finish
In this recipe, I chose not to remove the skins from the hazelnuts as they add to the rustic, homemade charm and provide a bit of extra fiber. However, hazelnut skins can sometimes carry a slightly bitter note, and some prefer their truffles with a smoother texture. If you’d like to take this extra step, or if you simply prefer a skin-free hazelnut, here’s how to do it. Alternatively, you can always opt to purchase blanched hazelnuts, which come pre-skinned.
To remove the skins from raw hazelnuts:
- Preheat your oven to 350°F (175°C).
- Spread the hazelnuts in a single layer on a baking pan.
- Roast them in the oven for 10-15 minutes. Keep a close eye on them; you’ll know they’re ready when they become fragrant, appear slightly blistered, and their skins begin to crack and loosen.
- Once roasted, carefully remove the pan from the oven. Immediately transfer the hot hazelnuts to a clean kitchen dish towel, cover them with another part of the towel, and let them sit for a few minutes.
- After a few minutes, rub the hazelnuts vigorously within the dish towel. The friction will help loosen and remove most of the skins. Don’t worry if a few stubborn bits remain; it’s perfectly fine.
- Allow the skinned hazelnuts to cool completely before using them in the recipe.
DIY Delight: How to Make Homemade Hazelnut Butter
Using homemade hazelnut butter in your truffles can truly elevate their flavor, providing an incredibly fresh and intense hazelnut essence. If you’re eager to make your own, the process is quite simple and results in a wonderfully rich, creamy butter. This is also a fantastic option if store-bought hazelnut butter is hard to find or if you simply prefer to control the ingredients.
Here’s how to make your own hazelnut butter:
- Roast the Hazelnuts: Start with about 3 cups of raw hazelnuts. Spread them in a single layer on a baking sheet and toast them in a preheated oven at 350°F (175°C) for 10-15 minutes. This step is crucial as roasting releases their natural oils and deepens their flavor. You can also skin them after roasting, as described in the previous section, for a smoother butter.
- Cool Down: Once roasted, remove the hazelnuts from the oven and let them cool on the pan for at least 10-15 minutes. Cooling helps them firm up and prepares them for processing.
- Process into Butter: Transfer the cooled hazelnuts to a high-speed blender or a food processor. Begin processing them. Initially, the hazelnuts will chop into coarse pieces, then turn into a fine meal, and eventually, thanks to their natural oils, they will start to clump together. Keep processing, scraping down the sides as needed.
- Achieve Creaminess: Continue to process until the mixture transforms into a smooth, runny butter consistency. This stage can take anywhere from 5 to 15 minutes, depending on the power and efficiency of your blender or food processor. Be patient; it will eventually reach the desired texture!
If you can easily find high-quality hazelnut butter in stores, that works just as well and saves you a step. However, the satisfaction and fresh flavor of homemade hazelnut butter are truly unmatched!
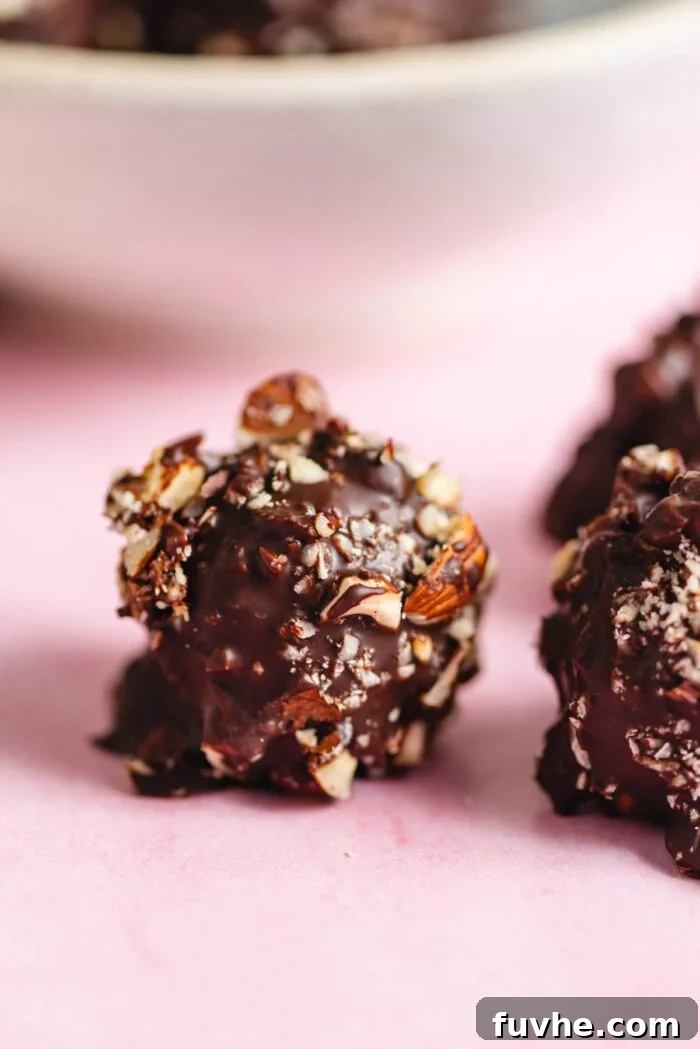
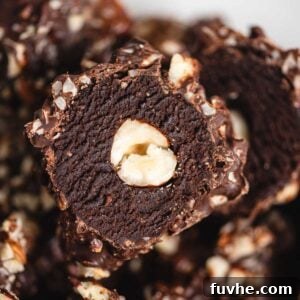
Homemade Vegan Ferrero Rocher
By: Deryn Macey
Decadent homemade Ferrero Rocher that are vegan, gluten-free and simple to make with 7 wholesome ingredients. These no-bake chocolate hazelnut truffles are perfect for holidays, gifts, or a special treat.
Prep Time: 10 mins
Total Time: 10 mins (plus chilling)
Yields: 14-16 truffles
Ingredients
For the Fudge Filling
- ½ cup cocoa powder (unsweetened)
- ⅓ cup maple syrup
- ⅓ cup almond butter (or hazelnut butter for enhanced flavor)
- 1 tsp vanilla extract
- ¼ tsp salt
- 14-16 whole hazelnuts (for centers)
For Coating
- 1 cup dairy-free chocolate chips (semi-sweet or dark)
- 1 tbsp coconut oil
- ½ cup hazelnuts, very finely chopped (for outer coating)
Instructions
- Prepare the Fudge Filling: In a medium mixing bowl, combine the cocoa powder, maple syrup, almond butter (or hazelnut butter), vanilla extract, and salt. Stir vigorously until all ingredients are thoroughly combined and form a thick, uniform dough. This will be your rich chocolate fudge base.
- Chill the Fudge: Place the bowl with the fudge mixture into the refrigerator for 10 minutes. This chilling period is essential to help the fudge firm up, making it easier to handle and roll into neat balls. While it chills, line a baking tray with parchment paper.
- Shape Truffles & Add Hazelnuts: After 10 minutes, remove the fudge mixture from the fridge. Scoop out portions of the mixture, using approximately 1 tablespoon for each truffle. Roll each portion into a smooth, round ball. You should get about 14-16 small truffles. Carefully press one whole hazelnut into the center of each fudge ball, ensuring it is completely enclosed by the fudge. Place the formed truffles on the prepared baking tray and return them to the refrigerator for at least another 10 minutes while you prepare the chocolate coating.
- Melt Chocolate & Chop Hazelnuts: In a microwave-safe bowl, combine the dairy-free chocolate chips and coconut oil. Melt in the microwave in 30-second intervals, stirring well after each, until the chocolate is smooth and fully melted. Alternatively, melt using a double boiler. Set the melted chocolate aside to cool slightly. In a separate shallow bowl, place your very finely chopped hazelnuts. For best results, use a food processor to achieve a grainy, flour-like consistency for the chopped nuts.
- Coat the Truffles: Retrieve the chilled truffles from the refrigerator. Using a fork or a toothpick, dip each fudge ball into the slightly cooled melted chocolate, ensuring it’s completely coated. Gently tap the fork handle on the edge of the bowl to remove any excess chocolate. Immediately transfer the chocolate-coated truffle to the bowl of finely chopped hazelnuts. Sprinkle and press the hazelnuts over the truffle until it is entirely covered. Place the coated truffle back on the parchment-lined baking tray. Repeat this process for all remaining truffles.
- Final Chill: Once all your vegan Ferrero Rocher truffles are coated, place the baking tray back into the refrigerator. Chill for another 20-30 minutes, or until the chocolate coating has fully set and hardened. Once firm, they are ready to be savored!
Nutrition Information (Approximate per serving)
Serving: 1 truffle, Calories: 187kcal, Carbohydrates: 19g, Protein: 4g, Fat: 12g, Sodium: 43mg, Fiber: 3g, Sugar: 14g