
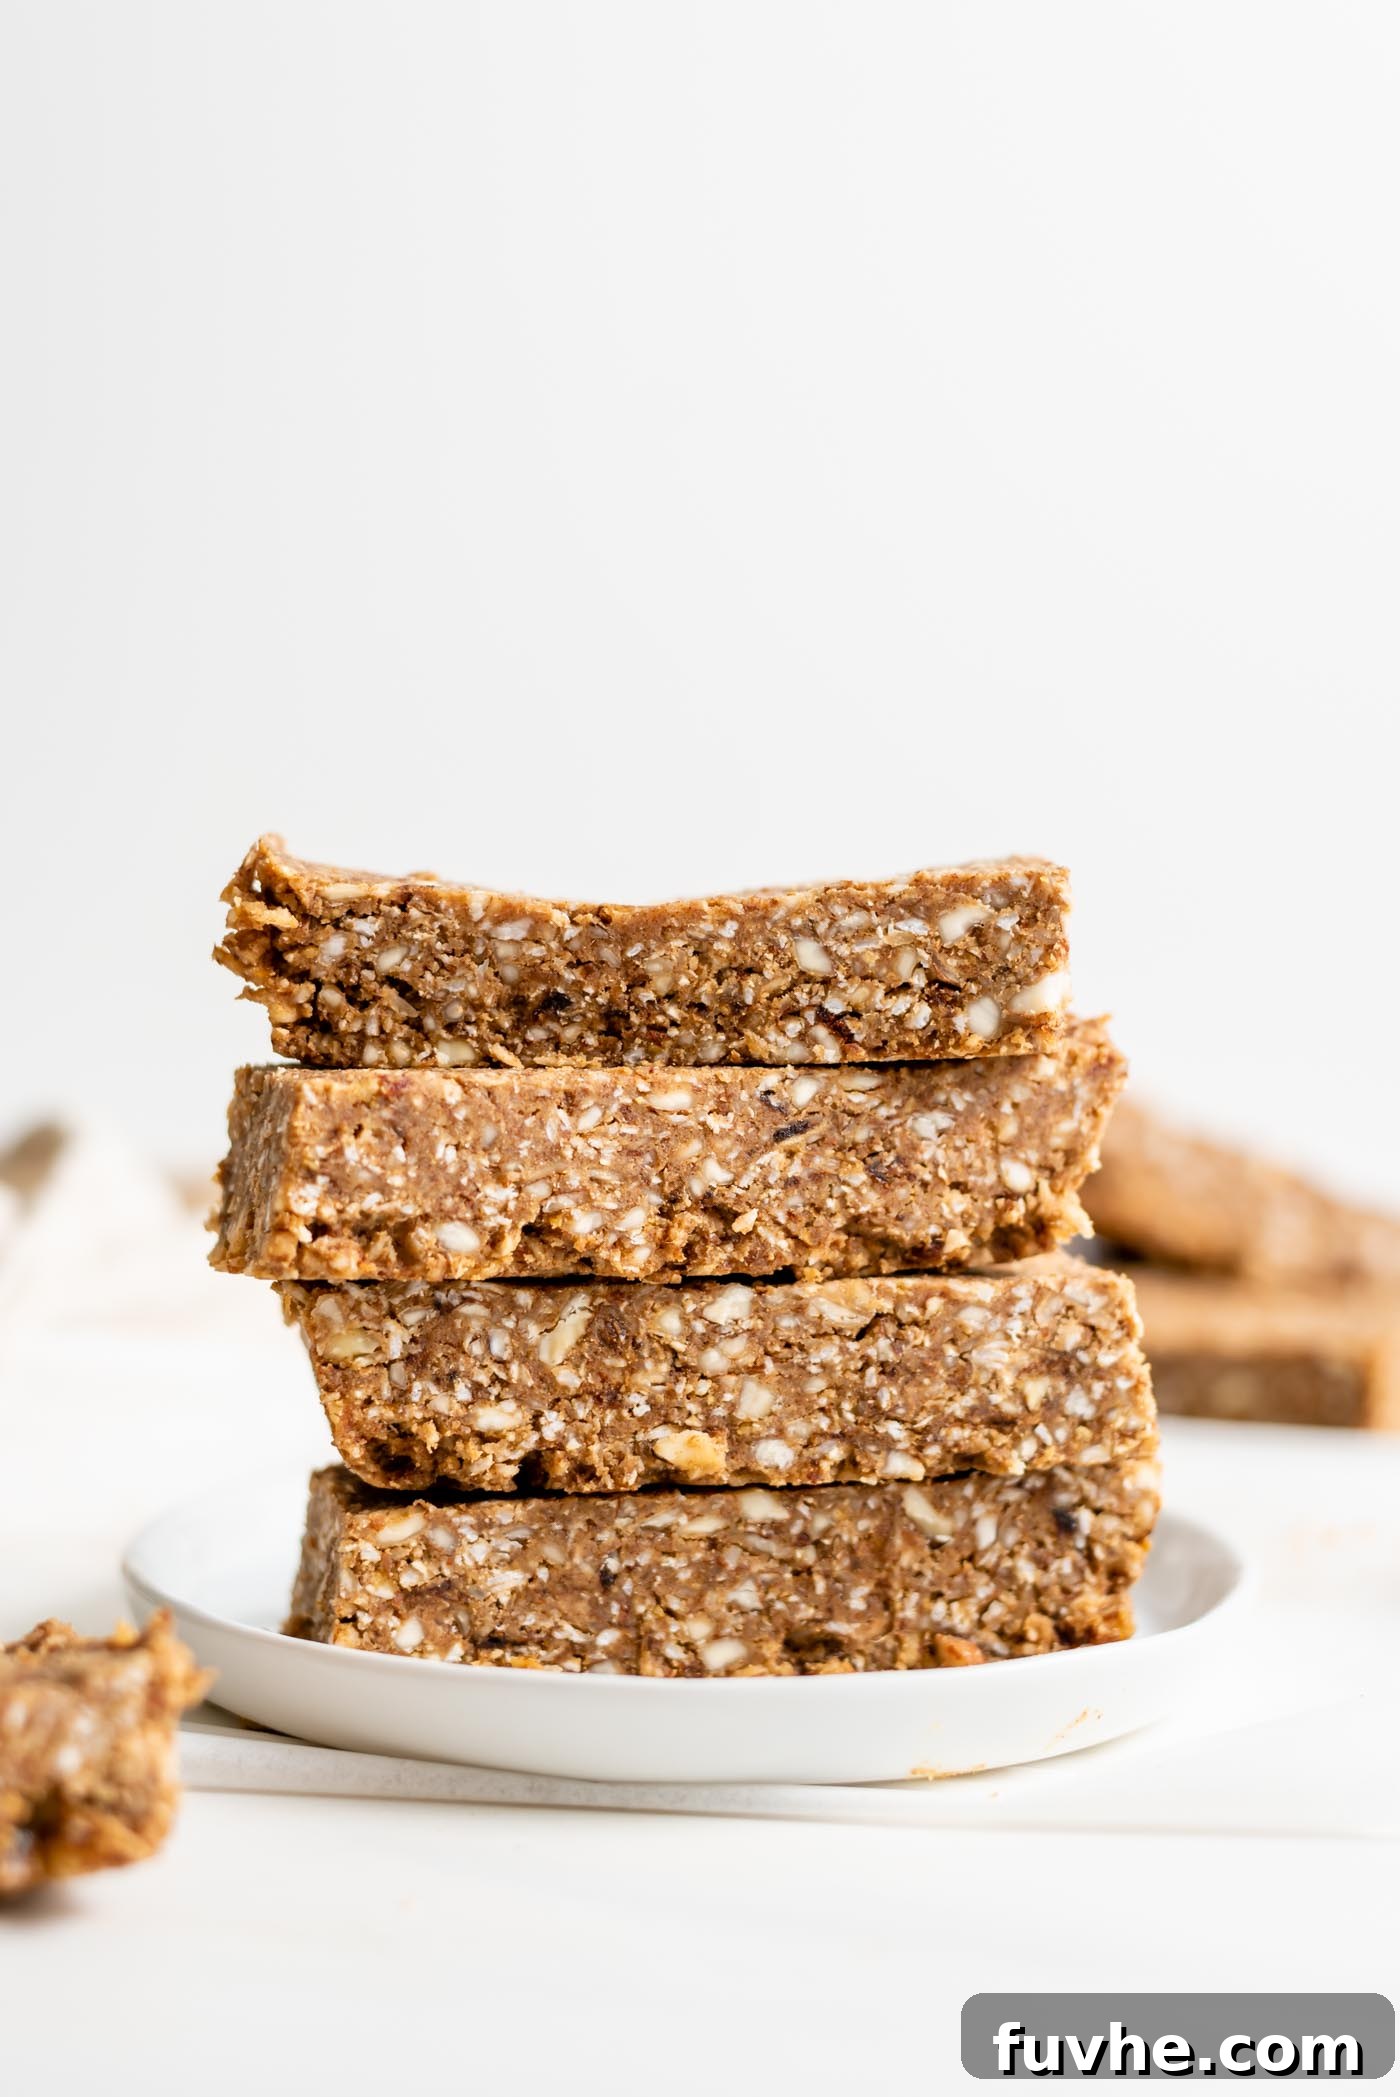
Discover the ultimate guilt-free treat with these delightful no-bake coconut energy bars, perfectly boosted with protein powder. Crafted for convenience and packed with wholesome goodness, these bars are incredibly easy to prepare in minutes using just 7 basic ingredients. Whether you’re seeking a quick breakfast on the go, a satisfying mid-day snack, or a post-workout refuel, these bars are designed to energize and delight your palate at any time of day!
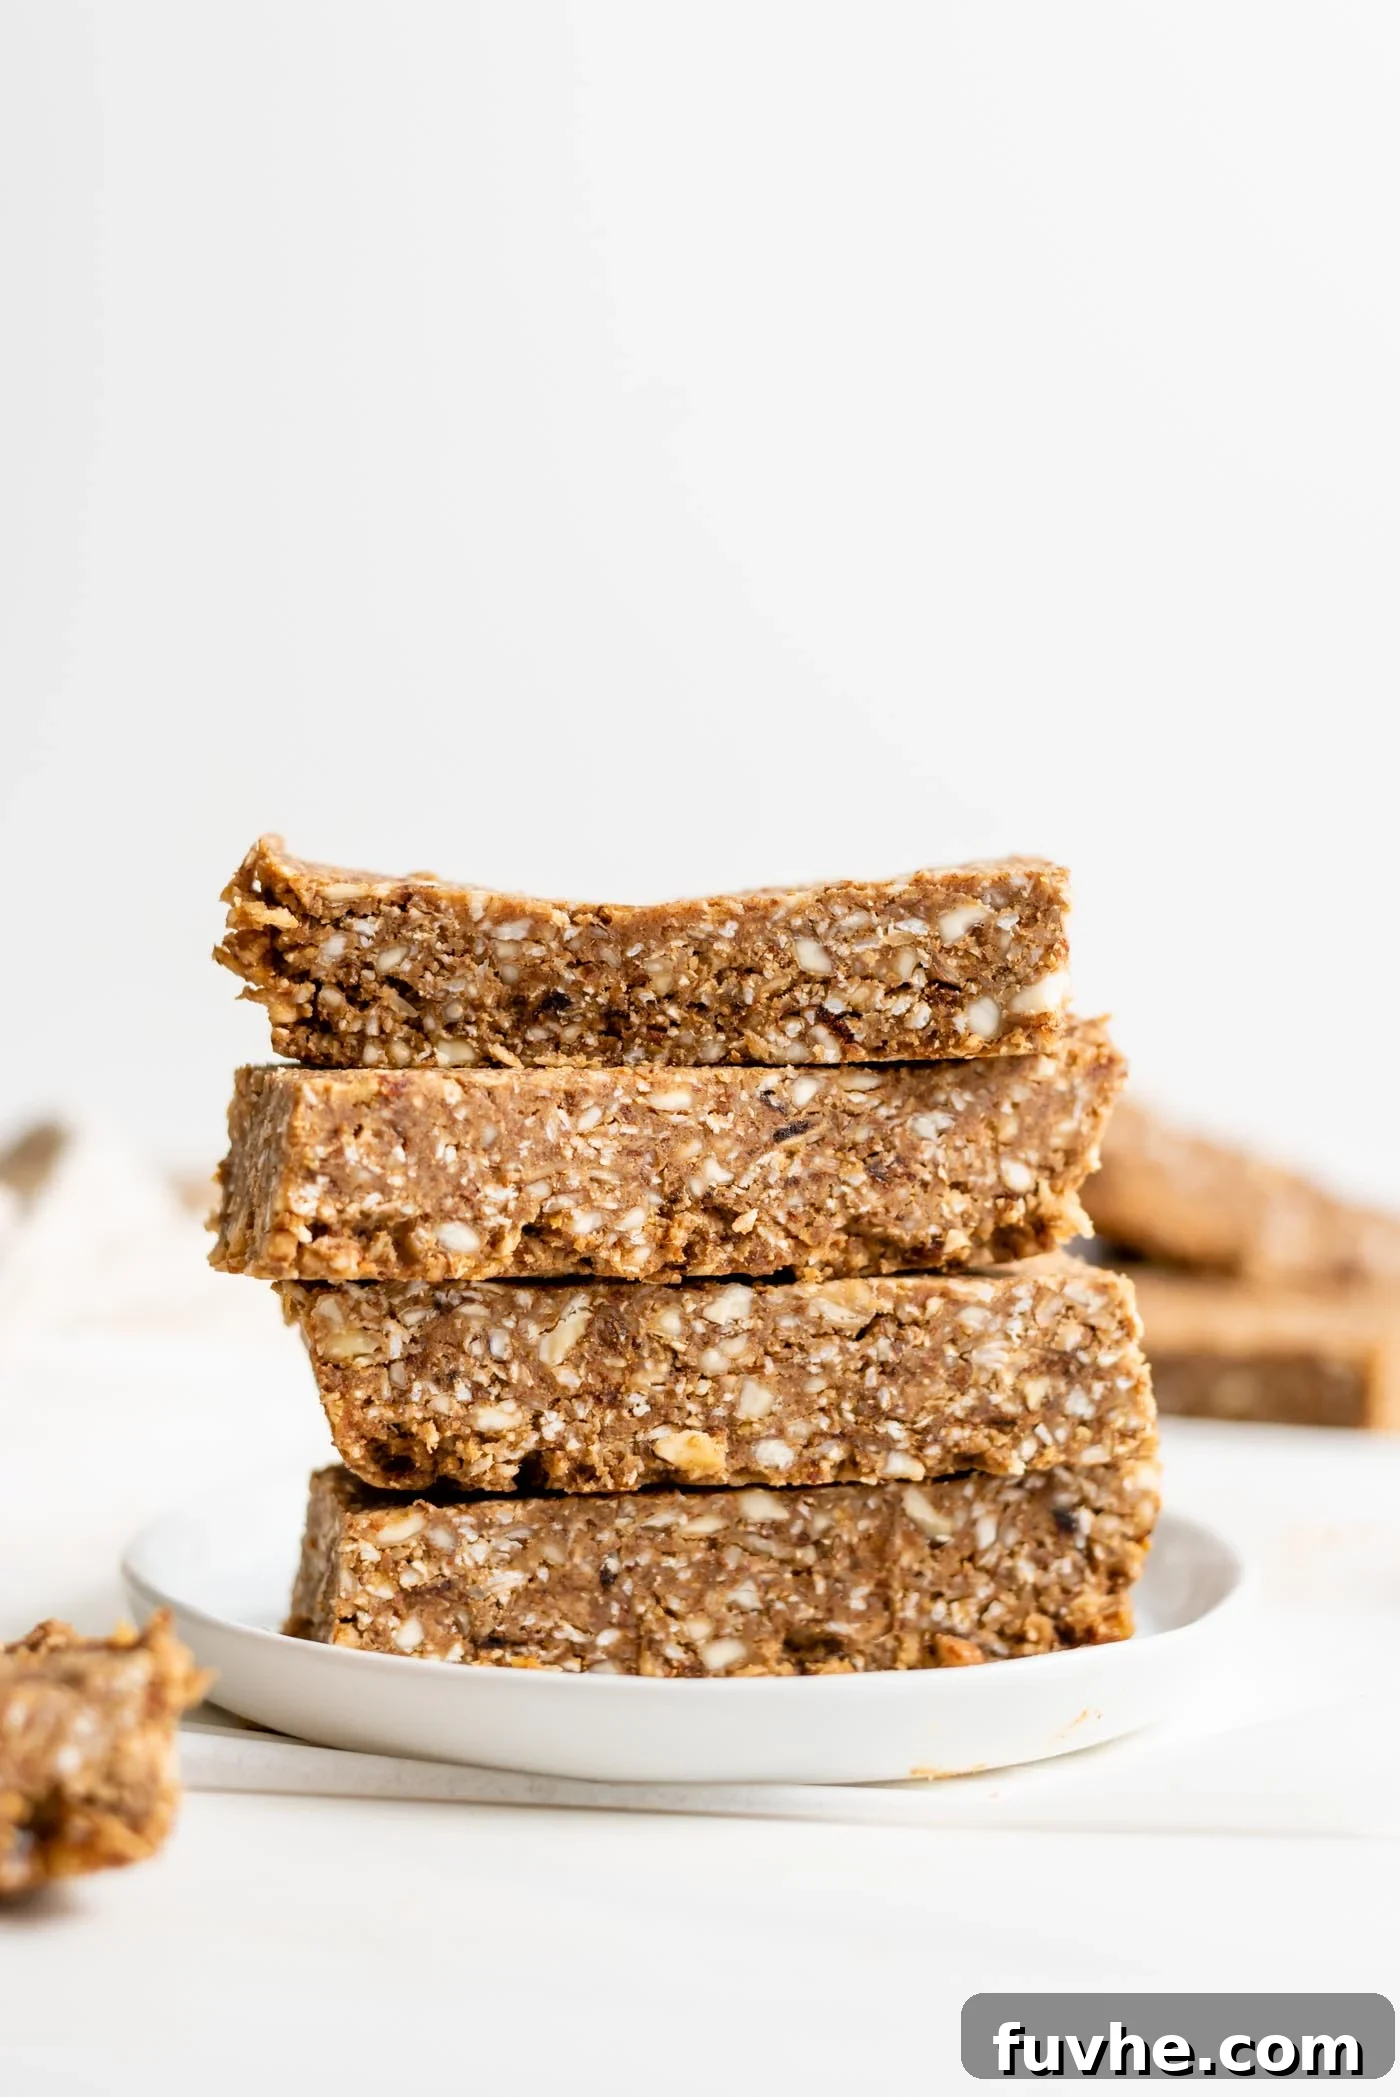
Effortless Energy: Easy No-Bake Coconut Protein Bars for a Healthy Boost
Are you searching for a convenient, delicious, and nutritious snack that doesn’t require a hot oven or complicated steps? Look no further than these incredible no-bake coconut protein bars! Perfect for busy individuals, athletes, or anyone craving a wholesome treat, this recipe offers a simple solution to your healthy snacking needs. Bursting with natural flavors and packed with sustained energy, these bars are a fantastic addition to your meal prep routine or a quick fix whenever hunger strikes. Get ready to transform simple ingredients into a powerhouse snack in under an hour!
Why You’ll Fall in Love with These No-Bake Energy Bars
These no-bake coconut energy bars are more than just a recipe; they’re a lifestyle hack for healthy eating. Designed for maximum flavor with minimal effort, they quickly become a staple in any health-conscious kitchen. Here’s an in-depth look at the compelling reasons why these bars are a must-try:
- Perfectly Vegan and Gluten-Free: Catering to a wide range of dietary needs, these bars are entirely plant-based and made without gluten-containing ingredients. This makes them an ideal choice for those following vegan diets or managing gluten sensitivities, ensuring everyone can enjoy a delectable and safe treat.
- Flexible Oil-Free Option: Concerned about added oils? This recipe is incredibly versatile and can be easily adapted to be completely oil-free. Simple substitutions allow you to maintain the delicious taste and texture while aligning with your specific dietary preferences or health goals.
- Naturally Sweetened, No Refined Sugar: Say goodbye to processed sugars! These bars derive their delightful sweetness solely from natural sources, primarily dates. This ensures a healthier indulgence without the sugar crash, providing sustained energy from whole foods.
- Simple 7-Ingredient Recipe: You don’t need a pantry full of exotic ingredients to create these gourmet-tasting bars. With just seven fundamental components, you can whip up a batch using common kitchen staples, proving that healthy and delicious can indeed be uncomplicated.
- Rapid 10-Minute Prep Time: Time is precious, and this recipe respects that. With an active preparation time of just 10 minutes, you can quickly assemble these bars, making them perfect for those busy weekdays or last-minute snack cravings. The ease of preparation means less time in the kitchen and more time enjoying your day.
- Excellent for Freezing & Meal Prep: Planning ahead is made simple with these freezer-friendly bars. Prepare a larger batch and store them in the freezer for up to two months, providing a convenient, ready-to-grab healthy snack whenever you need it. They are an absolute lifesaver for efficient meal prepping and ensuring you always have a nutritious option at hand.
- Protein-Packed Power: Enhanced with your favorite vegan protein powder, these bars aren’t just tasty; they’re a powerhouse of nutrition. The added protein content makes them an ideal choice for post-workout recovery, helping muscles repair and grow, or simply as a filling snack to keep you feeling satisfied and energized between meals.
- Infinitely Customizable: While the core recipe is fantastic, it also serves as a perfect canvas for customization. Easily adjust flavors, add spices, or incorporate different mix-ins to suit your personal taste preferences, making each batch uniquely yours.
If you’re already a fan of homemade energy solutions, you’ll love exploring these other protein-packed, no-bake recipes. Be sure to check out our No-Bake Hemp Protein Bars, the indulgent Easy No-Bake Vegan Chocolate Tahini Energy Bars, and the classic No-Bake Almond Coconut Protein Bars.
Ingredient Spotlight: Essential Components & Smart Substitutions
The magic of these no-bake coconut energy bars lies in the synergy of their simple, wholesome ingredients. Each component is carefully chosen for its contribution to flavor, texture, and nutritional value. Understanding each ingredient’s role and potential substitutions allows you to tailor the recipe to your dietary needs and taste preferences. Below, we delve into the specifics of what you’ll need and how you can creatively adapt this recipe. For precise measurements, please refer to the comprehensive recipe card located at the bottom of this article.
- Almonds: We highly recommend using plain, raw almonds that are unsalted and free from any added oils. Almonds form the foundational base of these bars, contributing a rich, slightly sweet, and nutty flavor. They are an excellent source of healthy monounsaturated fats, dietary fiber, vitamin E, and protein, all of which promote heart health and provide sustained energy. When processed, they help create a hearty, satisfying texture.
- Substitution Insight: For a different flavor profile or to use what you have on hand, feel free to substitute almonds with other nuts. Cashews will yield a creamier, milder bar, pecans offer a buttery richness, and walnuts provide a more earthy taste. A combination of different nuts can also add delightful complexity. For individuals with nut allergies, sunflower seeds or pumpkin seeds (pepitas) can be used as a nut-free alternative, though be prepared for a slightly different flavor and color.
- Dates: These natural powerhouses serve as both the primary sweetener and the binding agent in our energy bars. Any variety of soft, moist pitted dates, such as Medjool or Deglet Noor, will work beautifully. Dates are rich in natural sugars, fiber, and essential minerals like potassium and magnesium, offering a quick yet sustained energy boost. Their inherent stickiness is crucial for holding all the ingredients together without the need for additional artificial binders.
- Preparation Tip: If your dates feel firm or appear overly dry, a simple trick can bring them back to life. Soak them in hot water for about 10-15 minutes, then drain them thoroughly before using. This softens them considerably, making them easier to process and ensuring they properly bind the mixture.
- Protein Powder: This ingredient is your opportunity to boost the nutritional profile and infuse additional flavor. Your favorite chocolate or vanilla vegan protein powder is ideal. The protein powder enhances the satiety factor of the bars, making them perfect for post-workout recovery or as a substantial snack that keeps hunger at bay.
- Flavor Freedom: Expand beyond the usual chocolate or vanilla! A mocha-flavored protein powder will accentuate the coffee notes beautifully, creating a deeper, more complex taste. Peanut butter flavored protein powder could introduce a delightful nutty dimension. For a more neutral bar where the coconut and coffee flavors truly shine, opt for an unflavored vegan protein powder.
- Unsweetened Shredded Coconut (Desiccated Coconut): A defining ingredient that imparts a distinct tropical essence and a wonderfully chewy texture to these bars. It’s imperative to use unsweetened varieties to control the overall sugar content. Both fine and medium shredded coconut work well; fine coconut blends more seamlessly for a smoother bar, while medium shredded coconut adds a bit more textural intrigue.
- Quality Note: Always opt for high-quality unsweetened coconut for the best flavor.
- Coconut Oil: This ingredient is a secret weapon for achieving the perfect consistency. When melted and then chilled, coconut oil helps the bars solidify and hold their shape beautifully, contributing to a firm yet appealingly chewy texture. It also lends a subtle richness that harmonizes with the other flavors.
- Oil-Free Alternative: For those seeking an oil-free option, you can successfully replace the melted coconut oil with an equal amount of additional strongly brewed coffee. Alternatively, incorporating a tablespoon or two of a creamy, unsweetened nut butter (such as almond or cashew butter) can also act as a binder, though this will slightly alter the fat content and the overall flavor profile.
- Strongly Brewed Coffee or Espresso: The coffee is not just for flavor; it’s a key ingredient that elevates these bars. It introduces a deep, robust note that beautifully complements the richness of chocolate (if using chocolate protein) and the sweetness of coconut, culminating in a sophisticated mocha-like experience. A strong brew is essential to ensure its presence is noticeable and impactful.
- Caffeine Consideration: If you plan to enjoy these bars in the evening, or if you are sensitive to caffeine, we strongly recommend using decaffeinated coffee or espresso to avoid any unwanted stimulant effects.
- Sea Salt (Optional): While technically optional, a small pinch of high-quality sea salt can work wonders in enhancing and balancing all the other flavors. It brightens the sweetness of the dates, deepens the notes of chocolate and coffee, and prevents the bars from tasting overly sweet. It truly rounds out the flavor profile for a more gourmet experience.
Crafting Your Delicious Bars: An Easy No-Bake Method
The beauty of this recipe lies in its simplicity and the absence of baking. All you need is a reliable food processor, and you’ll be on your way to a batch of homemade energy bars in record time. This section provides a clear, visual-guided process, breaking down each step to ensure your success. While these steps offer comprehensive guidance, remember that the full ingredient list with exact measurements can be found in the detailed recipe card at the end of this post.
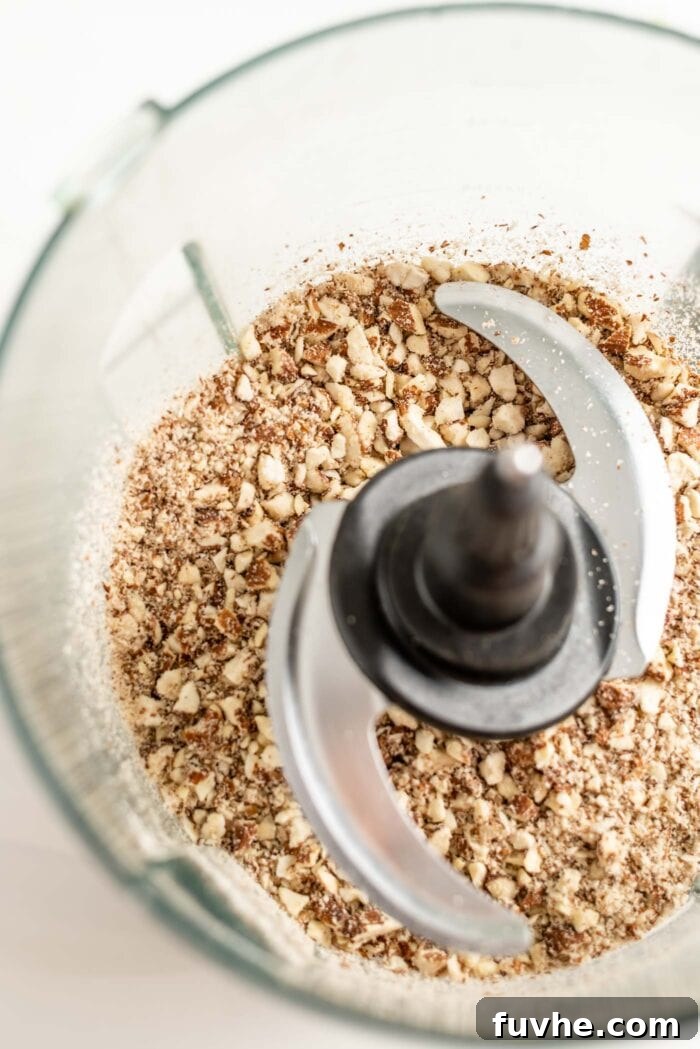
Step 1: Process the Almonds. Start by adding your raw, unsalted almonds to the bowl of a powerful food processor. Secure the lid and pulse the almonds until they break down into a coarse, grainy flour consistency. It’s perfectly fine if a few slightly larger chunks remain, as these will add a delightful textural element to your finished bars. The key here is to process them just enough to achieve a flour-like texture without over-processing and turning them into almond butter.
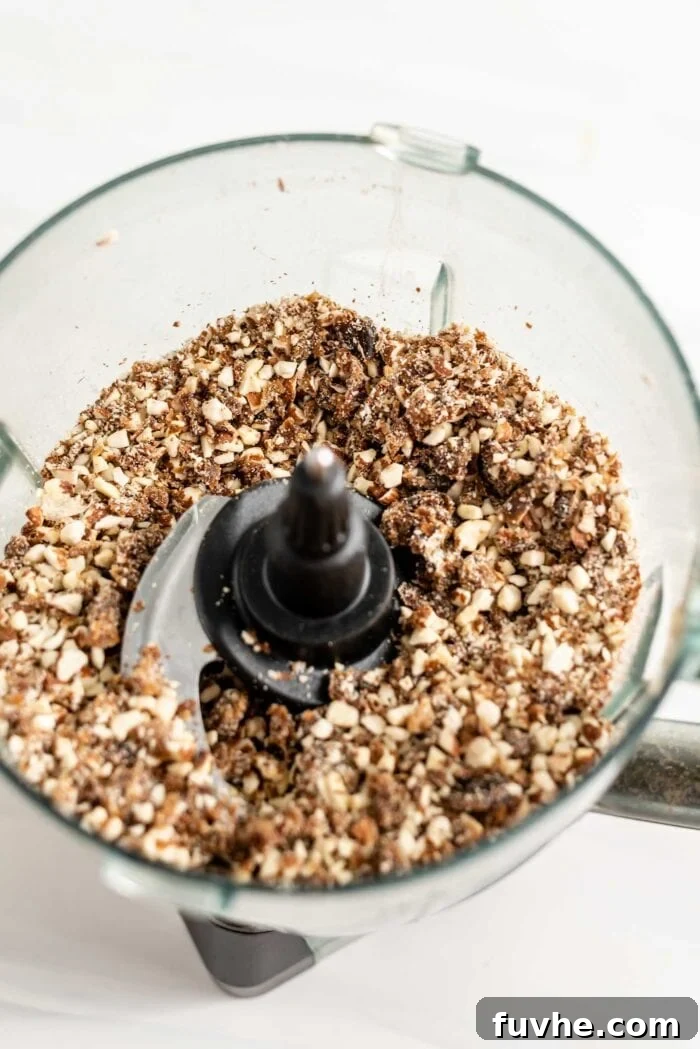
Step 2: Incorporate the Dates. Next, add the soft, pitted dates directly into the food processor bowl with the almond flour. Continue to process the mixture. As you blend, the dates will gradually break down and combine with the almond flour, transforming into a sticky, cohesive, and slightly crumbly dough. Keep processing until no large pieces of dates are visible, and the mixture begins to cling together when pressed.
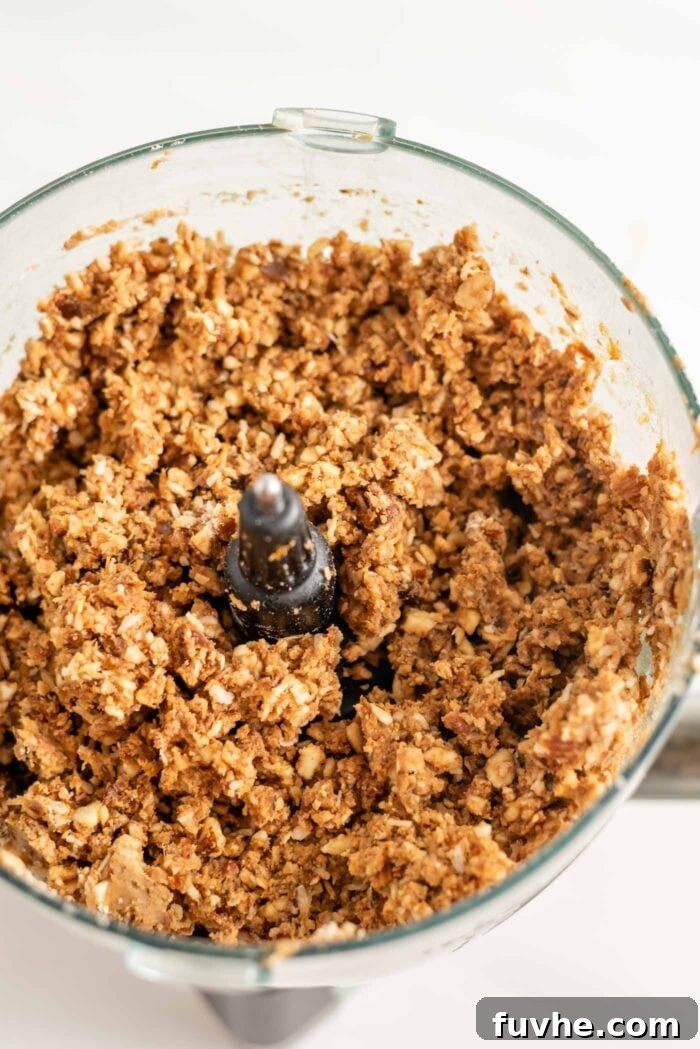
Step 3: Combine All Remaining Ingredients. Now it’s time to introduce the rest of the flavors! Add the vegan protein powder, unsweetened shredded coconut, melted coconut oil, strongly brewed coffee, and the optional sea salt to the food processor with the almond-date mixture. Process everything thoroughly until a thick, uniform, and cohesive dough forms. The dough should be sticky enough that you can easily press it together between your fingers, indicating it will hold its shape well.
- Processor Power Tip: If your food processor is on the smaller side or lacks significant power, it might struggle to fully combine this dense mixture. In such a scenario, simply transfer the almond and date mixture into a large mixing bowl. Then, add the remaining ingredients and use your hands to thoroughly combine and knead the dough until it’s perfectly uniform and sticky. This ensures all components are well-integrated without overworking your appliance.
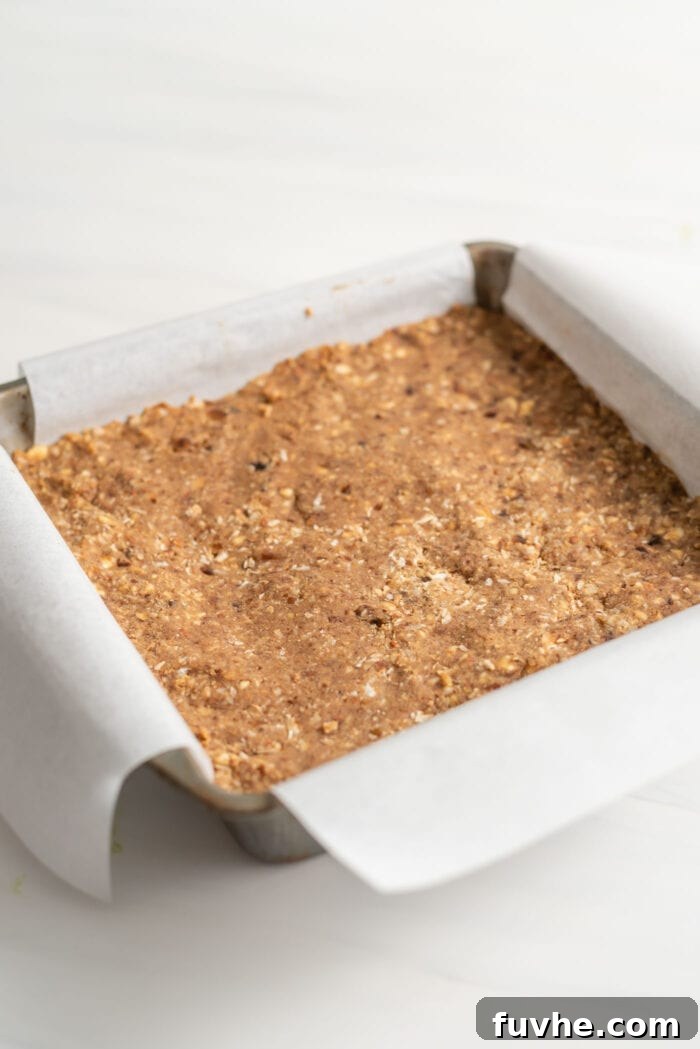
Step 4: Press and Chill for Perfection. Prepare a 7-8 inch square baking pan by lining it completely with parchment paper. Ensure the edges of the parchment paper extend over the sides of the pan; these will act as convenient “handles” to easily lift the entire block of bars out once chilled. Transfer the prepared dough into the lined pan. This next step is crucial for perfectly structured bars: use your hands to firmly and evenly press the dough into the pan. Take a few moments to truly work the dough into all the corners and create a compact, uniform layer. The firmer you press, the more solid and less crumbly your bars will be. Once pressed, place the entire pan in the freezer for a minimum of 30 minutes. This chilling period is essential for the bars to firm up and set completely.
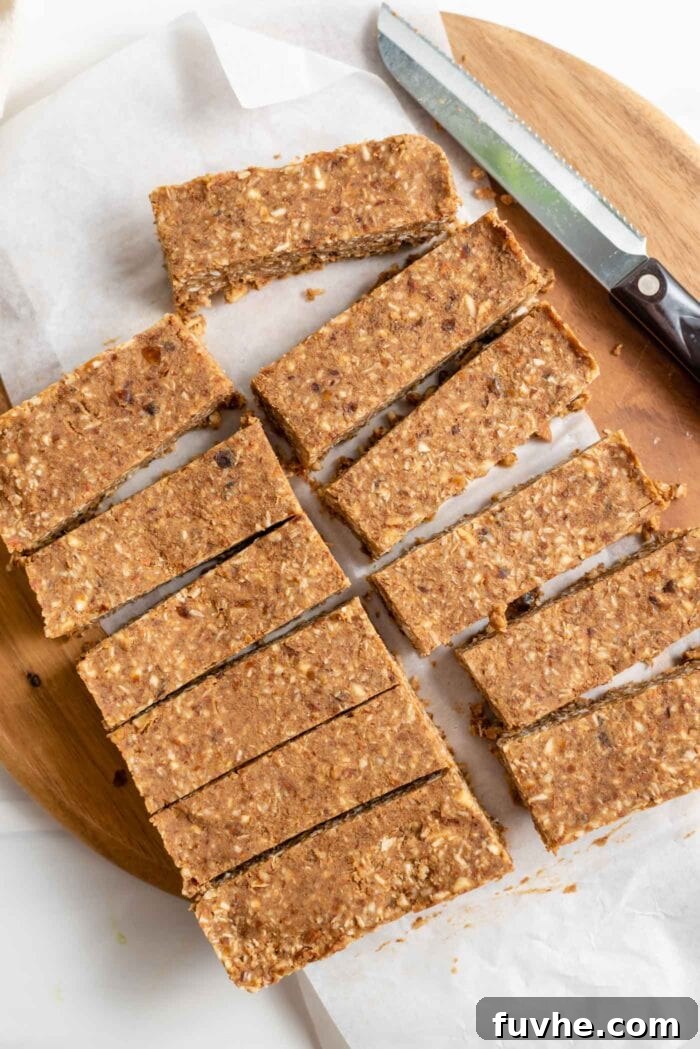
Once your bars have sufficiently chilled and firmed in the freezer, simply use the parchment paper edges to lift the solidified block of dough out of the pan. Transfer it to a clean cutting board, slice it into your desired portion sizes (typically 12 regular bars or 24 smaller mini-bars work well), and your homemade, nutritious energy treats are ready to be savored!
The Complete Recipe: No-Bake Coconut Energy Bars
Coconut Energy Bars
By: Deryn Macey
Wholesome coconut energy bars crafted with dates, almonds, coconut, and a boost of vegan protein powder. These quick and easy no-bake bars are perfect for a nutritious snack or post-workout fuel.
Prep Time: 10 mins | Chill Time: 30 mins | Total Time: 40 mins
Servings: 12 bars
Ingredients
- 1 1/2 cup raw almonds (225 g)
- 1 1/4 cup tightly packed soft pitted dates (270 g)
- 3/4 cup vegan chocolate or vanilla protein powder (75 g)
- 1 cup unsweetened fine or medium shredded coconut (100 g)
- 1/4 tsp sea salt (optional, but enhances flavor)
- 1/3 cup coconut oil, melted (or additional coffee for oil-free option)
- 1/3 cup strongly brewed coffee (use decaf if sensitive to caffeine)
Instructions
- Place the raw almonds in a food processor or high-powered blender. Process until they are broken down into a coarse, grainy flour consistency. A few larger pieces are acceptable.
- Add the soft, pitted dates to the food processor. Continue to process until the mixture forms a sticky, cohesive, and slightly crumbly dough. Ensure no large date chunks remain.
- If you have a large and powerful food processor, add the vegan protein powder, unsweetened shredded coconut, sea salt (if using), melted coconut oil, and strongly brewed coffee. Blend all ingredients until a thick, uniform dough forms that can be easily pressed together between your fingers. If your food processor is smaller, transfer the almond-date mixture to a large mixing bowl, add the remaining ingredients, and use your hands to thoroughly combine and knead the dough until smooth and cohesive.
- Line a 7-8 inch square baking pan with parchment paper, ensuring the paper overhangs the sides to create “handles.” Transfer the prepared dough into the lined pan. Using your hands, firmly and evenly press the dough into the pan, making sure to compact it thoroughly into all corners for a dense and uniform layer.
- Place the entire pan in the freezer for at least 30 minutes to allow the bars to firm up and set completely. This chilling step is crucial for the bars to hold their shape.
- Once chilled, lift the solidified block of bars out of the pan using the parchment paper handles. Transfer to a cutting board and slice into 12 evenly sized bars or 24 smaller mini-bars. Serve immediately or store as directed.
Notes & Tips for Optimal Results
- Coffee Choice: If you’re sensitive to caffeine or plan to enjoy these bars later in the day, opting for decaffeinated coffee is highly recommended.
- Nut Varieties: For a twist on flavor and texture, almonds can be substituted with other nuts such as cashews, pecans, or walnuts. You can also create a blend of different nuts.
- Oil-Free Adaptation: To make these bars completely oil-free, substitute the 1/3 cup of melted coconut oil with an additional 1/3 cup of strong brewed coffee. Alternatively, a tablespoon or two of a creamy nut butter can also serve as a binder.
- Ensuring Soft Dates: The quality of your dates significantly impacts the texture. Always use soft, moist dates. If they seem dry, soak them in hot water for 10-15 minutes, then drain thoroughly before blending.
- Firm Pressing: Do not underestimate the importance of firmly pressing the dough into the pan. This compression prevents the bars from crumbling and ensures they maintain their shape beautifully.
- Flavor Enhancements: Feel free to customize! A pinch of cinnamon, a dash of vanilla extract, or even some mini chocolate chips can be added with the final ingredients for extra flair.
Storing Your Delicious Energy Bars
These no-bake coconut energy bars are fantastic for meal planning and long-term storage, ensuring you always have a healthy, homemade snack within reach:
- Store the sliced bars in an airtight container to maintain freshness and prevent them from drying out.
- Refrigerator Storage: They will remain perfectly fresh and delicious for up to 2 weeks when stored in the refrigerator. The texture will be firm and delightfully chewy.
- Freezer Storage: For extended shelf life, these bars can be frozen for up to 2 months. You can enjoy them straight from the freezer for a super chewy treat, or allow them to thaw slightly at room temperature for a few minutes before eating.
Nutrition Information (Estimated Per Bar)
Serving Size: 1 bar
Calories: 299kcal, Carbohydrates: 26g, Protein: 6g, Fat: 21g, Sodium: 107mg, Fiber: 5g, Sugar: 18g
Note: Nutritional values provided are estimates and may vary based on the specific brands of ingredients used and any substitutions made.
Frequently Asked Questions (FAQ) About No-Bake Energy Bars
- Can I make these no-bake bars without a food processor?
- While a food processor is highly recommended for achieving the ideal smooth and cohesive texture with minimal effort, you can make these bars without one. If you don’t have a food processor, you will need to finely chop the almonds and dates by hand (or use pre-ground almond flour if available). After chopping, mix all the ingredients thoroughly in a large mixing bowl. You’ll need to use your hands to knead the mixture vigorously until a cohesive dough forms. It requires more manual effort but is certainly achievable.
- What should I do if my dates are too dry to blend?
- Dry dates are a common challenge, but easily remedied. Simply place your pitted dates in a bowl and cover them with hot water. Let them soak for 10-15 minutes until they are noticeably softer. After soaking, drain them very thoroughly to remove any excess moisture before adding them to your food processor. This will ensure they blend smoothly and effectively bind the other ingredients.
- Is it possible to make these energy bars nut-free?
- Yes, you can absolutely make these bars nut-free! To do so, substitute the almonds with an equal amount of sunflower seeds or pumpkin seeds (pepitas). Keep in mind that this substitution will slightly alter the flavor and texture of the bars, but they will still be delicious and packed with energy. If you have severe nut allergies, also ensure that your chosen protein powder is certified nut-free.
- How can I introduce more flavor variations to this recipe?
- These no-bake bars are incredibly versatile and can be customized with various flavor enhancements:
- Warm Spices: Add a pinch of cinnamon, cardamom, or nutmeg to the food processor with the dry ingredients for a comforting flavor.
- Extracts: A few drops of vanilla extract, almond extract, or even peppermint extract can introduce different aromatic profiles.
- Citrus Zest: Freshly grated lemon or orange zest can provide a bright, zesty counterpoint to the richness of the bars.
- Additional Mix-ins: Fold in mini chocolate chips, cacao nibs for extra crunch and chocolatey goodness, dried cranberries for a tart chew, or a sprinkle of flaky sea salt on top before chilling for a sophisticated finish.
- Are these bars suitable for a low-carb or ketogenic diet?
- Given that dates are a primary ingredient and a natural source of carbohydrates and sugars, these bars are not considered suitable for low-carb or ketogenic diets. If you are following a specific low-carb regimen, you would need to explore alternative binders and sweeteners that align with those dietary requirements, which would significantly change the original recipe’s profile.
Why Choose Homemade Energy Bars Over Store-Bought?
In a marketplace saturated with countless processed snack options, taking the time to make your own energy bars, like these no-bake coconut protein bars, offers a wealth of advantages that store-bought alternatives often cannot match. Embrace the benefits of homemade goodness:
- Uncompromised Ingredient Control: The most significant benefit of homemade bars is knowing exactly what goes into your body. You gain complete control over the quality and source of each ingredient, eliminating hidden sugars, artificial flavors, preservatives, and unnecessary additives often found in commercial products. You choose the best almonds, the freshest dates, and your preferred protein powder.
- Tailored to Your Nutritional Needs: Whether you have specific dietary restrictions, allergies, or simply personal preferences, homemade bars can be customized to your exact requirements. As demonstrated, these bars are easily adaptable to be vegan, gluten-free, or even oil-free. You can adjust the protein content, the level of sweetness, and the flavor profile to perfectly align with your health goals and taste buds.
- Economical and Cost-Effective: While the initial purchase of certain ingredients might seem like an investment, homemade energy bars are almost always significantly more cost-effective per serving than their pre-packaged counterparts. Buying ingredients in bulk further enhances these savings, allowing you to enjoy high-quality snacks without breaking the bank.
- Superior Freshness and Authentic Flavor: There’s an undeniable difference in taste and freshness when a snack is made right in your kitchen. The vibrant, natural flavors of real almonds, sweet dates, and fragrant coconut truly shine through when they haven’t been subjected to industrial processing and prolonged shelf storage. Experience the difference real ingredients make.
- Convenience That Fits Your Lifestyle: Despite being “homemade,” these no-bake bars are designed with modern, busy lifestyles in mind. A single batch yields numerous servings that can be stored for weeks, offering a quick, grab-and-go option for breakfast, a satiating afternoon pick-me-up, or essential pre and post-workout fuel. They seamlessly integrate into your busy schedule, providing a reliable source of healthy energy.
Enjoyed this recipe? Share your thoughts and rate it below! Your feedback helps others discover delicious and healthy options.